The cocoa polenta cake with orange jelly is extraordinarily delicious, soft, melts in the mouth, and is gluten-free. It’s a refined cake, perfect for Christmas holidays or special occasions, with an enveloping and delicate aroma and taste at the same time, not at all cloying or heavy. The preparation of this delight is simple; besides my proposed version, it can be customized as we like.
- Difficulty: Very Easy
- Cost: Cheap
- Rest time: 30 Minutes
- Preparation time: 1 Hour
- Portions: 10
- Cooking methods: Oven
- Cuisine: Italian
- Seasonality: Autumn, Winter and Spring, Christmas
Ingredients
- 3/4 cup fine cornmeal
- 2 cups milk (also lactose-free)
- 2/3 cup granulated sugar
- 1/2 tsp fine salt
- 1/4 teaspoon ground cinnamon
- 5 drops orange blossom essence
- 1/4 teaspoon vanilla paste or liquid
- finely grated zest of one orange
- 1/4 cup unsweetened cocoa powder
- 1 teaspoon orange liqueur or Strega
- 1/4 teaspoon instant coffee powder
- 2 medium whole eggs
- 1 3/4 cups freshly squeezed orange juice
- zest of one orange and one lemon
- 3/4 cup granulated sugar
- 1/4 tsp fine salt
Steps
Take the eggs out of the fridge. They should be at room temperature when we add them to the cake.
Let’s start by preparing the cocoa polenta cake.
Pour the milk into a saucepan and place it on the small stove over medium heat.
As soon as the milk is warm (not boiling), add the fine cornmeal (it’s important that it is finely ground), lower the heat to the minimum, and start mixing with a fork or a steel whisk.
After about ten minutes, add the sugar, the very finely grated zest of a washed and dried orange, the orange blossom essence, the liqueur, the cinnamon, and the vanilla.
Keep stirring without leaving the mixture until the milk has completely dried out, and we have obtained a consistency that resembles soft polenta.
Turn it off immediately, remove the pot from the stove, and immediately add the unsweetened cocoa and instant coffee (it will help to further enhance the flavor and aroma of the cocoa).
To cool the mixture faster, transfer it into a heat-resistant steel or glass bowl.
Let the mixture rest for about half an hour, stirring it occasionally, to let it cool and prevent an annoying crust from forming on the surface.
After half an hour, separate the yolks from the whites and whip the whites for 60 seconds with an electric whisk at maximum speed. The egg whites should remain soft but firm, meaning they should not drip from the whisks.
Preheat the oven to 350°F
Butter and flour a round mold 8 inches in diameter and 2.5 inches high.
Incorporate the yolks into the cocoa polenta mixture to soften it; then start adding the egg whites, a little at a time, gently folding them in with a spatula, using a motion from the bottom (i.e., from the bottom of the bowl) upwards and turning the bowl as you go, so they are absorbed evenly.
When we have incorporated all the egg whites, immediately pour the mixture into the mold, gently tap it on the table, and put it straight into the oven, in the middle rack, for about 50 minutes or until it is cooked, after performing the toothpick test, i.e., inserting a skewer that should come out dry.
In this case, immediately turn off the oven and remove the mold. Let the cake rest for about 30 minutes before removing it; during this time, the polenta cake will detach from the sides of the mold and flatten slightly in the center.
While the cake is baking in the oven or cooling after baking, we can prepare the jelly and candied orange peels.
1) Wash the oranges thoroughly, scrubbing the outer peel.
2) Extract the juice from the oranges and pour it into a small pot. Cut the “caps” of the squeezed oranges into wide strips, including the white part, from which we will obtain the candied peels.
3) Add the sugar, salt, and the juice of half a lemon, which, besides keeping the color of the jelly and peels vivid, will help enhance their flavor and aroma.
4) Place the pot on the smallest stove over medium heat, cover, and wait for it to boil.
5) From the first boil, count about 45 minutes to obtain a very soft, fluid jelly, perfect for brushing on cakes or accompanying them as a “sauce.” If we prefer it thicker, firmer, extend the cooking by only 5 minutes. The boiling jelly will still appear semi-liquid, but once cooled, it will become much firmer.
6) Keep stirring the jelly until you notice it is starting to thicken. Immediately turn it off and transfer it into a heat-resistant bowl, along with the peels (which will have perfectly candied by now).
7) Remove the peels from the jelly and let them cool on a plate.
Assemble the cocoa polenta cake.
When both the cake and the jelly are cold, we can complete their preparation.
Brush the whole cake with the jelly.
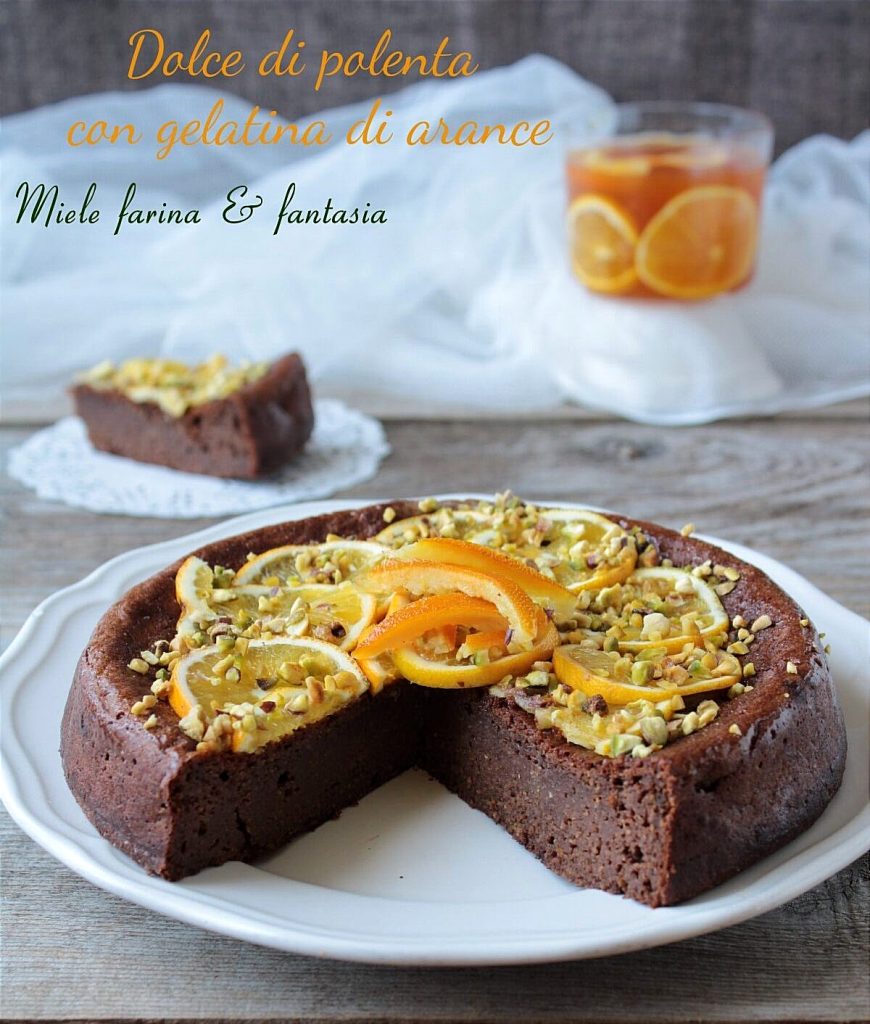
Cut the candied peels into even narrower strips and decorate the cake according to your creativity. If desired, you can slice a small orange thinly and place it around or on the cake (maybe adding some crushed pistachios, which, besides an extra note of color, will add crunchiness) to make the decoration even richer and more scenic.
The cocoa polenta cake is delicious on its own, but to make it even more chic and refined, accompany each slice with a teaspoon of orange jelly.
Extra idea
I recommend preparing the polenta cake a day in advance because it becomes more delicious and spiced as time goes by.
If you have a lot of orange jelly left, you can use it for breakfast, as a snack, as a filling for cakes and desserts; or, you can transfer it into one or more sterilized jars, with an airtight lid, and pasteurize it.
For pasteurization
– Wrap the jar in a kitchen towel to prevent it from breaking during the boiling of the water. Fill the pot with water until it exceeds the jar by a finger. Cover, bring to a boil, then lower the heat and let it simmer for 30 minutes.
– After the time has passed, turn off and let the jar cool without touching it, until it is completely cold. Then you can store it in a cool, dry place. This way, you can safely use the jelly later.
Bon appetit
.