I tried it the other day and today I want to show you my result again: a perfect and constant proofing, done directly in the Instant Pot!
To be honest: how many times have I tried to proof doughs in the winter, especially when I was at my mom’s… but nothing worked. It was cold at home, the temperature was never consistent, and the proofing took forever. Sometimes the dough would sit still for hours, and other times it would rise poorly and then collapse.
With the Instant Pot, however, I found the perfect solution.
Just set the ideal temperature and let it do all the work. It basically creates a small warm and stable environment — just what the yeast needs to work well.
In this article, I’ll show you how I did it, step by step: how to set the temperature, how to position the bowl, and how long it takes to get a puffy, soft dough ready to work with.
It works with the Sous Vide function, but if your Instant Pot doesn’t have it, you can easily use Yogurt.
And the beauty is that you can choose the temperature: lower if you want a slow proofing, a little higher if you want to speed things up.
- Difficulty: Very easy
- Cost: Very affordable
- Cooking methods: Instant pot
- Cuisine: Italian
- Seasonality: All seasons
Ingredients
Prepare your leavened dough
Tools
- 1 Instant pot
- 1 Rack inside the Instant Pot
- 1 Bowl preferably heat-resistant glass or steel up to 8.27 inches in diameter
- 1 Plastic wrap
Step-by-step procedure
Prepare the dough as you usually do: mix flour, water, yeast, and salt, and work until you get a smooth and elastic consistency.
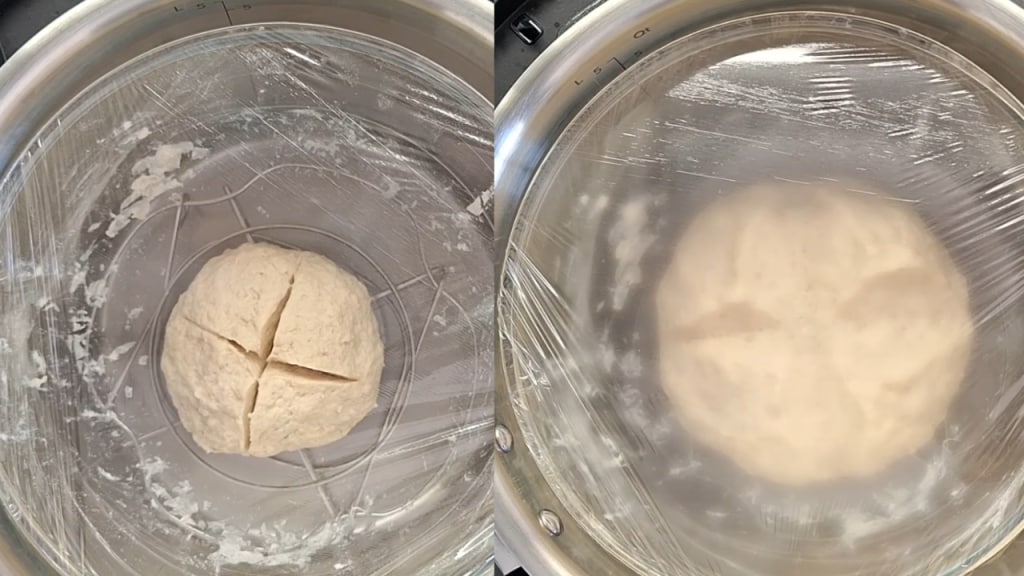
When it’s ready, lightly grease a bowl — it will help you remove it easily after proofing — and place the dough inside, covering it with plastic wrap or a suitable lid.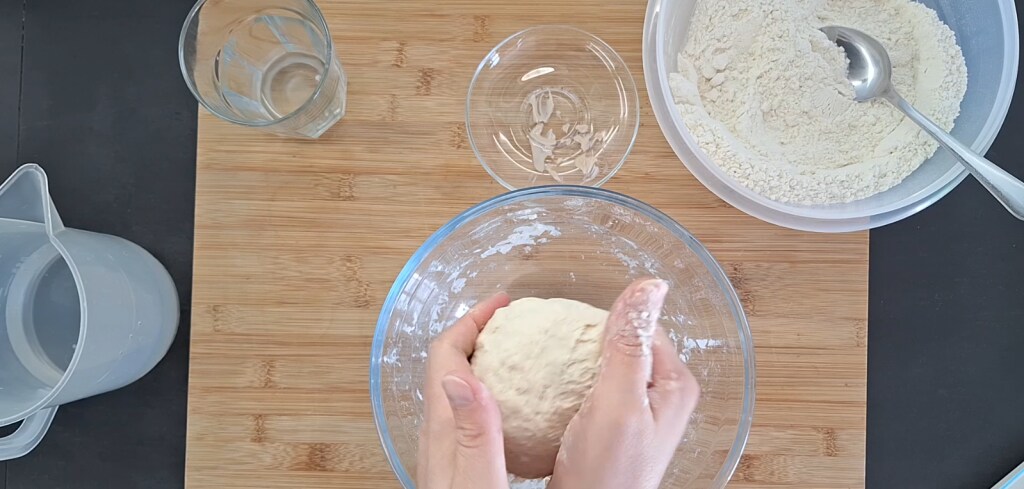
Place the internal rack at the bottom of the pot, the one that comes with the Instant Pot.
This step is important: it keeps the bowl elevated and helps distribute heat more evenly, ensuring uniform proofing.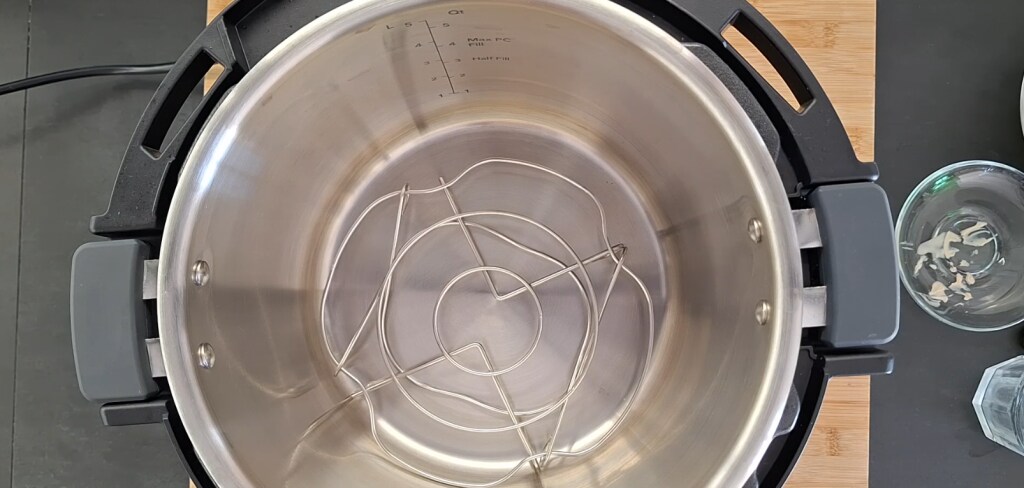
Close the lid (for versions earlier than the Instant Pot Pro leave the valve on Venting) and set the temperature.
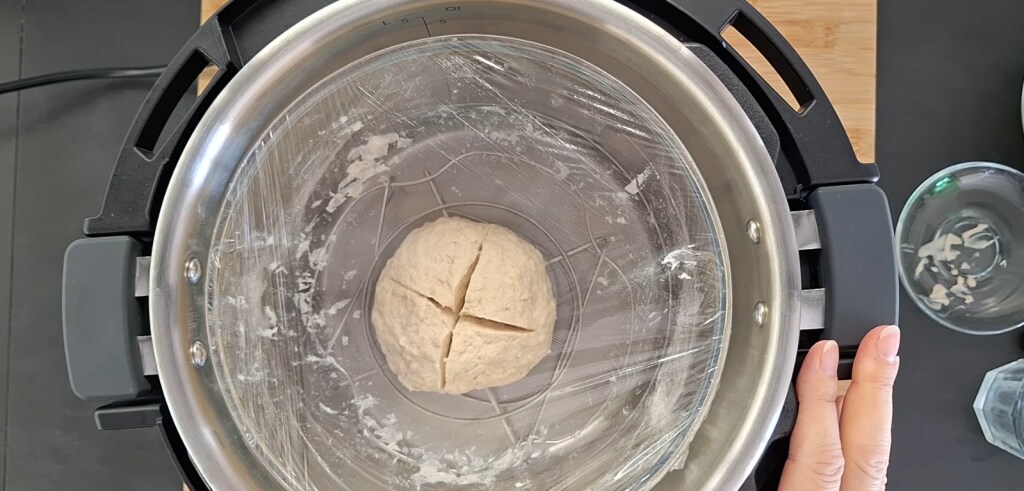
Set the temperature you prefer:
Between 77°F and 81°F if you want a slow and gentle proofing.
Between 82°F and 86°F if you want to speed up the process a bit.
You choose based on the result you want, and the beauty of it is that you can control the temperature as you wish!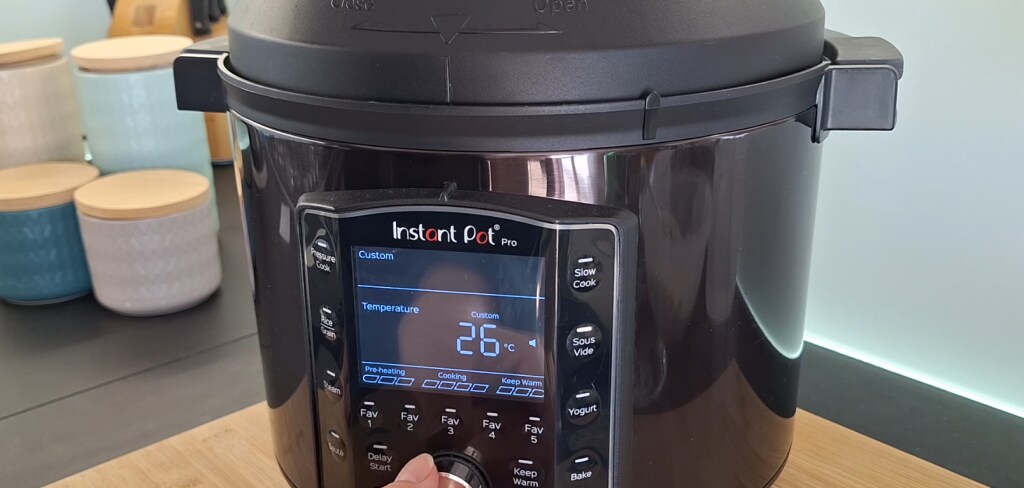
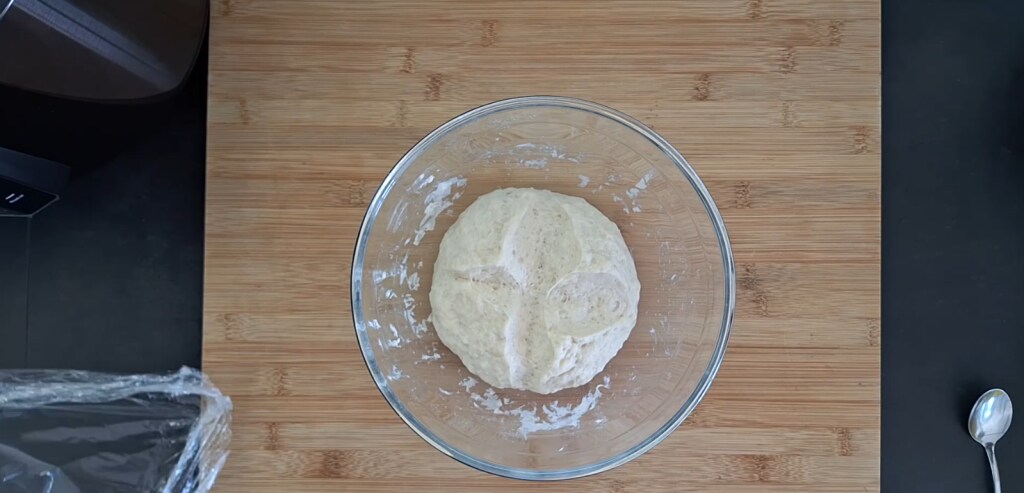
Let it proof for about 60-90 minutes, or until you see that the dough has doubled in volume.
No need to open or check continuously: the warm and constant environment will make the dough rise perfectly.When the dough is nicely puffy, take it out of the Instant Pot and use it immediately.
You can roll it out to make a pizza, shape buns, or continue with your favorite recipe.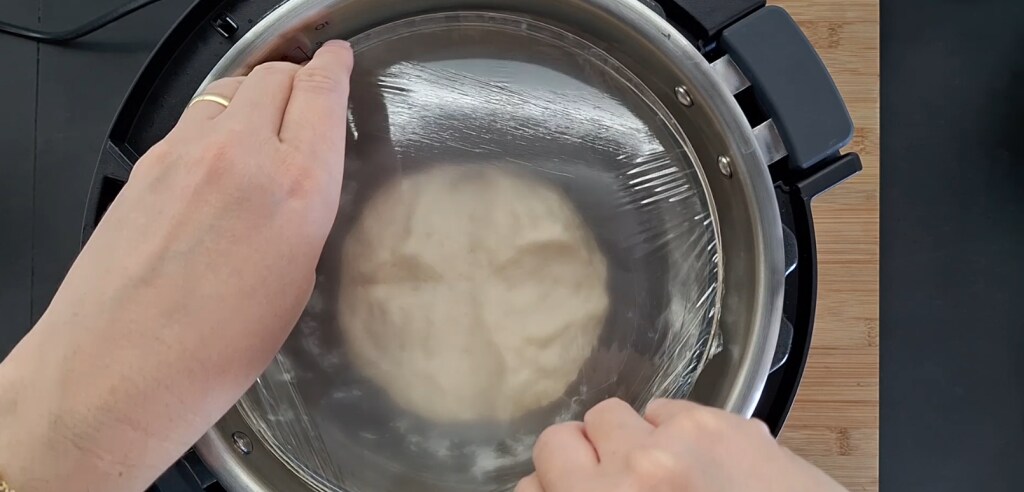
My Tips
Always use a heat-resistant bowl, never plastic.
For doughs with little yeast, this method is perfect because it keeps a constant temperature even for several hours.
It works great with sweet doughs like brioche or panbrioche.
Why This Method Works
The secret is all in the controlled temperature: yeast works best in a warm and stable environment.
With the Instant Pot, you recreate the ideal conditions, like a small “warm room” that nourishes the dough until it’s ready to be worked.
No more temperature fluctuations, no more endless waits… just precise and consistent proofing, just as it should be.
FAQ – Proofing with Instant Pot
Do I need to add water to the bottom of the pot?
No, you don’t need to. The Sous Vide or Yogurt function heats evenly without water. However, if you want to maintain a slight level of humidity (for very hydrated doughs or long proofing), you can add half a cup of water to the bottom, but it is not mandatory.
Can I use this method for sweet doughs as well?
Absolutely yes! It is perfect for panbrioche, brioche, and sweet buns. Keep the temperature around 79°F and the result will be soft and uniform.
Here is a simple, clean, and convenient way to achieve perfect proofing every time.
Since I tried it, I no longer use the switched-off oven or blankets over the dough: the Instant Pot does everything precisely and consistently!
Try it yourself and let me know in the comments how it went, and if your dough rises like a cloud, well… you can say you have a technological proofer in your kitchen!