How many times have you prepared Berry Cheesecake in your life? I’ve made it countless times, yet it took me 10 years to share my recipe with you! Indeed, it has been 10 years since I prepared the first recipe for the blog of the New York Cheesecake with sour cream on top, the long baking, the various and lengthy resting times, and then the berry sauce for the garnish.
One of my favorite cakes, the one that if I see it on the dessert list at the restaurant, I order it without a second thought, even though sometimes I take big risks and regret my order. Unfortunately, making a good, compact, tasty, and creamy cheesecake is not easy. Often, unfortunately, restaurateurs choose to serve a frozen cheesecake rather than preparing it in the kitchen respecting the baking and resting times. And often, these tricksters don’t even declare that it’s defrosted, meaning it’s from some large production and not “homemade“!
I will explain step by step how to prepare this delicious and tasty dessert with the utmost simplicity to help you as much as possible. I have indeed made for you the Berry Cheesecake video recipe to follow; it will be like making it together in my kitchen. I removed the sour cream to cater to everyone’s taste, thus creating a cheese cream with only cream cheese and mascarpone.
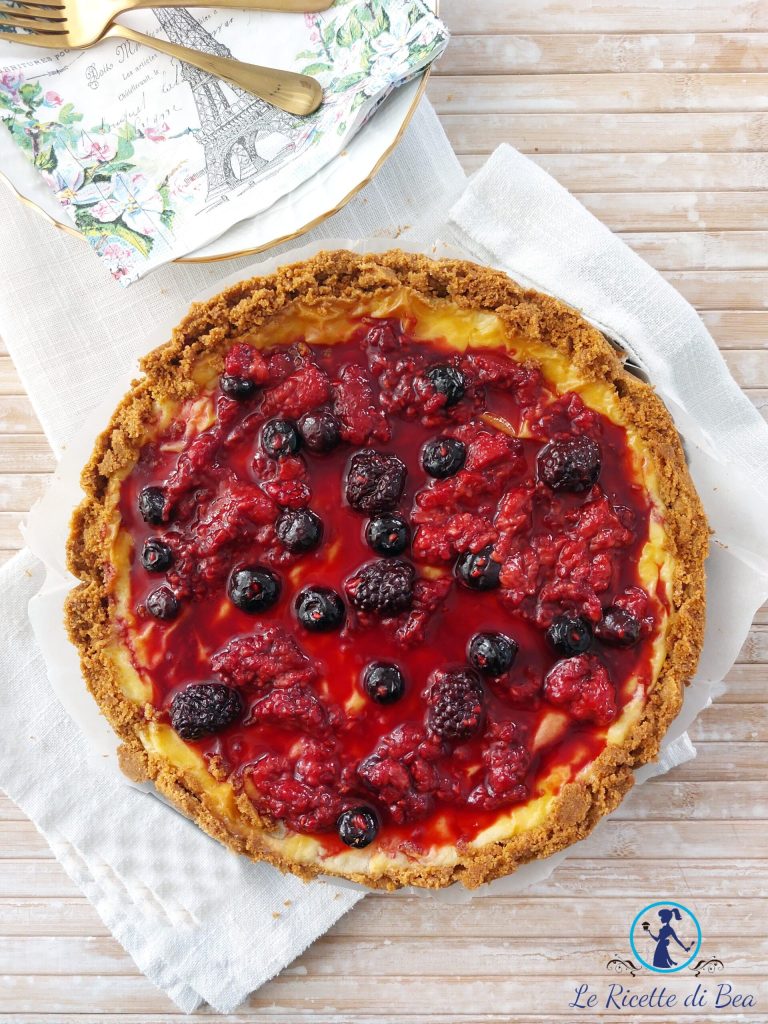
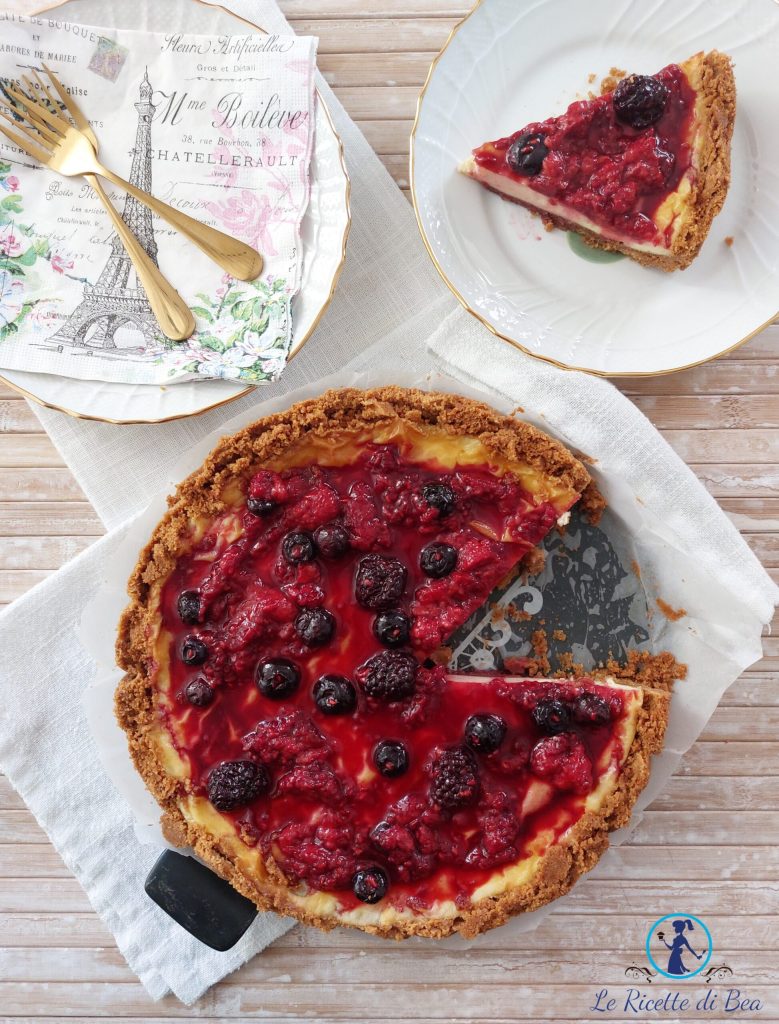
I then chose to use blackberries, raspberries, and blueberries fresh rather than frozen to make the berry sauce for decorating the baked cheesecake even more tasty and creamy. For this cream, you can also follow the video recipe that you find below the first picture.
I also leave you the links to other recipes I have prepared using berries, both fresh and defrosted, and a little gem I found at the supermarket, berry drops. Gems similar to chocolate, but they’re pink, smell like raspberries, strawberries, and blackberries, melt during baking, and are delicious! The links below are clickable and will take you directly to the recipe you have chosen to read. I recommend trying the Pastry Baskets with Custard and Berries. A real treat!
I remind you that every morning, I await you in the group and on the Facebook fan page of Le Ricette di Bea with the Recipe of the Day. I remind you that every Monday, Wednesday, and Friday, you will find the New Recipe here on the blog! Three Days Three New Recipes just for you!
- Difficulty: Very Easy
- Cost: Cheap
- Rest time: 3 Hours 30 Minutes
- Preparation time: 20 Minutes
- Portions: 8 People
- Cooking methods: Oven
- Cuisine: Italian
- Seasonality: All Seasons, Christmas
- Energy 660.37 (Kcal)
- Carbohydrates 61.01 (g) of which sugars 35.36 (g)
- Proteins 7.83 (g)
- Fat 44.61 (g) of which saturated 21.09 (g)of which unsaturated 8.34 (g)
- Fibers 1.93 (g)
- Sodium 271.00 (mg)
Indicative values for a portion of 187 g processed in an automated way starting from the nutritional information available on the CREA* and FoodData Central** databases. It is not food and / or nutritional advice.
* CREATES Food and Nutrition Research Center: https://www.crea.gov.it/alimenti-e-nutrizione https://www.alimentinutrizione.it ** U.S. Department of Agriculture, Agricultural Research Service. FoodData Central, 2019. https://fdc.nal.usda.gov
Ingredients for a 9.5 – 10.5-inch pan Berry Cheesecake
- 10.5 oz Digestive biscuits (the most classic and best biscuits for this cake)
- 6 oz butter
- 2 tablespoons brown sugar
- 8.8 oz mascarpone
- 8.8 oz cream cheese
- 1 egg
- 4.23 oz sugar
- 2 teaspoons lemon juice (or lemon extract)
- 1.06 oz cornstarch (or potato starch)
- 1 coffee cup water
- 8.8 oz berries (in my case fresh but frozen ones are fine too)
- 2 tablespoons sugar
Note that these indicated doses are for a cake with a diameter ranging from 9.5 to 10.5 inches. If you prepare a cake with a 9-inch pan, you will manage to make tall edges on the dessert. If you choose a 11-inch pan, you will need to increase the dose of biscuits and butter and all the others accordingly, otherwise you will get a low and not very fluffy cake.
Tools for Berry Cheesecake
- 1 Bowl
- 1 Mixer
- 1 Saucepan
- 2 Spoons
- 1 Stove
- 1 Electric whisk
- 1 Pan
- 1 Oven
- 1 Parchment paper
- 1 Spatula
- 1 Skillet
- 1 Small bowl
- 1 Scale
Don’t be intimidated by the long list of tools we will use for this recipe; the recipe itself is very simple, but it requires several steps and long resting times. We will also have time to wash and reuse some tools more than once.
Recipe Steps for Berry Cheesecake
Let’s start with the cheesecake base which needs to rest for 30 minutes in the fridge, thus facing the first rest. Put some water in a saucepan and place it on the stove over medium-low heat. Cut the butter into pieces and place them in a bowl that can fit into the saucepan; we will indeed melt the butter in a water bath.
In the meantime, crumble the biscuits using a mixer or chopper; in my case, I chose the classic and always perfect digestive biscuits. They are always used in all cheesecake recipes, whether classic, New York, or no-bake. They cost a bit more, but they are worth it.
Pour the crumbled biscuits into a nice wide bowl with high edges, add two tablespoons of brown sugar and the now melted butter. Mix the ingredients with a spoon and set them aside for a few moments.
Take a springform pan of 9.5 to 10.5 inches and line the bottom with a sheet of parchment paper. Pour the biscuits into it and prepare the base and edges of the cheesecake. You can press with the bottom of a glass, the back of a spoon, or your hands.
Compact well and place the pan in the fridge for at least 30 minutes. Do not take it out before this time, because the butter we melted needs to cool well.
After this time, we can proceed. The first thing to do is preheat the oven to 340°F in static mode, so it reaches the right temperature before putting the berry cheesecake in it in a few moments.
Wash the bowl where we worked the biscuits earlier, dry it, and now pour inside the two types of cheese, the mascarpone and the cream cheese. Break an egg and let it fall into the bowl with the cheeses.
Add the tablespoons of white sugar, cornstarch or potato starch, and lemon extract or lemon juice if you have it at home. This will only serve to give a hint of acidity to the cheeses without altering the sweetness of the cream we are preparing. Work with the electric whisk or a spatula until you obtain a smooth, homogeneous, and nice compact cream.
Pour the cheese cream into the pan over the biscuit base, level the surface of the cake, and put it in the oven. There is no need to cover the cake as many recipes suggest; in fact, we will let the moisture evaporate during baking in the oven, and the surface will crack and rise slightly. Place the cheesecake in the oven on the middle shelf and bake at 340°F for about 45 to 50 minutes.
Once baking is complete, turn off the oven, slightly open the door, and leave the cake inside for about 25 minutes. If you are not in a hurry, leave it even longer. This time will allow the cake to cool, but also to stabilize the cheese cream.

After this resting time in the oven, we can move the cake to the fridge for the third and final resting time. We will leave the baked cheesecake in the fridge for at least 1 hour. Obviously, it’s better if you have more time at your disposal.
Keep in mind that all the people, friends, and family who have tasted my berry cheesecakes have specified that they are always better the next day, meaning after hours of resting in the fridge. Indeed, this will make the base compact, the cream spongy, and thus delicious the cheese and berry cake.
So if you don’t have time to wait longer than the hour indicated as minimum rest, you can proceed like this. Take a small skillet, pour a coffee cup of water into it, add the fresh fruit you have chosen, and two tablespoons of white sugar.
In my case, they were berries such as raspberries, blackberries, blueberries. However, you can choose peaches, strawberries, apples, kiwis, apricots, bananas, pineapple, or any other fruit to your liking. I think you can base the choice of fruit also on its seasonality.
Place the skillet with the fruit on the stove over medium-low heat, without a lid and without stirring too much. Let the water evaporate, stirring occasionally. Then turn off the heat and let the berry sauce cool completely. The sauce will be ready when you see that the bottom has become thick, colored in bright purple and pink, it will be creamy and the berries will be soft and delicious.
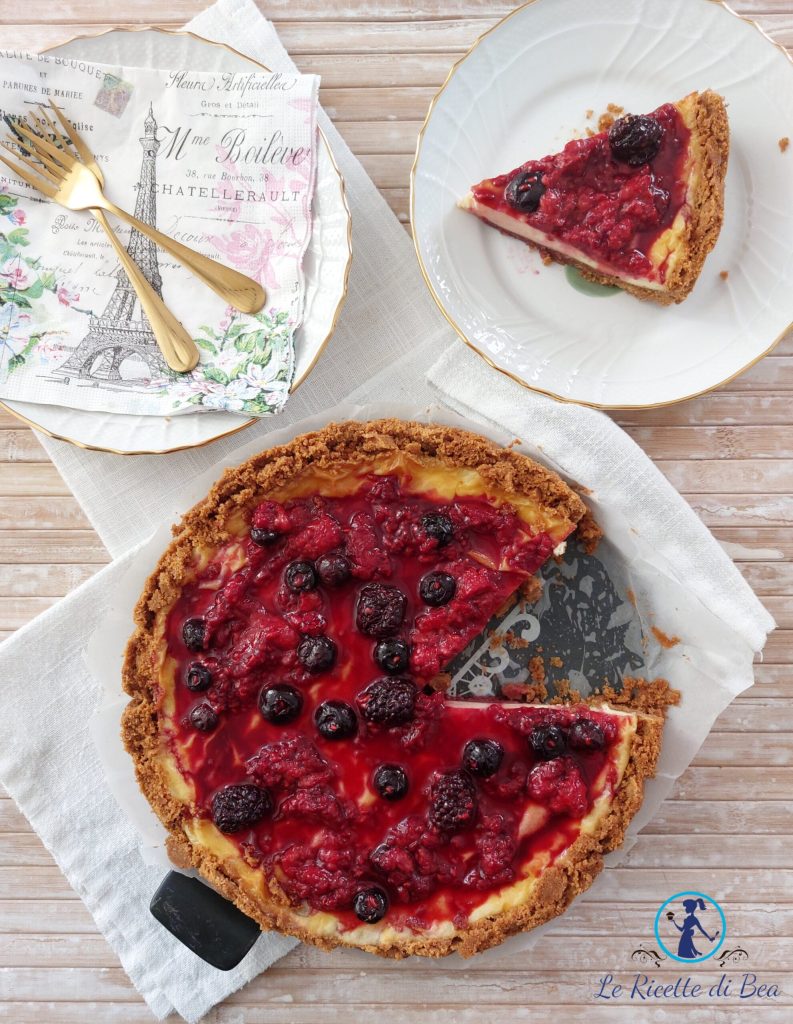
Take the Cheesecake from the fridge and pour the berry sauce on the surface gently with a spoon. Serve and enjoy slice after slice the most delicious and tasty cheesecake you will ever have prepared!
I hope this recipe is clear; if not, feel free to write in the comments, on the social media chats, or contact me via email if you prefer! I invite you to watch the video recipe if any step in the writing is not too clear.
I wish you all a good appetite and remind you that I await you every day on the social profiles with the Recipe of the Day!
Advice, Storage, and Variations
We can store the Cheesecake in the fridge for two days, obviously without topping it with berry sauce. I recommend preparing the sauce and decorating the surface of the dessert only when we are about to serve the cake to our guests or our family.
I hope I have already given enough advice during the text of the berry cheesecake recipe, but I feel the need to emphasize both the baking time, slow and at low temperature, and the resting times which are crucial for this recipe and its optimal success, especially the final enjoyment!
For variations, apart from the fruit as already indicated, I can tell you that you can vary the cheeses; if you don’t want to use cream cheese, you can choose ricotta. Or do like my colleague Annalisa, who divides the doses into three choosing: mascarpone, cream cheese, and ricotta. Basically, she divides the 500 grams of cheese doses equally among three different types. Surely a nice mix of flavors and textures for the cheesecake cream.