Let’s enrich our World Recipes Collection with a new recipe, today we will prepare Pão de Queijo Brazilian Cheese Bread Recipe perfect as an appetizer, aperitif or as homemade bread, very tasty and delicious. How did I also get a Brazilian recipe? If you were wondering, I’ll answer right away. My friend Isa, the girl co-star of the trip to Spain (for those who have just started following me, you can also find Spanish Recipes below) and my smiling companion of many years of life lived together.
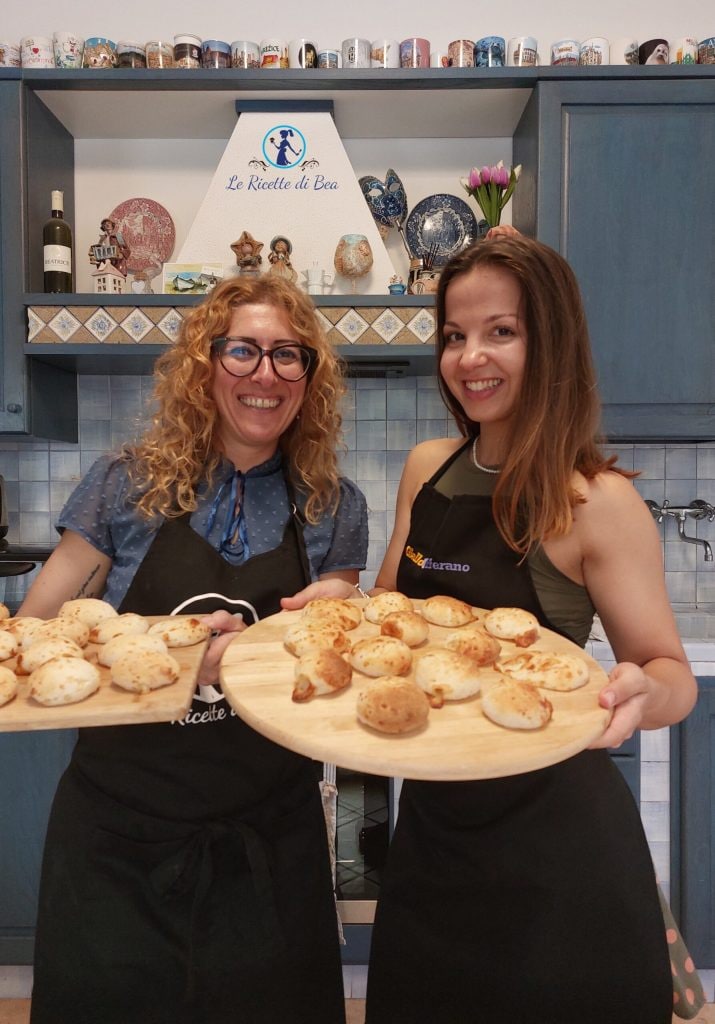
Thanks to her holidays, we organized ourselves to prepare in live video (but recorded) the homemade Pao de Queijo recipe with her family’s recipe that she has enriched and adjusted over the years. In short, the Typical Recipe from the Brazilian State of Minas Gerais, the place of origin of Isa’s parents, which she herself then adapted to her own tastes. Imagine that this recipe was super popular in Brazil during the 1950s.
As you can imagine, the recipe varies from region to region in Brazil, habits also change, some enjoy Pao de Queijo accompanied by coffee, others as a midday snack, and others still consume Cheese Bread as a classic homemade bread.
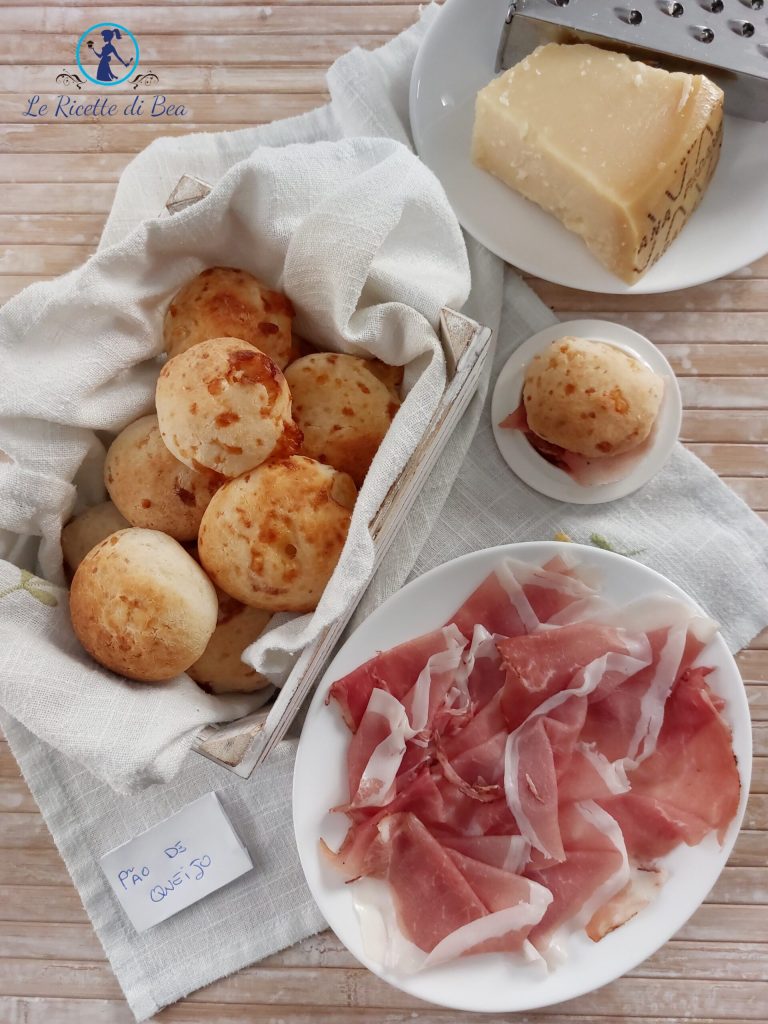
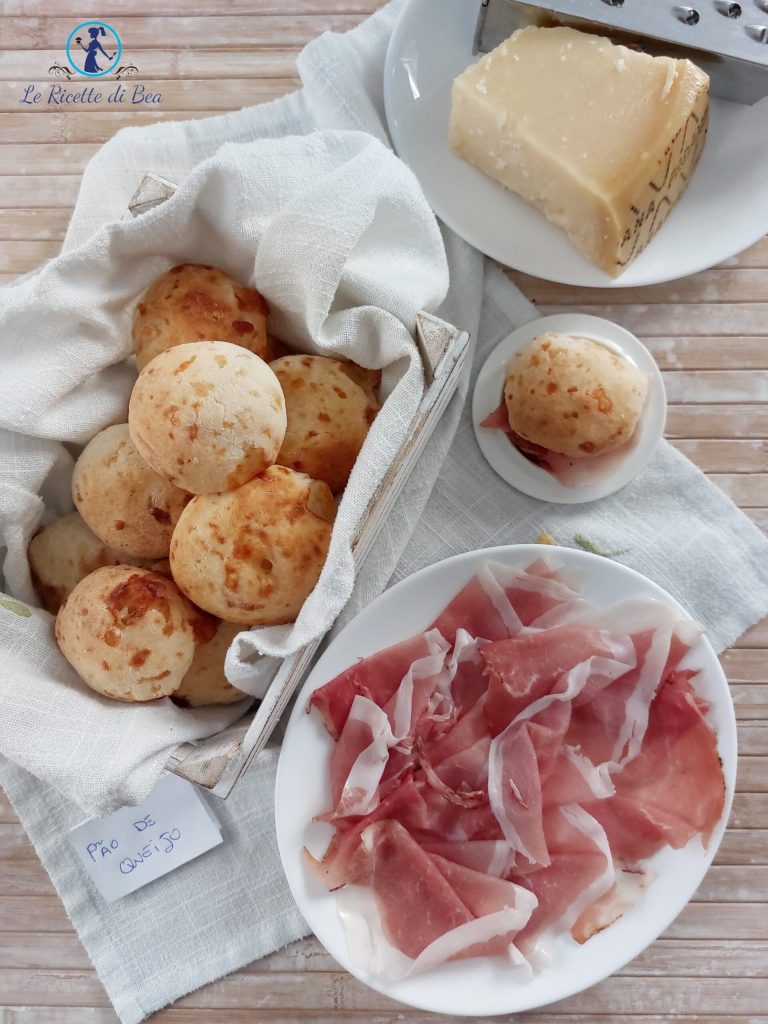
As consumption habits change and recipes vary, obviously also the cheese varies depending on the regions of origin, tastes, and cheeses available. In Italy you can use grated cheese (choose between Grana Padano or Parmigiano Reggiano), then you can add scamorza, emmental, or mozzarella to give more taste and flavor to these Brazilian rolls. In the Mineira Region the most widespread cheese of this state is used: Queijo Minas which gives the typical flavor to these rolls and from which they take the name.
Below you will find other World Recipes that I have already experimented with over the years, every link is clickable and will take you directly to the recipe you have chosen to read!!!
- Difficulty: Very easy
- Cost: Very cheap
- Preparation time: 10 Minutes
- Portions: 20 Pieces
- Cooking methods: Oven
- Cuisine: Brazilian
- Seasonality: All seasons
- Energy 163.98 (Kcal)
- Carbohydrates 15.66 (g) of which sugars 0.94 (g)
- Proteins 4.30 (g)
- Fat 9.86 (g) of which saturated 2.26 (g)of which unsaturated 5.06 (g)
- Fibers 0.08 (g)
- Sodium 144.08 (mg)
Indicative values for a portion of 50 g processed in an automated way starting from the nutritional information available on the CREA* and FoodData Central** databases. It is not food and / or nutritional advice.
* CREATES Food and Nutrition Research Center: https://www.crea.gov.it/alimenti-e-nutrizione https://www.alimentinutrizione.it ** U.S. Department of Agriculture, Agricultural Research Service. FoodData Central, 2019. https://fdc.nal.usda.gov
Ingredients for about 30 Pão de Queijo
- 4 1/4 cups tapioca flour
- 2 eggs (at room temperature)
- 1 cup milk
- 2/3 cup vegetable oil
- 1 cup cheese (to grate, in our case Grana Padano)
- 9 oz scamorza (in our case smoked, or other cheese like Emmental or Casciotte)
- to taste salt (to taste and your preference)
- to taste black pepper (to taste and your preference)
In many recipes, you’ll read that water is present, Isa and her family recommend not adding it immediately, but rather to use it only in cases where the flour is too lumpy and it’s impossible to work with because the right consistency to work the dough has not been reached.
Tools for the Brazilian Cheese Bread Recipe
- 1 Bowl
- 1 Wooden spoon
- 1 Small pot
- 1 Stove
- 1 Scale
- 1 Oven
- 1 Cutting board
- 1 Knife
- 1 Grater
- 2 Plates
- 2 Parchment paper
- 2 Baking trays
Steps for the Pão de Queijo Traditional Brazilian Bread Recipe
We start the preparation of these little cheese rolls by grating the Grana Padano or Reggiano, about 250 grams, and then setting it aside on a small plate. If you are lucky enough to find Queijo Minas because you live somewhere in the World where it is available, grate about 250 grams.
Then we focus on the scamorza or another type of soft cheese you have chosen. Isa recommends scamorza because, as heard in the video recipe, she is spoiled and loves scamorza. However, you can vary from Emmental to a soft Casciotta sheep cheese. Cut about 250 grams into not too large cubes and set them aside on a small plate.
Once these two ingredients are ready, we can proceed with the liquids. So, take a small pot, we will only need it to bring the milk with the vegetable oil to a boil. Then, pour the milk and oil into the pot, place it on the stove, and wait for it to almost boil. So hot but not boiling. Meanwhile, turn on the oven with a ventilated mode with the grill on top at 392°F.

Now, take a nice big bowl, preferably with high sides, and pour all the tapioca flour into it. Obviously, we are preparing many small pao de queijo, between 25 and 30 rolls, which is why the amount of tapioca flour is 500 grams. If you want to prepare less cheese bread, you can halve all the quantities indicated to get half of our rolls.
As stated in the video, the tapioca flour is the true queen and protagonist of this recipe, even if it might seem that the queijo is the main actor. The tapioca flour is a typical Brazilian flour and from other places around the World. Here, it costs an arm and a leg (I know, and it is indeed the first time I am proposing a recipe with such an ingredient), but in other parts of the World, it costs less and is a central part of the diet of many populations. In pao de queijo, tapioca flour is the core of the recipe and is also gluten-free.
As the milk with the oil nearly reaches a boil, we can proceed. Pour these two ingredients slowly into the bowl with the tapioca flour, stirring slowly with a wooden spoon. You will see the flour start to divide into many small spheres, it’s normal, don’t worry. We will get many small lumps of dough. I urge you, or rather, we urge you, not to pour the liquid all at once, otherwise, you won’t know if the flour can be worked well in the subsequent steps.
In the video recipe above the list of ingredients, this step is very evident; you can see how slowly we added the hot liquids while continuously stirring. Therefore, before starting, we recommend watching the video to understand each step well.
Only if necessary, keep a dose of water nearby on your work surface; it will only be needed if the flour you purchased remains unbound and a proper sticky consistency for working it has not been achieved. Otherwise, do not add additional liquids.
Now add the whole and room temperature eggs. The eggs are indeed the fatty component, along with the vegetable oil, that will help us work the tapioca flour. In particular, besides the cheeses, the eggs give these cheese rolls a golden color during cooking.
Add salt and pepper, especially regulate the salt because the grated cheese already has its well-accentuated saline charge. In fact, when the cheese is baked, it releases its savory part into the rolls. As for the pepper, use your judgment and follow your tastes. Isa recommends a mixed creole to give more flavor to the pao.
Fun fact: The Creole Pepper is nothing but a mix of five-colored pepper: Black Pepper, White Pepper, Green Pepper, and Pink Pepper.
Finally, let’s add the cheese (or the cheese, as Isa calls it) in the bowl. That’s why I recommended a nice large bowl; we will indeed have about a kilo of ingredients to work all at once. So, pour the grated cheese and continue working with the wooden spoon.
Then add the scamorza in pieces, slowly while constantly working the dough. In the video recipe, you’ll hear us laughing, laughing really hard, because this recipe is easy, with very few ingredients and steps, simple in procedure, but it will test your physical endurance regarding the dough part.
Consider that Isa proposes preparing this recipe with children, I recommend having them intervene in the second part, in the first I don’t think they can be of much help, indeed you risk ruining the dough and having to throw everything away. While in the second part, just making the bread balls, the children will surely have a lot of fun.
Know that these steps will be a bit tiring, as heard in the video, I often say “I’m tired”. This dough indeed, besides being lumpy, is also sticky and therefore requires a certain amount of force to work it at its best. Gaia suggested yesterday evening using the stand mixer with the bread hook, but I haven’t tested this, so I write it now, but it is not proven as a recipe. Next time I prepare pao de queijo, I will let you know if they are equally good using the stand mixer for kneading everything.
Another little curiosity: if you are from the Marche, you may not notice, but if you are from outside the Region or State, you will hear many dialect terms during the video recipe, when having fun, one doesn’t pay much attention to Italian. Mesteca is indeed a term that my grandmother Sandrina uses often, and that day we mestecated a lot!!!
Back to the recipe: finally, we have obtained the dough for the pao de queijo. Now place two nice trays in front of you, each with a sheet of parchment paper. Grease your hands and take portions of dough, about 1.4 ounces per ball, to prepare the pao.
Place the balls directly on the parchment paper placed on the trays. Well spaced from each other because they will grow in volume during cooking. We placed about 12 to 13 pao de queijo per tray. It will be necessary to oil your hands more than once, so keep the vegetable oil close during this step of the recipe.
We can bake two trays at a time as well, it is not a preparation with yeast, so we can safely open the oven to place the second tray once filled with cheese bread. The important thing is that the oven is hot, between 392 and 428°F with the ventilated mode and if possible with the grill on top. If you don’t have this oven setting, do this: bake the pao for about 15 minutes with the ventilated mode then switch to the grill for another two or three minutes.
While if you have the same oven setting as mine, so with ventilated grill on top, bake the cheese bread and let them cook for about 15 to 20 minutes. Without varying degrees or mode.
In both cases, you will see that the cheese bread will puff up, taking on color, that typical color that makes them recognizable throughout Brazil. Beautifully golden and crispy on the outside with a soft and stringy heart, like many Brazilians!
We just have to enjoy the pao de queijo serving them with your preferred cold cuts and other cheeses. We chose a Speck Alto Adige IGP that we love, perfect! These cheese bread rolls are perfect as an appetizer, aperitif, or mid-morning snack or afternoon snack. Rich in taste and flavor, they are an extraordinarily delicious energy boost!
We wish you, this time we are two, a good appetite and remind you that Le Ricette di Bea await you every morning in the group and on the Facebook fan page with the Recipe of the Day and many other curiosities and videos live from my kitchen!!
Storage and Variation
of Homemade Pao de Queijo
You can store the cheese rolls in a plastic container with a lid for about two or three days. Otherwise, the advice we give you is to freeze them in classic freezer bags. This way, you can store them for up to a month. When you go to thaw them, remember to do so by placing them in the refrigerator the night before. Isa slightly warms them in the microwave to make the scamorza beautifully stringy again. I heated them in the breakfast toaster, and they were as delicious as freshly baked!