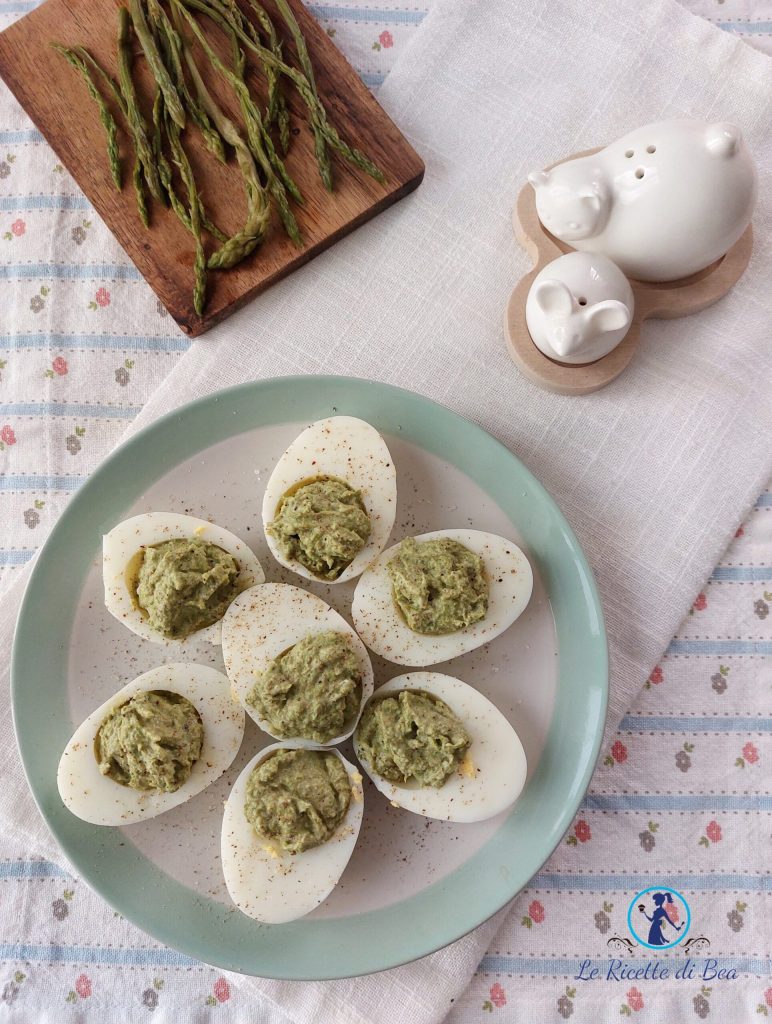
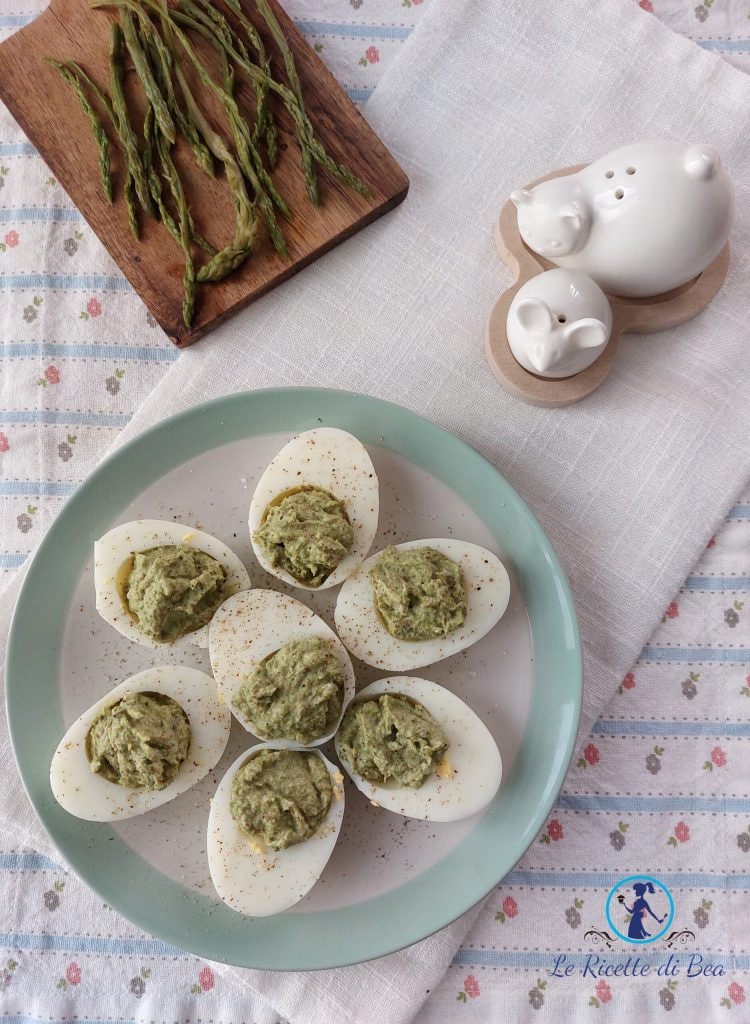
Today I present to you the Deviled Eggs with Asparagus, a perfect appetizer or aperitif that’s super tasty and colorful. You can also serve the stuffed hard-boiled eggs as a main course, just accompany this dish with a seasonal side dish. If you’ve read the previous recipes with asparagus on my blog, you know that my father takes long walks with his partner in search of wild asparagus. Then he divides half of the finds between me and them so that I can always offer you new recipes, like this one.
In the past weeks, I indeed proposed the following recipes, you can find the links a bit further down to read and save them whenever you want. Recipe for rolls with asparagus and turkey, a creamy first course like Risotto with Asparagus and Prosecco, Scrambled eggs with asparagus, perfect even for a savory breakfast. Or the more classic side dishes: Baked Asparagus or Flavorful Pan-Fried Asparagus. All recipes I recommend trying!
Let’s move on to the tricks for perfect hard-boiled eggs! From the cooking time of the eggs to the trick with vinegar and obviously cold water! Lots of cold water!
However, returning to the hard-boiled eggs and every time you’ve asked yourself: how many minutes to cook hard-boiled eggs? I can give you a simple and honest answer with advice. My mother always said: cold water, lots of cold water, add a tablespoon of vinegar, place the eggs you need to cook, being careful not to break them initially (I place them gently in the pot with a spoon), turn on the stove and wait for it to boil. From the boil wait between 9 and 10 minutes. This is the cooking time for hard-boiled eggs according to her! I’d say that after many years in the kitchen, it’s also my perfect hard-boiled egg cooking time! Firm white and the yolk with the right consistency, super digestible.
What should you absolutely do after this time? Pass the hard-boiled eggs in cold water, lots of cold water. This stops the cooking definitively, because just draining them isn’t enough. Think about how many times you’ve let hard-boiled eggs cool on their own and they ended up floury and dry. Unfortunately, this is due to poor post-cooking cooling of this food. You need to pass the eggs in cold water multiple times until they no longer emanate heat.
Are you wondering what the vinegar does for the hard-boiled eggs? Well, I’ll answer you right away. The vinegar added before starting the stuffed egg preparation helps to seal any cracks that may already be on the surface or that could form during the process.
Of course, each of us has their own method and cooking time, but if you want to get a nice firm yolk and never rubbery, keep those 10 minutes in mind. Below that time you’ll have yolks:
– at 2 minutes you’ll have soft-boiled eggs, the classic egg where you can dip bread;
– between 4 and 5 minutes you’ll have eggs with firm whites and creamy yolks;
– between 6 and 7 minutes both the white and yolk start to firm up while still maintaining a soft center;
– between 8 and 9 minutes can be a suitable time for small eggs;
– with medium to large eggs, like mine often are, you’ll need to reach the 10-minute mark.
If you like hard-boiled eggs, you can’t miss the new recipe: Green bean salad with tuna and eggs, a delicious and easy-to-prepare main dish.
I’d say we can continue with the preparation of the recipe for deviled eggs with asparagus. Let me first remind you of the blog’s social channels where you can stay always updated on the latest from my kitchen. You can choose the Facebook fan page of Le Ricette di Bea or the Instagram profile by clicking here. I’ll be waiting with the Recipe of the Day every morning and much more.
As I mentioned before, below you’ll find other recipes with asparagus:
- Difficulty: Very easy
- Cost: Very cheap
- Preparation time: 10 Minutes
- Portions: 2
- Cooking methods: Stove
- Cuisine: Italian
- Seasonality: Spring, Summer
- Energy 739.11 (Kcal)
- Carbohydrates 3.83 (g) of which sugars 3.09 (g)
- Proteins 44.47 (g)
- Fat 61.56 (g) of which saturated 17.76 (g)of which unsaturated 15.86 (g)
- Fibers 1.90 (g)
- Sodium 1,038.42 (mg)
Indicative values for a portion of 250 g processed in an automated way starting from the nutritional information available on the CREA* and FoodData Central** databases. It is not food and / or nutritional advice.
* CREATES Food and Nutrition Research Center: https://www.crea.gov.it/alimenti-e-nutrizione https://www.alimentinutrizione.it ** U.S. Department of Agriculture, Agricultural Research Service. FoodData Central, 2019. https://fdc.nal.usda.gov
Ingredients
- 10 wild asparagus (or greenhouse asparagus)
- 6 eggs (at room temperature)
- 3 tablespoons extra virgin olive oil
- 1 tablespoon vinegar
- 2 pinches salt
- to taste black pepper
Tools
- 1 Cutting board
- 1 Pot
- 2 Spoons
- 1 Blender
- 1 Knife
- 1 Small bowl
- 1 Small pot
- 2 Teaspoons
Steps
Let’s start preparing the hard-boiled eggs stuffed with asparagus by making the asparagus cream. Simple to prepare and super tasty. Let’s start by bringing a small pot of water to a boil. When the water boils, we’ll add the asparagus. Of course, we’ll have removed the woody part with the help of a knife. Let them cook for about 8 minutes if they’re small wild asparagus; the time should be extended if they’re larger or greenhouse-grown. The larger ones you buy at the market might require up to 15 minutes to become soft and easily pierced with a fork. Once cooked, we need to cool them quickly under running water to maintain that bright green color and be able to work them immediately in the blender. Place them in the blender’s bowl and add two tablespoons of extra virgin olive oil, a pinch each of salt and black pepper. Give the machine a couple of pulses and set aside. We’ll also need a hard-boiled yolk to add to the cream. So, let’s proceed with cooking the hard-boiled eggs.
Take a tall and spacious pot to add the 6 eggs. Cover the eggs with cold water. We’ll also add the tablespoon of vinegar. Place the pot on the stove and turn the heat to medium. Now we wait for a maximum of 9 to 10 minutes. Before draining the eggs, remove a few tablespoons of cooking water; we’ll need it to work the asparagus cream.
After the cooking time, quickly cool the eggs under cold running water. Make sure they’re very cold. Peel them gently and place them on a wooden cutting board. With the knife, divide the egg into two equal parts along its vertical axis. Remove all the yolks, adding only one to our asparagus cream. Add a tablespoon of the hot cooking water we set aside. Then turn on the blender and work the cream until you obtain a smooth mixture.
If you’re wondering: what do we do with the 5 leftover yolks from this recipe? I can tell you that my father used to add them to breadcrumbs to prepare oven-baked gratin vegetables. Crumble all the hard-boiled yolks into the breadcrumbs, add salt, pepper, parsley, extra virgin olive oil, rosemary, a tablespoon of white wine, and mix everything by hand. Place this flavored bread on the surface of the vegetables to be gratinated and bake. You’ll taste how delicious it is!
Take a serving plate and arrange all the half hard-boiled eggs. Take two teaspoons and fill the eggs with the asparagus cream. Once the cream is finished, sprinkle everything with salt and pepper, optionally adding a good drizzle of extra virgin olive oil, and serve this colorful and delicious appetizer with hard-boiled eggs to our guests or family.
As always, I remind you that I’ll be waiting for you with the next recipe and on the blog’s social channels. Enjoy your meal!!!
Storage:
You can store the deviled eggs with asparagus cream in a refrigerator container with a lid. This for up to one day from their preparation, always be careful with egg storage, even if well-cooked.
Another tip I can give you is that you can fill the eggs with any other ingredient. In my house, they love them with tuna, mayonnaise, a pinch of ketchup, and paprika. I then sprinkle with parsley and pepper. Delicious!