Layered Pandoro, an incredibly soft pandoro that I didn’t think I could make at home. It was a great satisfaction, the process is a bit long but the final result fully rewarded me. To make this pandoro, I used sourdough starter which, of course, I had to activate daily for at least a week and used only after three consecutive refreshments. If your sourdough starter does not double and become well aerated in three hours, it’s useless to try because it won’t be able to leaven your pandoro. I recommend activating your sourdough starter well before trying the recipe.
You can certainly make pandoro at home using yeast, but the original flavor of pandoro and panettone involves the use of sourdough starter.
To use yeast, replace the sourdough starter in the first dough with 8g of yeast and add 115g of all-purpose flour and 55g of lukewarm water.
The preparation involves two doughs and the rising times obviously vary from house to house because they depend on many factors, including external temperature and humidity. To prepare pandoro and panettone at home, it would be good to have a proofing chamber, but if like me you don’t, you can help yourself with an off oven which creates a stable environment for rising, perhaps you can keep the oven light on to help raise the temperature a bit. In any case, don’t move to the second dough if the first hasn’t tripled and isn’t highly aerated.
I hope I haven’t discouraged you from trying the recipe with all these recommendations, but they are simply meant to simplify your work and achieve an excellent result that will reward you for the time spent.
I remind you of other leavened products to make every sweet moment with family special.
- Difficulty: Medium
- Cost: Medium
- Rest time: 1 Day
- Preparation time: 30 Minutes
- Portions: 16 pieces
- Cooking methods: Oven
- Cuisine: Italian
- Seasonality: Christmas
- Energy 278.65 (Kcal)
- Carbohydrates 42.43 (g) of which sugars 18.46 (g)
- Proteins 6.00 (g)
- Fat 9.91 (g) of which saturated 5.99 (g)of which unsaturated 3.64 (g)
- Fibers 0.62 (g)
- Sodium 212.64 (mg)
Indicative values for a portion of 82 g processed in an automated way starting from the nutritional information available on the CREA* and FoodData Central** databases. It is not food and / or nutritional advice.
* CREATES Food and Nutrition Research Center: https://www.crea.gov.it/alimenti-e-nutrizione https://www.alimentinutrizione.it ** U.S. Department of Agriculture, Agricultural Research Service. FoodData Central, 2019. https://fdc.nal.usda.gov
Ingredients
We divide the ingredients for convenience between the first and second dough
- 6 oz oz sourdough starter
- 2 cups cups Manitoba flour
- 3 tbsp tbsp water
- 1/3 cup cup sugar
- 1 tbsp tbsp honey
- 1 egg
- 1 egg yolk
- 3 tbsp tbsp butter (softened)
- 3/4 cup cup Manitoba flour
- 3/4 cup cup all-purpose flour
- 3/4 cup cup sugar
- 2 eggs
- 1 tsp tsp salt
- 1 tbsp tbsp honey
- 2 packets vanillin
- to taste vanilla flavor (preferably in paste or pod)
- 4 oz oz butter (cold for laminating)
- to taste powdered sugar (to serve)
Tools
To knead the pandoro, we definitely need a stand mixer, it’s not feasible to knead by hand. To bake it, a special mold is needed which is easily available.
- 1 Stand Mixer Howork
- 1 Mold
Preparation
The preparation is a bit long because you need to knead well and respect the rising times, but the result will amaze you.
As the first step, warm the water and dissolve the sourdough starter in it. Then proceed to put the flour in the stand mixer, the water with sourdough starter, and start rotating at medium speed with the dough hook or the flat beater. Add the sugar, honey, egg yolk, and finally the egg.
Be careful to ensure that the previous ingredient is well absorbed and blended into the dough before adding the next one.
When the dough is well blended, add the butter one piece at a time, always waiting for the previous piece to be absorbed. Let the stand mixer rotate until the dough is shiny and well blended. This will take at least 20/25 minutes.
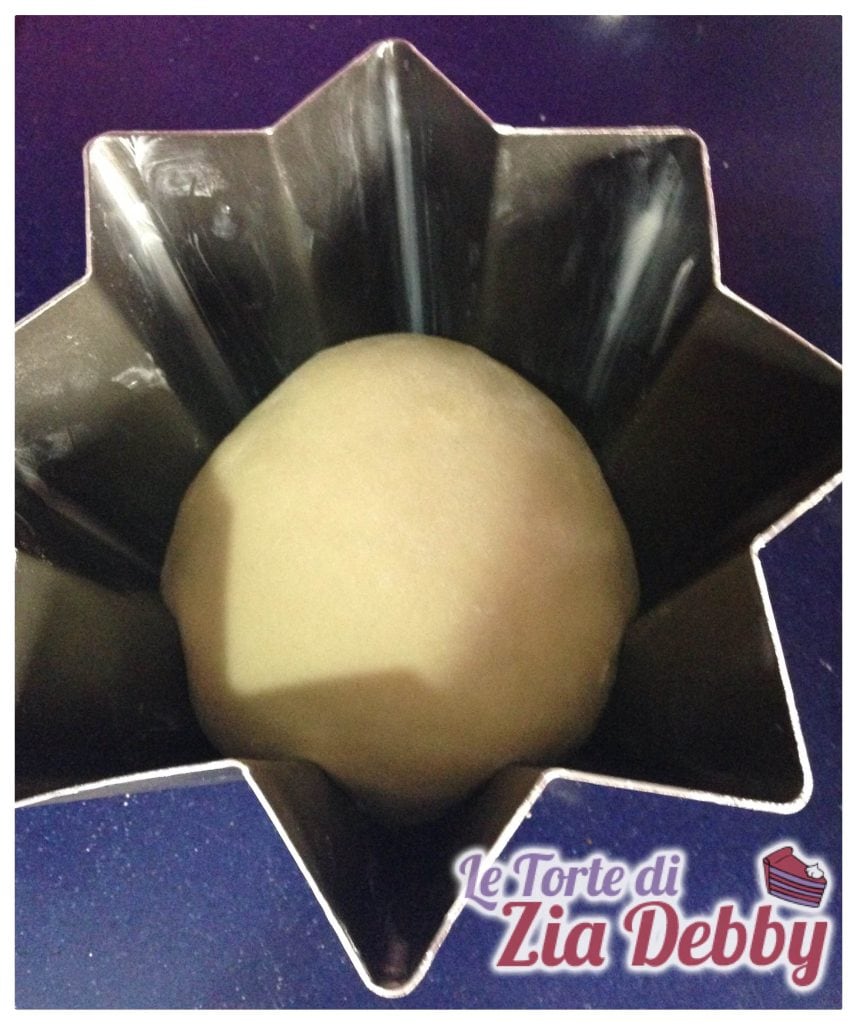
Now remove the dough from the stand mixer, form a ball and put it in a slightly buttered container, cover and let rise. The dough must triple in volume. For convenience, I kneaded around 9 PM.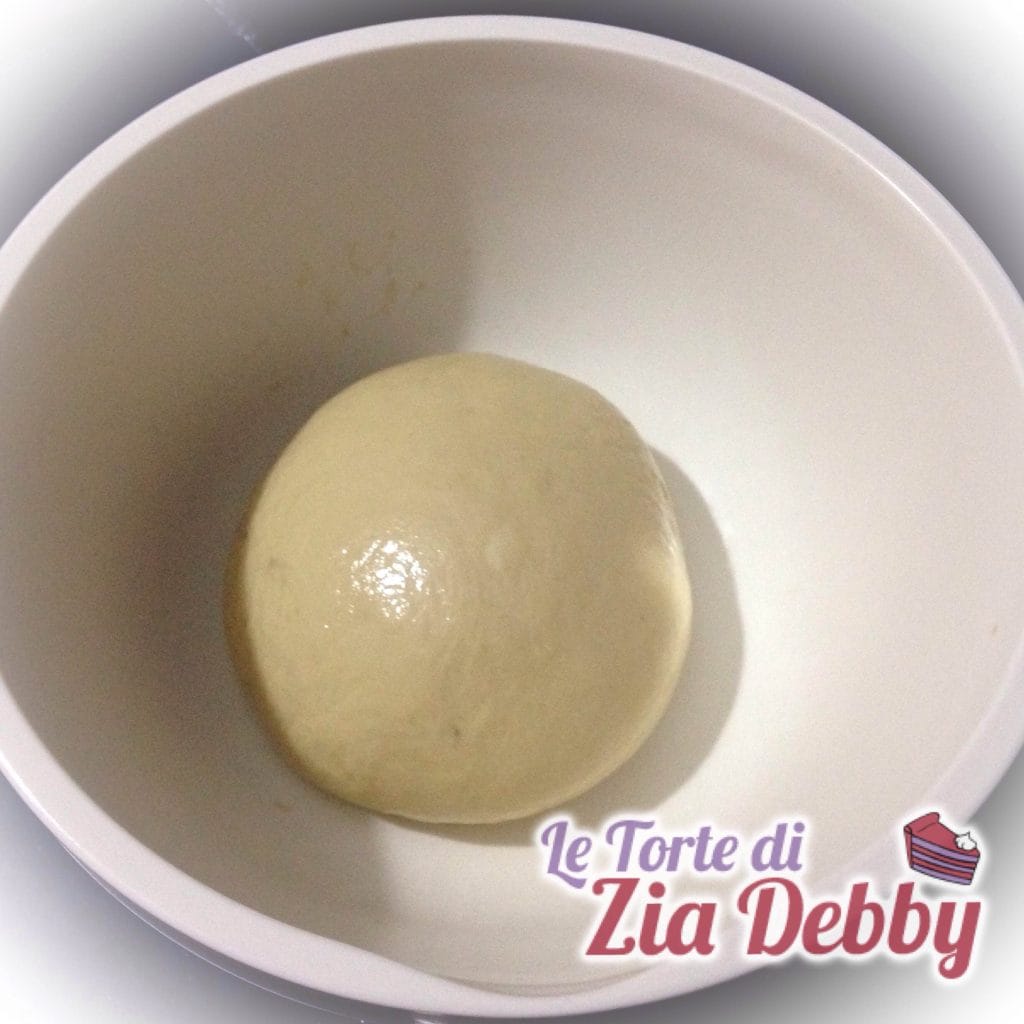
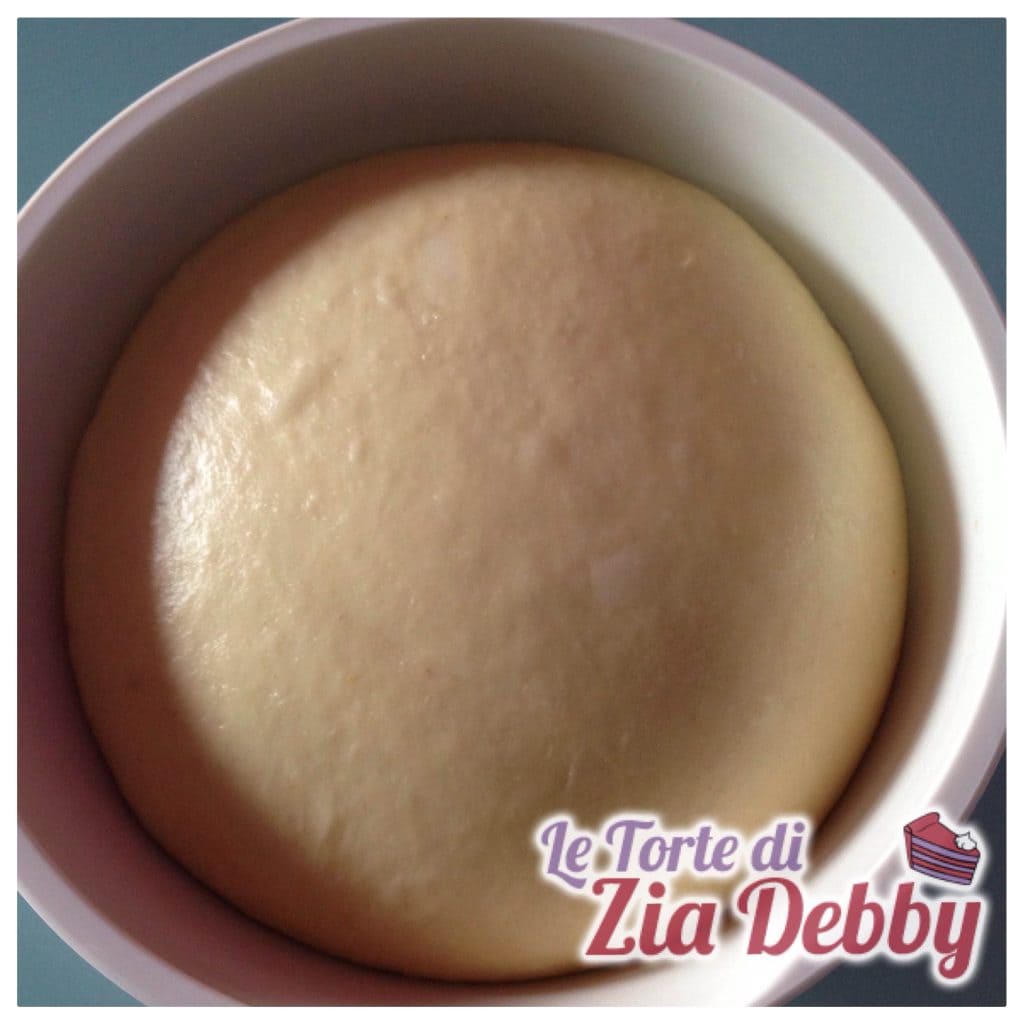
At 8 in the morning it looked like this, but it always depends on the temperature and humidity present in the house. If it hasn’t tripled yet, I repeat, do not proceed to the second dough but patiently wait for the dough to triple in volume.
Start the second dough by putting all the first dough into the stand mixer, add one flour and start rotating, when the dough is homogeneous proceed with the other one then gradually add all the ingredients except the butter which will be used for laminating. Always remember the rule of adding one ingredient at a time and never before the dough has returned to compact and homogeneous, you must not break the blending!
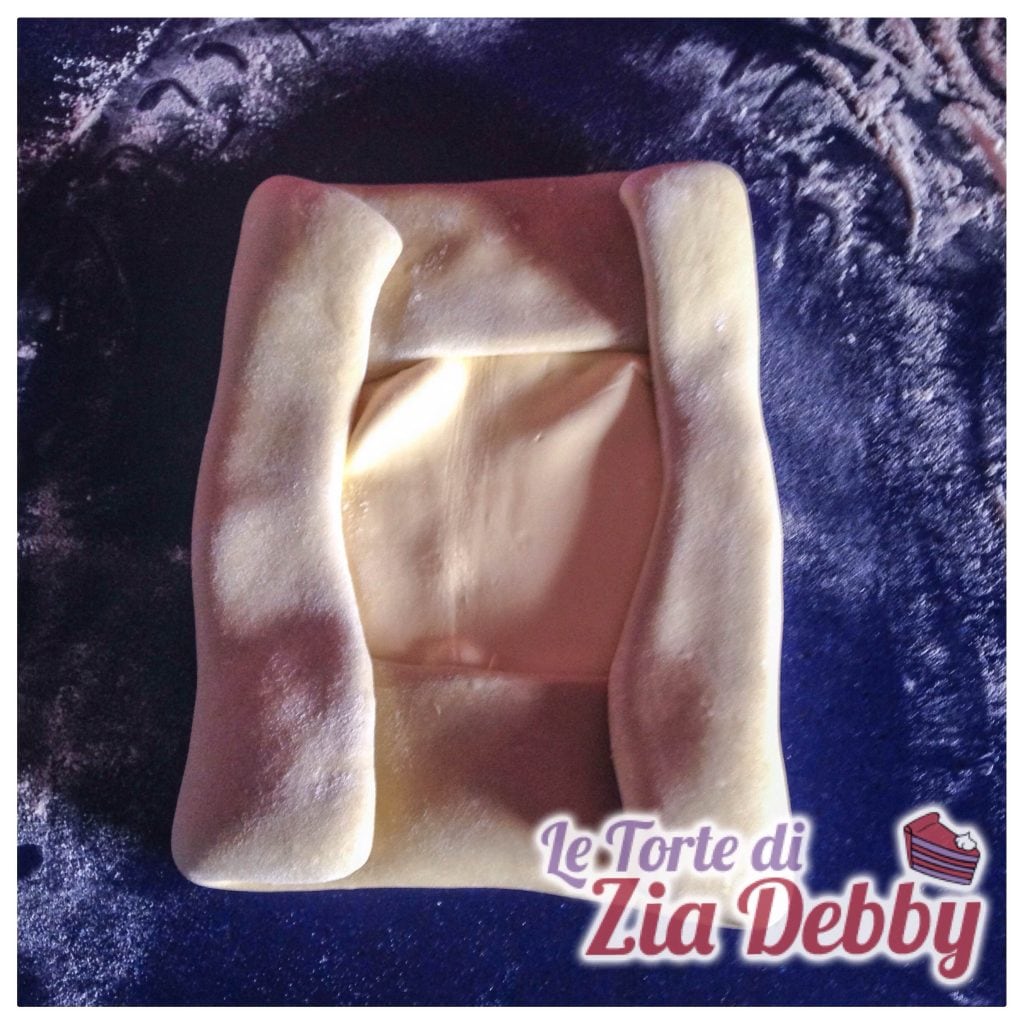
Wait until the dough is properly mixed, then transfer it to a well-floured work surface and create a rectangle. In the center of this rectangle, place the butter which you have previously taken out from the fridge, placed between two sheets of plastic wrap, and rolled to a thickness of about 1/8 inch.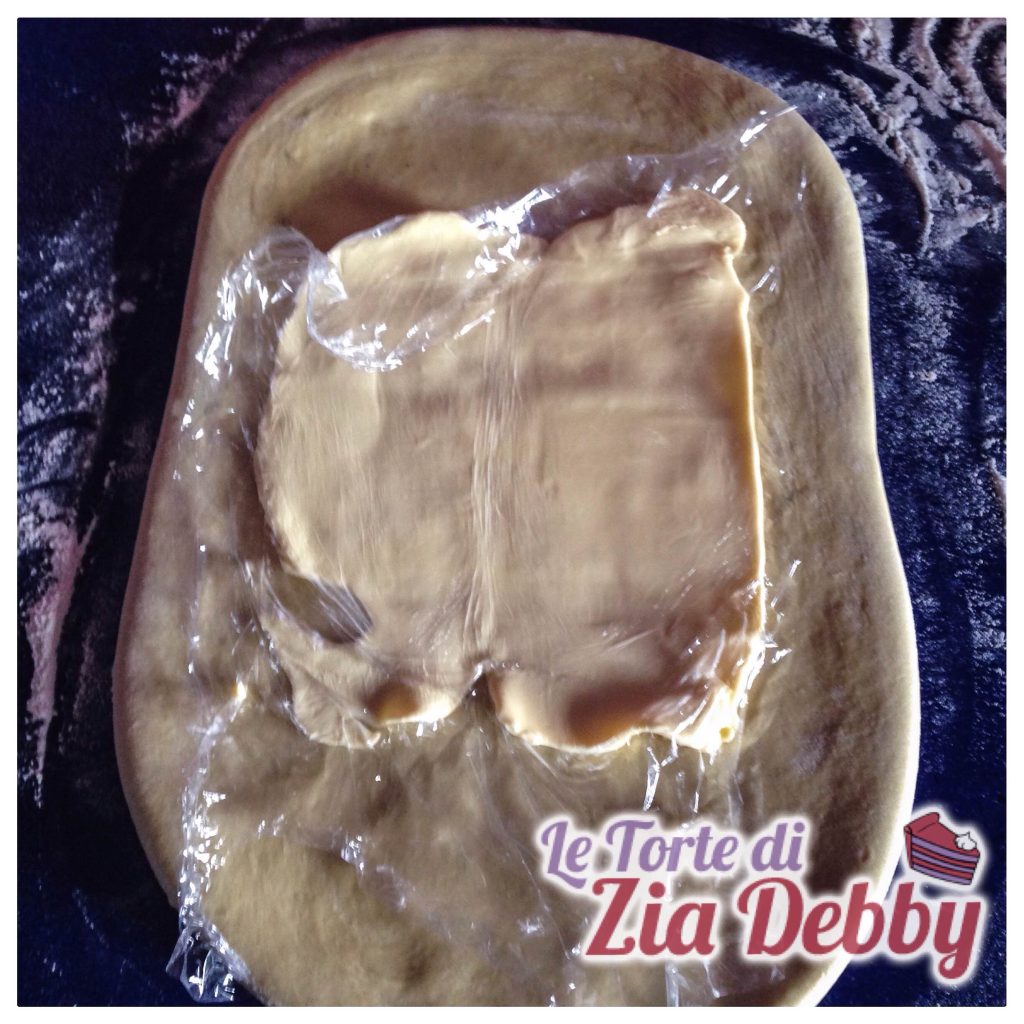
Remove the plastic wrap and fold the edges of the dough to form a frame around the butter to prevent it from leaking out everywhere as you laminate!
Fold in half and place on a cutting board or similar, cover with plastic wrap and refrigerate for about half an hour.
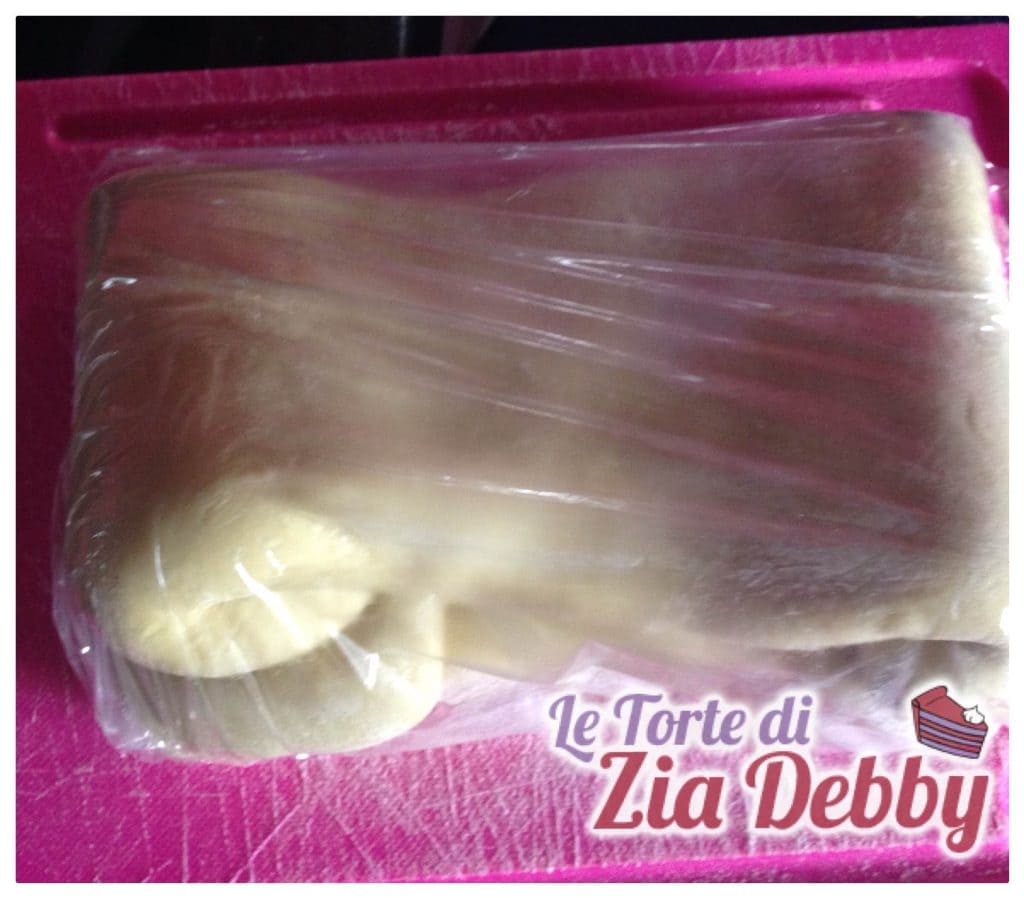
After the resting period, take the dough with the open side on your right and roll it out again into a rectangle, fold the dough into three and place it back in the fridge for another 15/20 minutes.
Take the dough with the open side on your right and roll it out again into a rectangle, fold the dough into three and place it back in the fridge for another 15/20 minutes.
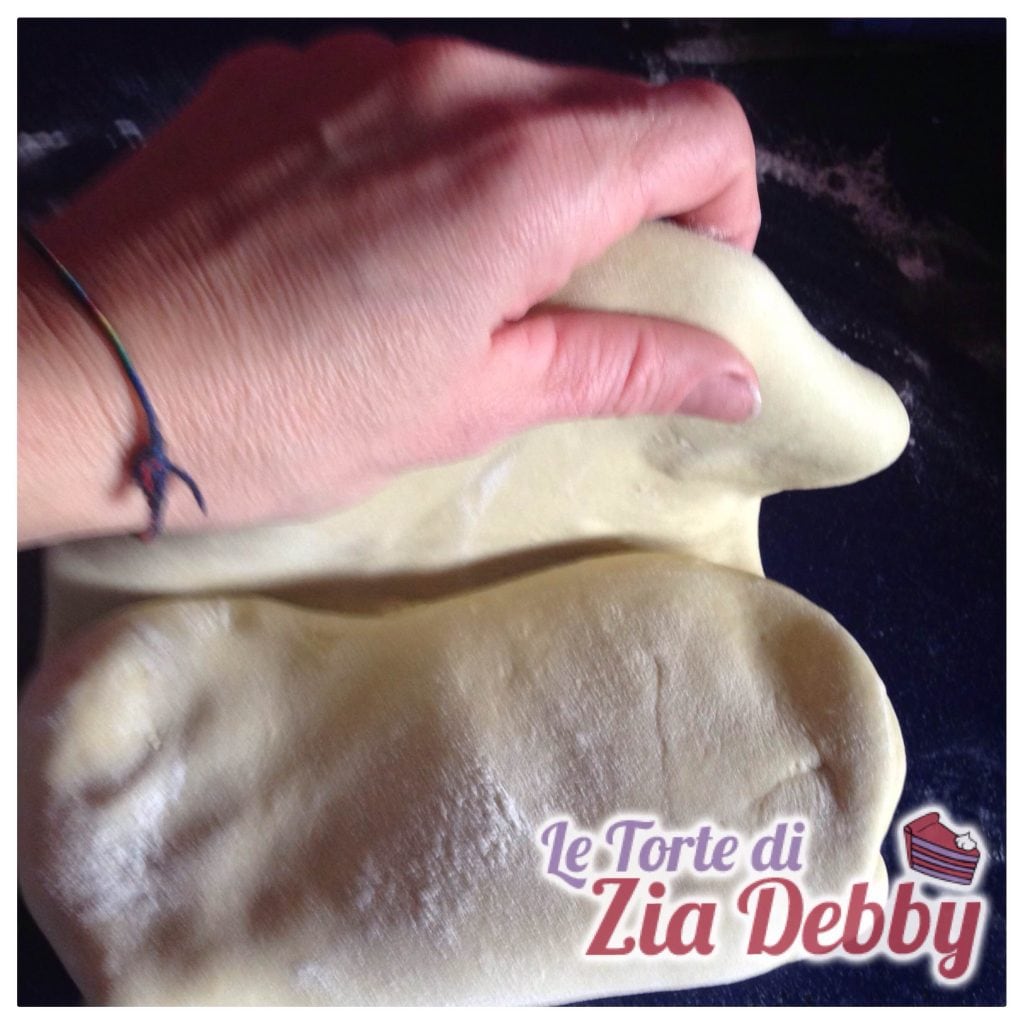
Take the dough again and from the rectangle you have, by pushing the edges downward, rotate it between your hands to form a ball to place in the mold.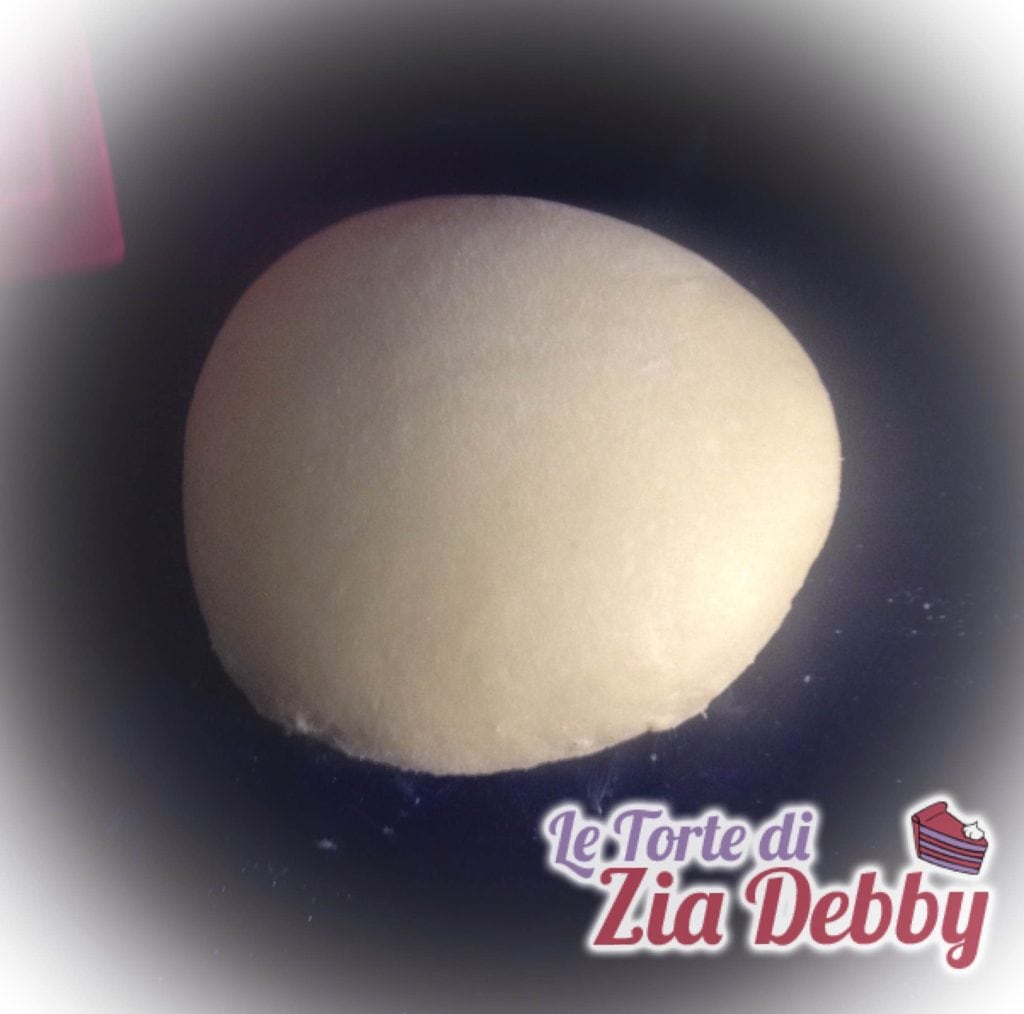
Butter the pandoro mold very well in every corner and place the obtained ball at the bottom of the mold without compressing too much.
Place in the turned-off oven to rise, to facilitate this operation I recommend placing a pot with boiling water in the oven. This will bring the environment to the right temperature and maintain the necessary humidity for the dough. The original recipe called for 8/10 hours of rising but I only needed 4.
It depends on the strength of your sourdough starter, the temperature of your house, and many small variables that characterize natural leavening. You will know that your dough is ready when it reaches the edge of the mold.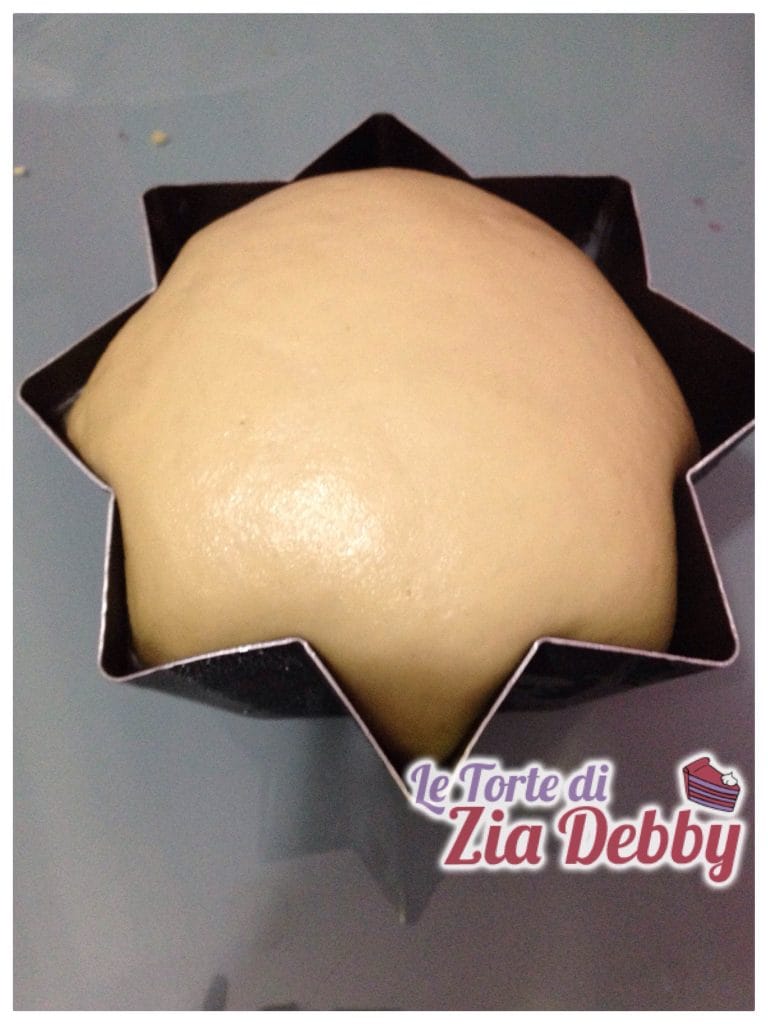
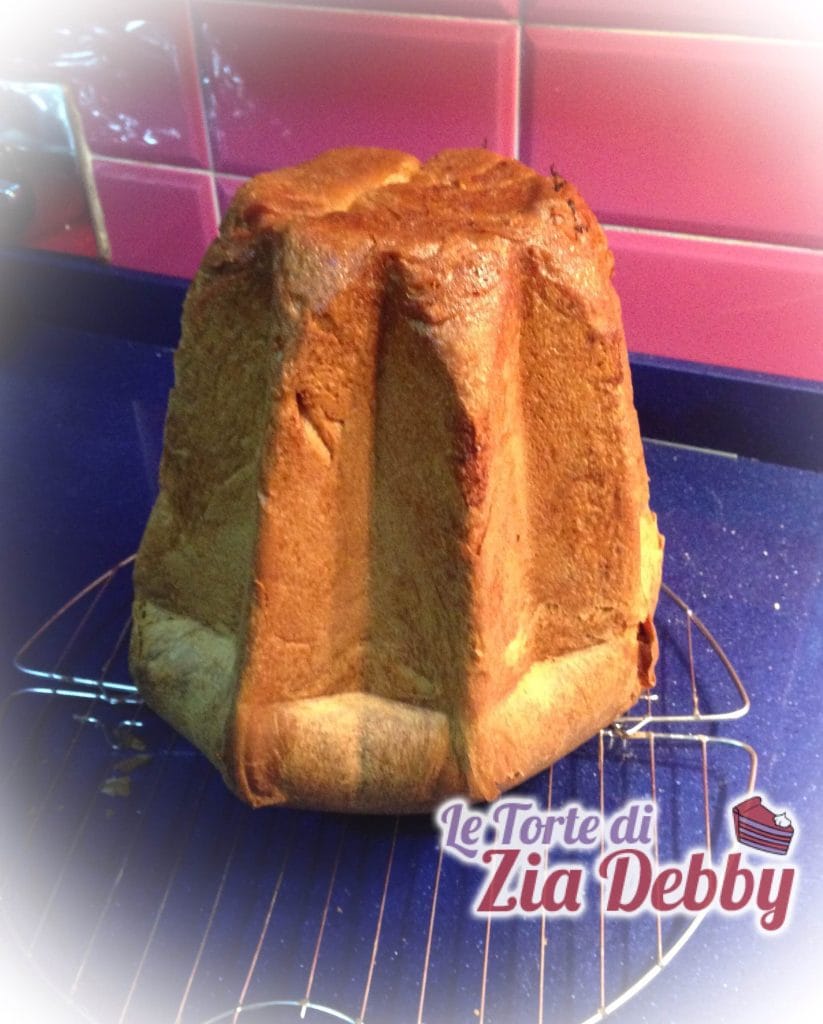
Finally, bake in a preheated oven at 347°F for 10 minutes then lower the oven to 320°F and let cook for another 30/35 minutes. Do the toothpick test and if you notice that the surface is coloring too much, cover it with a sheet of aluminum foil. If your oven has a pastry function that uses only convection, this will solve the problem.
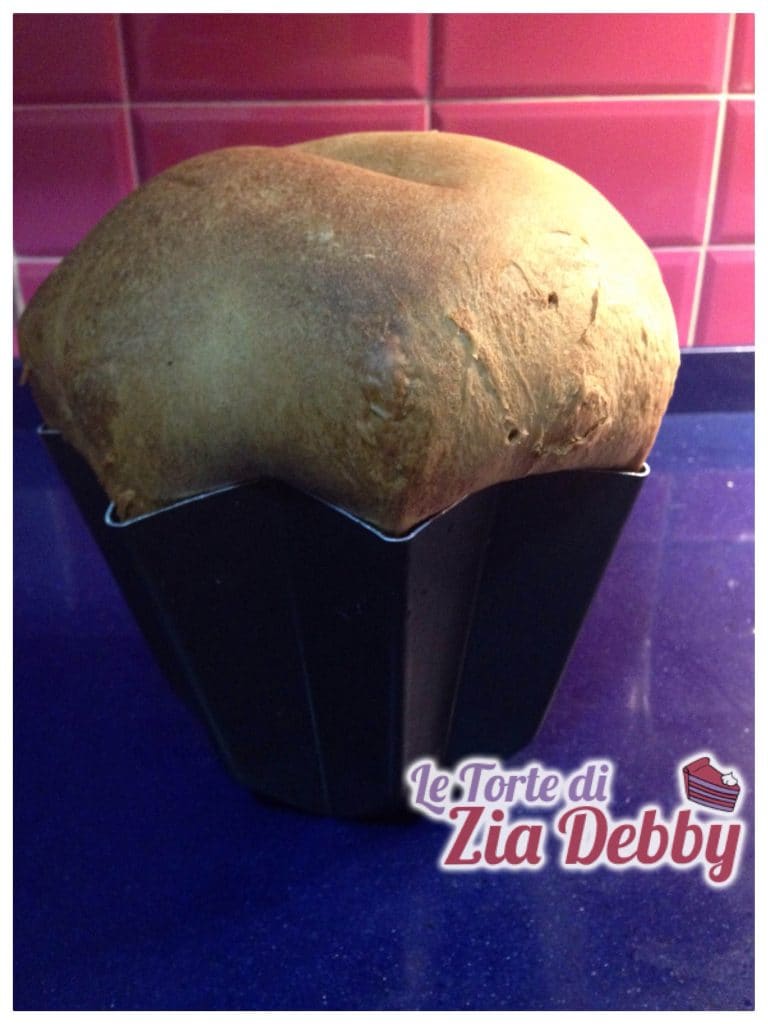
Turn your beautiful pandoro onto a wire rack, remove the mold which will come off easily if you buttered it well, and let it cool.
When it is completely cool, you can place it in a food bag and sprinkle with powdered sugar.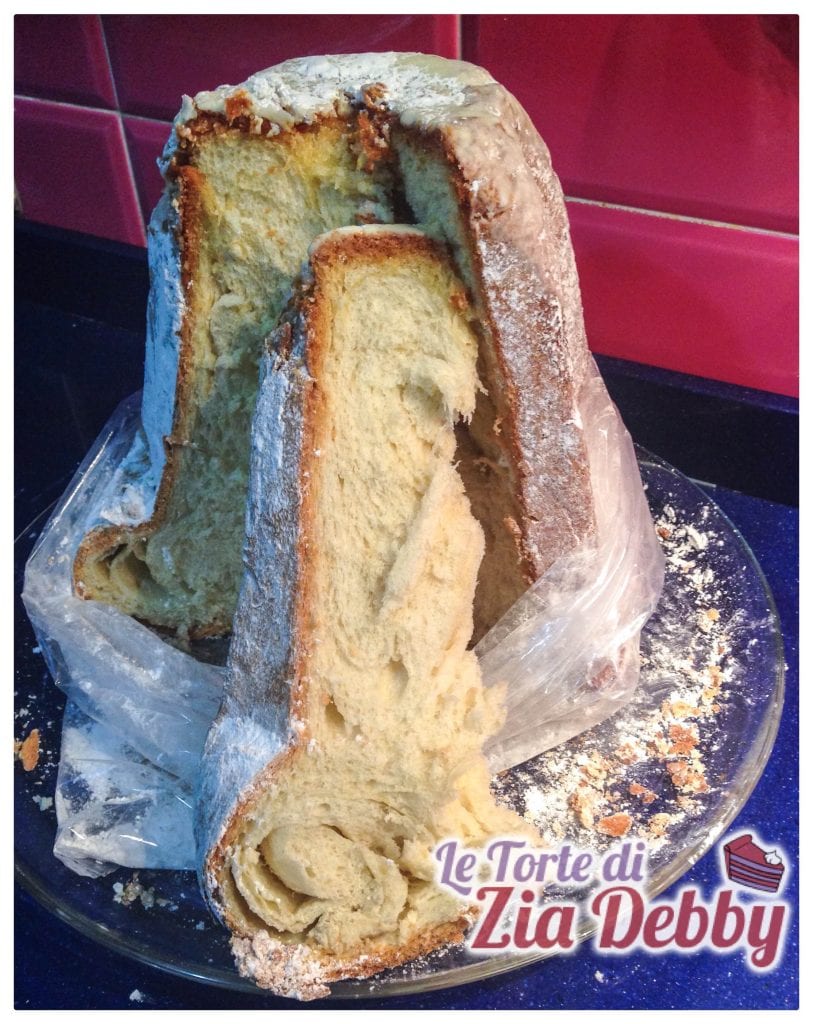
Now you can enjoy it, but I recommend letting it rest for at least 24 hours to enhance the flavor.
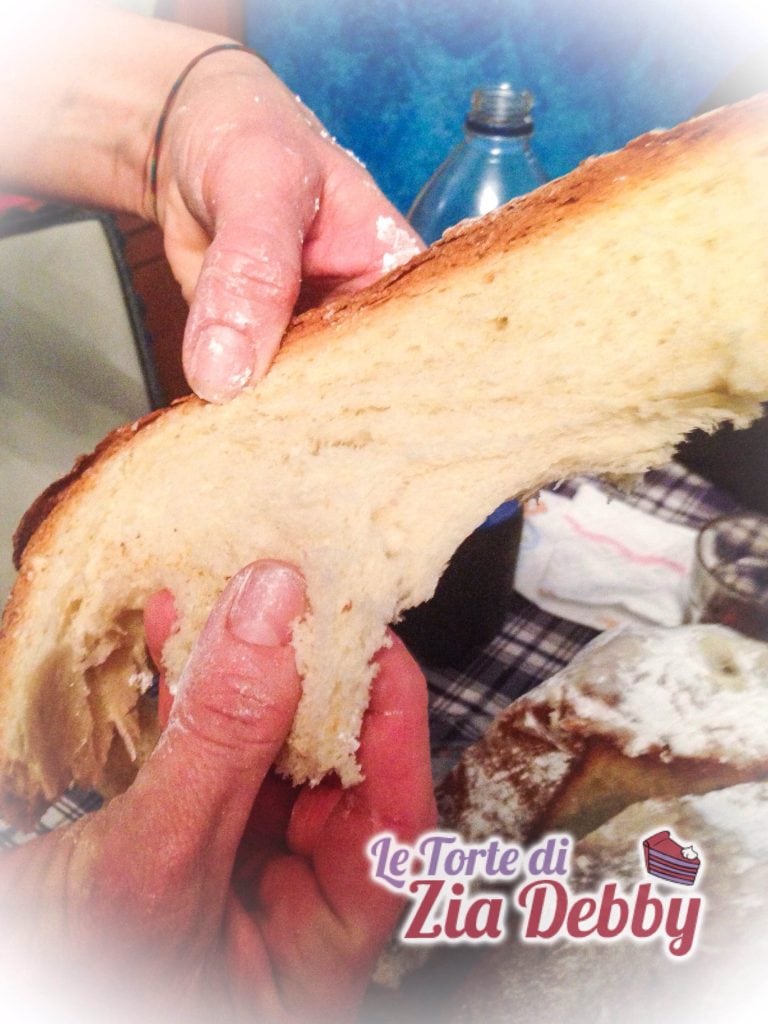
I’ll also leave you a picture of the slice because it really is soft and aerated.
NOTES
The layered pandoro keeps well for many days if sealed in a food bag and stored in a cardboard or tin box with a lid.
I recommend dusting it with powdered sugar only at the moment you decide to consume it.
This recipe contains one or more affiliate links.
If you liked the recipe or if you have questions, do not hesitate to comment here or on social media Facebook, Pinterest, Instagram and Twitter
Frequently Asked Questions
Can it be kneaded by hand?
I advise against trying to knead by hand recipes that require blending, for these you need to use a stand mixer. It doesn’t have to be an overly expensive stand mixer, just powerful and spacious.
Can I knead with only all-purpose flour?
This recipe calls for Manitoba because it still requires strong flour, so I would advise against using low-protein flours. It does not have to be specifically Manitoba but must still be a strong flour.