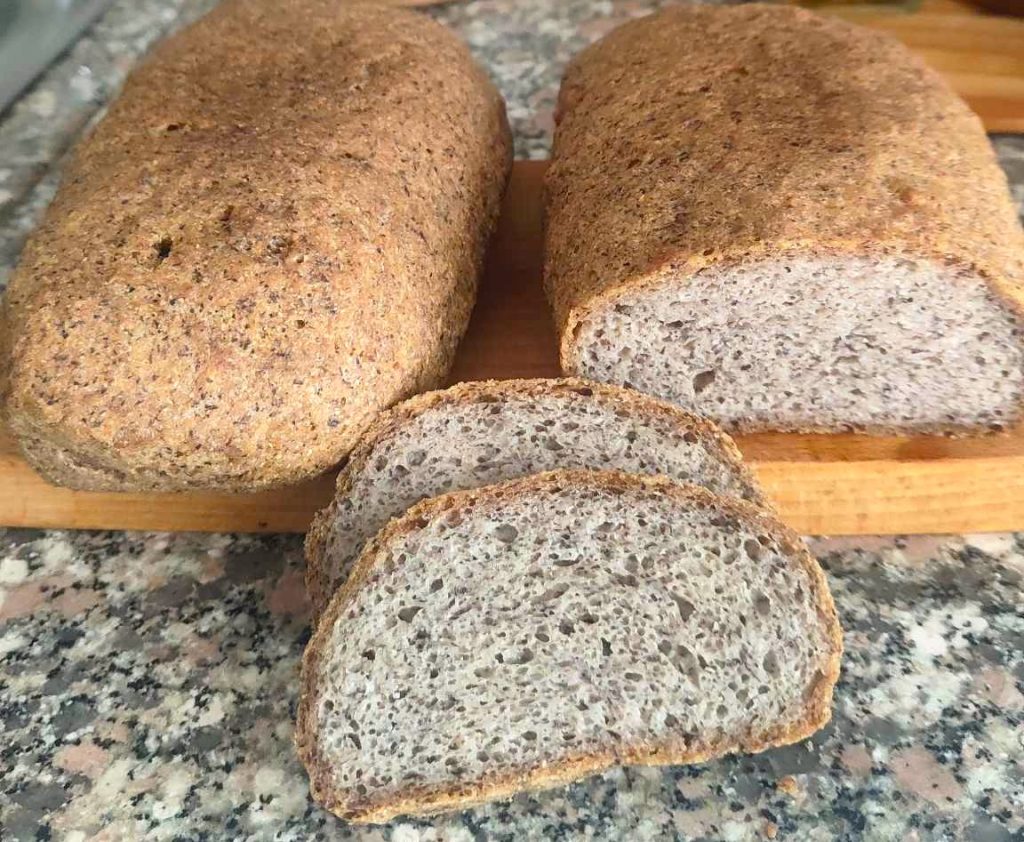
The smell of freshly baked bread always has something magical, especially when it is homemade with simple and natural ingredients. This buckwheat bread is a delicious gluten-free alternative, perfect for those seeking a rustic taste and a soft yet compact texture.
The real surprise? A secret ingredient that makes the difference: psyllium husk powder. A valuable ally in gluten-free baking, psyllium helps provide structure and cohesion to the dough, significantly improving the texture of gluten-free bread.
Cooking in the air fryer makes it even more practical and quick, but it can also be baked in a traditional ventilated oven. Gluten-free buckwheat bread is perfect to enjoy for breakfast, with a spread of jam, or to accompany your favorite dishes.
- Difficulty: Very easy
- Cost: Cheap
- Rest time: 3 Hours
- Preparation time: 15 Minutes
- Portions: 2Loaves
- Cooking methods: Air Frying
- Cuisine: Italian
Ingredients
- 2 cups buckwheat flour
- 2 cups rice flour (or a ready-made gluten-free flour mix)
- 2 1/3 cups water (warm)
- 2 tsp active dry yeast
- 3 tbsp psyllium husk powder
- 1 1/2 tsp fine salt
- 1 tsp sugar
- 2 3/4 tbsp extra virgin olive oil
Steps
In a large bowl, place the warm water with the yeast and sugar. Allow the yeast to rehydrate and at the same time dissolve the sugar for 5 minutes.
Then add the flours, both buckwheat and rice, or the ready-made gluten-free flour mix, also add the psyllium husk powder, salt, and mix the mixture well with a fork inside the bowl. Initially it will be soft, I recommend not using your hands.
Mix for a few minutes to combine all the ingredients well together.

After mixing the ingredients well, stop for 10 minutes and let the dough rest in the bowl covered with a cloth napkin.
This short rest will serve to firm up the mass, initiating a simulation of the gluten mesh, thanks to the secret ingredient, namely the psyllium husk powder.
After the resting time, add the olive oil and gently incorporate it into the dough with your hands.
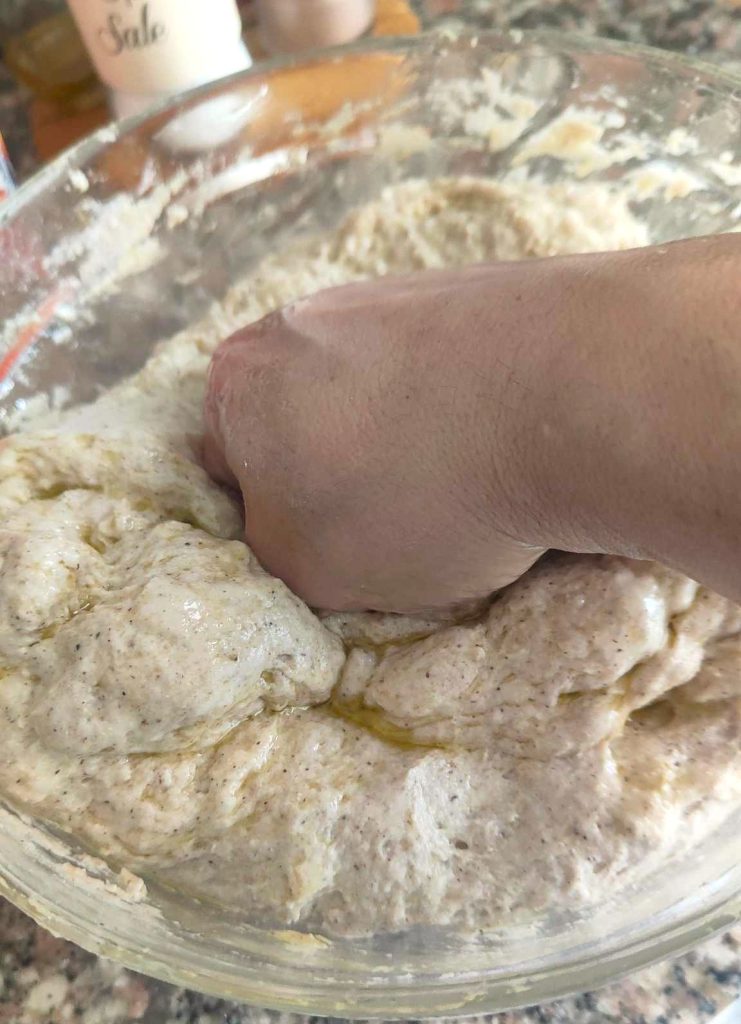
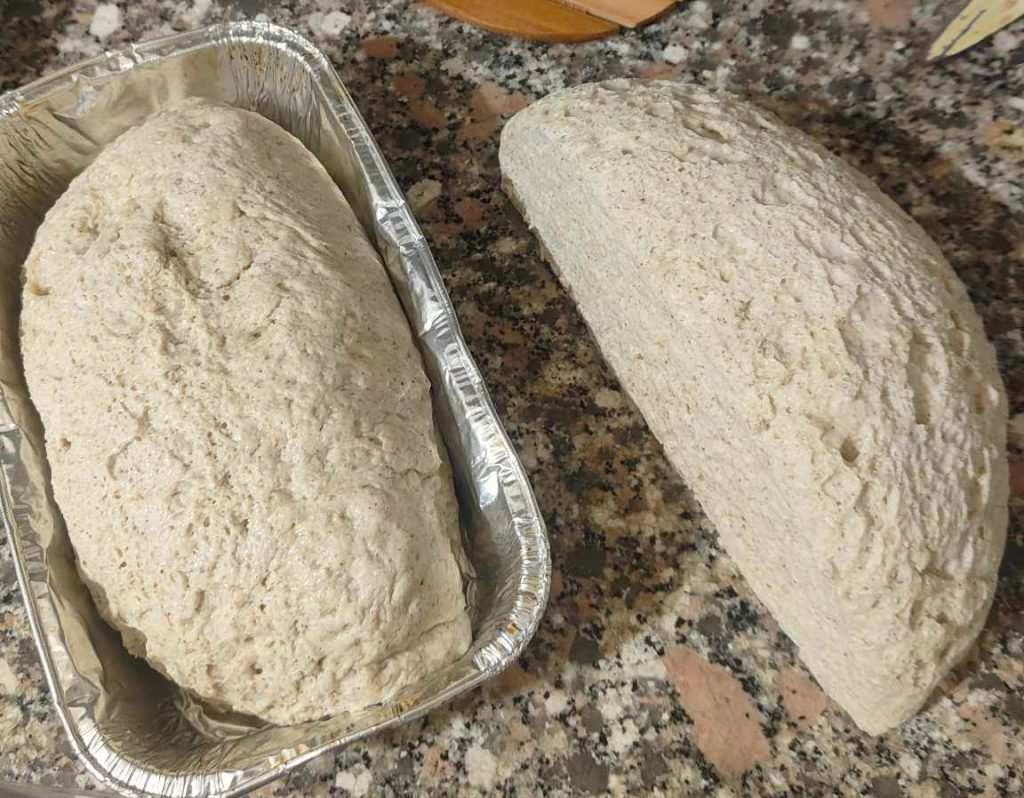
After incorporating the oil, shape a ball in the bowl, cover and let it rise for 3 hours.
After the rising time, turn the dough directly onto the work surface, simply divide it in half with a knife and place the two masses in an oiled rectangular aluminum mold, of the shape that fits in your air fryer. I use those that are 8 inches x 5 inches.
With these doses, you can produce 2 loaves of bread of about 1 lb each.
Finally, before baking, brush the surface of the loaf with olive oil.
Preheat the air fryer to 392°F for 5 minutes.
Place the bread in and bake at 392°F for 30 minutes. Then flip the bread and continue baking for another 10 minutes at 392°F.In total, it will take 40 minutes to bake a delicious bread, crunchy on the outside and soft on the inside, but above all very tasty.
If you want, you can also freeze it, whole or sliced for easy use.

