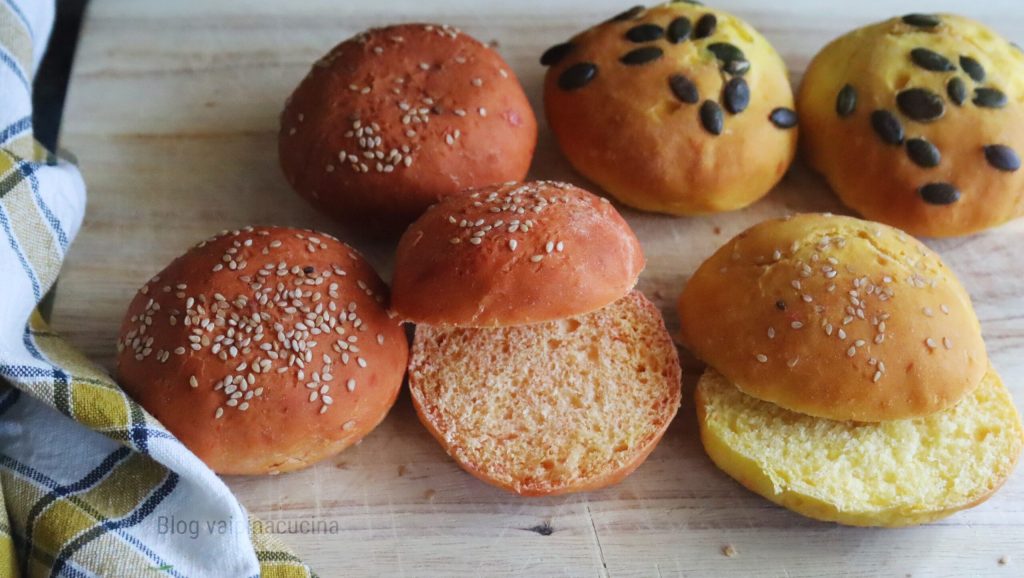
Colored milk buns, the first time I saw them was in Milan at the Giallo Zafferano headquarters during a meeting with fellow food bloggers and among the other courses offered at lunch there were these fantastic red and yellow colored milk buns. Surely my photos do not do justice to the colors of the buns, but I assure you they are very beautiful as well as delicious. I made them on a dark, rainy afternoon, have you ever seen the blackness of rain-laden clouds ready to burst at any moment? At that moment, it really helps to keep your hands busy and make something, like bread, fragrant and steaming, good even on its own without any accompaniment.

- Difficulty: Easy
- Cost: Economical
- Rest time: 2 Hours 30 Minutes
- Preparation time: 20 Minutes
- Portions: 10
- Cooking methods: Oven
- Cuisine: Italian
- Seasonality: All Seasons
- Energy 357.94 (Kcal)
- Carbohydrates 52.54 (g) of which sugars 4.01 (g)
- Proteins 13.38 (g)
- Fat 10.68 (g) of which saturated 2.02 (g)of which unsaturated 1.36 (g)
- Fibers 3.10 (g)
- Sodium 19.28 (mg)
Indicative values for a portion of 150 g processed in an automated way starting from the nutritional information available on the CREA* and FoodData Central** databases. It is not food and / or nutritional advice.
* CREATES Food and Nutrition Research Center: https://www.crea.gov.it/alimenti-e-nutrizione https://www.alimentinutrizione.it ** U.S. Department of Agriculture, Agricultural Research Service. FoodData Central, 2019. https://fdc.nal.usda.gov
Ingredients
- 25 oz Manitoba flour
- 1 cup pumpkin
- 2/3 cup milk
- 2 eggs
- 1 teaspoon sugar
- 0.88 oz fresh brewer's yeast
- 5.5 tbsp extra virgin olive oil
- 1 cup boiled beetroot
- 1 tablespoon pumpkin seeds
- 1 teaspoon sesame seeds
Tools
- Stand Mixer
- Board
- Food Brush
Steps
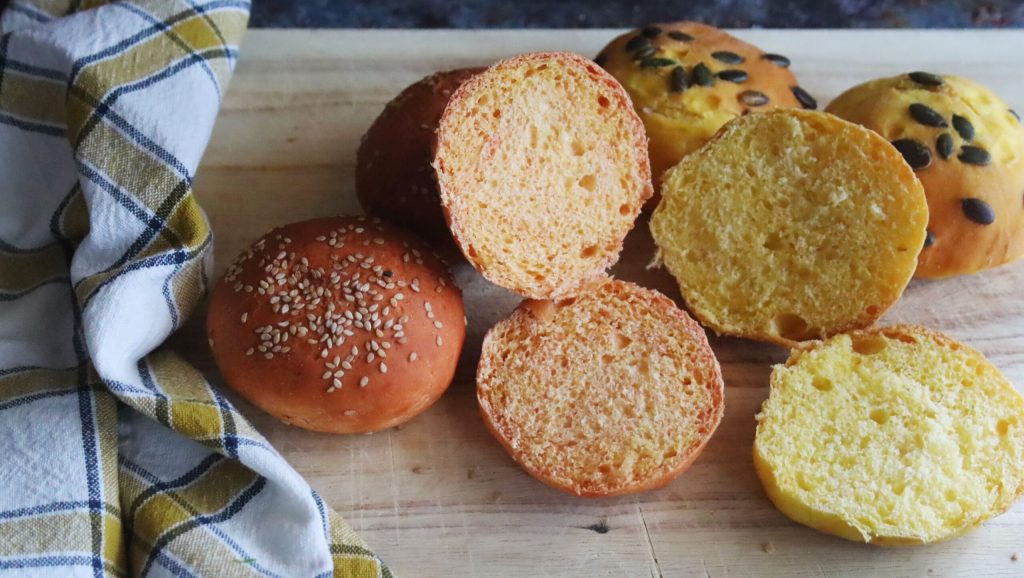
Today you can find pre-cooked and vacuum-packed beets on the market, and today I used those, I find them convenient and good. I removed the packaging, drained them, and then peeled them, blending them very finely until they became creamy. As for the pumpkin, I cooked it in the microwave for 10 minutes at maximum power on a dish covered with plastic wrap. Blend the pumpkin in the same way as the beetroot.
In a bowl, place the yeast with the sugar and lukewarm milk, let them rest for 10 minutes. Add the eggs with the oil and half of the flour with the salt. Mix all the ingredients and then divide the dough into two equal parts. Add the beetroot puree to one dough and the pumpkin puree to the other, divide the remaining flour between both mixtures until they become smooth and homogeneous. Cover the two containers with plastic wrap and let them rise for 2 hours, the time it takes to double.
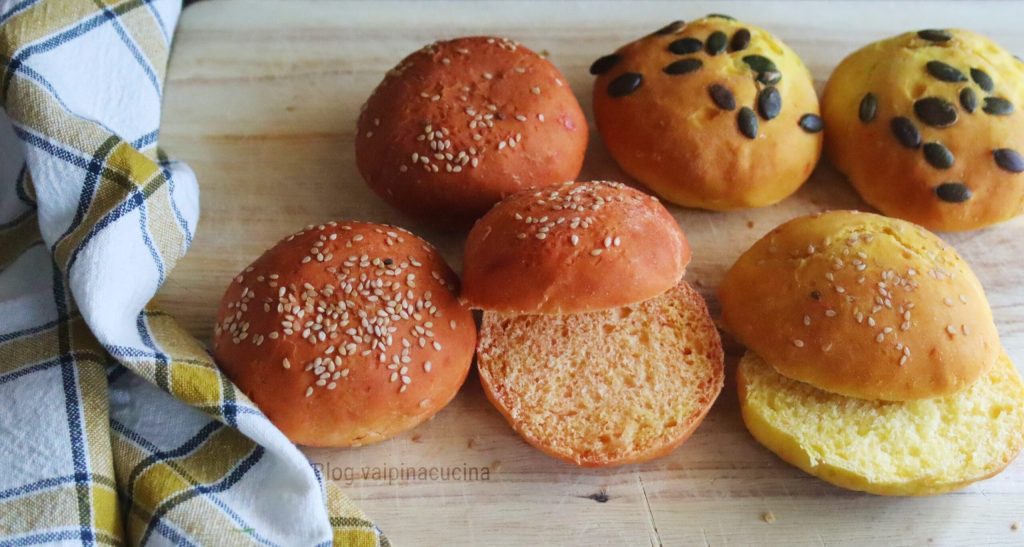
After the resting time, prepare the buns of about 1.4 oz each, add the pumpkin seeds on top of the pumpkin buns and place the sesame seeds on the beetroot buns, place them on the tray and cover them again for 30 minutes to let them rest.
Bake the buns in a preheated oven at 356°F for 30 minutes. As soon as they come out of the oven, brush the colored milk buns with cold water.
FAQ (Frequently Asked Questions)
Can I use other seeds to decorate the colored milk buns?
Of course, you can use any seeds you prefer, or you can also choose not to add them at all.