I don’t know about you, but I’m starting to feel nauseous from chocolate 🙂 Easter is over, but there’s plenty of chocolate in stores and especially in homes! It’s customary to give eggs to children; I have two, and this year, between eggs, chocolates, bunnies, and other chocolate goodies, I’ve stocked up! So I indulged in baking! Muffins, cookies, cakes, and finally this delicious tart. I called it Easter Tart because in the preparation, I used only chocolate from the eggs. It’s a revisited and original version of the Grandfather’s Cake (less known than the Grandmother’s Cake, but just as good!): a chocolate shortcrust pastry with a particular ingredient that creates the “smudged” effect with a chocolate custard inside and topped with crumbled cookies and powdered sugar.
- Difficulty: Medium
- Cuisine: Italian
- Seasonality: Easter
Ingredients
- 1 Eggs
- 2 tablespoons Sugar
- 2 tablespoons Flour
- 2 cups ml Milk
- 2 tablespoons Potato starch
- 4.5 oz g Chocolate (about half an egg)
- 2 Eggs
- 4 cups g Flour
- 5.5 oz g Sugar
- 7 oz g Butter
- 4.5 oz g Chocolate (about half an egg)
- 1 tablespoon Activated charcoal (optional)
- Powdered sugar
- 2 Cookies
Preparation
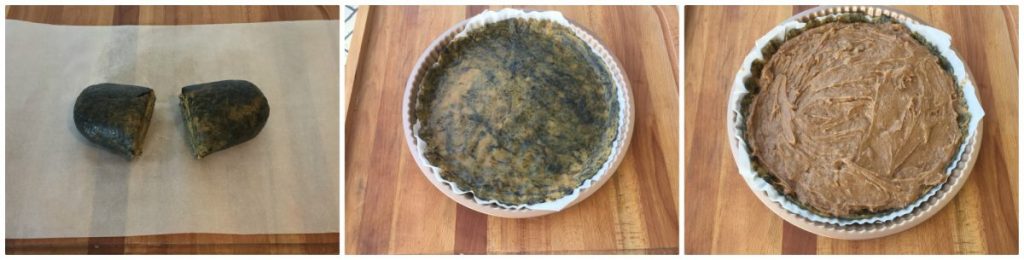
Start the preparation of the Easter Tart beginning with the shortcrust pastry. I was inspired by the cocoa shortcrust. Put the flour and the chopped butter in a food processor. Pulse with the blades until you get a sandy mixture.
Pour the contents onto a work surface and form a well in the center where you place the eggs and sugar. Start mixing with a fork and then knead with your hands until you get a smooth and homogeneous dough.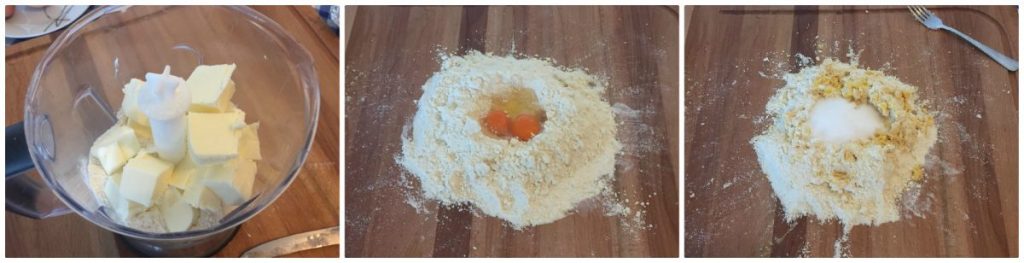
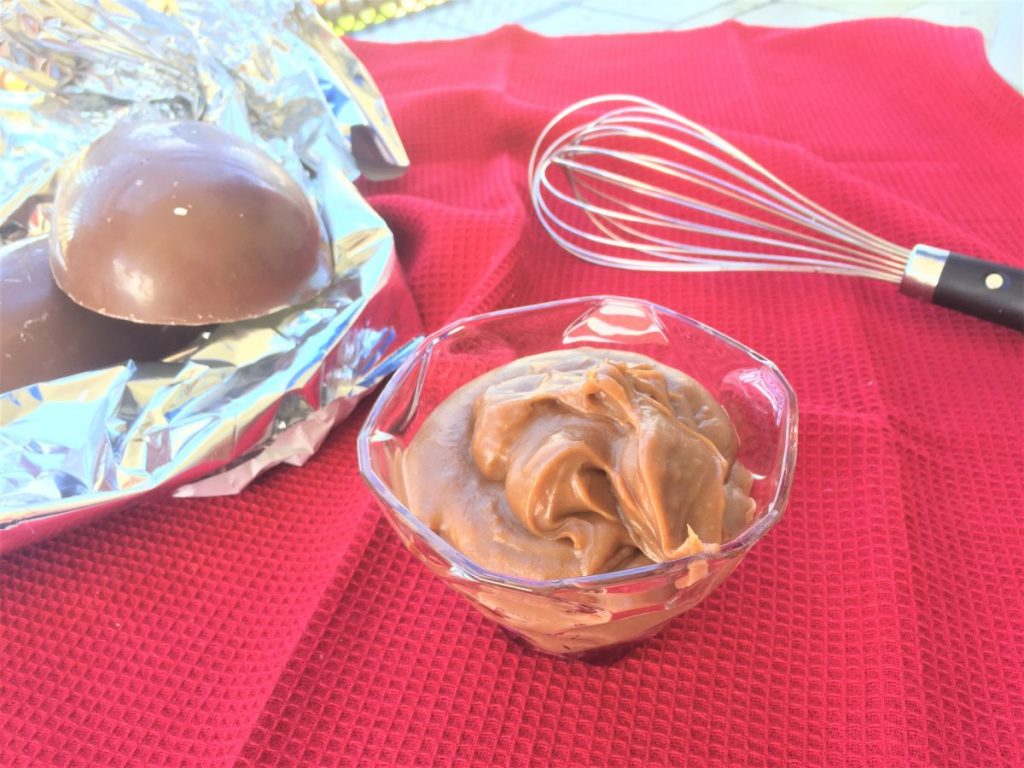
Melt some chocolate in a bain-marie and then pour it over the pastry. You need to be patient because at first it will seem sticky and difficult to handle, but gradually the chocolate will be absorbed and you’ll be able to form the dough.
To make this tart more unique, I added a couple of tablespoons of activated charcoal. It’s odorless and tasteless, simply a food coloring in powder form. To avoid ending up with a dough like before, I spread it around without making it uniform, creating the “smudged” effect on the Easter tart. This step is optional, and you can skip it if you want.
Finally, wrap the dough in plastic wrap and let it rest in the refrigerator for about 1.5 hours.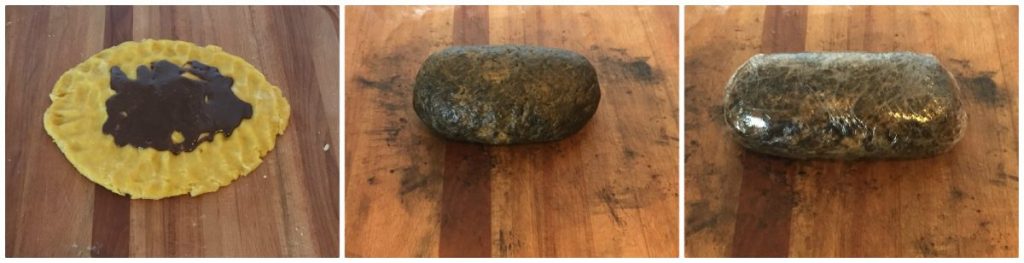
Now you can focus on the custard with Easter eggs. Melt the chocolate in a bain-marie, in the meantime, beat the egg with the sugar and add the flours. Once all the ingredients are combined, you can add the chocolate and then the milk. The link contains the complete procedure with photos of the various steps.
After the resting time, take the pastry out of the fridge and divide it into two parts. Roll out the first dough and cover the surface with the custard prepared with the eggs.
Spread the remaining chopped chocolate and cover with the second disc of pastry. Trim the excess and seal the edges. Prick the surface with a fork and then sprinkle 2 cookies (I used cream shortbread) crumbled.
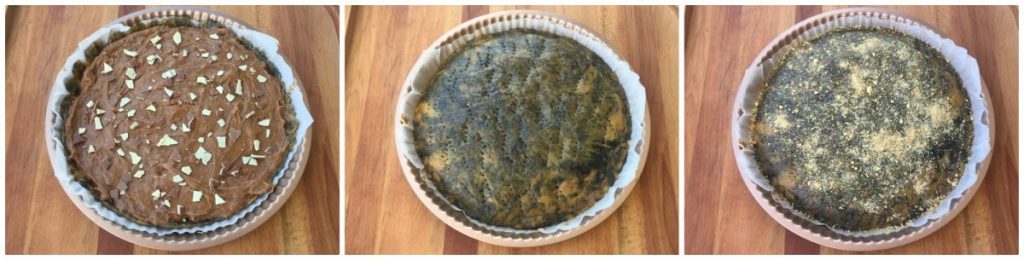
The Easter tart is ready to be baked! Bake in a preheated static oven at 320°F for about 50 minutes on the lowest rack, then another 5-10 minutes at 350°F.
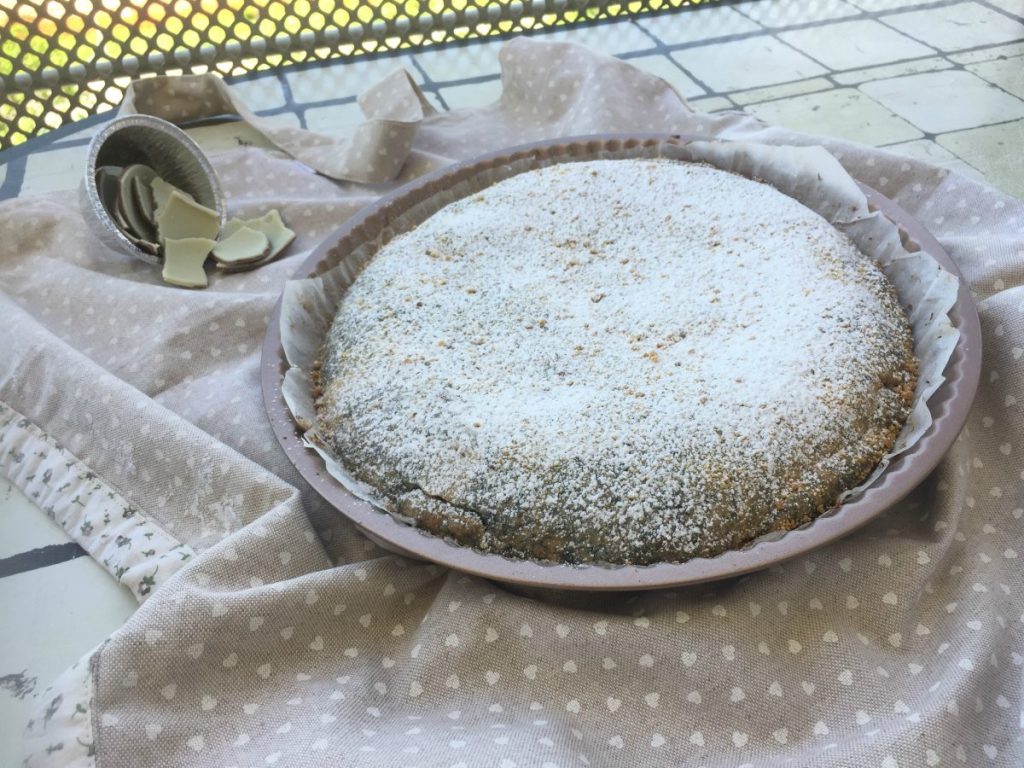
Here is the Easter tart, prepared with chocolate eggs!
Once ready, I recommend letting it cool; you’ll see how delicious it is!
If you enjoyed this recipe and want to stay updated, follow me on my Facebook page by clicking acasadigery and leave your like!
See you soon…Gery
Go back to the home to read all the other recipes.
You can also find me on instagram, twitter, and pinterest
You might be interested in:
Chocolate salami
Dark chocolate heart with chili
Cheesecake CIOBAR and pear jelly