The heat has been knocking at our doors for a few days now, I didn’t think the summer season would start so soon! However, apart from drinking a lot and avoiding going out at prohibitive hours, we try to counter it with fresh and light dishes and indulge in some treats by preparing homemade ice creams, obviously more healthy and nutritious than industrial ones! As you know, I am always on the lookout for ideas that suit my dietary needs because I have learned to appreciate good food, made of simple and genuine things, so when I saw these blueberry and cashew magnums on the web, I immediately rushed into the kitchen to replicate them having all the ingredients already available! Compared to the original proposal, I replaced the yogurt with ricotta, which in my opinion gives more body and taste at the time of the final tasting, while for the coating, instead of the white chocolate that I find too cloying on the palate, I opted for excellent dark chocolate! I confess that I recently switched to the joy of appreciating 95%, but for the less daring, you can easily use 70% or 85% which are already excellent choices! I swear, they are among the best I have experimented with so far, and the beauty is that they are made easily and quickly! You just need a powerful blender and some ice cream molds, and you’re done! They will be perfect for your children’s snack but also, in my opinion, as a summer dessert to offer informally to friends. They will be a hit!
If you, like me, love to pamper yourself with healthy and genuine recipes, try these fitness-style alternatives too:
- Difficulty: Very Easy
- Cost: Medium
- Rest time: 8 Hours
- Preparation time: 10 Minutes
- Portions: 10 popsicles
- Cooking methods: No Cooking
- Cuisine: Italian
- Seasonality: Spring, Summer
Ingredients
⚠ THIS RECIPE INCLUDES ONE OR MORE AFFILIATE LINKS. The products I recommend are the same ones I use in my recipes; purchasing them through my blog helps support me and my work, while it won’t cost you anything extra!
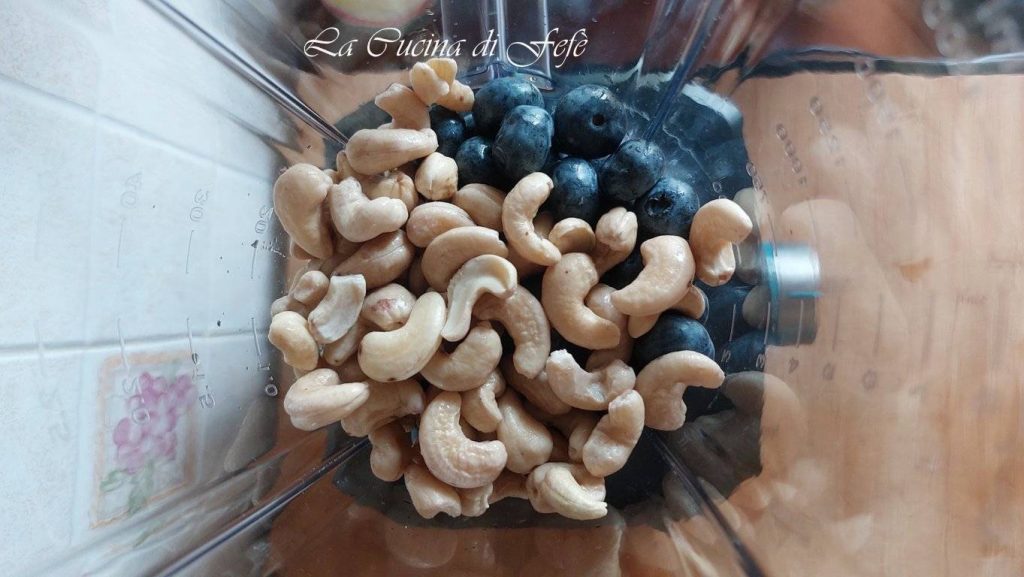
- 7 oz blueberries
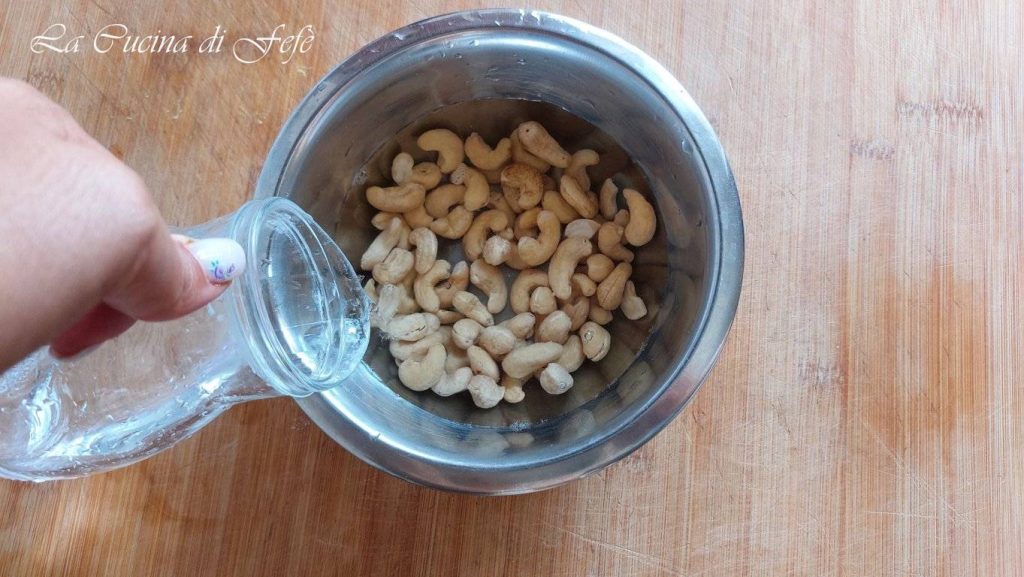
- 4.23 oz cashews
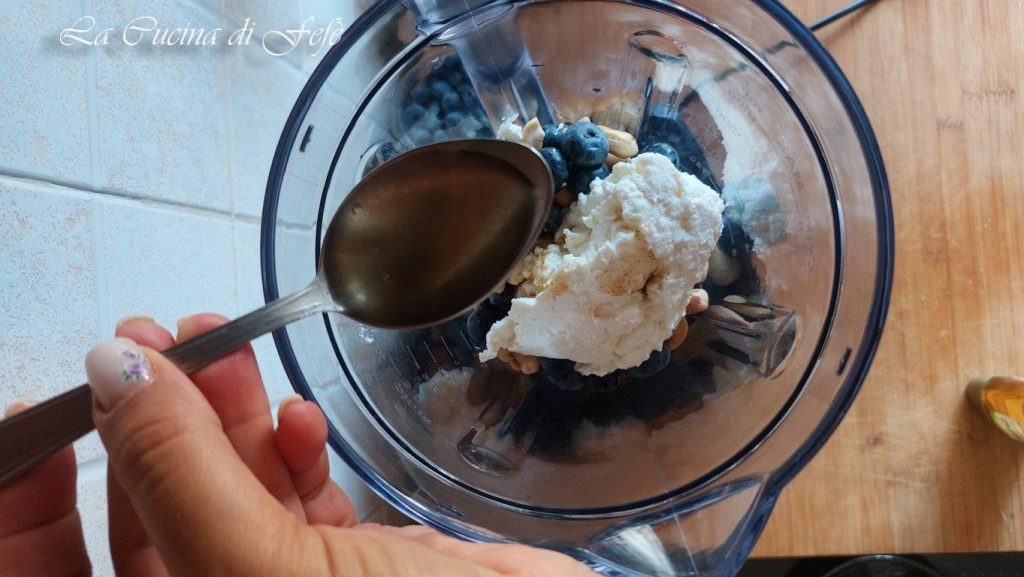
- 6.35 oz ricotta
- 1 tbsp vanilla extract
- 1 tbsp agave syrup (or honey)
- 4.23 oz 85% dark chocolate
- 1 tsp coconut oil
- as needed chocolate sprinkles
Tools
- 1 Bowl
- 1 Blender
- 10 Silicone Ice Pop Molds
- 10 Sticks
- 1 Spoon
- 1 Scraper
- 1 Tray
- 1 Parchment Paper
- 1 Saucepan
- 1 Wooden Spoon
- 1 Glass
Steps
Start by soaking the cashews in a bowl with fresh water at room temperature for 2 hours.
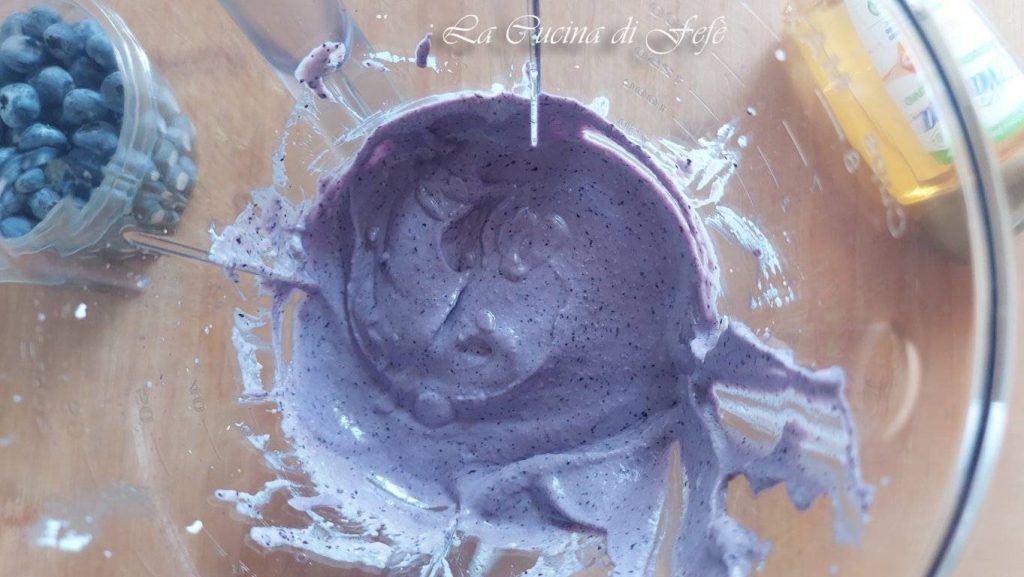
After this time, transfer the well-drained and now soft cashews into the blender along with the blueberries that have been rinsed under running water.
Add the ricotta after removing its whey and the vanilla extract.

Finally sweeten with agave syrup and blend intermittently for a few seconds.
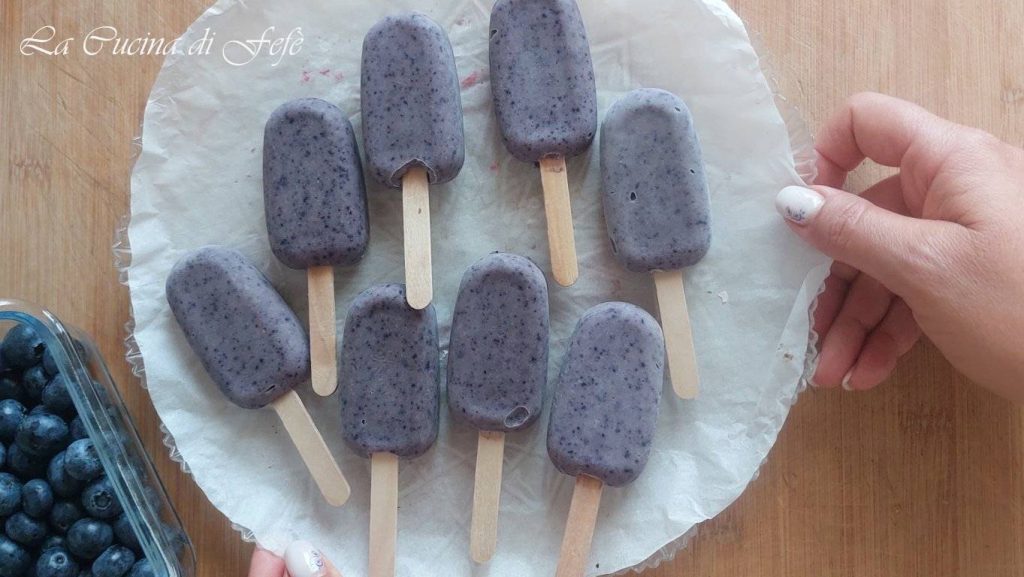
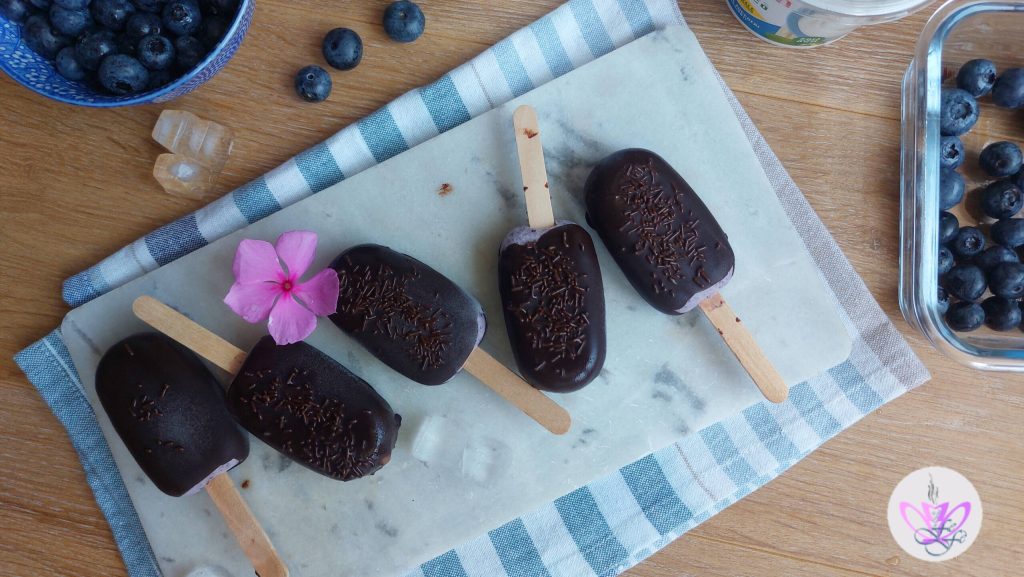
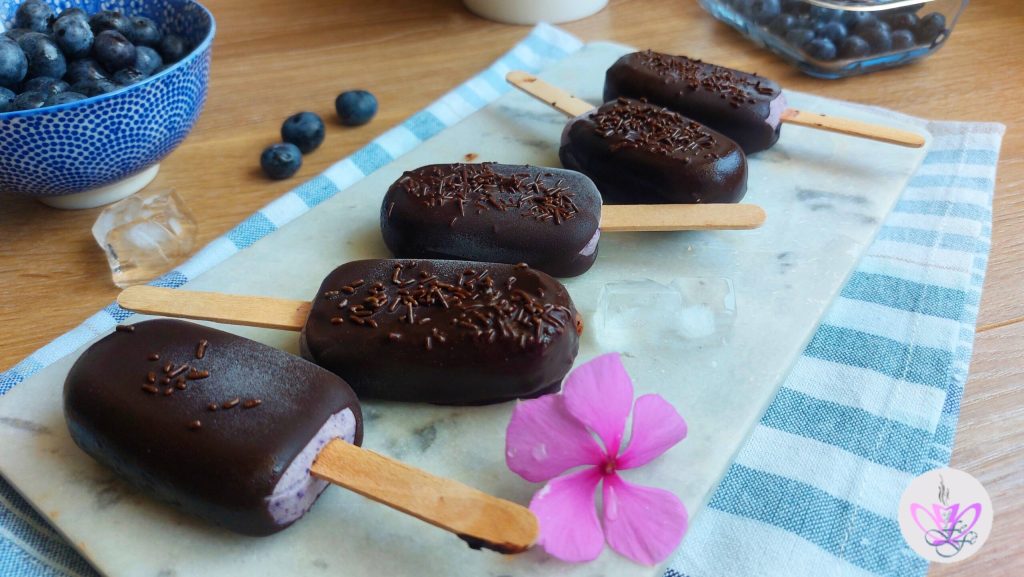
You should end up with a smooth, velvety, and homogeneous mixture of a beautiful purple color that you will love.
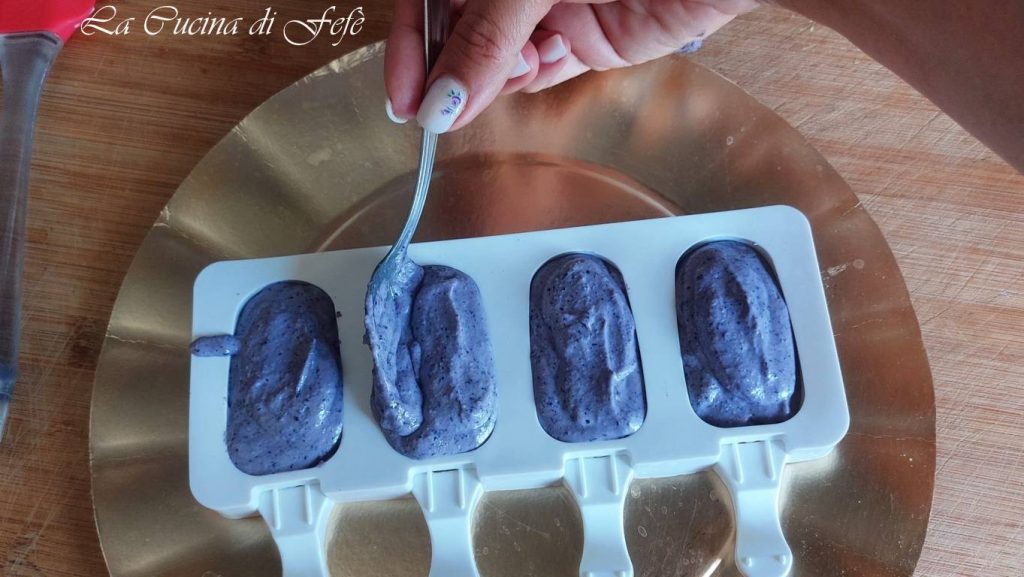
Next, place the silicone molds on a tray, insert the sticks into the appropriate slots, and start distributing the mixture.
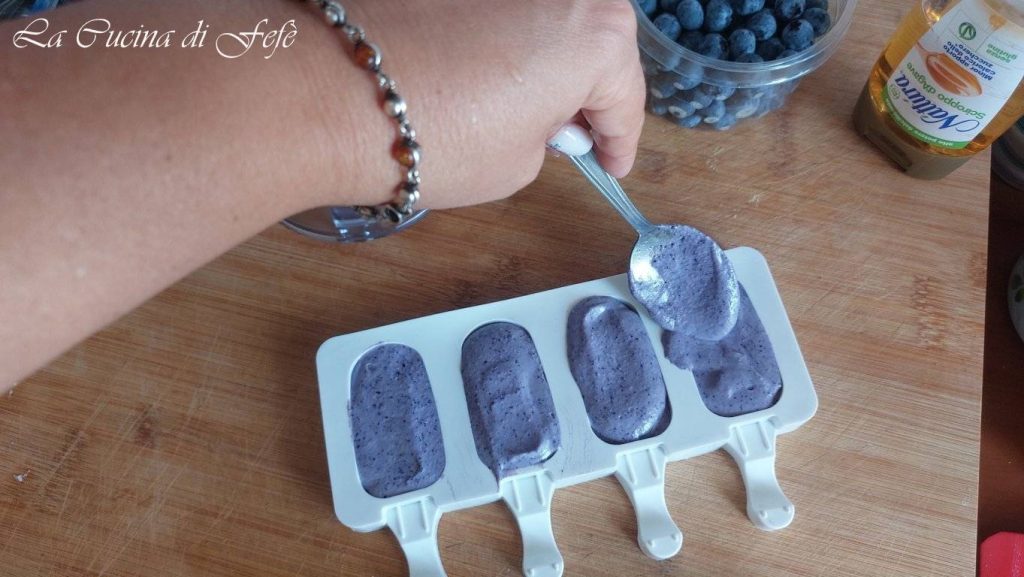
Fill all the molds to the brim, it doesn’t matter if a little spills out, then the excess will be removed.
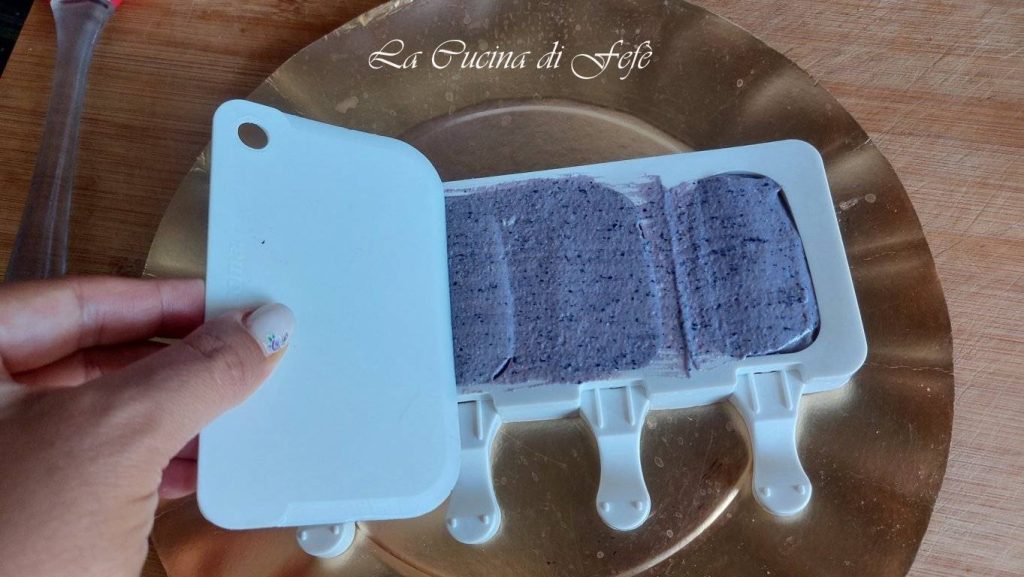
With the help of a slightly wet scraper, not wet, mind you, even out along the whole mold and then do the same vertically. Clean any smudges with a paper towel and put in the freezer for at least 2 hours.
After this time, unmold your popsicles with extreme delicacy.

Transfer them again to a tray with parchment paper and keep them in the freezer for all the time before proceeding to the coating phase.
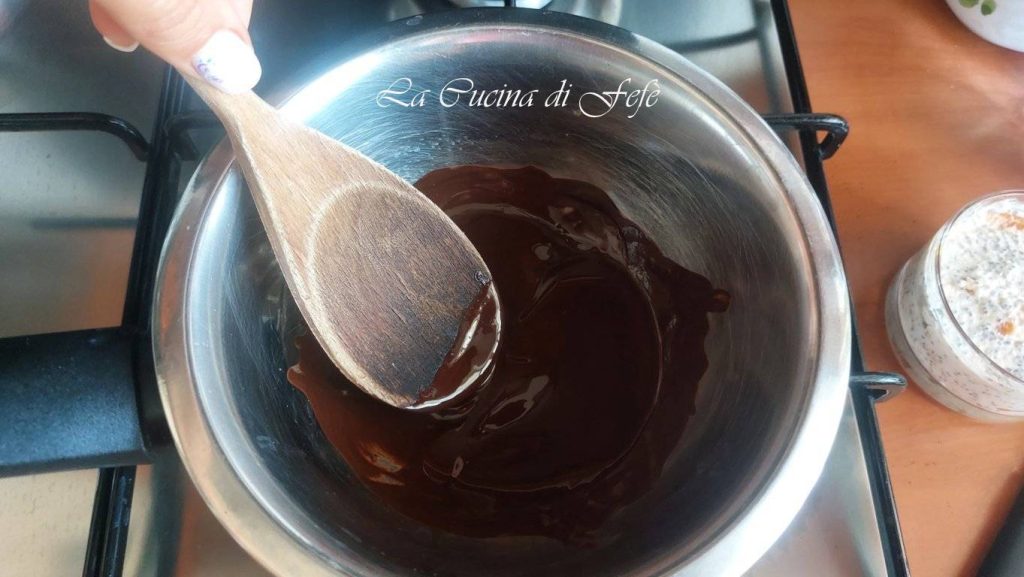
Break the chocolate into small and regular pieces, fill a saucepan with hot water, and place a smaller bowl containing the chocolate on top.

Melt over medium-low heat (no more) and start stirring continuously with a wooden spoon until it is completely melted. Turn off and immediately add the oil*, stirring again.
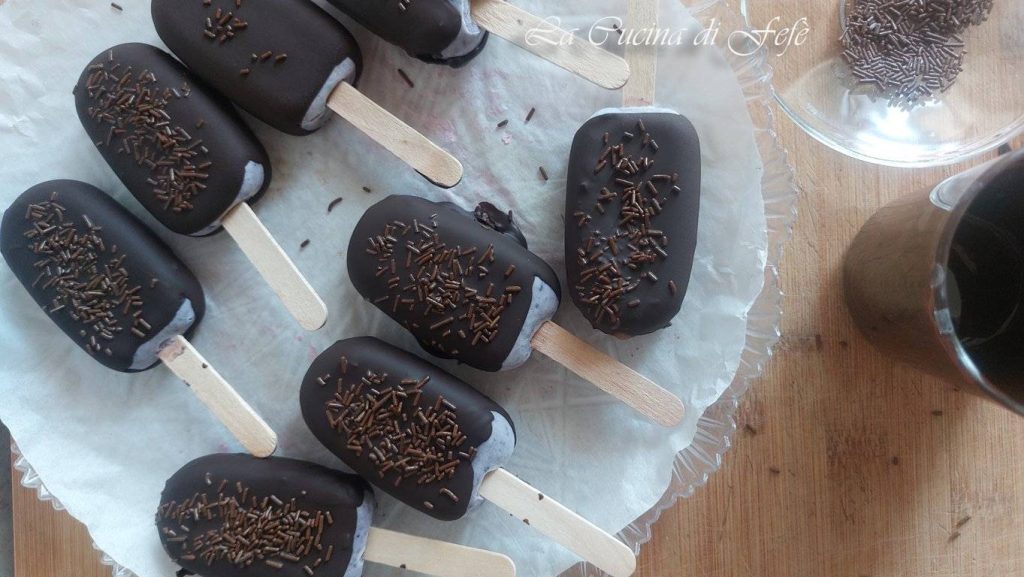
Transfer the chocolate into a tall and narrow glass (it will be more practical, trust me) and dip the popsicles one by one**, letting them drip a few seconds from the excess chocolate. Be careful during this operation to be quick, to avoid the chocolate setting before time when in contact with the ice cream, especially if you want to garnish them on top.
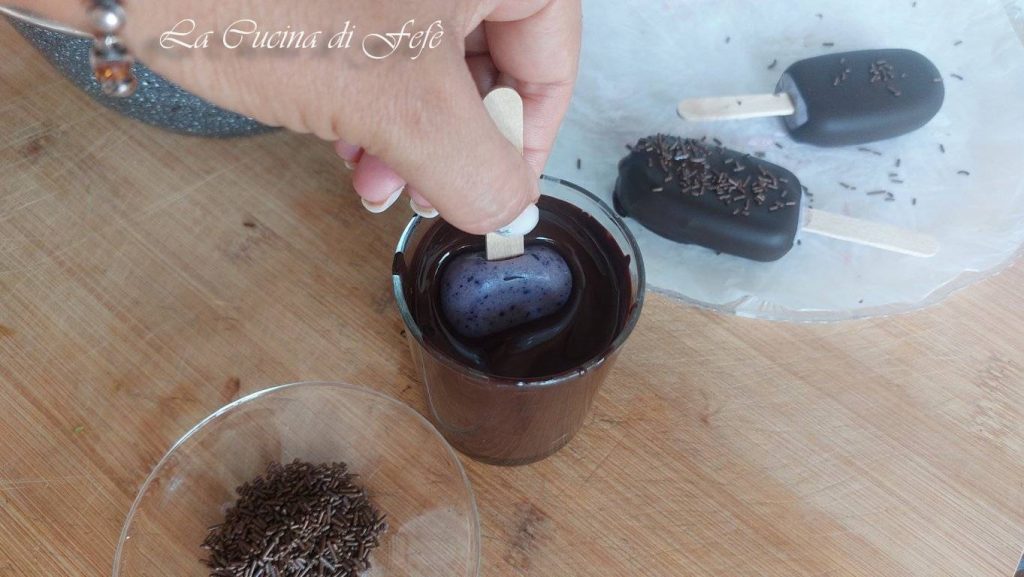
Decorate then with chocolate sprinkles on top.
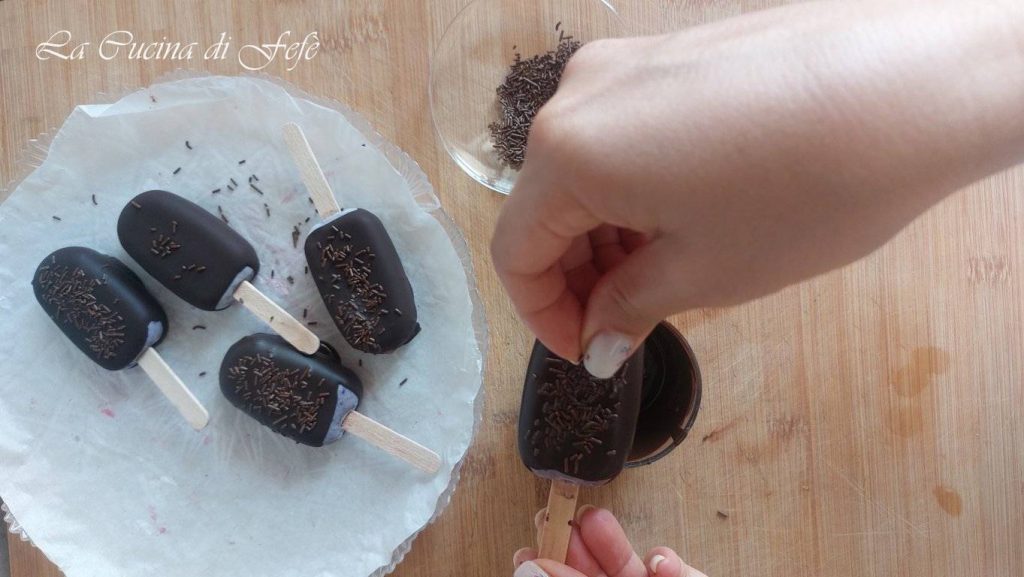
Arrange the popsicles one by one on the tray with previously used parchment paper and put in the freezer to firm up completely for another 4 hours.
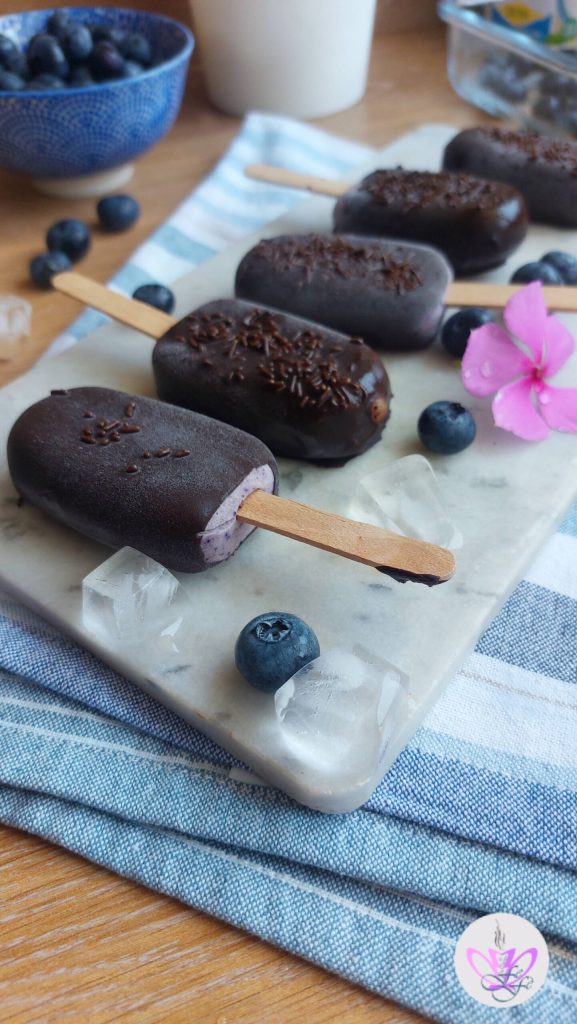
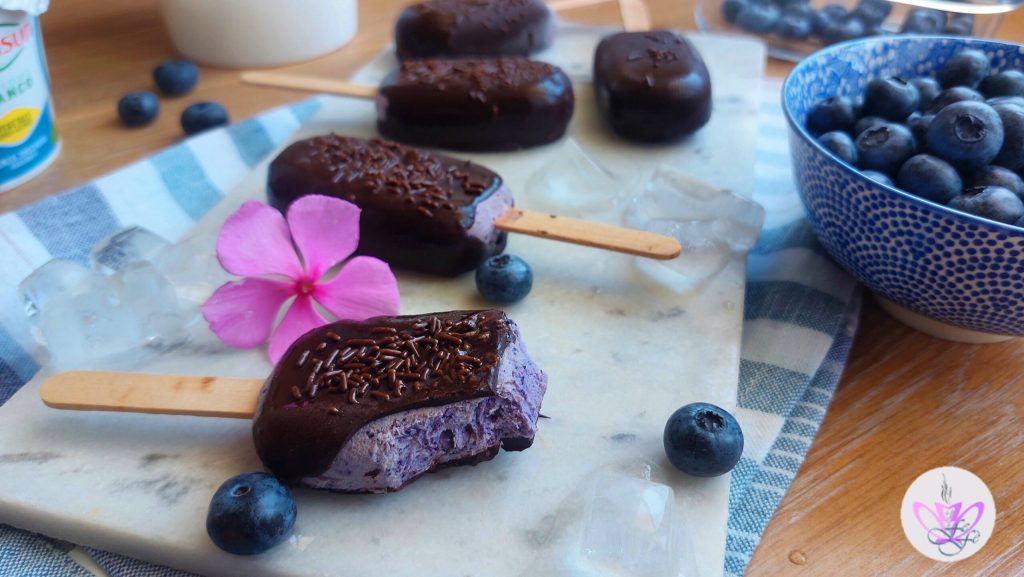
And voilà… the ricotta, cashew, and blueberry popsicles are ready to be enjoyed!
Try them also without coating or decorated with just a few chocolate drizzle, they are still delicious!
Bon Appétit from La Cucina di FeFè!
Storage
👉 Store the popsicles in the freezer until consumption and for up to 3 months, covered with plastic wrap to prevent ice from forming on the surface.
Tips, Notes, Variations, and Suggestions
🟣* Diluting the chocolate with coconut oil helps make the glaze more fluid so that you have a thinner and more chewable coating. In fact, chocolate would otherwise remain too thick. If you cannot find coconut oil, which is best suited for this type of preparation, you can always replace it with peanut oil.
🟣** I recommend immersing the popsicles one at a time, keeping the others in the freezer until the last moment to prevent them from starting to melt easily during this phase.
🟣For the base, you can opt for other red fruits like red currants or raspberries or combine them all together if you like the idea; for the coating, you can also use white chocolate if you prefer sweeter flavors, but I would avoid the agave syrup in the base mixture, also, if you like, you can opt for lower cocoa percentages; for the decoration you can choose some nut crumble like cashews themselves, almonds, or pistachios as shown in the picture. 

🟣 Ricotta, cashew, and blueberry popsicles are best enjoyed when brought to room temperature 10′ before consumption.
FAQ (Frequently Asked Questions)
Can this preparation be made vegan?
Absolutely! Just replace the cow’s milk ricotta with some plant-based ricotta, in my case homemade (incidentally made from cashews) or purchased from specialized stores.
