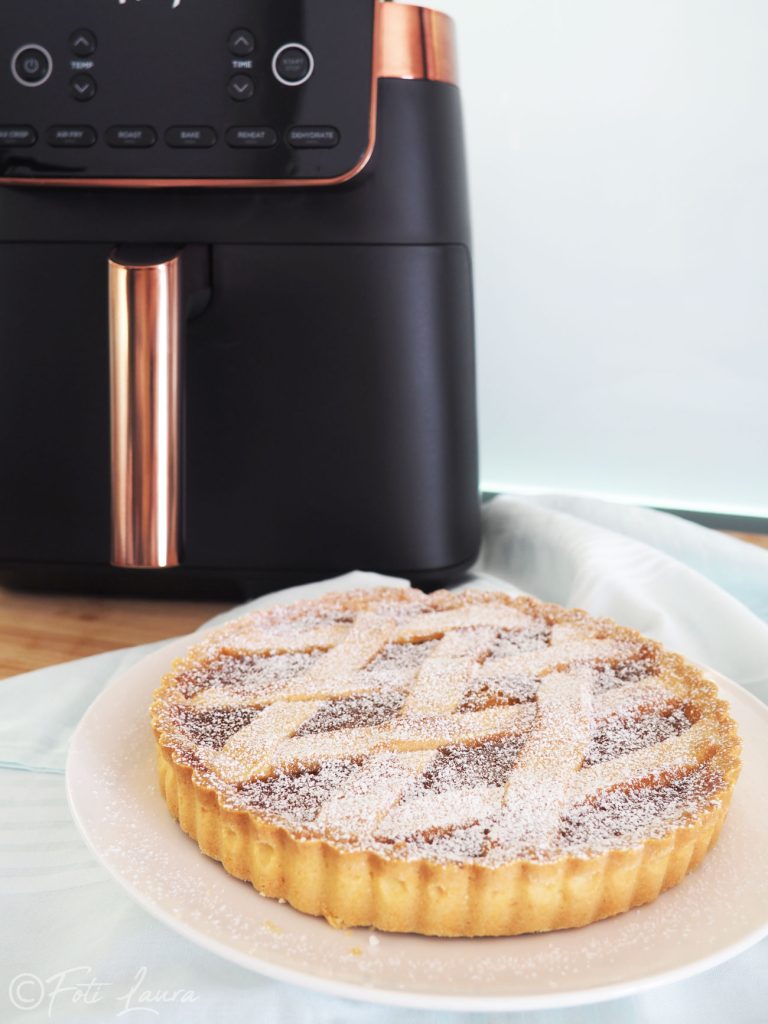
This apple jam tart is one of those simple desserts that you prepare with few ingredients and always provide satisfaction.
I baked it in an air fryer using a 20 cm pan to achieve a crumbly crust and a well-dried base without turning on the big oven.
It is perfect for breakfast, a snack, or to have ready when you crave something good homemade.
- Difficulty: Easy
- Cost: Very economical
- Cooking methods: Air Frying
- Cuisine: Italian
- Seasonality: All Saints
Ingredients
- 1 2/3 cups all-purpose flour
- 1/2 cup butter (cold)
- 1/3 cup powdered sugar
- 1 egg (medium)
- 1 pinch salt
- as needed lemon zest (or orange or vanilla)
- 1 cup jam (apple or your choice)
- 1 tablespoon cornstarch (leveled, only if jam is very fluid)
- as needed butter
- as needed flour
- as needed breadcrumbs (for the base of the pastry)
Tools
- 1 Bowl
- 1 Fork
- 1 Rolling pin
- 1 Parchment paper
- 1 Pie pan 20 cm
- 1 Teaspoon
- 1 Air fryer
Steps
Put the flour in a bowl and add the cold butter in pieces.
Work it quickly with your hands by rubbing flour and butter until you get a sandy mixture.
Add the sugar, salt, and the chosen aroma.
Add the egg and knead just enough to obtain a smooth dough. If it is a bit sticky, add a little flour.
Wrap in plastic wrap and let it rest in the fridge for at least 30 minutes.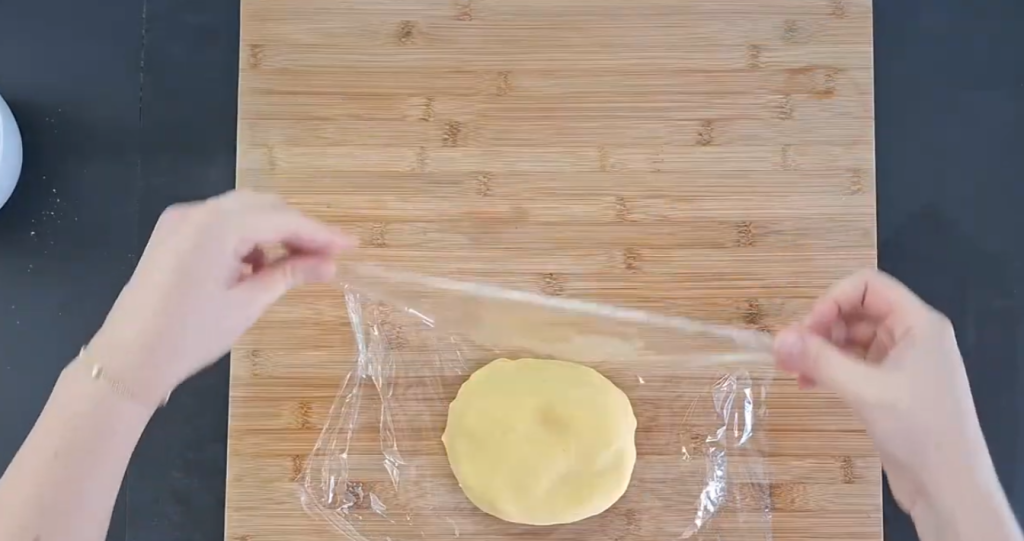
Butter the pan carefully (bottom and sides) and dust with a thin layer of flour, removing the excess.
Roll out the pastry on a sheet of parchment paper to a thickness of about 1/8 – 3/16 inch and line the pie pan, making sure the dough adheres to all parts. Set aside the excess.
Pierce the bottom well with a fork.
Now dust a scant tablespoon of fine breadcrumbs on the bottom of the pastry: this step helps absorb the moisture from the jam and keeps the base drier during cooking.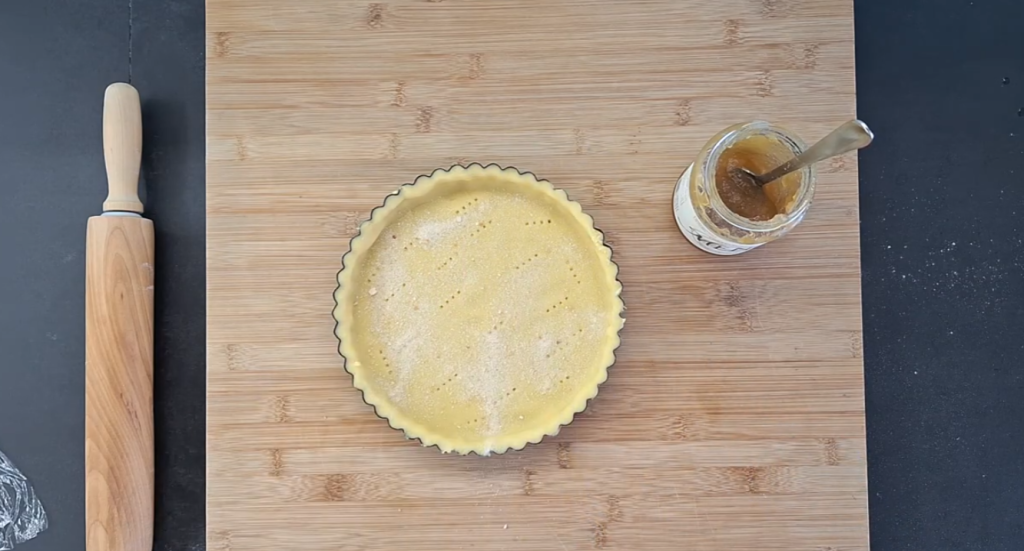
If the jam is very fluid, mix it with the cornstarch.
Pour the apple jam (or the one you chose) over the base and smooth it gently.
With the leftover pastry, form the classic strips and place them over the tart.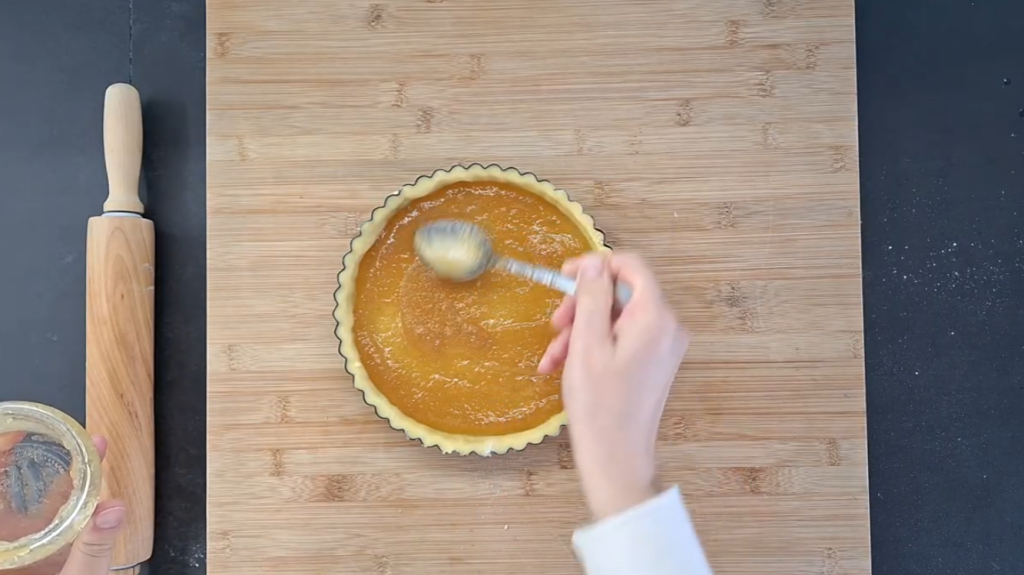
Preheat the air fryer for 3 minutes at 300 °F. It is preferable to have its rack on the bottom.
Insert the tart in the basket and bake.
Temperature: 300 °F
Time: 30 minutes
After about 18 minutes, check the surface: if it colors too much, gently place a sheet of aluminum foil.
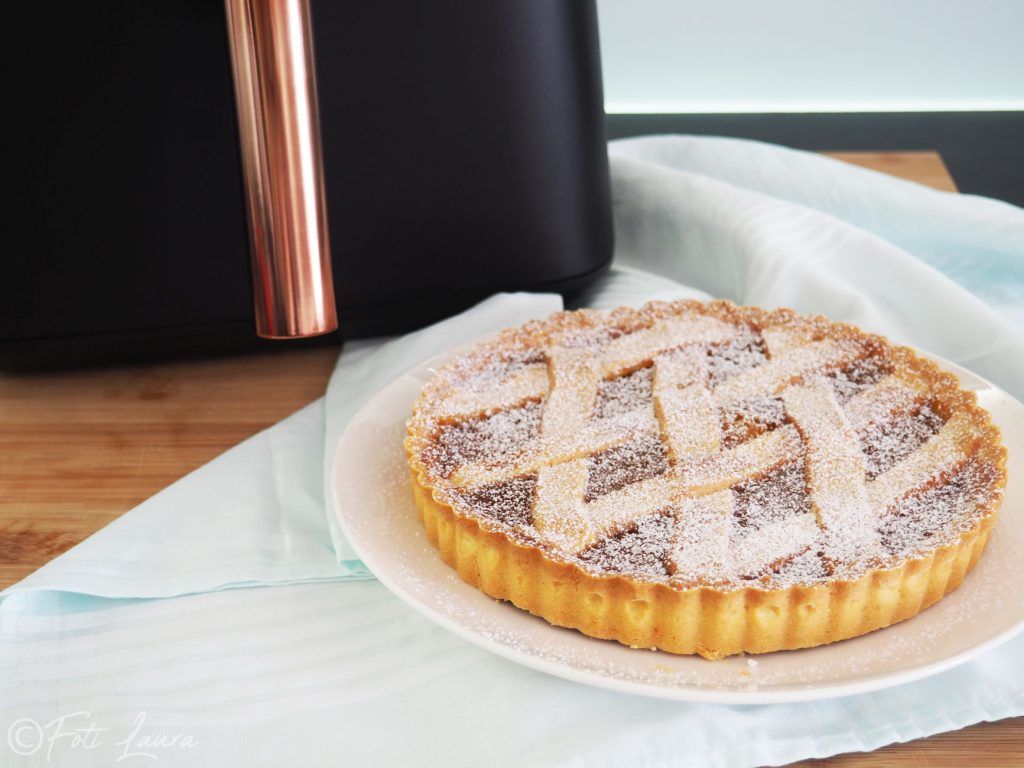
The tart is ready when the edges are golden and the jam appears glossy.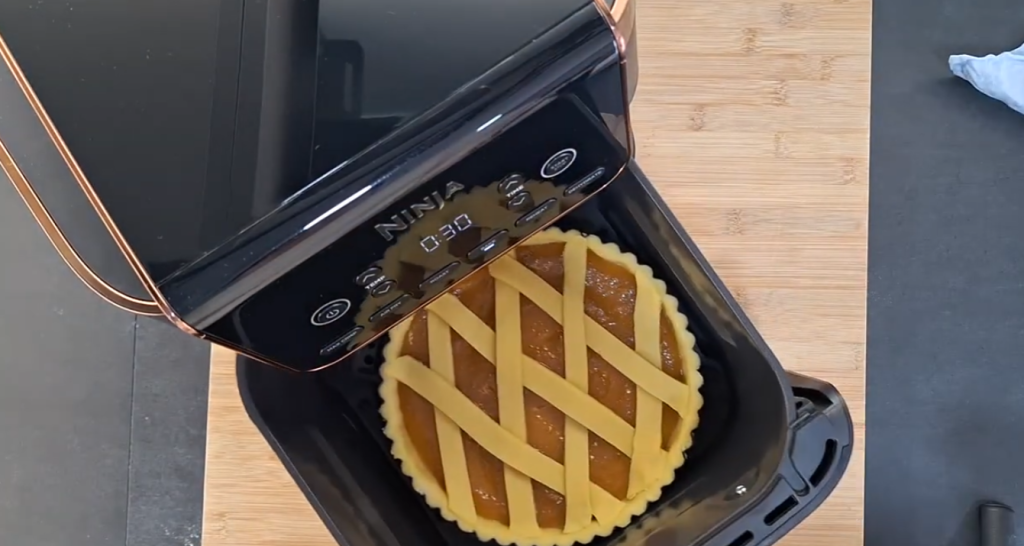
Let the tart cool completely in the pan before removing the removable bottom.
This step is crucial for a clean cut.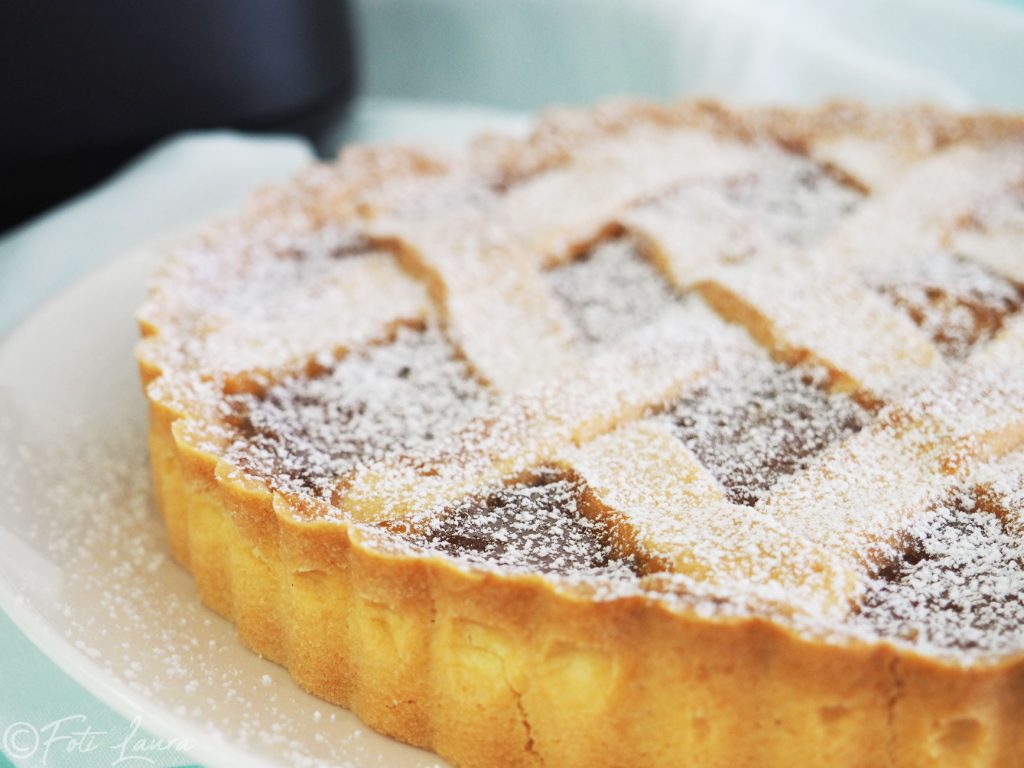
Mistakes to Avoid
Using too high a temperature: the crust dries out and the jam darkens
Adding too much jam: it might overflow and moisten the base
Skipping the rest time in the fridge
Removing the tart from the pan while still warm
Tips and Variations
Add a pinch of cinnamon to the jam for a more intense aroma
You can replace part of the flour with almond flour for a more aromatic crust
Also great with apricot or pear jam
Leftover Pastry …
Quick Cookies (the cleverest thing)
Form a ball
Flatten it slightly
Place it in the air fryer at 320 °F for 8–10 minutes
They make rustic cookies, perfect for tasting while the tart rests 😋
I call them “quality control tasting.”
Freezer Cookies
Wrap the pastry in plastic wrap
Place in the freezer
It keeps for 2–3 months
Next time, combine it with another leftover pastry and make a mini bake.
Mini Tart Shell
If you have:
a small mold
or a ceramic cocotte
You can make a micro tart with a teaspoon of jam.
FAQ – Air Fryer Baked Tart
Can I use a silicone mold?
Better not: in an air fryer, the metal mold ensures more even cooking.
Can I prepare it in advance?
Yes, it’s even better the next day.
Does the air fryer need to be preheated?
Yes, 2–3 minutes are enough for more even cooking.
This apple jam tart in the air fryer is proof that even the most traditional desserts can be prepared conveniently, without sacrificing taste.
A simple, genuine, and always appreciated dessert.