Homemade yogurt, in a simple and quick way. Homemade yogurt whether we have the yogurt maker or not. To prepare yogurt at home, it is not essential to have the machine, but it is crucial to maintain the milk’s temperature constant, around 95°F, which is the ideal temperature to promote the process in which microorganisms, the lactic ferments, lactobacillus bulgaricus, and Streptococcus thermophilus transform milk into yogurt. These bacteria reproduce quickly, increasing the milk’s acidity level and condensing it, coagulating it, and turning it from milk into lactic acid. For yogurt preparation, we can use either lactic ferments or ready-made yogurt. I usually use the ready-made yogurt available in stores the first time, any kind will do, whole, skimmed, classic, or Greek, as long as it is a natural unsweetened yogurt. Once you start making it, there’s no need to buy it anymore, and you don’t even need other lactic ferments, just take a portion of the prepared yogurt to make more next time. I often make it, initially without a machine, keeping it near heat sources, but now that I’ve been gifted a fantastic 1-liter Yisentno electric yogurt maker, I prepare it conveniently using the yogurt maker, putting it on in the evening and finding it ready in the morning. It costs very little, so you can buy it without incurring excessive costs. I enjoy making yogurt, placing it in the machine in the evening without even needing to heat the milk, and finding it ready for breakfast in the morning, and for all my recipes, remember, with yogurt I make Philadelphia-style spreadable cheese, I haven’t tried using my yogurt yet, as I always finish it too soon, but I’ll definitely do it in the coming days.

- Difficulty: Very Easy
- Cost: Very Cheap
- Preparation time: 4 Minutes
- Portions: 4 People
- Cooking methods: Other
- Cuisine: Italian
Ingredients
- 1 quarts Milk (partially skimmed or whole)
- 6 tablespoons Yogurt (about 4.4 oz)
Tools
- 1 Yogurt Maker
Preparation of Homemade Yogurt
To prepare yogurt without a yogurt maker, it is necessary to heat the milk to a temperature not exceeding 104°F. At this point, add the yogurt or lactic ferments, all in a well-cleaned container. Mix the two ingredients well and leave it for about 8-10 hours in a place where the temperature is kept constant around 95°F.
If we have a yogurt maker, it is not necessary to heat the milk; the temperature will still be reached, even with milk at room temperature, but it will take a bit more time unless your yogurt maker has specific instructions in this regard. I also prepare it without heating the milk, and this is how I proceed.
In the container of the yogurt maker, place the yogurt, about 6 tablespoons, roughly 4.4 oz. Add the milk, usually partially skimmed, of quality, but whole is better, and mix. The first time I prepare it, I use natural yogurt, whole or skimmed, but lactic ferments can also be used.
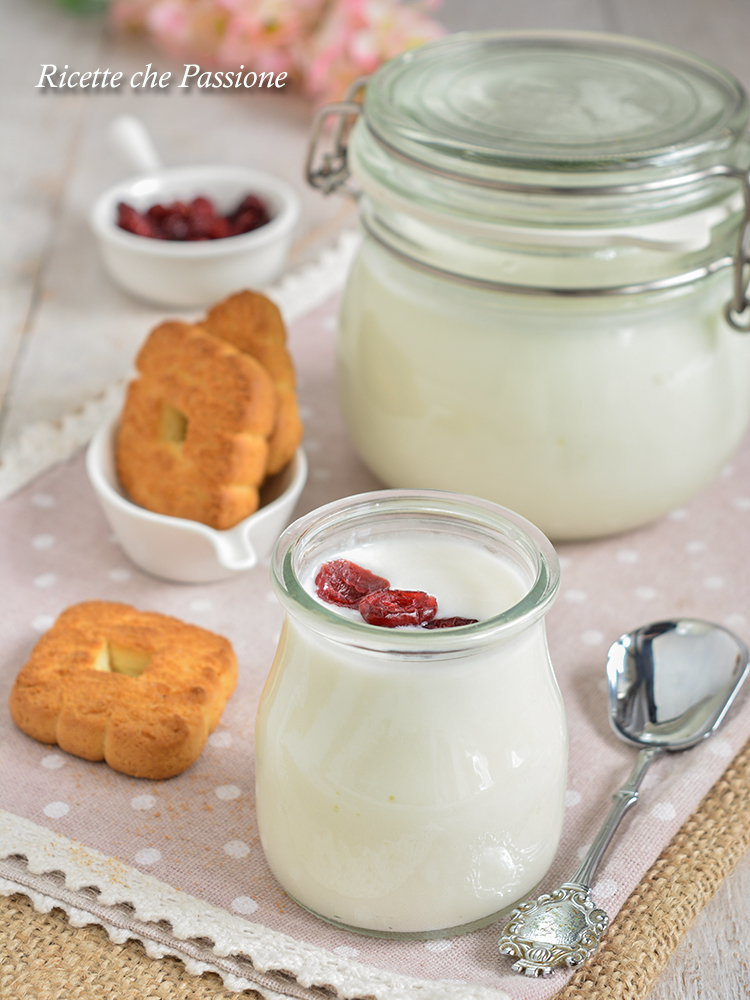
Once the yogurt and milk are well mixed, all that’s left is to plug in the machine and wait for the milk to turn into yogurt. I leave it all night, and in the morning, I find a very thick yogurt.
On the surface, there remains a bit of yellowish whey, which I remove, leaving all the yogurt underneath. The amount of whey depends on the type of milk used; the more whey residue we have, the less yogurt we produce. This depends on the milk’s quality, more or less fat. Even though I use partially skimmed milk, I manage to produce a lot of yogurt with very little whey, which I don’t throw away and use in another recipe.
If you use whole milk, the waste is almost nil or non-existent, depending on the various brands available, although I prefer to use skimmed milk, partially skimmed. I made a test with whole milk, and there was no waste, all the milk turned into yogurt.
Notes
It keeps for at least a week in the fridge in an airtight container, even 10 days, mine always finishes before.