Always in search of plant-based proteins, I wanted to try yeast-free red lentil bread. We know that 100 g of red lentils provide almost 8 grams of protein.
I preferred the yeast-free version, so it remains lower, but next time I will use different tricks to make it fluffier.
There are many recipes, some add dry yeast and then don’t let it rise (so what’s the point of the yeast), some soak the lentils for just two hours (but don’t they become indigestible when put directly in the oven?), some use green lentils (I really want to know how they manage to blend them into a cream). Well.. I did it my way, and like other gluten-free and yeast-free breads, I let it naturally ferment.
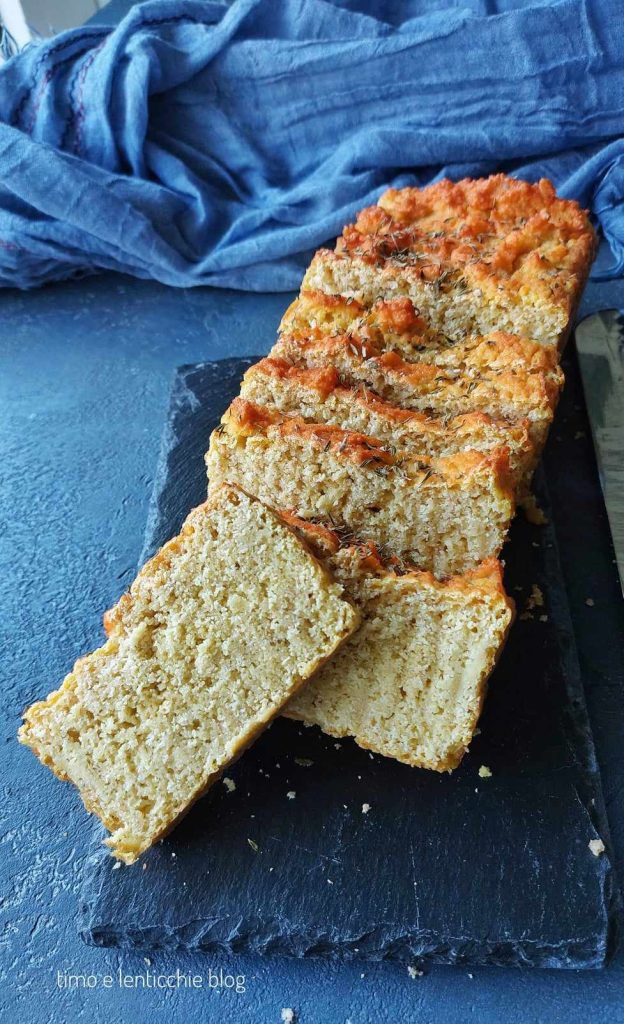
Anyway, a good flavor, I recommend slicing and lightly toasting it. If you add just a pinch of salt and toast it, it becomes like a toast slice. Add fruit compote and 3 nuts or almonds for a super breakfast.
I prefer to toast these yeast-free breads because they are naturally less airy and more moist. For those with intolerance issues, they are surely a healthier alternative to gluten-free breads full of starches. Alternatively, you can add 2 tablespoons of oil, seeds on top—I’ve just used thyme.
Here are some other alternative breads to try:
- Difficulty: Easy
- Cost: Economical
- Preparation time: 1 Day 12 Hours
- Portions: 10 Pieces
- Cooking methods: Stove
- Cuisine: Healthy
- Seasonality: All Seasons
Ingredients for Lentil Bread
- 11.64 oz red split lentils
- 0.67 cup lukewarm water
- 1 pinch sea salt
- 1 tbsp thyme (dry)
Tools
- 1 Loaf pan
- 1 Blender
- 1 Bowl
Steps for Yeast-Free Red Lentil Bread
First, rinse and soak the red split lentils in a large bowl. Add plenty of water and leave for 12 hours in the pantry, out of the refrigerator.
After the time has passed, rinse again, pour the lentils into a powerful blender, add the water and salt, and blend until creamy.
I poured it back into a bowl, covered with a plate, placed in the oven turned off, and left to rise for 24 hours. As seen in the photo, it rises a lot.

At this point, I delicately poured it into the 25 x 11.5 x 7 cm loaf pan lined with parchment paper, sprinkled with thyme (well, my name is thyme and lentils) and baked at 180 degrees for 50 minutes.
Immediately removed from the pan and left to dry on a rack.
Tips and Storage
As you can see, it didn’t rise much. The only way would be to pour it into the mold before rising, but then what do you do, do you still line it with parchment paper and leave the very wet dough in contact even if my parchment paper is BPA-free? Or do you not use parchment paper, oil the mold well, and place it directly in the non-stick mold? It’s not that in 24 hours, so wet, it releases something?
I preferred it low and safe rather than high (because when emptying from bowl to mold, it deflates a bit). I promise to redo it with yeast (naturally letting it rise for an hour and then let you know if it comes out higher. Anyway, we liked it.
I store it sliced in the freezer, take out when needed, and toast it.
If you liked the recipe, share it on your profile, and invite your friends to visit my blog. For updates, become a fan of my page.
For any information, don’t hesitate to contact me on my page Facebook Timo e lenticchie where you can interact and ask any question. Or join my group.
Follow me also on Instagram, Pinterest, or YouTube or subscribe to the Telegram channel.
If you want to return to the HOME PAGE for more ideas among my recipes.
If you want to know me better by reading who I am.
If you want to be always updated on my recipes, subscribe to the newsletter.
Article and Photos: Copyright © All Rights Reserved Timoelenticchie by Daniela Boscariolo