Carnival Shortcrust Pastry Masks. For these masks, you’ll need shortcrust pastry, a cookie cutter, and… lots of imagination!
They are very beautiful to look at, will make a great impression, and will be highly appreciated by children, as they are very cheerful and colorful.
Crunchy, fragrant, and decorated with thousands of sugar sprinkles, they are perfect for a Carnival buffet or for a snack different from the usual.
You can bake them comfortably in the oven or quickly in an air fryer.
What’s the best part of this recipe? In this post, I reveal my tested recipe for a dough that keeps its shape and some tips for decorating them with colorful sprinkles just like the ones you see in the photo!
You can unleash your imagination with glazes, chocolate, and decorations of all kinds!

- Difficulty: Very Easy
- Cost: Economical
- Rest time: 2 Hours
- Preparation time: 15 Minutes
- Portions: 12 Pieces
- Cooking methods: Electric Oven, Air Frying
- Cuisine: Italian
- Seasonality: Carnival
Ingredients
Carnival Shortcrust Pastry Masks
- 2 cups all-purpose flour
- 0.5 cup sugar
- 1 egg
- 1 egg yolk
- 0.5 cup butter (cold, in pieces)
- 1.5 tsp baking powder
- as needed lemon (zest grated or vanilla extract)
- as needed powdered sugar
- water (Drop of water on the sides of each mask or honey)
- as needed colored sprinkles
Tools
- Cookie Cutters
- Parchment Paper
- Air Fryers
- Bowl
- Cling Film
- Baking Tray
- Kitchen Scales
- Pastry Board
- Rolling Pin
Steps
Let’s Prepare the Dough
In a bowl, mix the flour with the sugar and baking powder. Add the butter in pieces, lemon zest, and vanilla.
Work the ingredients with your hands until you get a sandy mixture.
Work with your fingers until you get a sandy mixture.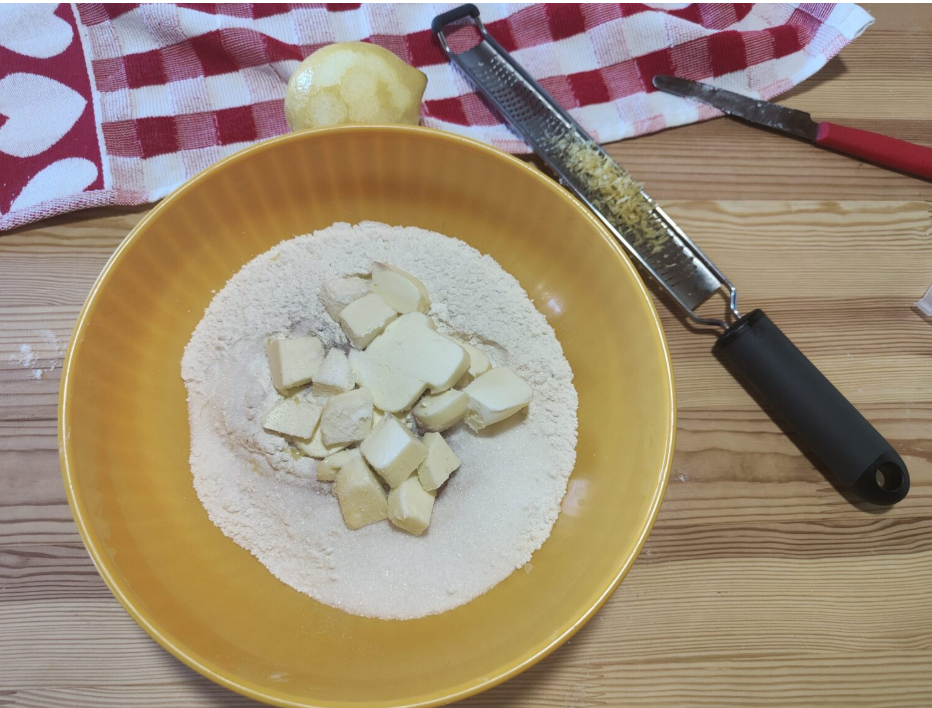
Add the whole egg, the yolk, and grated zest of an organic lemon. Knead everything until you get a homogeneous mixture.
Add the whole egg and the yolk. Knead quickly until you get a smooth and fragrant dough ball.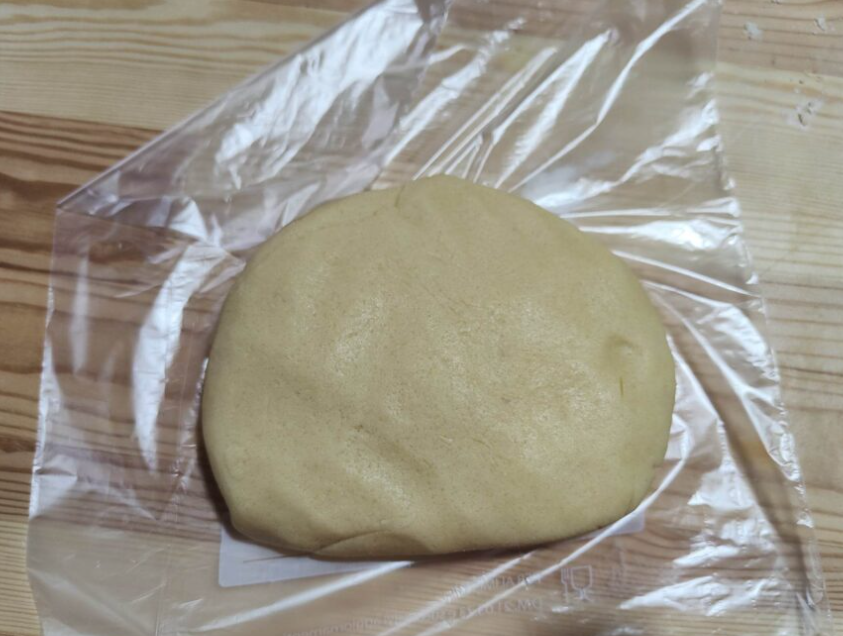
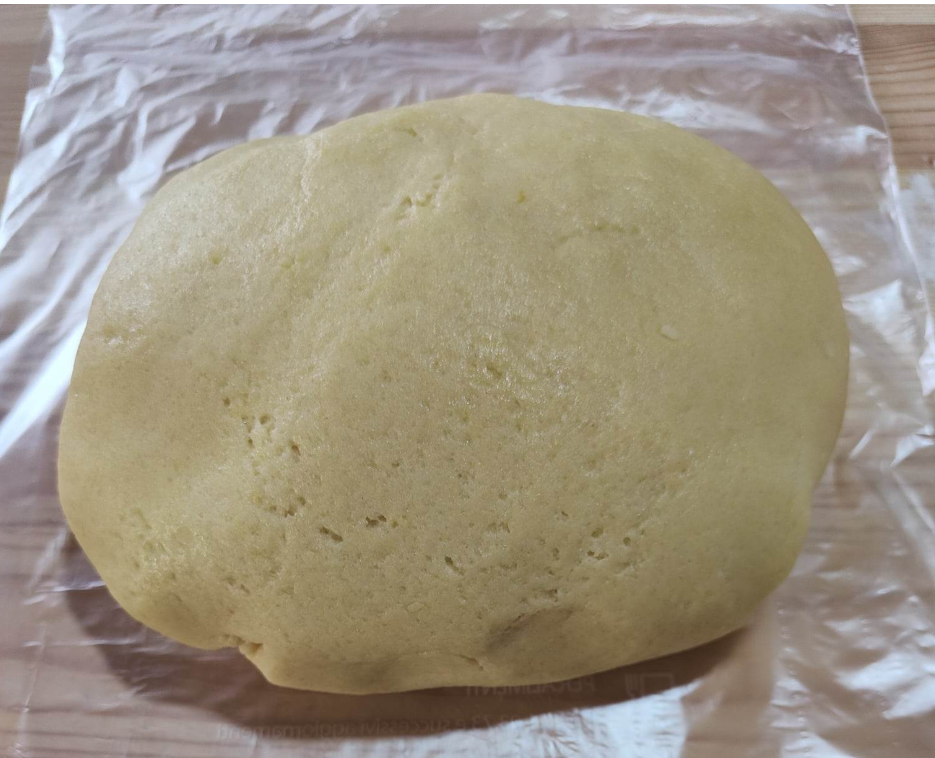
Wrap it in cling film and let it rest in the fridge for 2 hours.
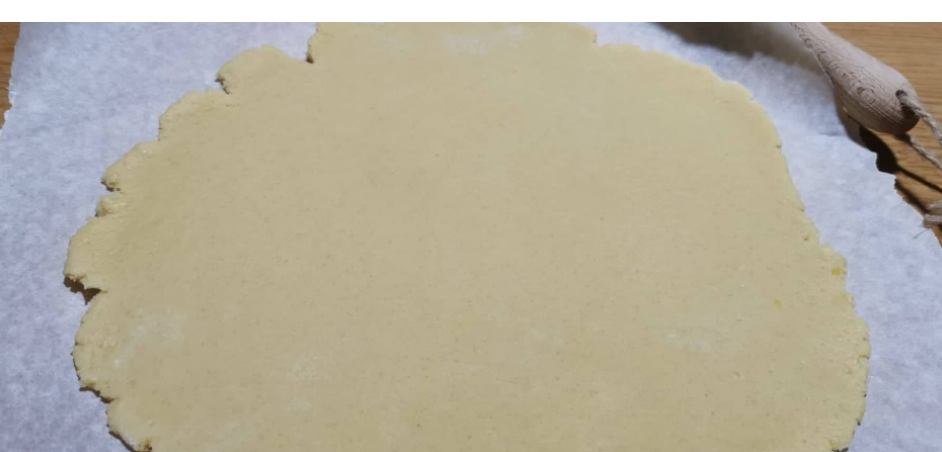
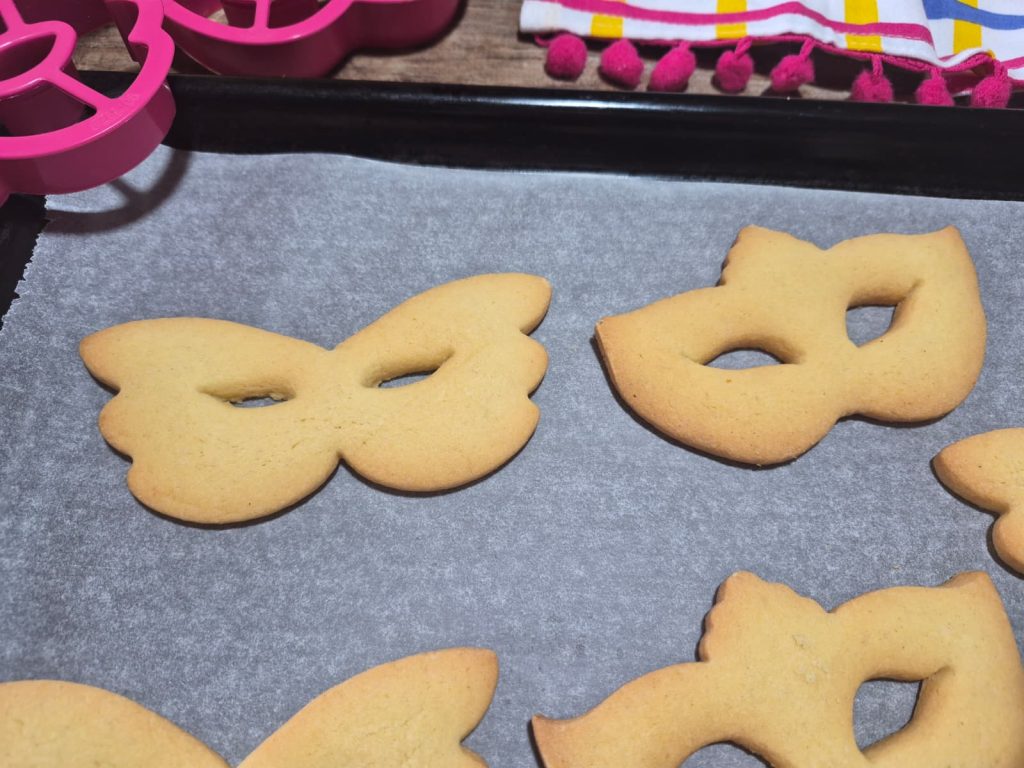
Take the dough and roll it out with a rolling pin on a lightly floured surface, reaching a thickness of about 0.2 inches.
Use your mask-shaped cookie cutter to cut out the shapes.
Re-knead the leftover scraps until the dough is used up.
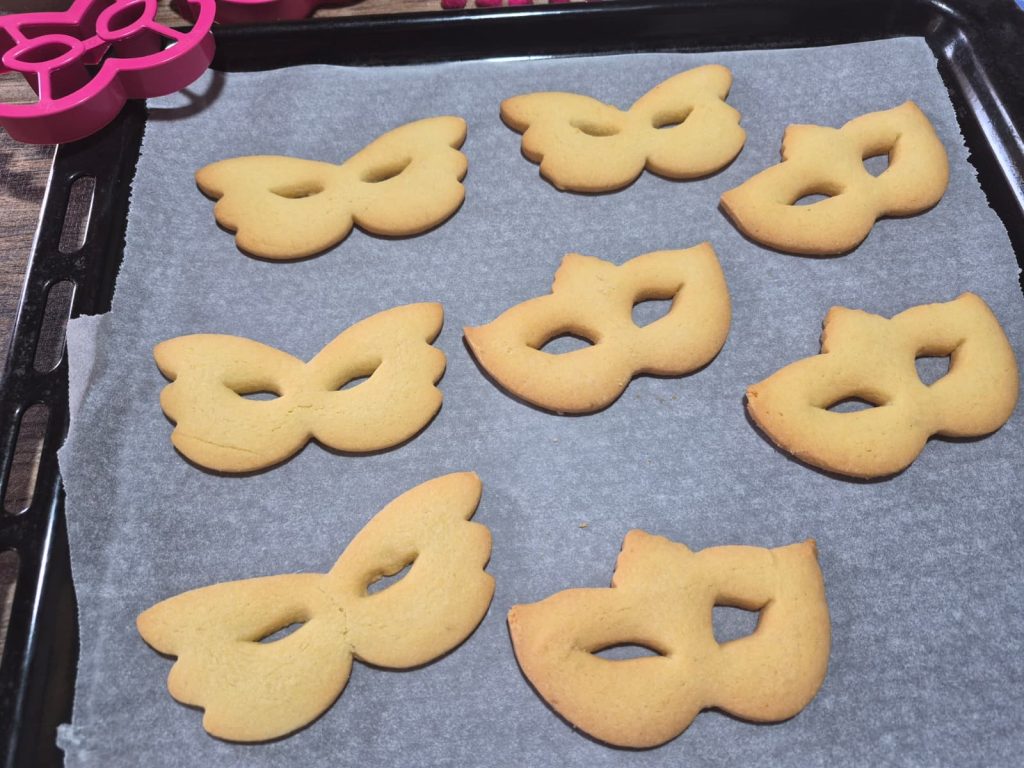
In Traditional Oven: Place the masks on a baking tray lined with parchment paper. Bake in a preheated static oven at 350°F for 10-12 minutes. Remove them as soon as the edges start to brown (they should not darken too much!).
In Air Fryer: Place the masks in the basket on top of a parchment paper disk (better if perforated). Cook at 340°F for about 7-9 minutes.The trick of the cold basket: Between batches, the basket will be very hot. Wait a minute before putting in new masks or reduce the cooking time of the second batch by 1-2 minutes.
I recommend checking halfway through as air fryer cooking is very quick and direct.
Once baked, let them cool completely.
The “Confetti”: Place a small drop of water or on the edges of each mask and immediately adhere the colored sprinkles.
Alternatively, you can use a small drop of honey or royal icing.
The water will act as a natural adhesive simply and cleanly.
The Snow Effect: Only at the end, arrange all the masks on a tray and generously sprinkle with plenty of powdered sugar.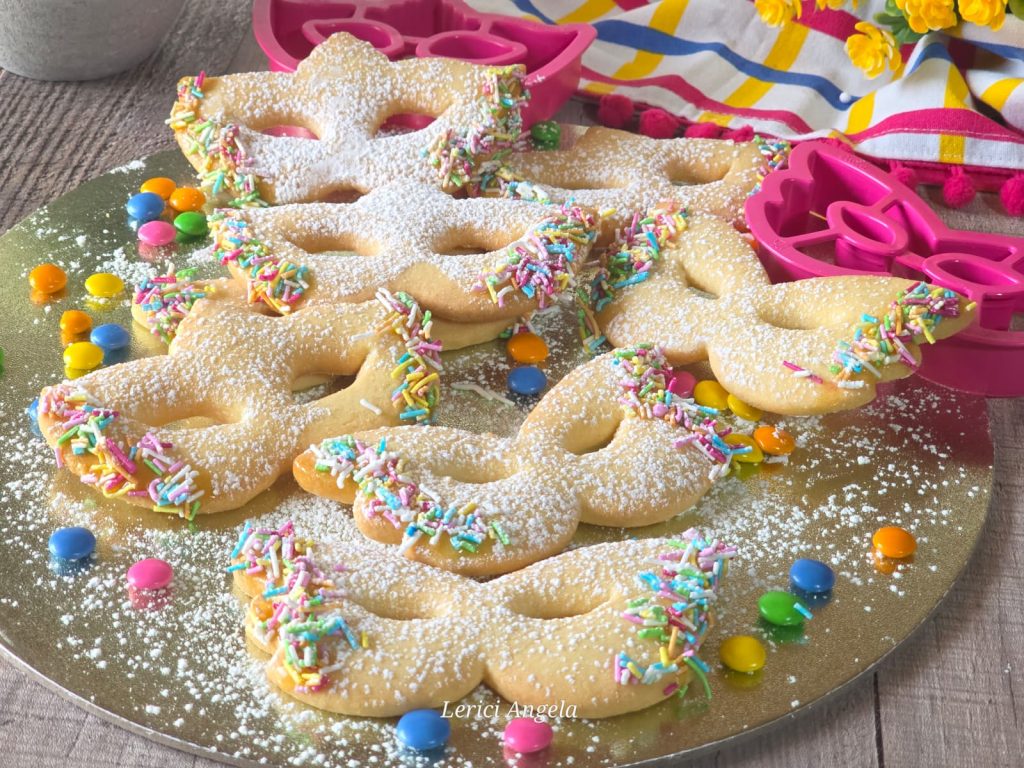
Happy Carnival.

Storage
To keep the shortcrust pastry crunchy and the powdered sugar perfect, I recommend storing the masks in a tin box or a container with an airtight seal. They will remain delicious for 4-5 days.
Tips
If while cutting out the masks you feel the dough becomes too sticky (perhaps due to the heat in the kitchen), put it back in the fridge for 10 minutes. A cold dough ensures sharp and defined edges.
Every oven and every air fryer has its own times and “characters”. The ones I have indicated are average times, but the secret for a perfect result is observation:
Always check: Don’t stray too far during the last minutes of cooking.
The color test: The masks are ready when the edges just start to brown, but the surface still looks clear.
Do not overdo it: If you see them too dark, the shortcrust will become bitter and too hard. It’s better to take them out a minute early: by cooling outside the oven, they will reach the ideal consistency!
Sprinkle the sugar only when the cookies are completely cold. If they are still warm, the sugar will melt creating a shiny crust instead of the soft “snow” effect we desire.
Curiosity
If you want a more intense flavor, you can replace 20g of flour with the same amount of unsweetened cocoa powder in the dough to get chocolate masks, then decorate them with powdered sugar for a super contrast!
If you make these masks for a party, you can insert a wooden stick (like those for lollipops or skewers) at the base of the mask before baking it. They will become fun “cookie-pops” to hold!
FAQ (Questions and Answers)
What if I want to make the dough without butter but with oil?
For your recipe from 120 g of butter, you’ll need to use:
95-100 g of oil (preferably sunflower or rice oil for a neutral flavor).
Unlike butter dough, oil-based dough doesn’t need long rests in the fridge because it doesn’t need to “set.” You can roll it out almost immediately.
If you use oil, the shell will be slightly darker and rustic.Can I dip them in chocolate?
If you want to make your masks even more irresistible, you can replace the drop of water with melted chocolate. Here’s how to do it:
Melt the chocolate: Coarsely chop 100g of chocolate (dark, milk, or white) and melt it in a bain-marie or microwave (in 30-second intervals, stirring each time).
Take the mask now cooled and dip only one half, or just the side tips, into the melted chocolate. Shake off the excess by lightly shaking the cookie.
While the chocolate is still melted, dip the wet part into a small bowl full of sprinkles or colored sugar. They will adhere perfectly and remain firmly in place.
Place the masks on a sheet of parchment paper and let the chocolate harden completely at room temperature (or 10 minutes in the fridge if you’re in a hurry).
The final touch: Only when the chocolate is solid, dust with powdered sugar.
The tip: If you use white chocolate, you can add a drop of food coloring to make masks of different colors (blue, pink, green) for an even crazier Carnival!Gluten-Free Version ?
Use 250 g of Universal Gluten-Free Flour Mix (the one specific for sweets and shortcrust pastries).
Gluten-free dough tends to crumble more easily. I recommend adding a teaspoon of cold water if the dough seems too dry and letting it rest in the refrigerator for 1 hour. This will help the fats bind the alternative flours better.
Attention: Make sure the yeast and decorations (sprinkles and chocolate) are also labeled “gluten-free” or have the crossed-out wheat symbol.
