The No-Knead Bread is a recipe that once you try, you won’t let go because it’s easy and quick to prepare.
As the name suggests, this bread is made without a mixer, and without hand kneading, so you won’t mess up the kitchen. It’s a dough that develops structure while resting in the fridge, all you need to do is mix the ingredients in a bowl for a minute with a fork and let the dough rise in the fridge for at least 12 hours, making only a few folds in the bowl.
I prepare it in the evening and bake it the next morning, so we have a freshly baked loaf of bread for lunch!
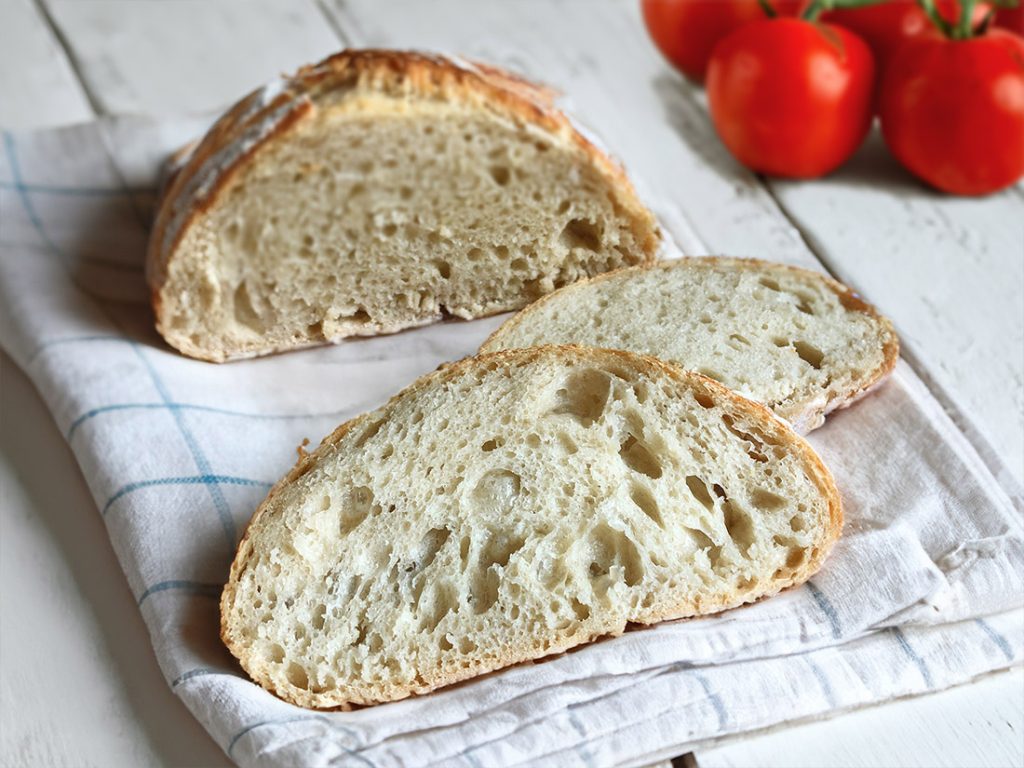
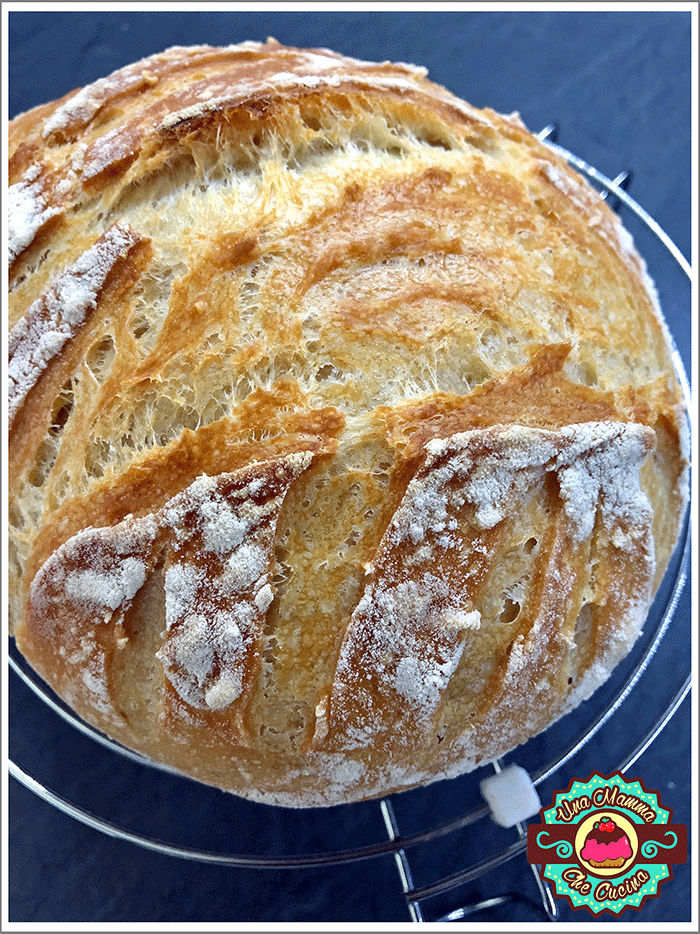
If you don’t like kneading but want to try making bread, you absolutely must try this recipe. As you can see from the photo, the bread has nice big holes, a soft interior, and a perfectly crispy exterior!
I find proofing baskets very useful; if you want to buy one, you’ll find the link in the recommended tools.
In the kitchen, unleash your creativity because it’s essential, and if you’re out of ideas, follow me and I’ll provide you with inspiration!
Subscribe to the WhatsApp Channel to stay updated on my recipes.
DON’T MISS THESE RECIPES:
- Difficulty: Easy
- Cost: Very Cheap
- Cooking methods: Oven
- Cuisine: Italian
- Seasonality: All Seasons
Ingredients
- 2 1/2 cups all-purpose flour
- 3/4 cup semolina flour
- 1 1/4 cups water
- 1 1/2 tsp fresh yeast (or 1/2 tsp dry yeast)
- 1/2 tsp sugar
- 1 1/4 tsp salt
Recommended Tools
- Proofing Basket
- Bread Lame
How to Prepare No-Knead Bread
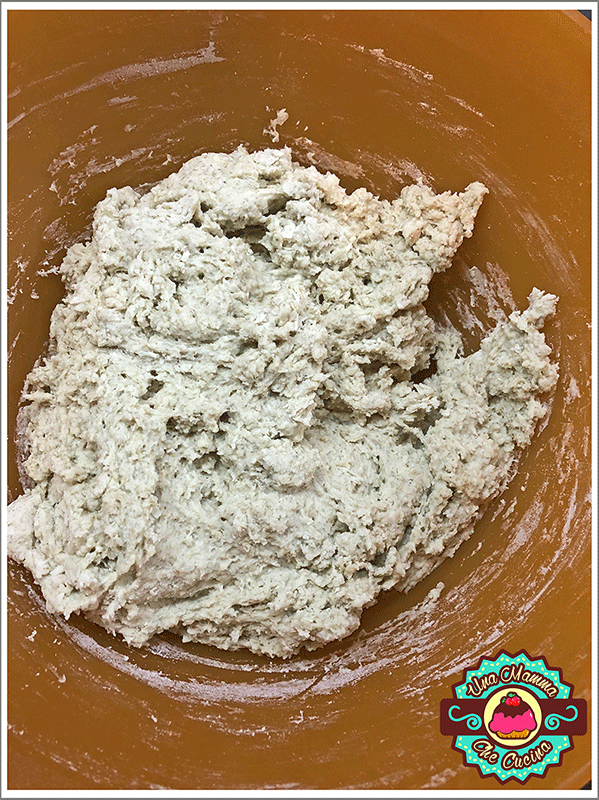
Pour the water into a bowl and add the sugar, yeast, and about half the weight of the flours. Mix with a fork, then add the salt and the rest of the flour.
Continue mixing with the fork for about a minute, until you obtain a lumpy and slightly sticky mixture like the one in the photo.
If you think something went wrong, don’t worry, it’s supposed to be like this!
Cover the bowl with a plate or a kitchen towel and let the dough rest at room temperature for 15 minutes.
Using a spatula, turn the dough by bringing it from the edge to the center of the bowl, rotate it 90 degrees, and bring the dough to the center again three or four times.
After 15 minutes, repeat the operation, cover with plastic wrap, and place the bowl in the fridge overnight.
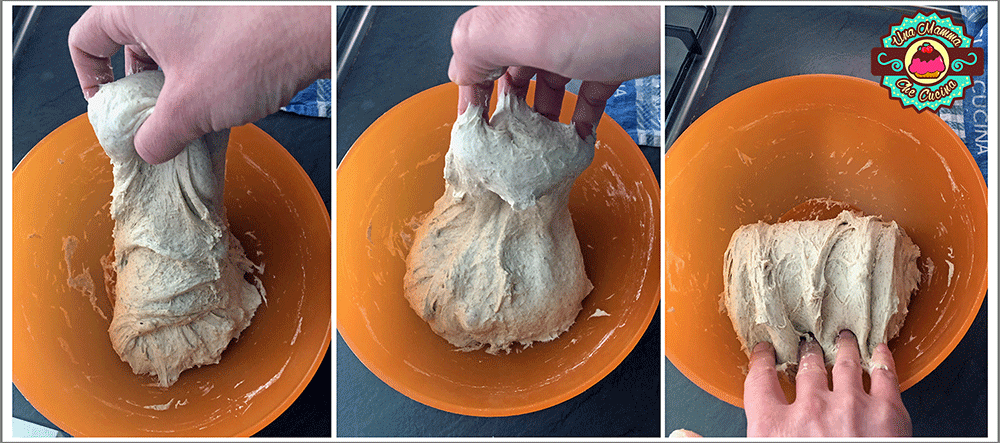
Remove the bowl from the fridge and proceed with the folds directly in the bowl. This step is to give strength to the dough.
Detach the dough from the bowl and lift one edge, pulling it up and then folding it over itself, rotate the bowl 90 degrees and fold the dough again over itself, in total four times. After 10 minutes, repeat the folds, and you’ll see how the dough changes consistency!
By doing the folds directly in the bowl, you won’t dirty anything.
Place a kitchen towel in a bowl, dust it with plenty of flour, and put the ball of dough inside. Dust with more flour, cover with the towel, and let the dough rise for at least an hour and a half at room temperature.
Preheat the oven to 450°F and place a pot or a Pyrex or ceramic dish with a lid inside to heat up. When the oven is at temperature, carefully remove the hot dish, take off the lid without burning yourself, and with the help of the towel, flip the dough inside.
Make cuts with a bread lame or a knife to help the dough rise during baking, put the lid back on, and immediately bake the bread for 30 minutes.
Lower the temperature to 430°F, remove the lid, and continue baking for another 25 minutes.
Remove from the oven and let the loaf cool on a wire rack before slicing.
Notes
To prevent the bread from sticking to the pot, it needs to be very hot. If you place the dough in a cold pot, it will stick!