There are flavors that can instantly take you back in time, and these stuffed eggs Genovese style are for me the scent of family Sundays.
It’s my grandpa’s recipe: a simple appetizer, yet capable of encapsulating the essence of Liguria in a single bite.
Forget the usual mayonnaise; here the star is a creamy filling of ricotta, fresh basil, and pine nuts, just as he used to make. A little family treasure that I have the pleasure to share with you today.
Perfect for a buffet or as a starter for a summer dinner, but also for Easter, as eggs take center stage, they will bring to the table the authentic taste of recipes from the past.
A very fresh, elegant appetizer with that ‘home’ flavor that never tires. Discover with me how to prepare them in a few simple steps, but first check out the other egg recipes below and you will surely find the one that suits you 😉
See you soon with the next recipe, Ana Amalia!
- Difficulty: Very Easy
- Cost: Very Cheap
- Preparation time: 10 Minutes
- Portions: 4 People
- Cooking methods: Stovetop
- Cuisine: Italian
- Seasonality: Easter, All Seasons
Ingredients for Stuffed Eggs Genovese Style
- 4 eggs (Large)
- 5.3 oz ricotta
- 0.7 oz pine nuts
- 1 clove garlic
- 1 bunch basil
- 2 pinches salt
- to taste black pepper
- 1 tbsp extra virgin olive oil
Preparation of Stuffed Eggs Genovese Style
The portion weight can vary slightly based on how “generous” you decide to make the decoration with the piping bag, but about 3.5-3.7 oz per person is the standard measure for this dish.
1. Cooking the eggs: To prepare the stuffed eggs Genovese style, first cook the eggs (you can follow my guide on [how to make perfect boiled eggs]) starting from cold water; once it comes to a boil, count 8 minutes.
Once ready, cool them immediately under running water and gently peel them to avoid damaging the white.
2. Preparing the filling: Cut the eggs in half lengthwise. Extract the yolks and transfer them to the glass of an immersion blender.
Add the ricotta, pine nuts, garlic clove (remove the core if you prefer a milder taste), cleaned basil leaves, oil, salt, and a pinch of pepper.
3. Blending: Blend everything for a few moments: the goal is to obtain a soft cream that maintains the green specks of basil leaves.
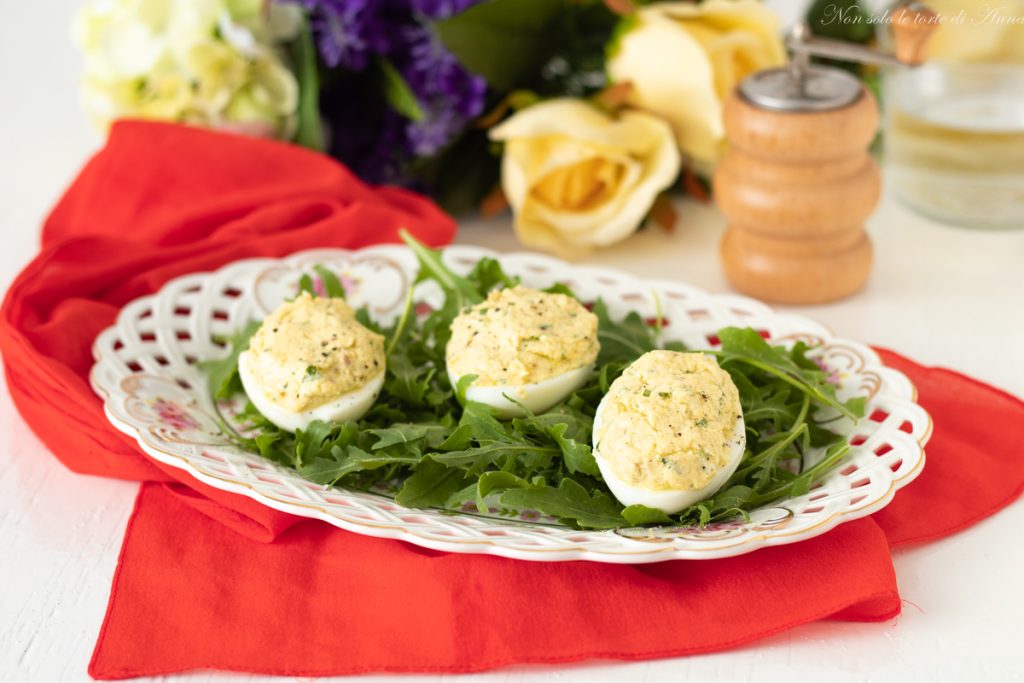
4. Filling: Transfer the mixture into a piping bag with a star or plain tip. Generously fill the cavities of the halved boiled eggs.
5. Resting and Serving: Transfer the eggs to the refrigerator for at least 2 hours, so the flavors can blend perfectly.
When ready to serve, prepare a bed of lightly-dressed arugula on the serving platter, place the eggs on top, and finish with a grind of fresh black pepper.
With the arrival of Easter, the stuffed eggs Genovese style have become a fixed appointment for me: they are the perfect appetizer to start the festive lunch or to include in the Easter Monday picnic basket, as they taste of spring, fresh herbs, and traditions that remain alive over time.
Try making them and let me know in the comments if you liked them! And if you serve them to your loved ones, take a photo and tag me: it will make me feel a bit like part of your celebration.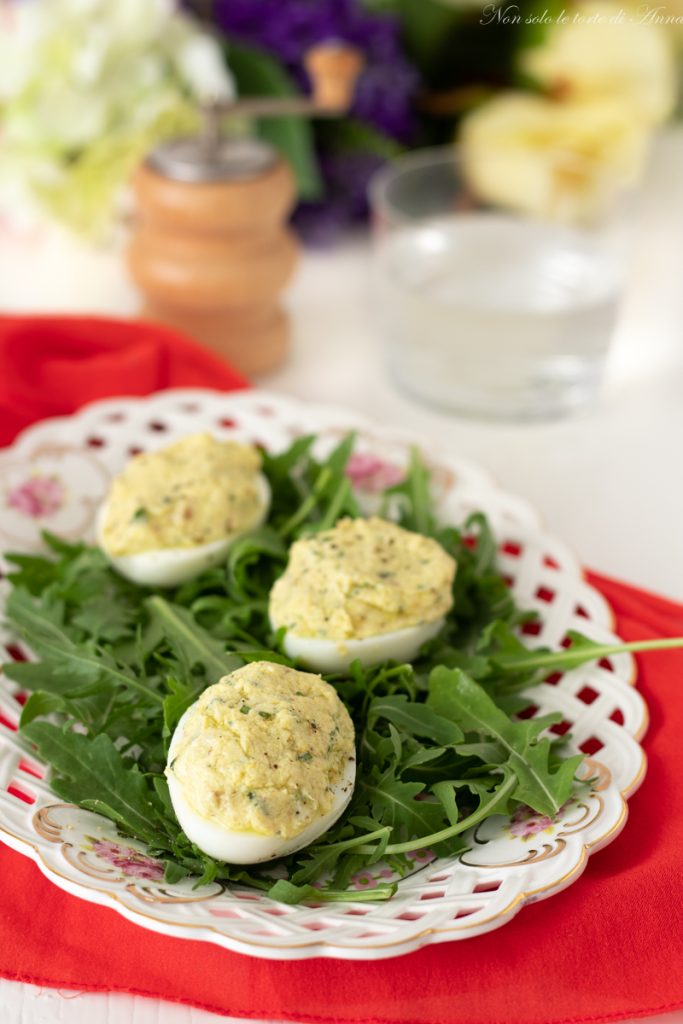
Storage, Tips, and Variations for Stuffed Eggs by My Grandpa
The stuffed eggs Genovese style store perfectly in the refrigerator, placed in an airtight container, for up to 24 hours. I recommend not exceeding this time to maintain the freshness of the ricotta and the bright color of the basil, which tends to oxidize over time.
Extra Tip: If you want to prepare them in advance, you can boil the eggs and prepare the cream the day before, storing them separately, and fill the eggs just a couple of hours before serving.
Extra Tip: If you want to prepare them in advance, you can boil the eggs and prepare the cream the day before, storing them separately, and fill the eggs just a couple of hours before serving.
Basil: To prevent the basil from turning dark, try not to blend it too much or, if you have time, lightly pound it in a mortar before adding it to the ricotta.
Ricotta: If the ricotta is too watery, let it drain in a sieve for about half an hour before using it. This will ensure a nice firm filling that holds the shape of the piping bag.
Garlic: My grandpa always added it, but if you prefer a milder taste, you can just rub the garlic clove on the sides of the mixer bowl or omit it altogether.
Garlic: My grandpa always added it, but if you prefer a milder taste, you can just rub the garlic clove on the sides of the mixer bowl or omit it altogether.
Delicious Variations
Crunchy Note: You can set aside some whole pine nuts, lightly toast them in a pan, and use them as a final decoration on top of each dollop of cream.
Sea Touch: If you want an even richer variation, add an anchovy fillet in oil to the mixture before blending: it will give an incredible burst of savoriness that pairs wonderfully with the basil.
Lactose-Free: You can replace cow’s milk ricotta with lactose-free ricotta or a plant-based spreadable cheese to make the recipe suitable for everyone.
Other Recipes
🖥If you want to see other types of recipes you can return to HOME
📲If you don’t want to miss any recipes you can follow me on my Facebook Page, just activate notifications and you’ll see how many new recipes every day.
Frequently Asked Questions (FAQ)
Can I make the ricotta cream the day before?
Definitely! You can prepare the filling in advance and store it in the refrigerator inside an airtight container or directly in the well-sealed piping bag. However, I recommend filling the eggs only a few hours before serving, so the egg white stays shiny and the cream very fresh.
What can I use instead of pine nuts?
If you don’t have pine nuts on hand, you can replace them with walnut kernels or blanched almonds. The flavor will change slightly, but you’ll keep that nutty note that pairs perfectly with basil and ricotta.
The eggs cracked while peeling, what should I do?
Don’t worry! If the white cracks, you can chop everything (whites and yolks), mix them with the ricotta and basil cream, and serve the mixture as a delicious spreadable mousse on toasted bread or inside small savory puffs.
How long should eggs boil to avoid the green ring around the yolk?
To have a bright yellow yolk perfect for this cream, follow my advice: 8 minutes exactly from boiling and then immediately into ice water. This will stop the cooking and prevent that unsightly gray-green ring.