Rustic olive bread loaves. There’s something magical about the smell of freshly baked bread filling the kitchen, but when you add the pungent and savory aroma of olives, the wait becomes irresistible.
These loaves strike the perfect balance between a crunchy crust and a soft, flavorful heart.
Whether for a spontaneous aperitif with friends or to accompany a rustic dinner, one thing is certain: they will disappear in no time.
Simple to make yet impressive, they are the ideal solution for those who love homemade bread without too many complications.
In this recipe, I reveal my tricks for achieving perfect bubbles and that Mediterranean taste that feels like home.
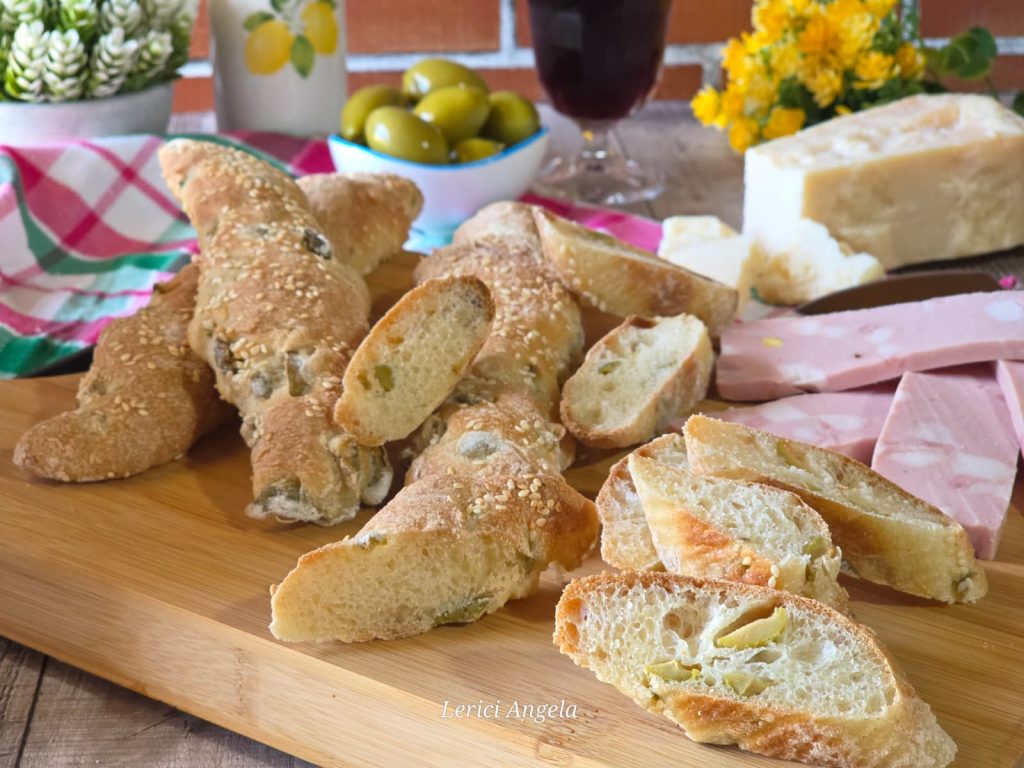
Homemade olive loaves: crunchy on the outside, soft inside, and full of flavor.
A versatile recipe, perfect to stuff or enjoy on its own, which will win you over at the first bite. Ready to get your hands dirty with flour?”
There’s no better way to honor these loaves than serving them warm.
You can choose the traditional oven baking or the modern air fryer, which makes the loaves beautifully crispy.
I chose to accompany them with a generous platter of quality mortadella, some pieces of aged cheese, and, of course, a good glass of red wine.
The savoriness of the olives and the aroma of sesame perfectly marry with the sweetness of the cold cuts, creating a contrast that is impossible to resist!
Now it’s your turn: challenge yourself with this recipe and rediscover the pleasure of making bread at home with calm and dedication.
Don’t be scared by the long times: the actual work is little! Most of the time is dedicated to slow rising, which is the true secret to obtaining such light, fragrant, and digestible loaves.”
Try to remake them and tag me in your creations, I can’t wait to see your loaves!
- Difficulty: Very easy
- Cost: Very economical
- Rest time: 6 Hours
- Preparation time: 30 Minutes
- Portions: 8 Pieces
- Cooking methods: Electric oven, Air frying
- Cuisine: Italian
- Seasonality: All seasons
Ingredients
Rustic Olive Bread Loaves
- 2 1/2 cups all-purpose flour (for lightness)
- 2 1/2 cups bread flour (essential for structure)
- 1 2/3 cups water (lukewarm at 70°F for perfect hydration)
- 1 tsp fresh yeast ((the secret to digestibility) or 1 tsp dry yeast)
- 1 tbsp sugar (to aid rising and browning)
- 1 tbsp fine salt
- 2 tbsp extra virgin olive oil (a generous drizzle)
- to taste olives (black or green, coarsely chopped)
- to taste type 2 flour
- to taste sesame seeds
Tools
- Bowl
- Baking Pan
- Parchment Paper
- Air Fryers
Steps
Rustic Olive Bread Loaves
The Starter: In a large bowl, dissolve the 6g of fresh yeast in the lukewarm water along with the sugar.
Sift the two flours (all-purpose and bread) and begin incorporating them into the liquids. When the dough starts to come together, add the salt and EVO oil.
Work until it is smooth and elastic.
Only at the end, add your olives cut “to taste.”Knead a few more minutes to distribute them well.

Cover and let rise until doubled (with little yeast it will take 4/6 hours, but the wait is worth it!).
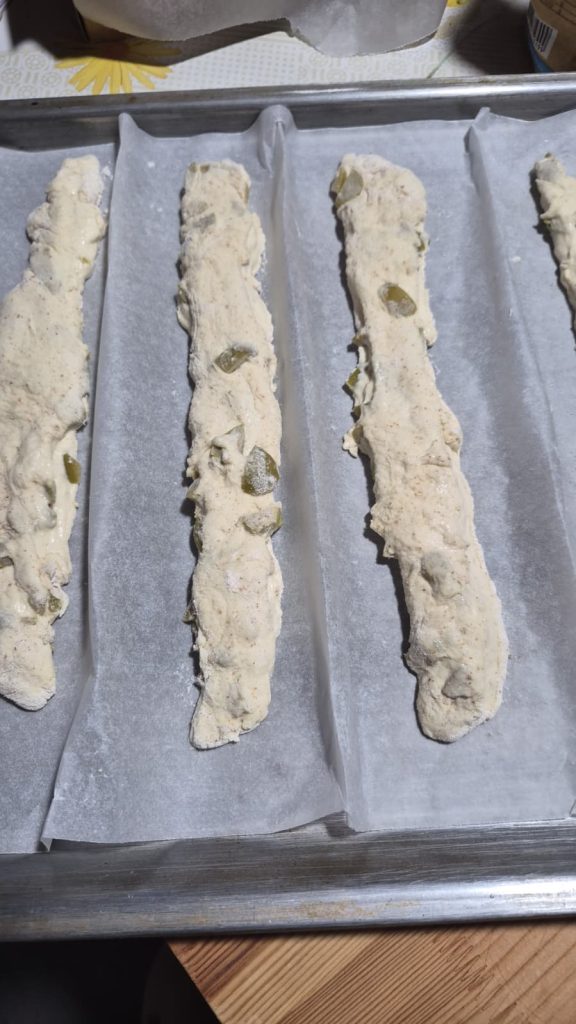
Shaping the Loaves: Here comes the fun part! Dust the work surface with type 2 flour.Divide the dough into several parts to create different loaves (I made several, ideal for sharing!).
Once you’ve formed your loaves and decorated with sesame, don’t rush to bake!Lay them on the baking tray and let them rest for at least an hour in a sheltered place (like the turned-off oven).
This second rising is crucial: it allows the gluten structure to relax and the dough to puff up again after the stress of shaping.
This rest will ensure you get an airy crumb and a crust that doesn’t crack irregularly during baking.”(Cover the loaves with a light cloth during this hour, to prevent the surface from drying too much before going into the oven).
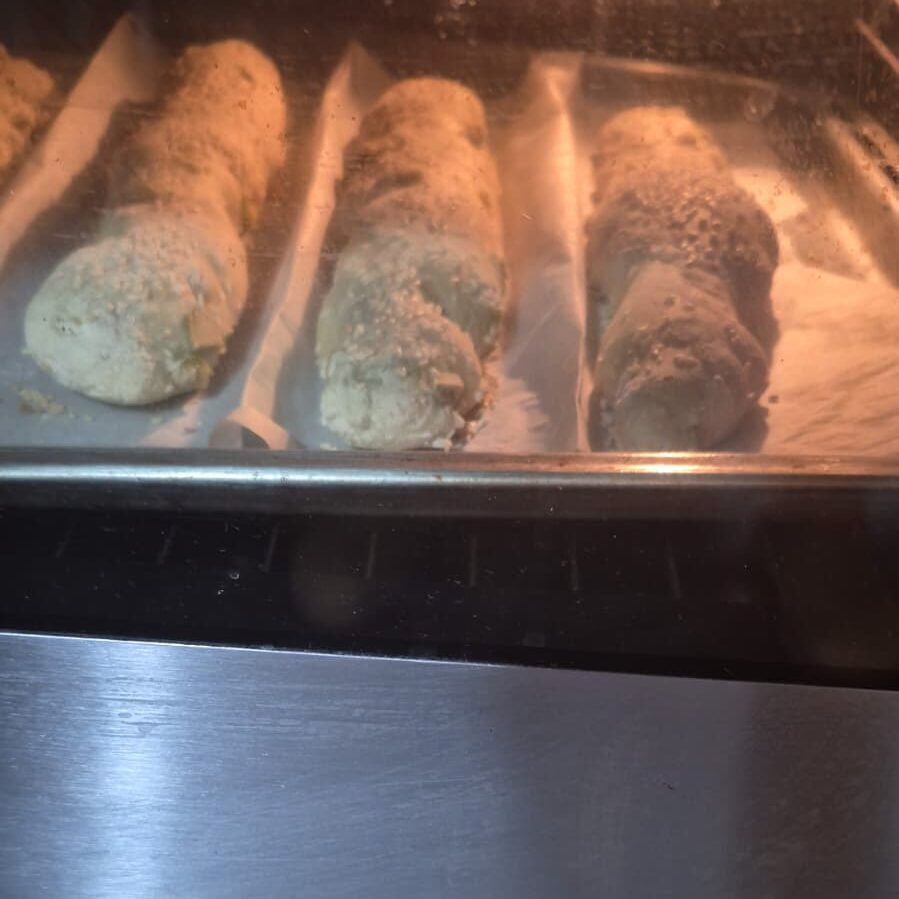
(Place the tray in the middle of the oven.)
Lay the loaves on a tray and bake at 430°F for about 20-25 minutes, until they are well browned and sound “hollow” when tapped on the bottom.

Air Fryer Cooking
The air fryer is a great alternative to the traditional oven, especially if you’ve made small-sized loaves or single-serving “rolls.”
Make sure the loaves aren’t too tall (maximum 1.5-2 inches) to avoid them getting too close to the upper heating element.
Cook at 350°F or 375°F. Do not use the 430°F of the classic oven because the heat is too direct.
About 15-18 minutes. Check the browning halfway through: if they brown too fast, lower to 340°F.
The trick for the bottom: To cook the base well too, 5 minutes before the end, turn the loaves upside down. This will ensure uniform crispness on all sides.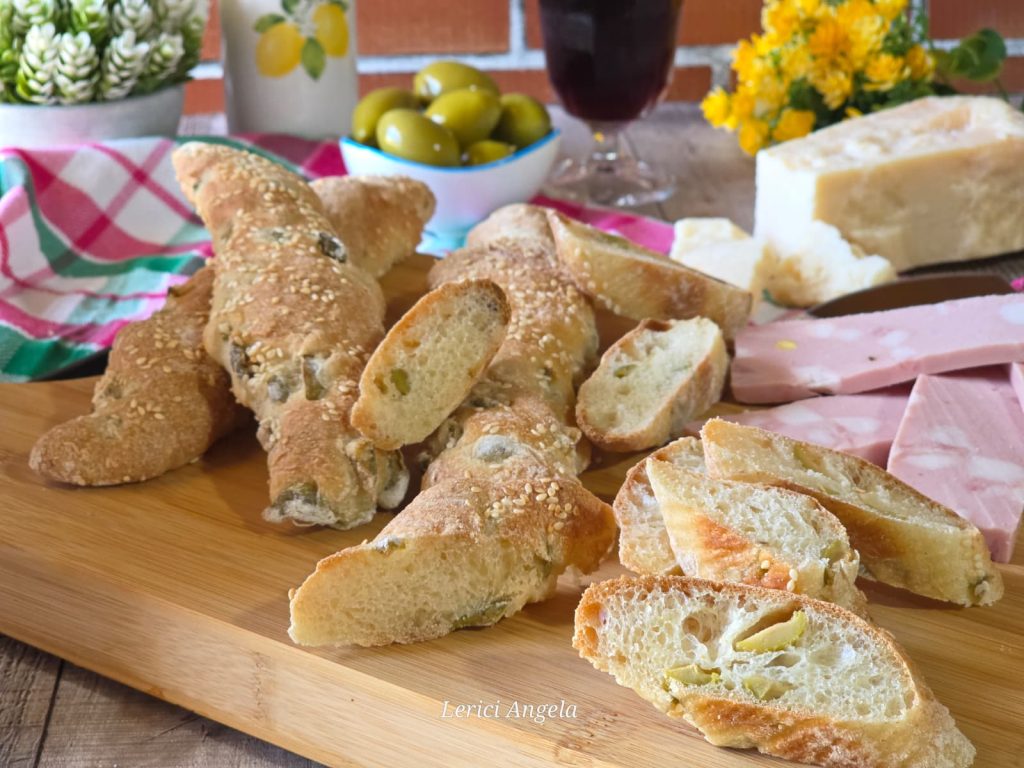
Cooking times are indicative. As each oven and air fryer has its specific timing and power, check visually
Delicious just served.
Enjoy your meal.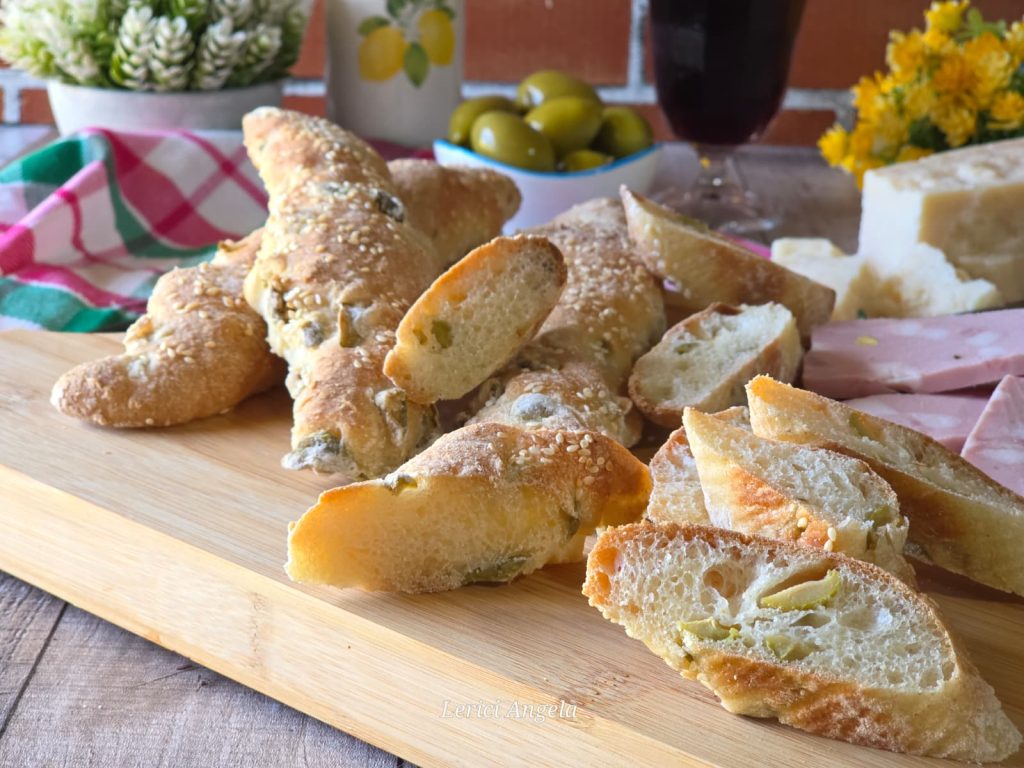
Tips
With these quantities, you’ll obtain about a kilogram of fragrant bread. I chose to divide it into smaller loaves to have more crust and ease in serving them, but you can also decide to make two larger loaves by slightly increasing the baking times.
For a thin and crunchy crust like in the oven, place a small pot of water at the bottom of the oven during the first 10 minutes of baking. The steam will help the loaves rise better without drying out immediately.
A common mistake is using olives directly from the brine. I recommend rinsing them and drying them well with paper towels before chopping them; this way, they won’t add excess moisture to the dough, risking ruining it.
For perfect rising… Use water at about 70-77°F (lukewarm, not hot!). If the water is too hot, it risks “killing” your precious 6 grams of fresh yeast.
Storage
These loaves are best freshly made, but if leftovers remain, they keep well for 2 days in a paper bag.
One more tip?
Slice them and freeze them: just a few minutes in the oven or toaster will bring back all the freshness of the bread.
Delicious Variation:
If you want an even more intense flavor, suggest adding a pinch of dry oregano or chopped sun-dried tomatoes to the dough along with the olives.
A Truly Excellent Extra Tip
If you want to make your bread even richer, you can add 80-100 g of walnut pieces coarsely broken by hand.
Adding…
“If you decide to add walnuts, I recommend lightly toasting them in a pan for a couple of minutes before inserting them into the dough: this step will release the walnut’s essential oils, making the bread aroma irresistible already during baking.”
Always add the walnuts as the last step.
Tips for Other Recipes
If you liked this recipe, click on many stars, thank you very much.
I invite you to become a fan of my Facebook page to always stay updated on my new recipes and stay in touch with me.
I await you in my group: https://www.facebook.com/groups/488624465780860
or on my page: https://www.facebook.com/gustoamoreefantasie
Return to Home page
