Grandma’s puff pastry recipe to make it at home, without mistakes! Here is the step-by-step recipe for homemade puff pastry, ideal for obtaining savory pies and all kinds of sweet puff pastry treats, such as Chausson aux pommes, Honey and walnut braids, Apple and jam puff pastries and Apple strudel with puff pastry, and it’s the perfect preparation for many quick puff pastry appetizers and delicious homemade breakfasts.
When I tried to make puff pastry at home for the first time many years ago, the results were really disappointing: a heavy, greasy product came out after all the effort. Now that many loaves of flour and sticks of butter have gone under the bridge, I believe that with a little care and attention, puff pastry is one of the simplest basic preparations to make.
Before getting your hands in the dough, I want to give you some information about the product we are going to prepare.
Did you know that puff pastry is also a leavened dough? Yes—puff pastry rises because it undergoes mechanical leavening, since the steam trapped between the layers made impermeable by the fat causes the characteristic laminated layers to form. The more folds you give the dough, the more uniform and controlled the rise; conversely, fewer folds will produce a very irregular rise. Finally, the oven should be around 392°F so that this reaction can occur at its best.
Other types of leavening found in pastry are natural leavening, obtained through gases produced by fermentation; chemical leavening, from the reaction of baking powder; and physical leavening, obtained by incorporating air into the batter, as in sponge cake.
After these brief explanations, if you, like me, want to try creating homemade puff pastry, follow me and I will explain step by step how to do it.
I only ask that you strictly follow the resting times and use the right flour: a medium-strong flour that can develop gluten well but not too much. A common type 0 flour could be suitable. Also use good butter, perhaps Bavarian, but make sure the mixture does not get too warm. During the folds respect the edges of the dough, trying to keep very regular and matching shapes. Finally, avoid making puff pastry during hot months; it would be impossible to get good results. That said, we are ready to start. Before rolling up our sleeves, remember that if you want to stay updated on my recipes, you can follow my Facebook page (here) and my Instagram profile (here).
Take a look:
- Difficulty: Medium
- Cost: Economical
- Preparation time: 2 Minutes
- Portions: about 1.54 lb (about 25 oz)
- Cooking methods: No-bake
- Cuisine: Italian
- Seasonality: All seasons
Ingredients
- 1 1/3 cups Butter (of good quality, such as Bavarian (about 300 g / 10.6 oz))
- 2 2/5 cups Type 0 flour (11–12% protein, medium strength (W); about 300 g)
- 6 tbsp Cold water (cold (about 90 g / 3 fl oz))
- 2/3 tsp Salt
Tools
- Rolling pin
- Dough sheeter for pastry
- Bowl
- Parchment paper
Preparation of Homemade Puff Pastry
For the butter block:
quickly work the cold butter together with 100 g of flour taken from the total. Form a square block about 4 3/4 x 4 3/4 in (use about 3/4 cup + 1 tbsp flour for the block). Dust it with flour and let it rest for 35 minutes at room temperature if the air is cool and the block is not warm; otherwise place it in the refrigerator.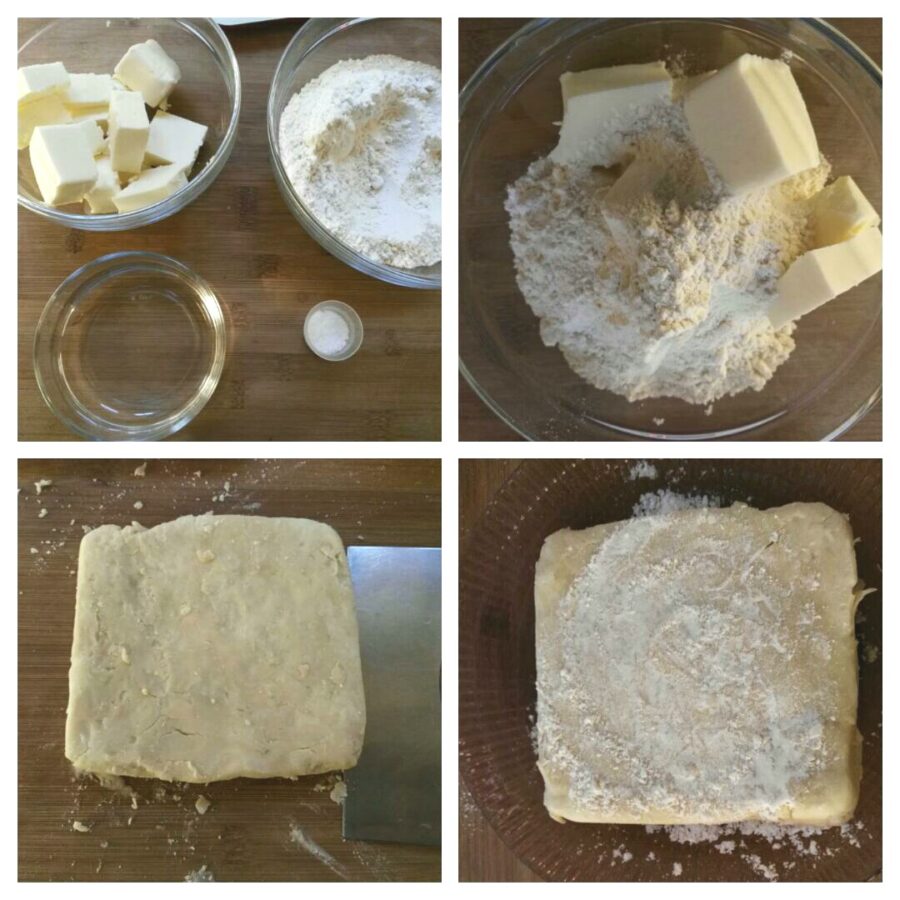
For the dough (pastello):
dissolve the salt in the water, pour the water over the flour and mix without overworking it; you do not need a highly developed dough—indeed it is better to avoid that. Let the dough rest for 30 minutes at room temperature; the gluten will relax and it will be easier to enclose the butter.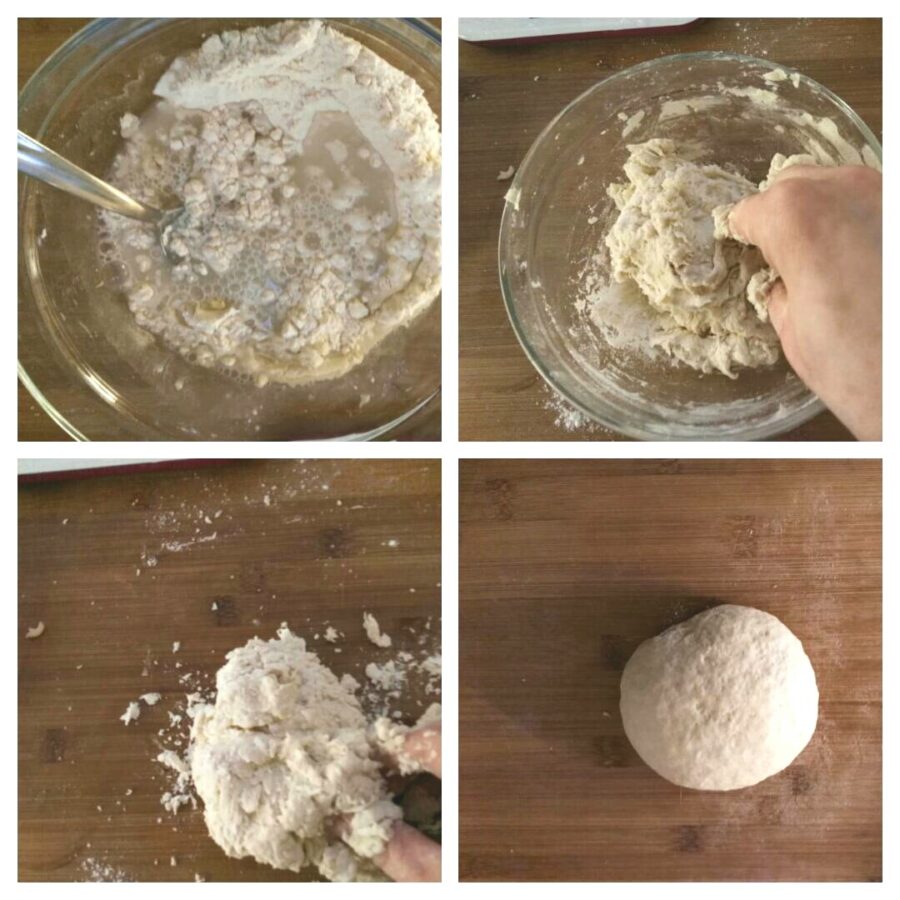
Roll the dough into a square large enough to fully encase the butter block. Place the butter block in the center of the dough and fold the corners of the dough over the block. You have “encased the butter.”
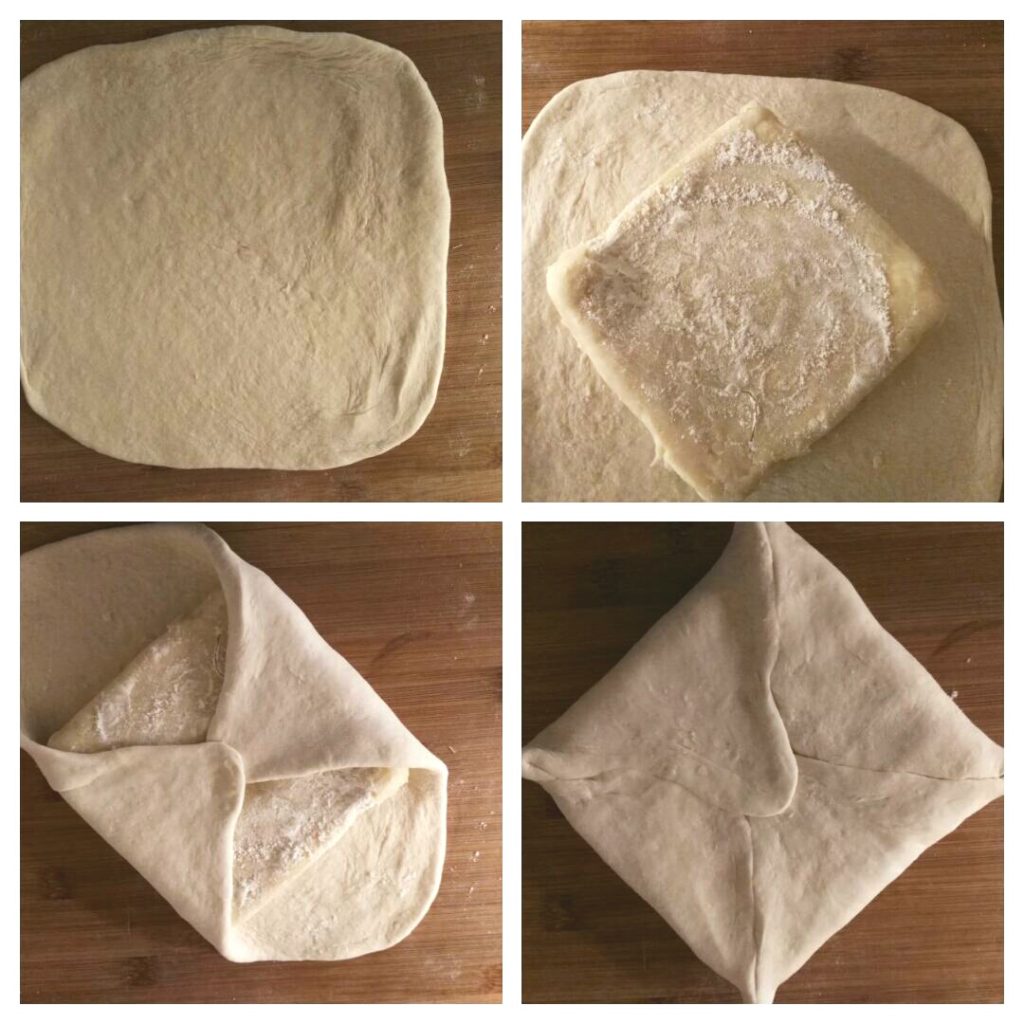
Press with your hands and then gently flatten with the rolling pin until you obtain a long rectangle just under 1 cm thick (about 3/8 in).
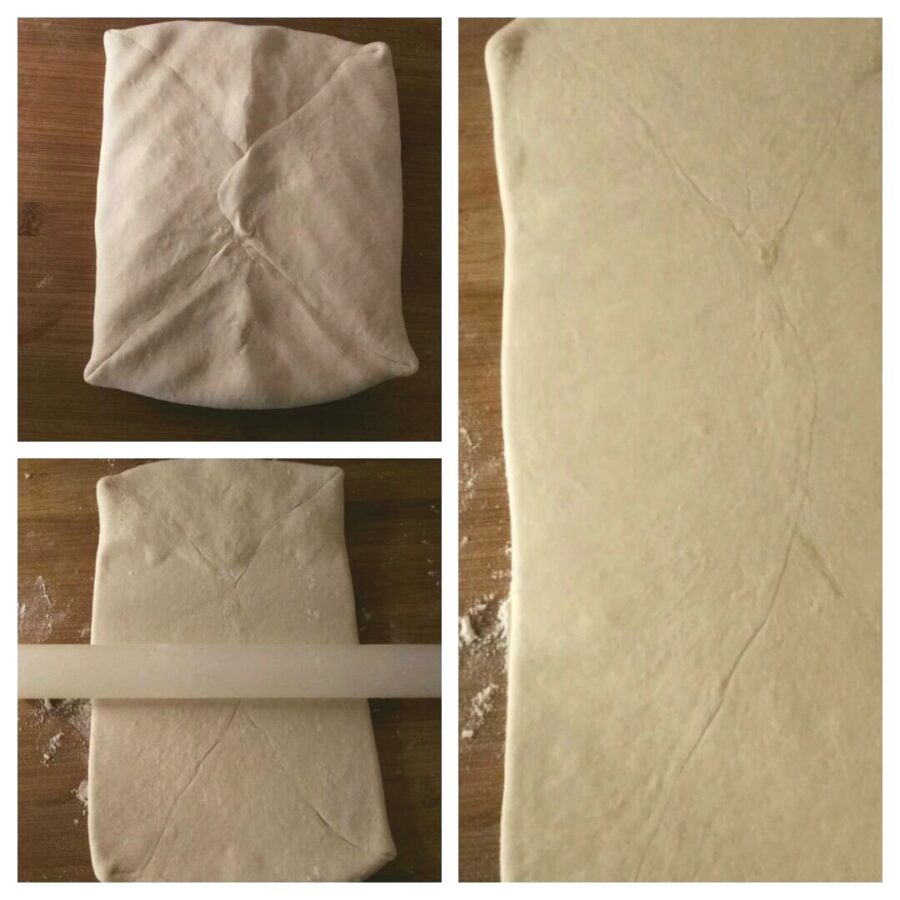
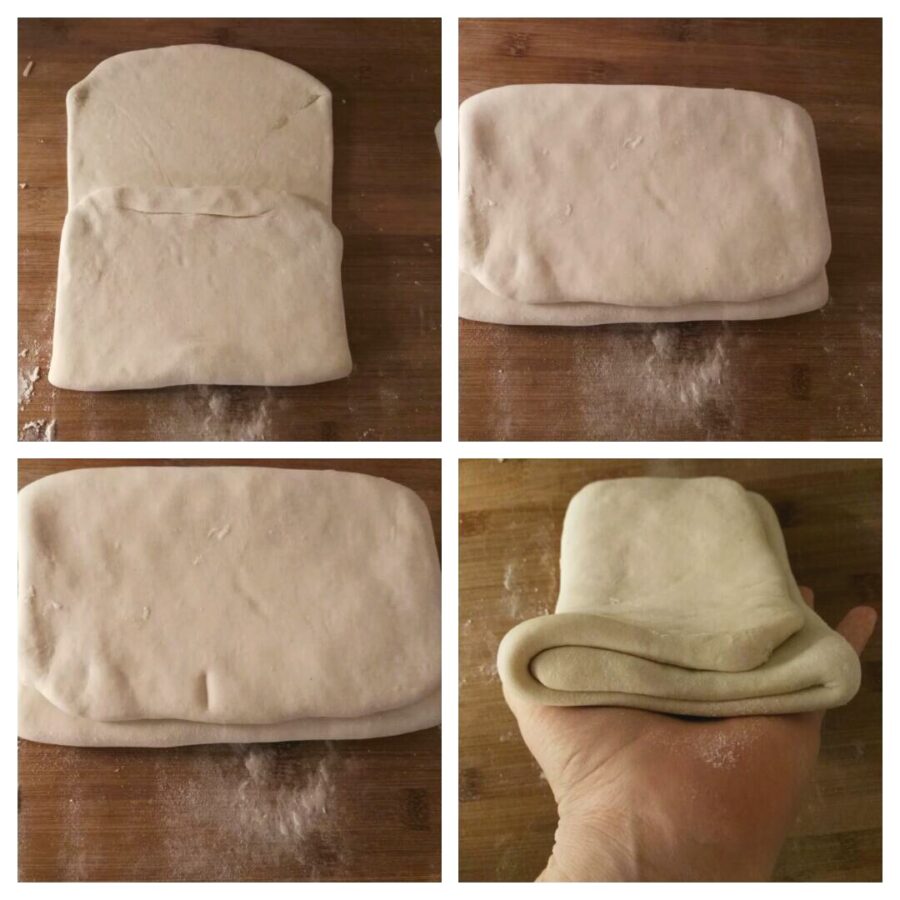
Proceed by making a series of “wallet” folds known as single turns (series of three). Turn the block with the long side facing you and the open side to the left or right—remember that the direction you choose will be the working direction of the dough. Make a small mark on the block to remind you that this is the first series of folds. Put it in the coldest part of the refrigerator for 30 minutes, covered with plastic wrap—the dough must not dry out!
Take the block out, keeping the open side to the left or right according to your earlier choice, and the short side towards you. Roll the dough again lengthwise. Mark the center of the sheet with your finger, fold the lower short side so that it comes slightly past the mark you made, then fold the other short side so it fits perfectly. Fold in two: you have completed a double turn (series of four). Make two marks in the dough to remind you that this is the second turn and refrigerate, covered with plastic wrap, for another 30 minutes.
After the time has passed, repeat a series of single turns (series of three), refrigerate another 30 minutes, then perform another double turn (series of four).
Once the series of turns are finished, you will have formed the puff pastry layers. During the whole process, remember to always use a little flour to prevent the dough from sticking or tearing: the layers must remain intact for good lamination and rise.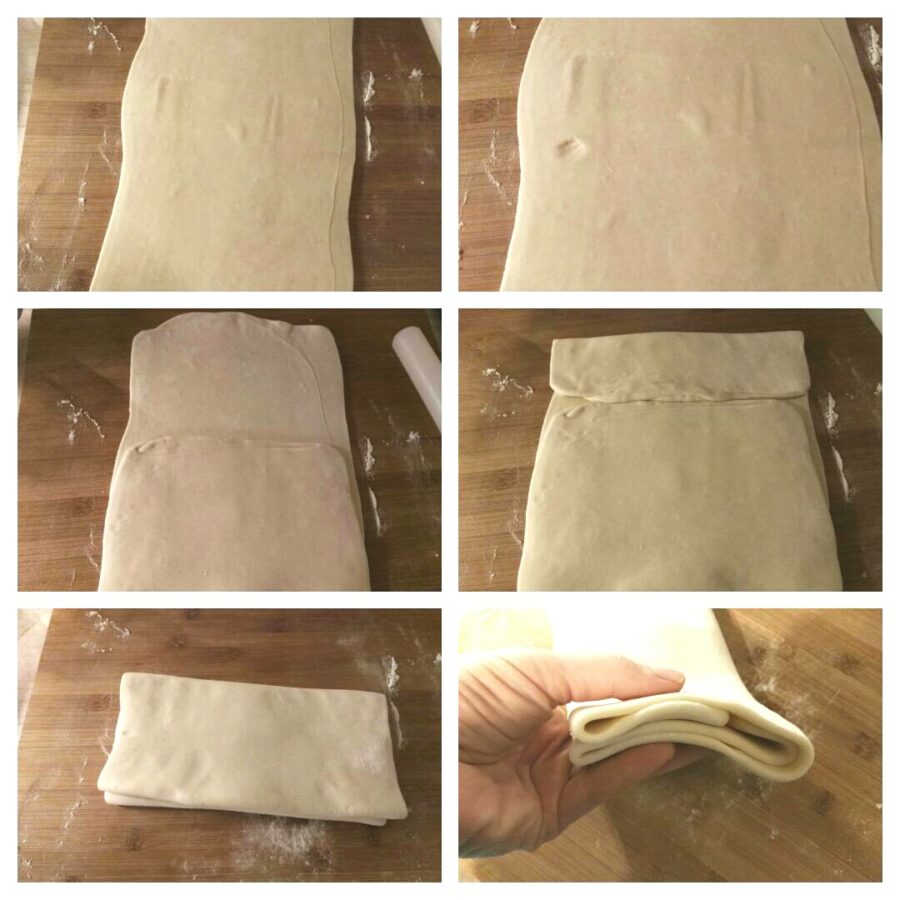
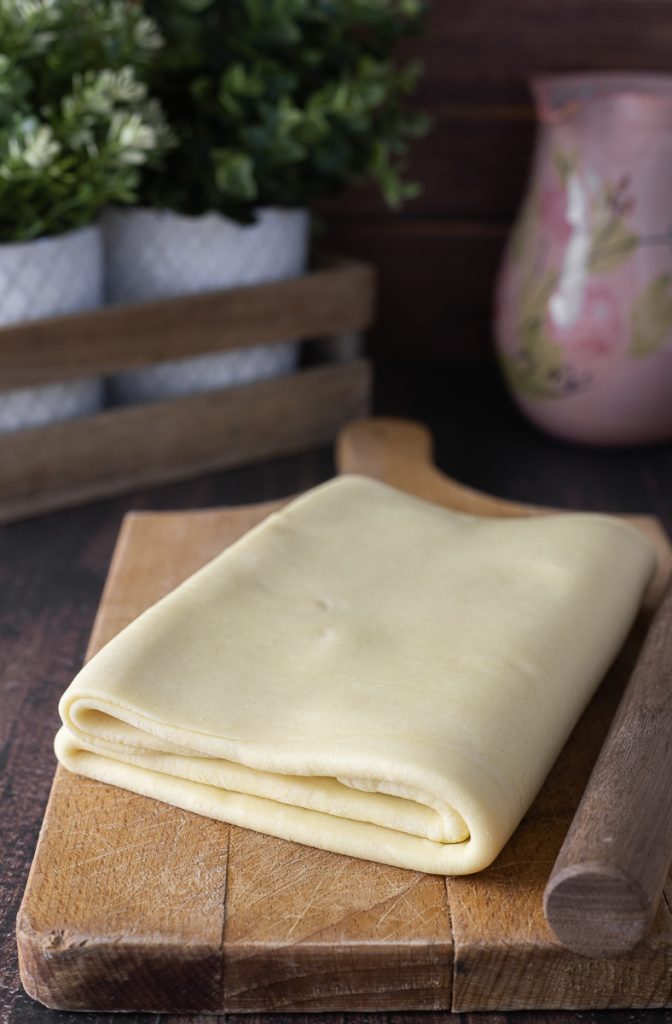
When you’ve finished the folds, place the block on a sheet of parchment paper and let it rest in the refrigerator for at least one hour before using. It can remain in the fridge up to three days or, alternatively, portion and freeze it until needed.
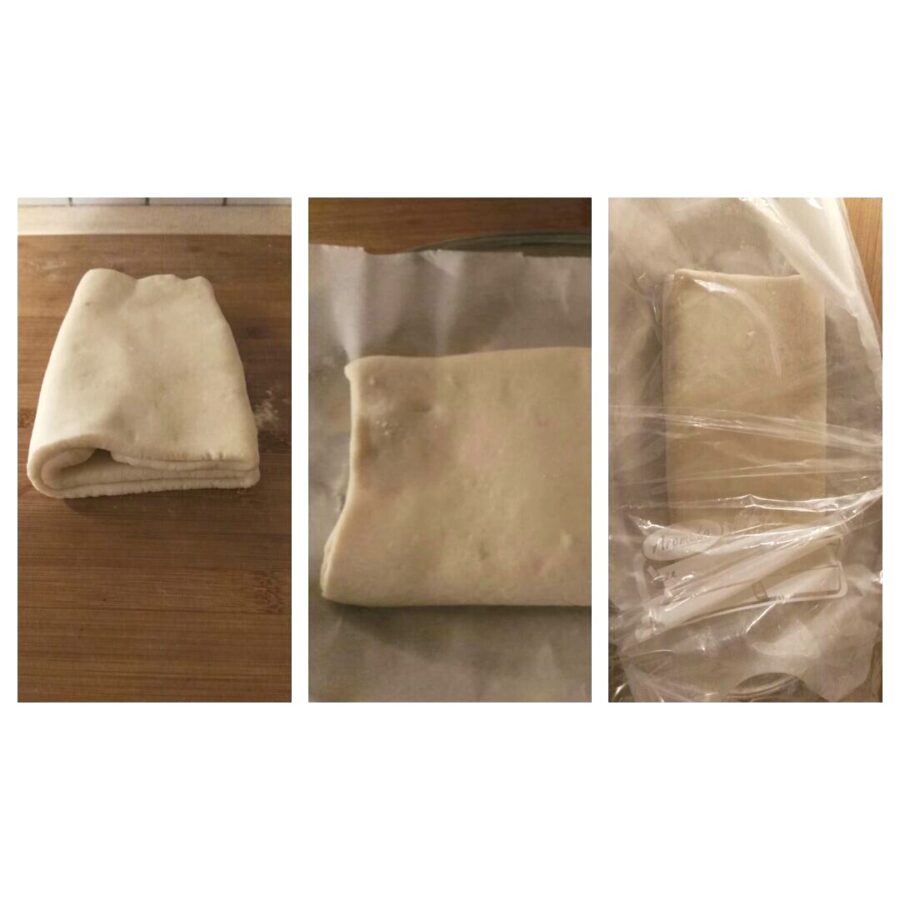
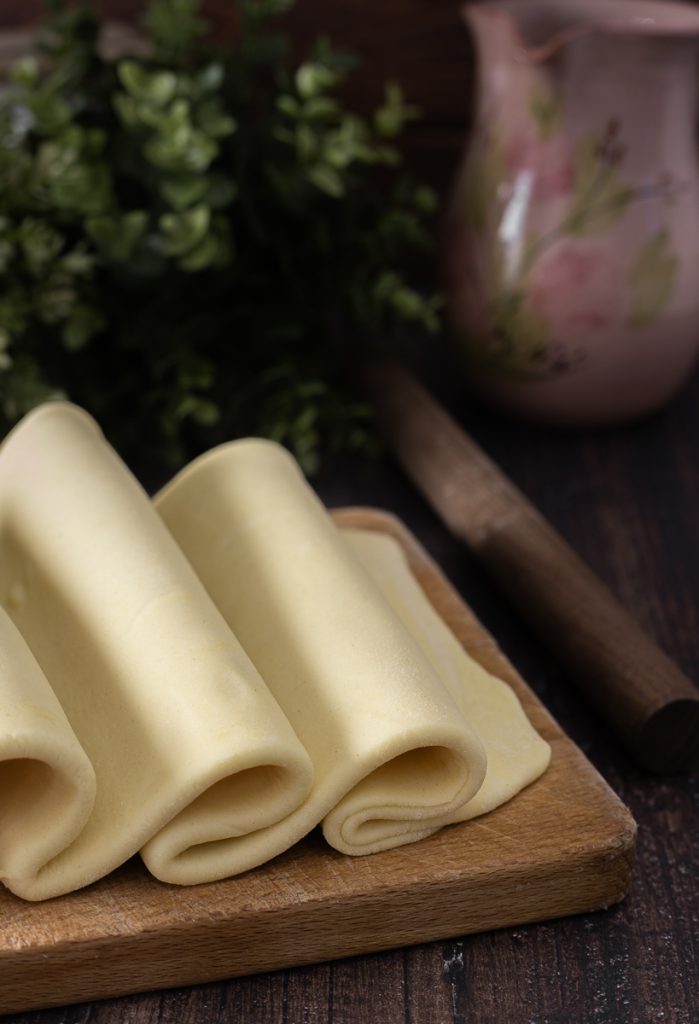
The photo shows a cross-section of the pastry; you can see the distinct layers.
You can use your puff pastry as you would a store-bought sheet and make both sweet and savory preparations.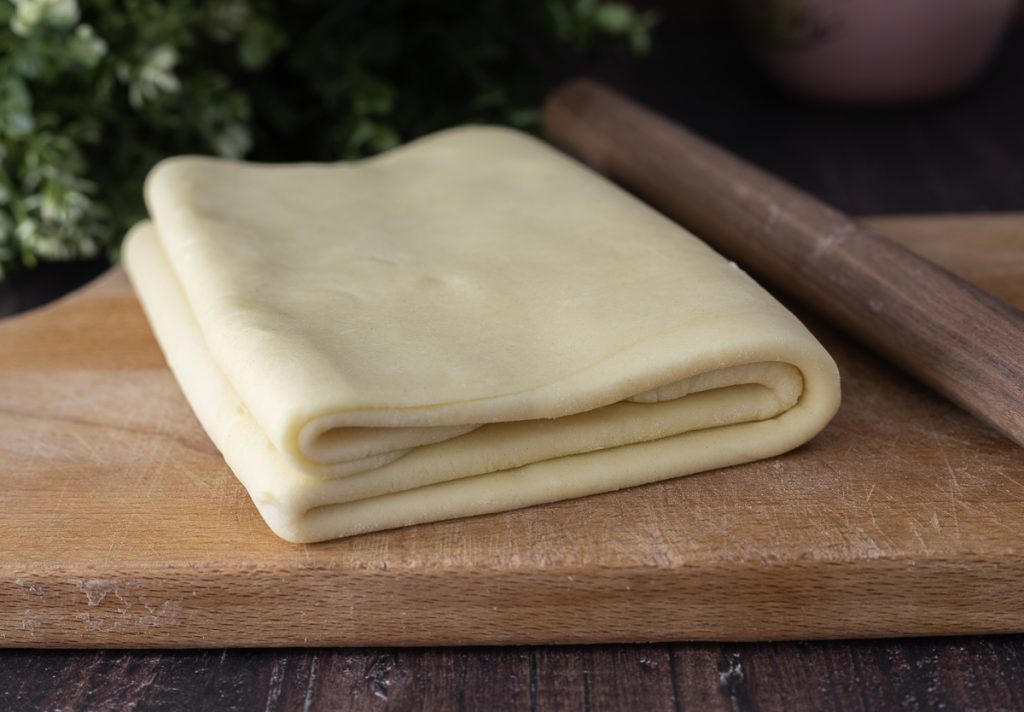
Notes
Homemade puff pastry made with real butter rises more than industrial pastry, has a more intense aroma and a fuller flavor. It keeps in the refrigerator for one week, wrapped in plastic wrap.
If you want to stay updated on my recipes, follow me on:
pinterest; X, you tube and tiktok.
From here, you can return to the HOME and discover new recipes!