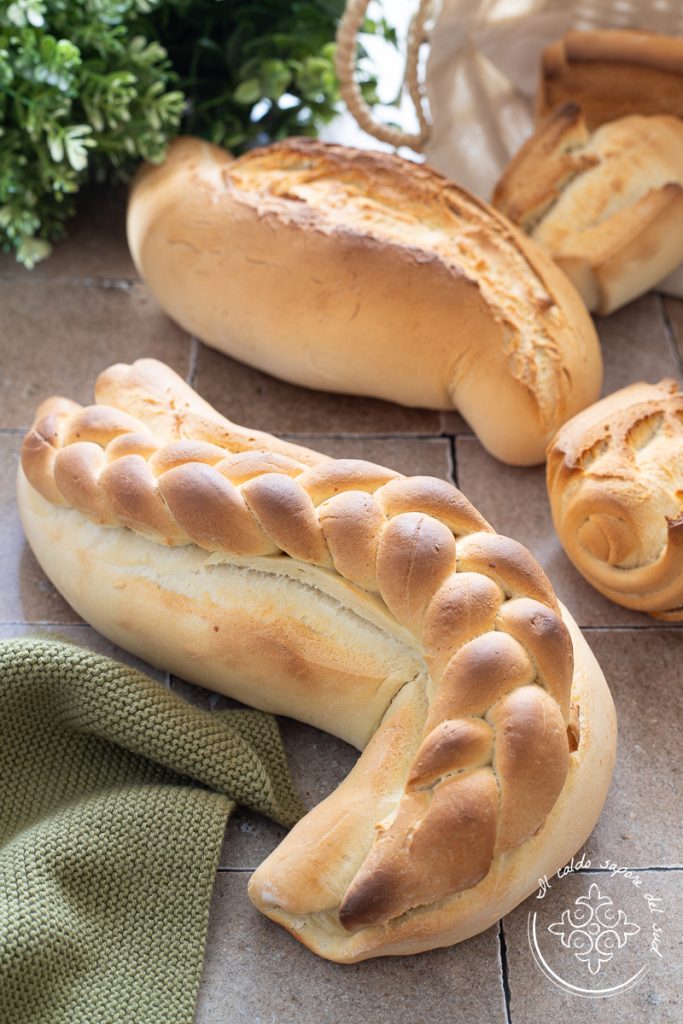
Semolina hard-dough bread with sourdough starter, one of the homemade bread recipes that will make you fall in love!
A good hard-dough bread made with sourdough starter — what could be better? My husband loves it and I make it sometimes.
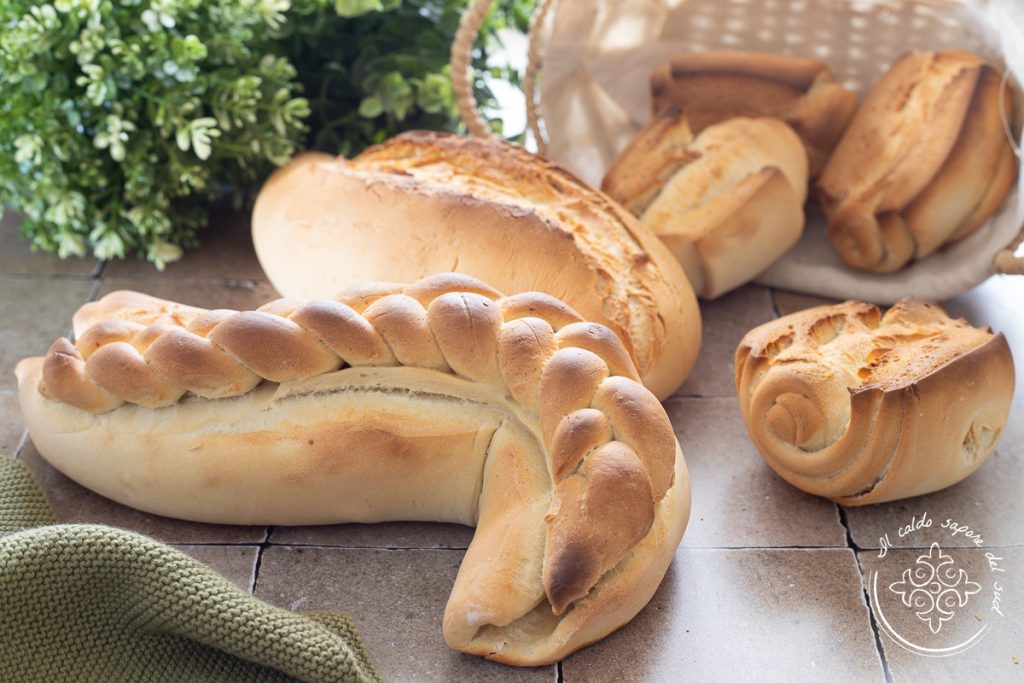
Semolina hard-dough bread is typical of eastern Sicily and it used to be the bread eaten by sailors; working the dough with little water creates a hard, compact crust that prevents moisture loss, so the bread stays good for longer.
In Catania we used to make a hard-dough bread that often had a crown shape or a form similar to “biove”. This bread, still found in some bakeries, is called “panuzzo” or “pani de marinara”. Throughout the peninsula there are variations of hard-dough bread and each area has its preferred shapes.
Today I want to make it with you — strictly using sourdough starter — and show you how to shape a few forms: the “S” shaped loaf, which is somewhat like the hard-dough bread of Modica and Syracuse, and the other loaves that resemble biove, a very common shape also in the Catania area.
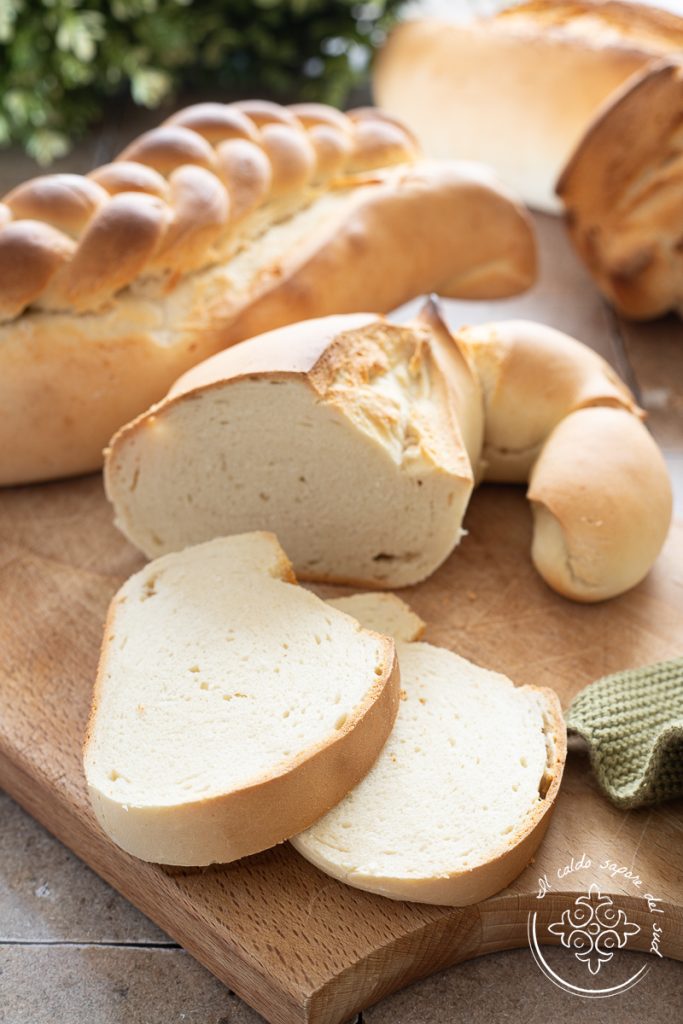
The dough is defined as hard-dough because it is very low-hydration; the crumb is very tight and the crust smooth, thick and crunchy. Working it is demanding: a dough made with about 40% water will indeed be firm and compact. In the past, when bread was made in large quantities to be used throughout the week, it was worked with a BRIULA, a flat wooden tool on which the dough was beaten; a pivoting stick acted as a lever to press and smooth the dough. The sourdough starter was refreshed the evening before mixing, many women worked the dough together and making bread was a moment of conviviality and joy.
But now it’s time to get into the kitchen and start working — are you ready? Let’s go, but before we roll up our sleeves I remind you that if you want to stay updated on all my recipes you can follow my Facebook page (here) and my Instagram profile (here) and that on my blog you will find many Sicilian and traditional grandmother recipes that might interest you!
Also check out:
- Difficulty: Easy
- Cost: Inexpensive
- Preparation time: 4 Hours
- Cooking time: 25 Minutes
- Portions: 6 small rolls
- Cuisine: Italian
Ingredients
- 8 cups semolina flour (Re-milled durum wheat (about 1 kg / roughly 2 lb 3 oz))
- 5.3 oz sourdough starter (Freshly refreshed and fully active (about 150 g))
- 4 tsp salt ((about 24 g))
- 1 tsp malt (or honey)
- 2.5 tbsp extra virgin olive oil ((about 35 g))
- 1 2/3 cups water ((about 400 g / 400 ml))
Preparation of Sicilian hard-dough bread and more
If you plan to bake the bread in the morning, refresh your sourdough starter the evening before. If it is very warm, for example in summer, after refreshing keep it at room temperature for 90 minutes, then refrigerate it and the next morning let it acclimate for at least about fifteen minutes before using.
Pour the flour into a bowl and add almost all the water. Mix roughly and let the mixture rest for 15 minutes. After that time, add the torn sourdough starter, the olive oil, the malt, the salt with the remaining water and begin working a dough that from the start will seem quite stubborn because it is dry.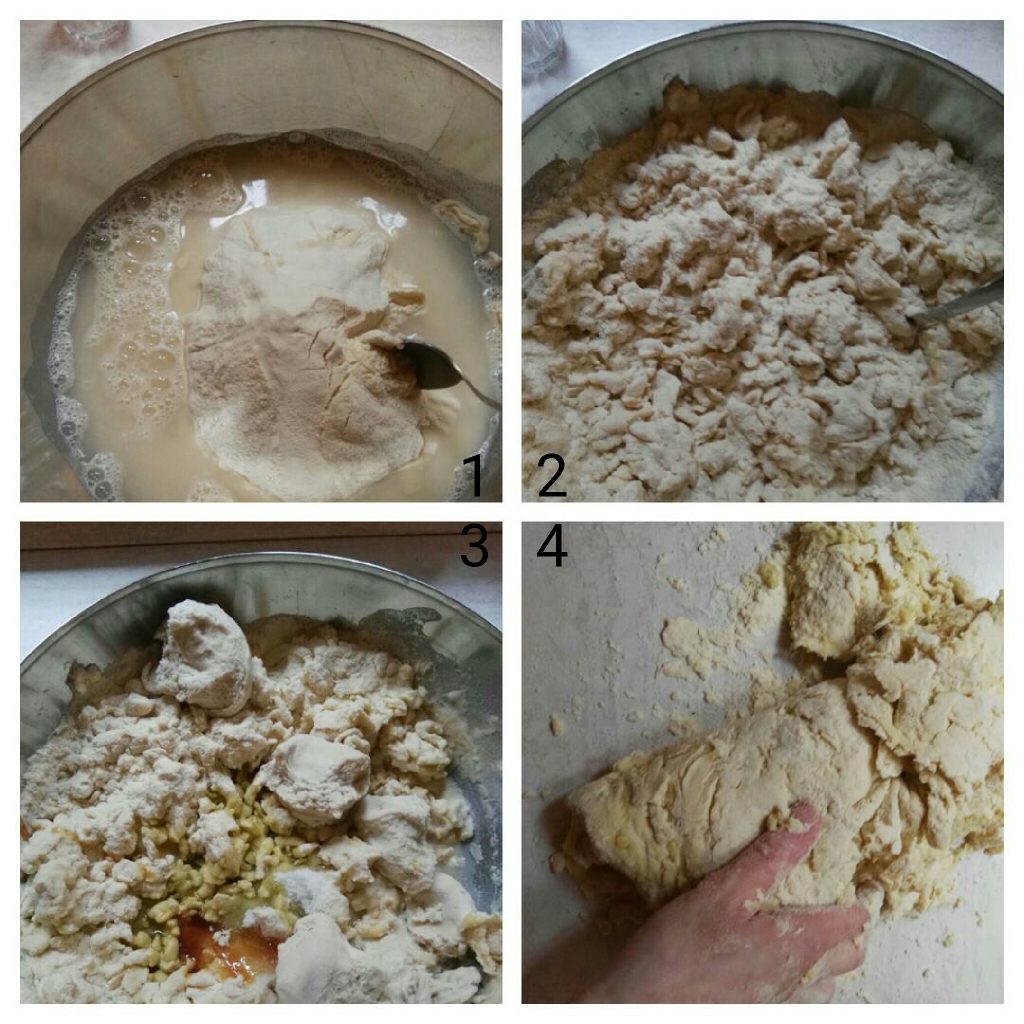
Work the dough; little by little it will become smooth and homogeneous. If you encounter difficulty, don’t give up and do not add water; at most let the dough rest for 5 minutes to relax the gluten and then resume. If that is still not enough, add a maximum of 50 g (about 3 1/2 tbsp) of water, but no more. If you prefer, you can also mix using a planetary mixer or dough mixer.
Once you have the dough, divide it: I made five rolls of 250 g each and with the remaining dough I made a larger loaf. Try to shape the pieces of dough into cylinders.
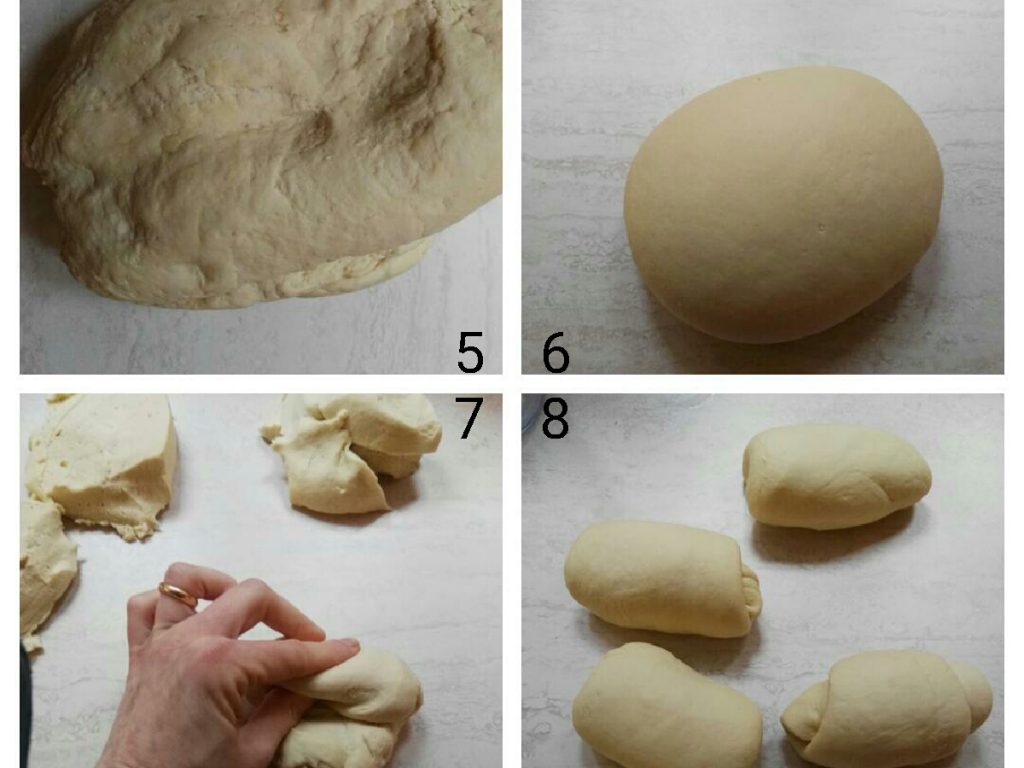
Roll out the small cylinders lengthwise, aiming for a strip about 12 cm (about 4 3/4 in) wide and 0.5 cm (about 3/16 in / 0.2 in) thick. Roll the strip up on itself,
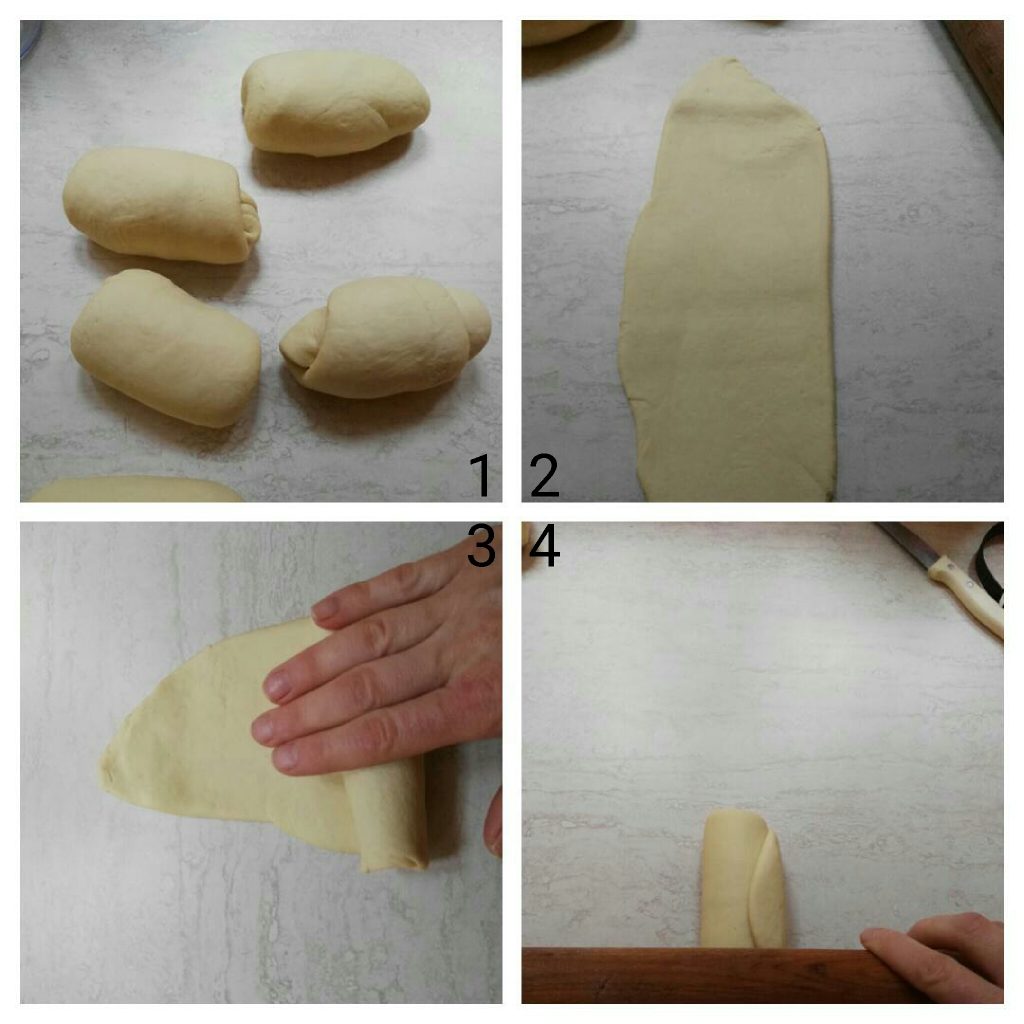
then roll it out lengthwise again to get a strip like the previous one and roll it up once more. You have now formed the loaf.

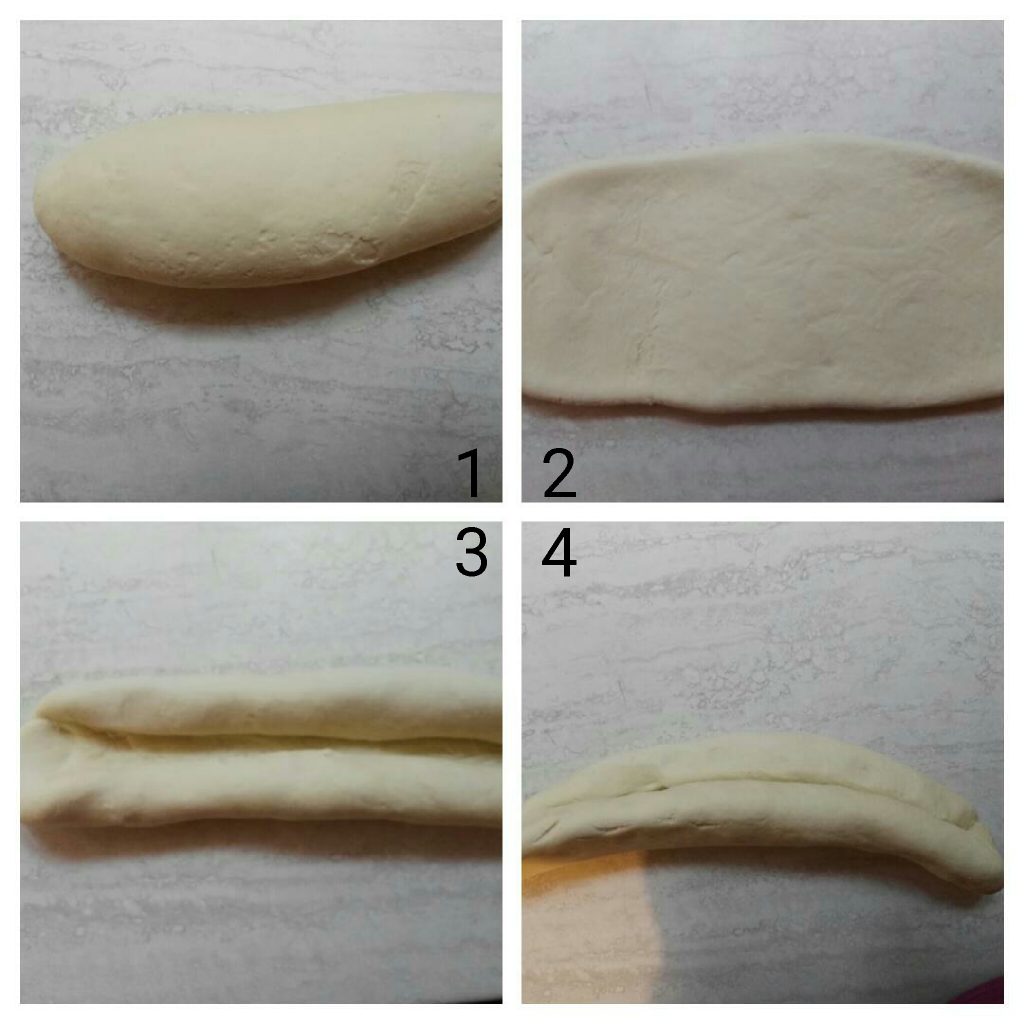
To form the longer loaf, set aside about 50–70 g of dough, roll out the larger cylinder into an ovoid, fold the longer sides toward the center — first one side, then the other — slightly press the two rolled parts and shape into a half-moon, see photo step 4.
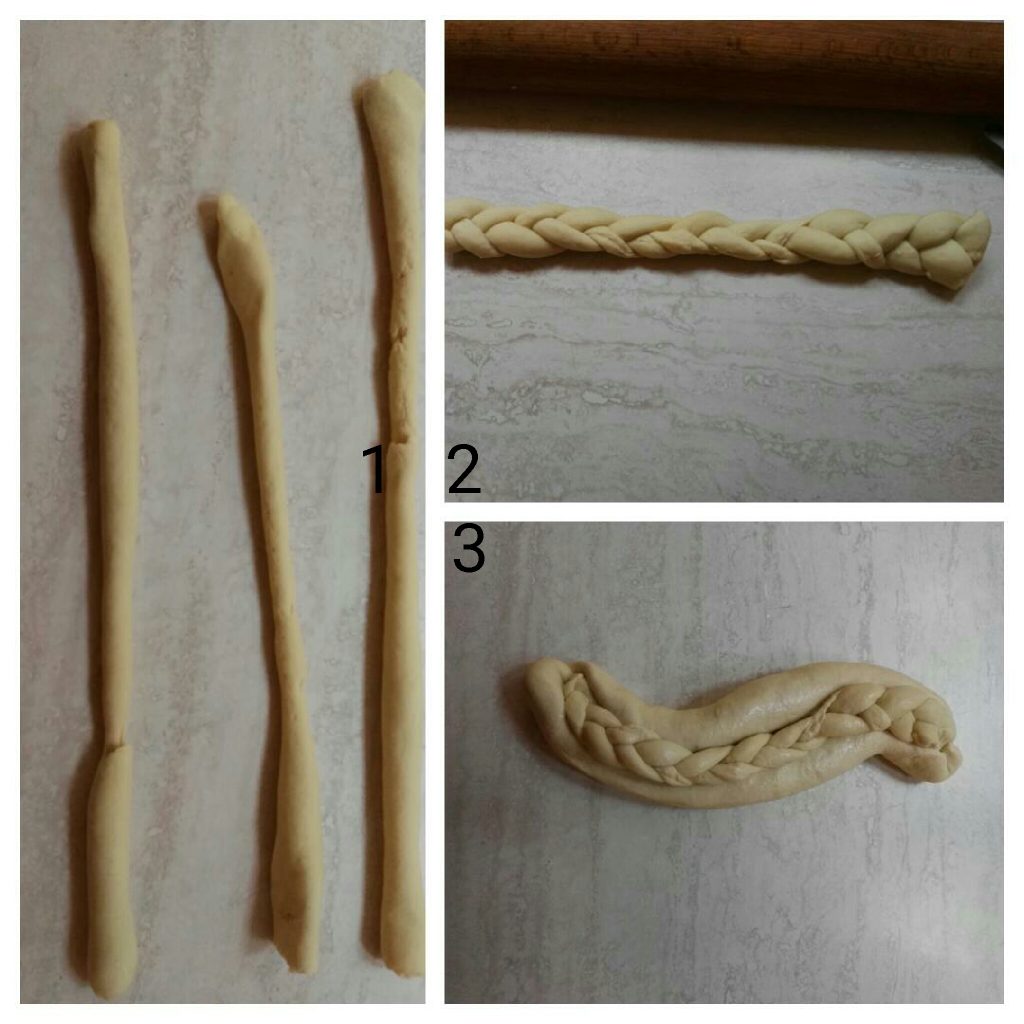
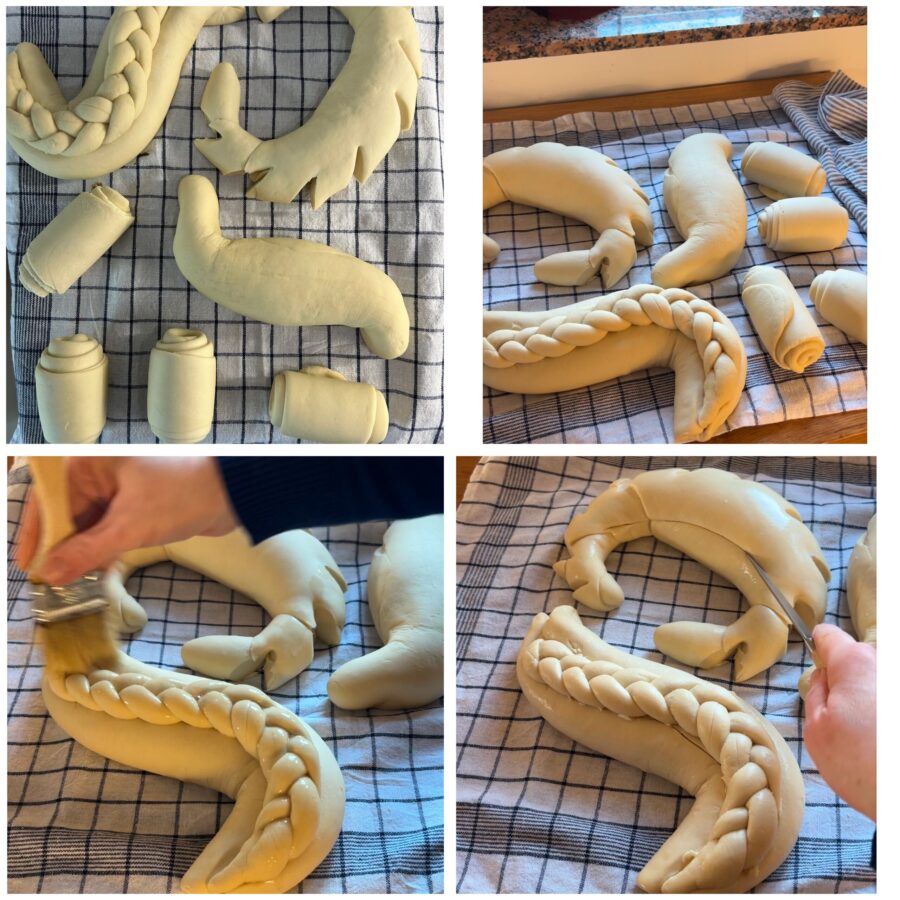
Create a dough braid, lightly moisten the loaf where it has the fold, lay the braid on it and shape it into an “S“. Proceed with the other shapes shown in the photos,
then let the bread proof until doubled. Kept warm in the oven with the light on, it will take about 6 to 8 hours — it all depends on the ambient temperature.
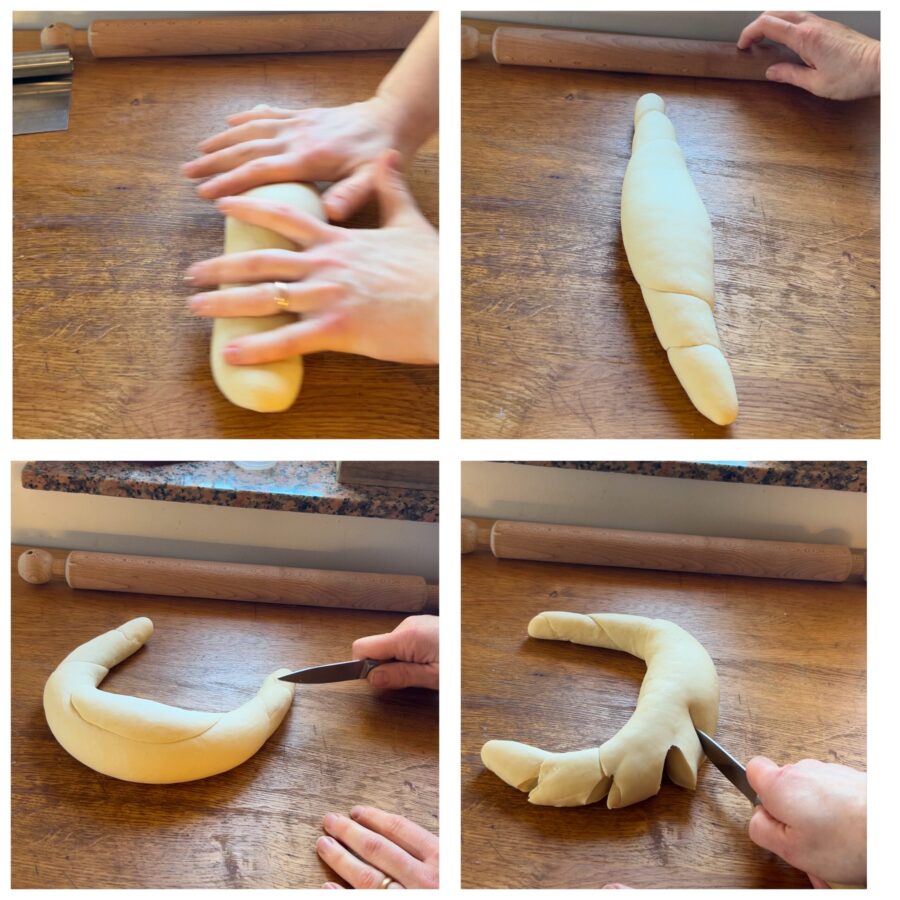
When proofing is complete, score the small rolls with a very precise and deep cut in the center. Score the longer loaf with cuts along the braid on both sides; in this case they do not need to be very deep because the bread will expand and open under the braid during baking. Brush or spray with water.
Bake at 428°F for the first 20 minutes, then reduce the temperature to 356°F for the next ten minutes. The bread is ready when it sounds hollow if you tap the bottom. For baking you can place the bread on a baking sheet lined with parchment paper, or place it on a preheated baking stone positioned on the second-to-last rack of the oven; in this case parchment paper is not necessary: if the stone is hot enough the bread will not stick.
Our hard-dough bread keeps well for up to 2–3 days, especially in winter if stored in a cotton bag, although it will gradually lose some of its crunch. In summer its shelf life is much shorter and it tends to dry out quickly unless stored in a sealed plastic food bag.
Proofing times are indicative: when working with sourdough starter there are no certainties and everything depends on external temperatures and the temperature at which you work. You will need to manage the proofing according to your conditions, independent of my indications. If you don’t have sourdough starter, mix 100 g flour with 60 g water and 5 g fresh brewer’s yeast. Let it ferment in the refrigerator overnight and then proceed as above, using this mixture in place of the starter. Proofing times will be faster and you will need to plan accordingly.
Notes
If you want to stay updated on my recipes, follow me also on:
Pinterest; X; YouTube and TikTok.
From here you can return to the HOME and discover new recipes!