Rustic seed bread made with whole Tumminia (timilia) flour, a semi-dark loaf with ancient Sicilian grains, re-milled semolina and sourdough starter — absolutely delicious. I love homemade bread, especially when made with sourdough starter. I adore kneading and wholegrain bread made from Sicily’s ancient wheats is one of my favorites. A few years ago I went on holiday to Germany and discovered my first dark bread there — I fell in love at first bite. Back in Sicily I tried to recreate it using our flours, and so I learned to make excellent loaves like this semi-whole loaf made with Tumminia (timilia) flour and re-milled semolina. A naturally leavened, high-hydration bread, fragrant, crunchy and delightful, which I bake in a pot using the fridge-oven technique. Want to try it? Let’s go to the kitchen. As always, if you want to stay updated on all my recipes, you can follow my Facebook page (here) and my Instagram profile (here).
Do you also love homemade bread? Check these out:
- Difficulty: Medium
- Cost: Very economical
- Rest time: 14 Hours
- Preparation time: 30 Minutes
- Portions: 20
- Cooking methods: Oven
- Cuisine: Italian
- Seasonality: All seasons
Ingredients to make Rustic Seed Bread
For this bread I used re-milled durum semolina and whole Tumminia (timilia) flour. If you can’t find timilia, substitute with Russello or Senatore Cappelli. You could also use only re-milled semolina; in any case, add the water little by little to find the right amount. I used a professional mixer, but you can use a stand mixer; kneading by hand is not impossible but a bit laborious — in that case you might reduce the amount of water used.
- 4 1/4 cups re-milled durum semolina (≈21 oz)
- 3 1/3 cups whole Tumminia (timilia) flour (≈14 oz)
- 4 1/2 tsp salt
- 3 3/4 cups water (≈900 ml)
- 2/3 cup sourdough starter
- 1 tsp malt (or honey)
- 2 1/8 cups mixed seeds (sunflower, sesame, flax, etc.)
Tools
- Stand Mixer
- Proofing Basket
- Pot
- Oven
- Bowl
- Plastic wrap
Steps to make Rustic Seed Bread
Use a strong, well-refreshed sourdough starter for this bread. Refresh it in the morning and begin preparing the dough in the late afternoon in summer and in the early afternoon in winter (working temperatures differ).
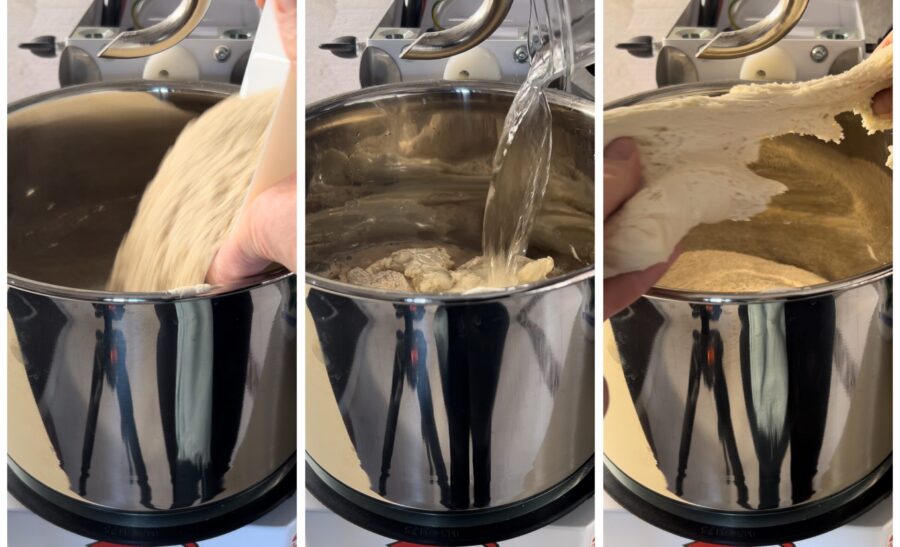
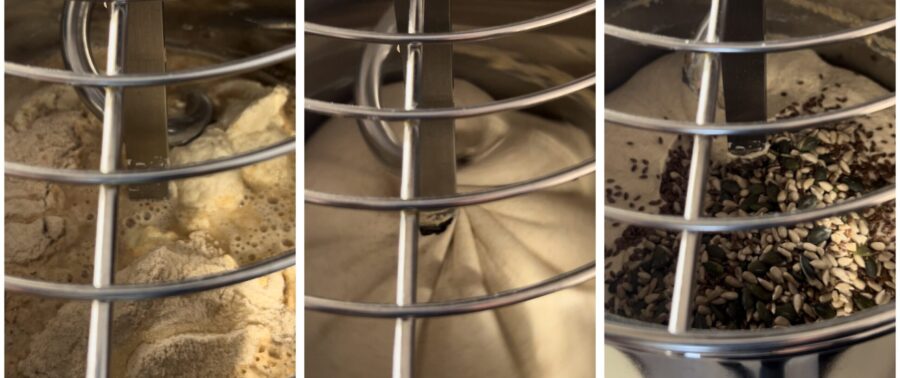
Put the flour, water and starter into the bowl of the stand mixer or mixer. Mix for 10 minutes at medium speed and wait for the dough to start developing gluten before adding the salt and malt (or honey).
Continue kneading; once the dough is formed and perfectly smooth — this will take about twenty minutes — add 150 g of mixed seeds and incorporate them into the dough.
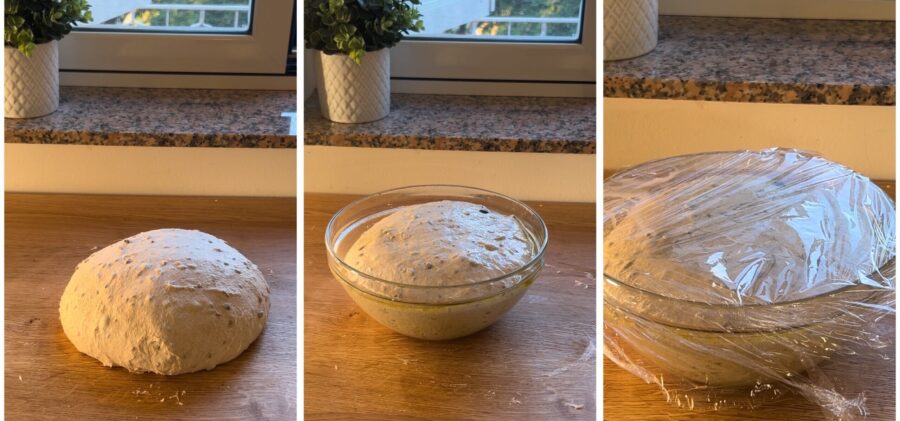
Turn the mass out onto the work surface,

shape it into a ball and place it in a glass bowl that you have generously oiled; also oil the surface of the dough.
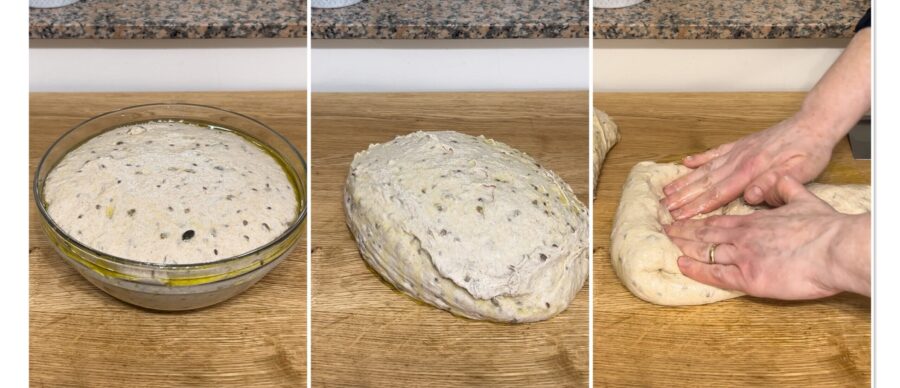
Cover with plastic wrap and place in a warm spot to proof at about 79°F (oven with the light on) for 3 hours or until the dough visibly begins to rise (you will see bubbles through the glass bowl).
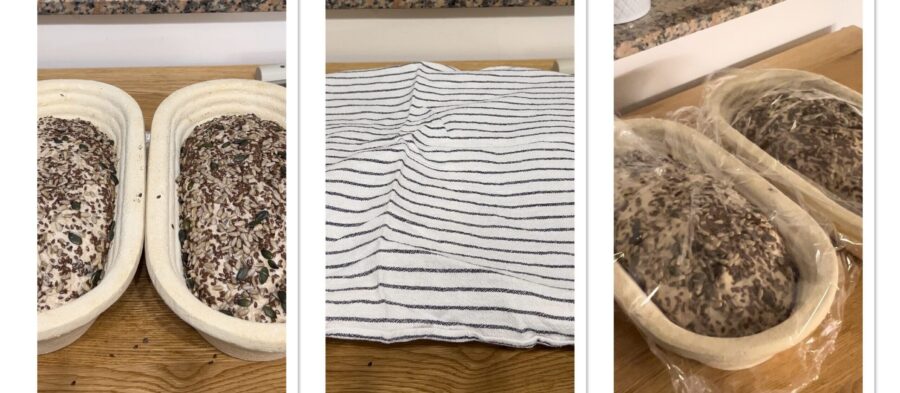
After that time, portion the dough according to the capacity of your baskets and start shaping. I used two 1 kg baskets and split the dough in half. Spread the dough on the work surface into a rectangle and roll it onto itself to form a cylinder.
Place the cylinder with the seam facing you, flatten again and roll. Repeat once more.
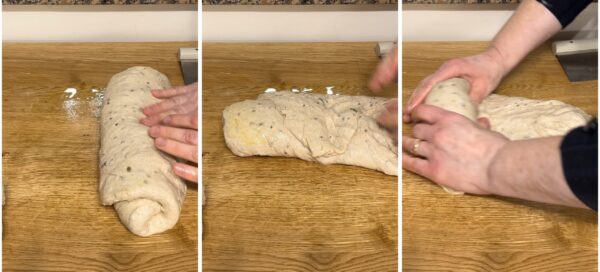
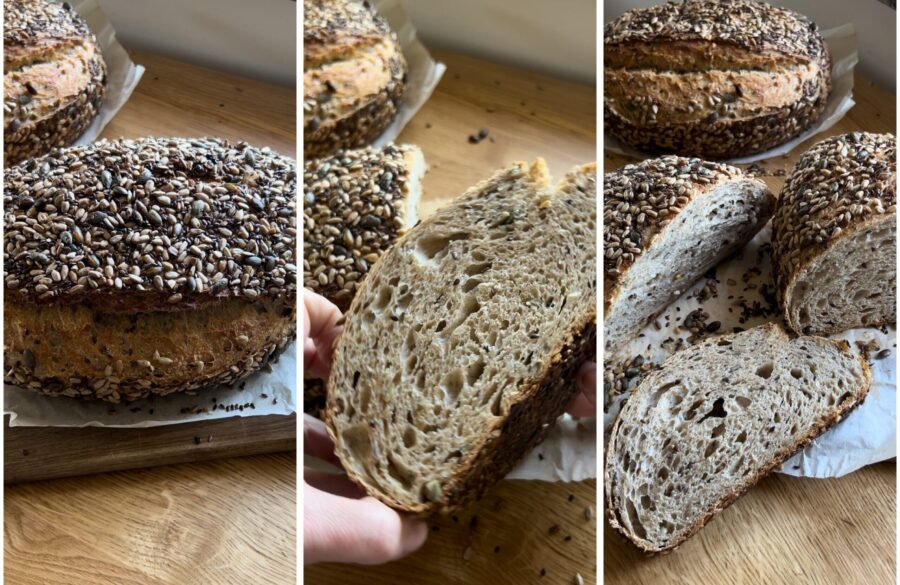
Scatter plenty of seeds on the work surface and roll the loaves over them so they adhere well, then place some more seeds in the baskets.
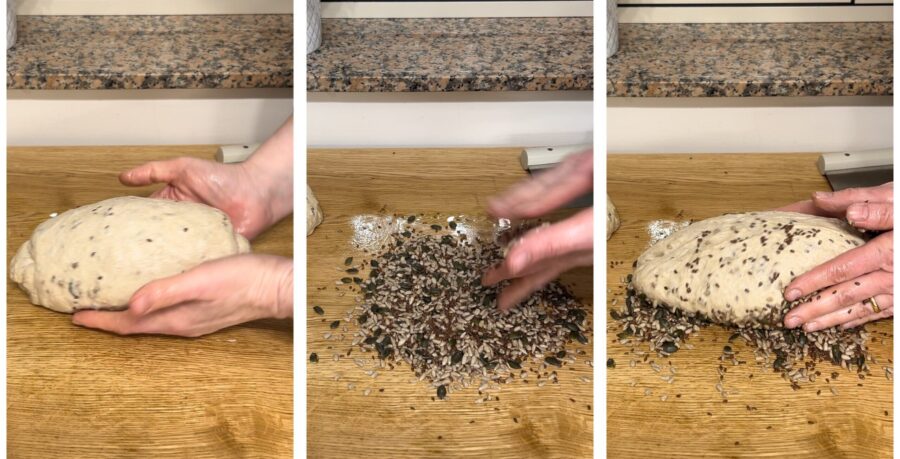
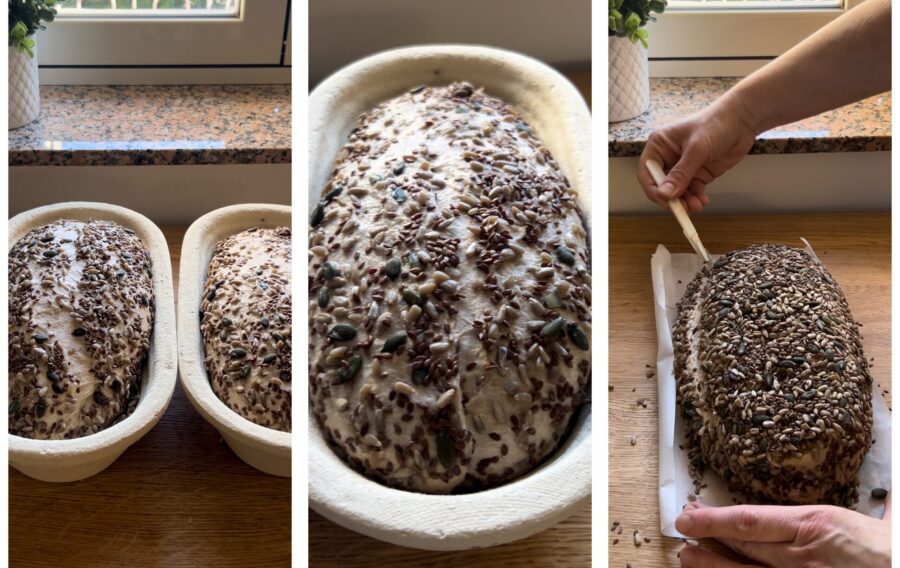
Put the two loaves in the baskets with the seam of the cylinder facing up and sprinkle with more seeds. Cover with a cloth and place in a warm spot to proof for another three hours. After that time, when the loaves have visibly risen, place them in the refrigerator covered with plastic wrap on the lower shelf for about 10–12 hours.
At the end of the fridge rest, take the bread out — it should now be puffy and well risen, but if not, let it come to room temperature for a few hours and wait for the rise to happen outside the fridge.
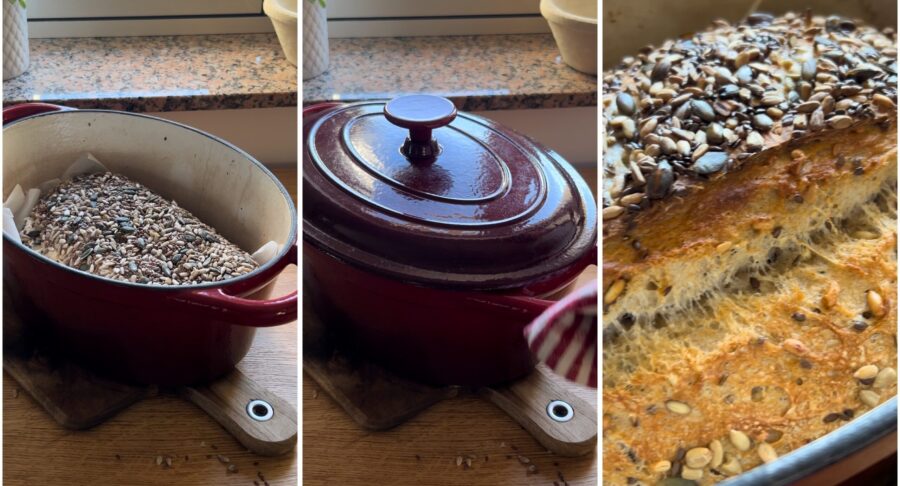
Once the bread has doubled — never before — preheat the oven to 482°F (or to its maximum temperature) and place the pot inside with its lid.
When the oven and pot have reached temperature, turn the loaf out onto parchment paper and make slashes so the bread won’t burst open randomly during baking.
Take the pot with oven mitts and move it to a suitable surface.
Transfer the loaf into the pot using the parchment paper, put on the lid and place in the oven.
Bake for the first 30 minutes at the highest temperature, then lower to 392°F and continue baking without the lid for 15–20 minutes.
Increase to 356°F for 10 minutes only if the bread still looks pale. Turn off the oven, open it slightly and let cool for 15 minutes before removing the bread.
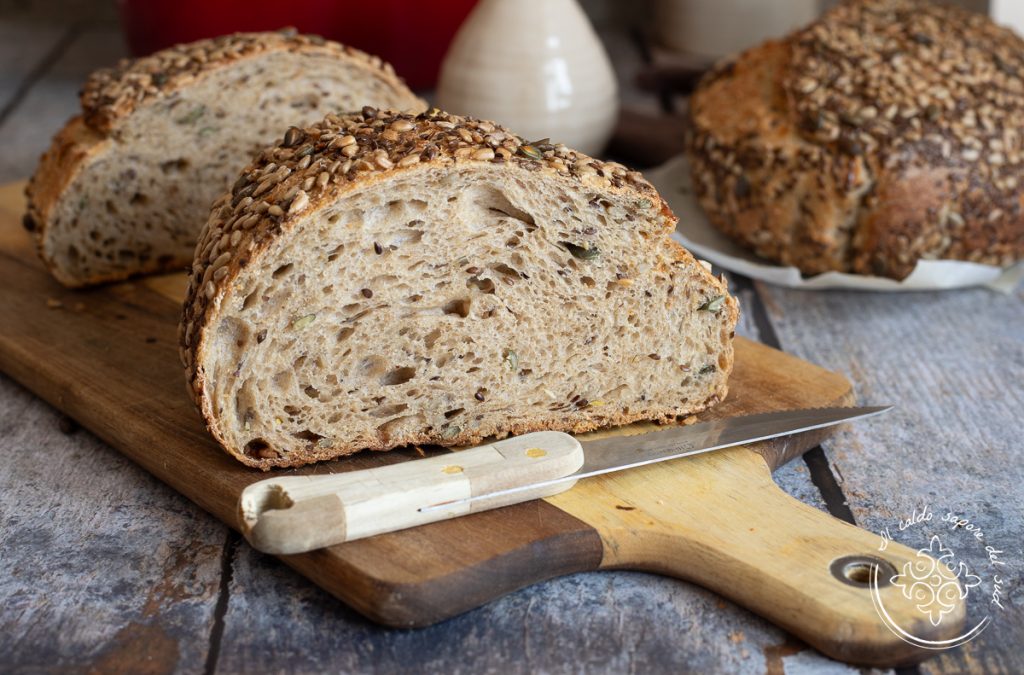
Our bread is ready to enjoy — let it cool slightly before slicing.
It keeps well for 3–4 days, especially in winter if stored in a cotton bag. In summer the shelf life is much shorter as it tends to dry out quickly unless stored in a food-grade plastic bag.