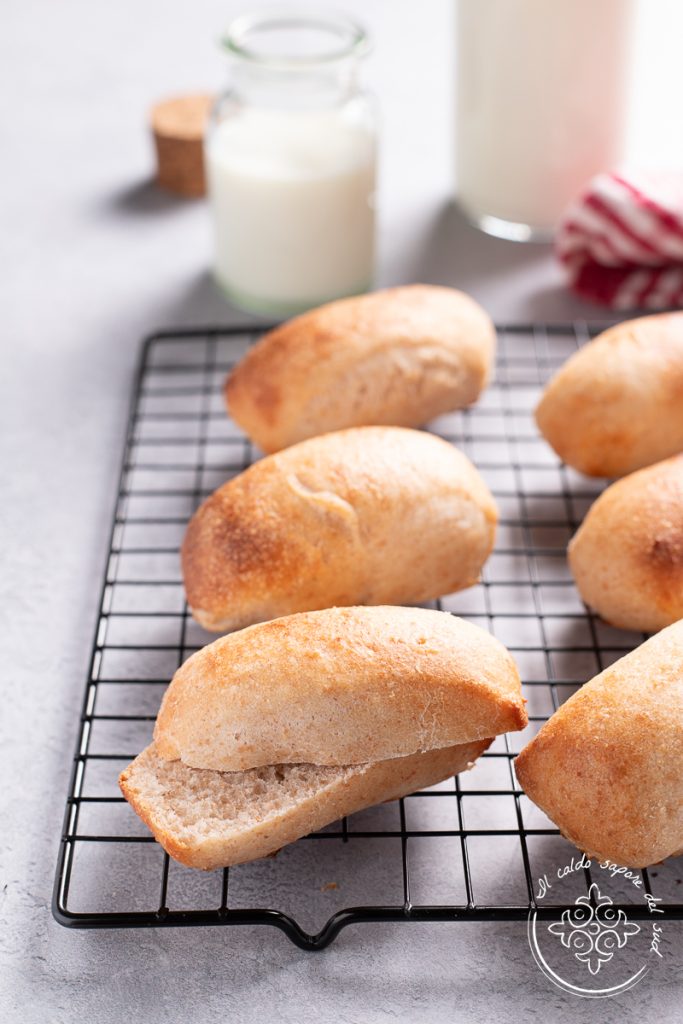
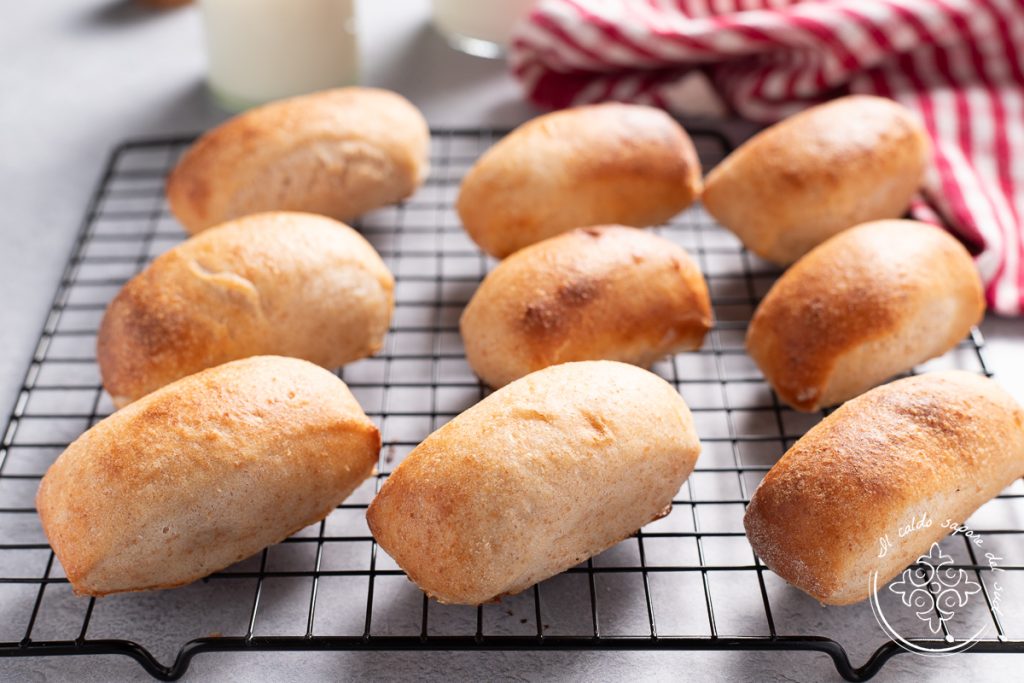
Whole-wheat milk rolls, super soft, made with type 2 flour. Have you ever thought about making very soft whole-wheat rolls? Follow me into the kitchen and I’ll tell you how I make them, with type 2 flour! Less famous than true wholemeal flour, type 2 flour is known as semi-wholemeal flour, but it resembles wholemeal in form and nutritional characteristics. Stone-milled, meaning a longer, low-speed milling process, this flour is a bit coarse but retains high nutritional quality and genuineness and is perfect for producing soft baked goods that are also healthy. I buy the stone-milled semi-wholemeal flour at the supermarket with ease and I often use it in my preparations. One recipe I adore is these super-soft whole-wheat milk rolls that you see in the photo and my children love; they can be filled with sweet spreads, jams, cheeses or cold cuts and they are also delicious on their own. I make them in different sizes depending on how I intend to serve them; the ones in the photo are really small, about 1.4 oz each, and are perfect as an appetizer for a buffet, but you can decide to make them larger and they will always be great! Want to discover how to make whole-wheat rolls as soft as these? Let’s go, our recipe is waiting, but first a reminder: if you want to stay updated on all my recipes, you can follow my Facebook page (here) and my Instagram profile (here).
Also look at:
- Difficulty: Easy
- Cost: Inexpensive
- Rest time: 3 Hours
- Preparation time: 30 Minutes
- Portions: 18
- Cooking methods: Stove
- Cuisine: Italian
- Seasonality: All seasons
Ingredients to make Whole-Wheat Milk Rolls
- 4 cups type 2 flour (or 2 3/4 cups whole wheat flour and 1 1/4 cups type 0 (all-purpose) flour)
- 1.25 cups milk (whole or 2% (partially skimmed), lukewarm)
- 2.5 tbsp sugar (brown or white)
- 5 tbsp extra virgin olive oil
- 2 tsp salt
- as needed milk (for brushing)
- 1 tsp active dry yeast (or 0.4 oz fresh yeast (12 g))
Tools
- Bowl
- Baking sheet
- Oven
Steps
To make these super-soft whole-wheat milk rolls you can knead by hand as I did, but using a stand mixer will make everything simpler. Don’t use a Thermomix as this dough doesn’t work well with it.
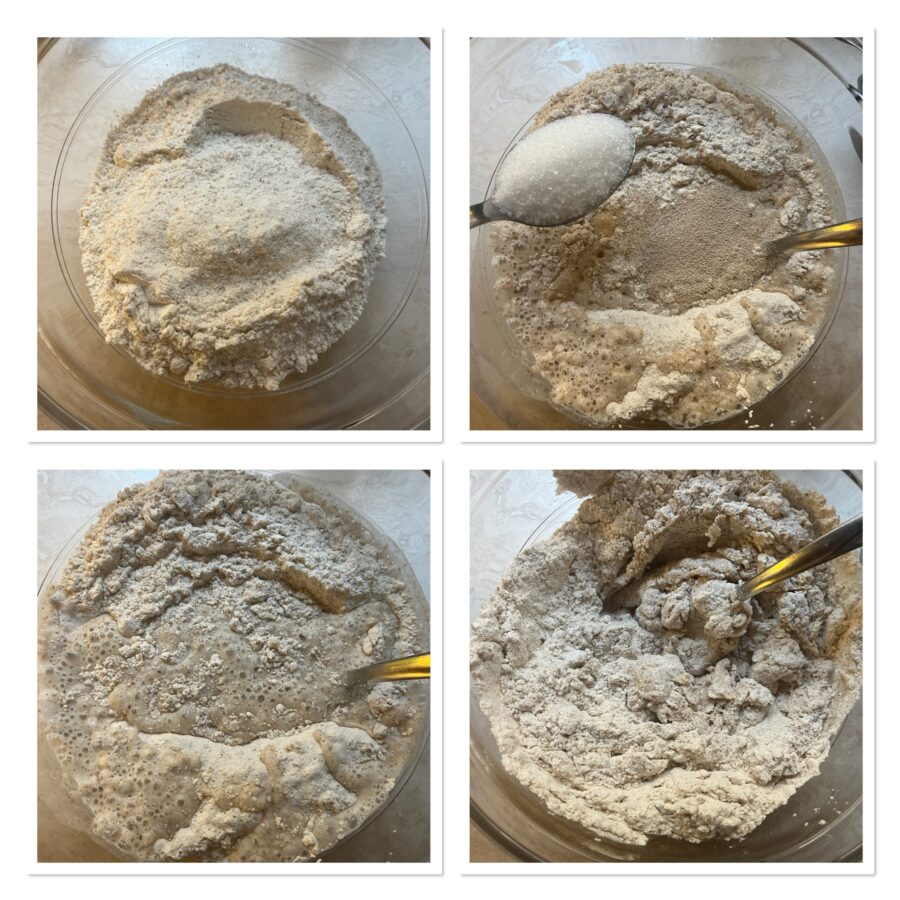
Pour the flour into a bowl, add some lukewarm milk and dissolve the yeast in it, add the sugar and mix.
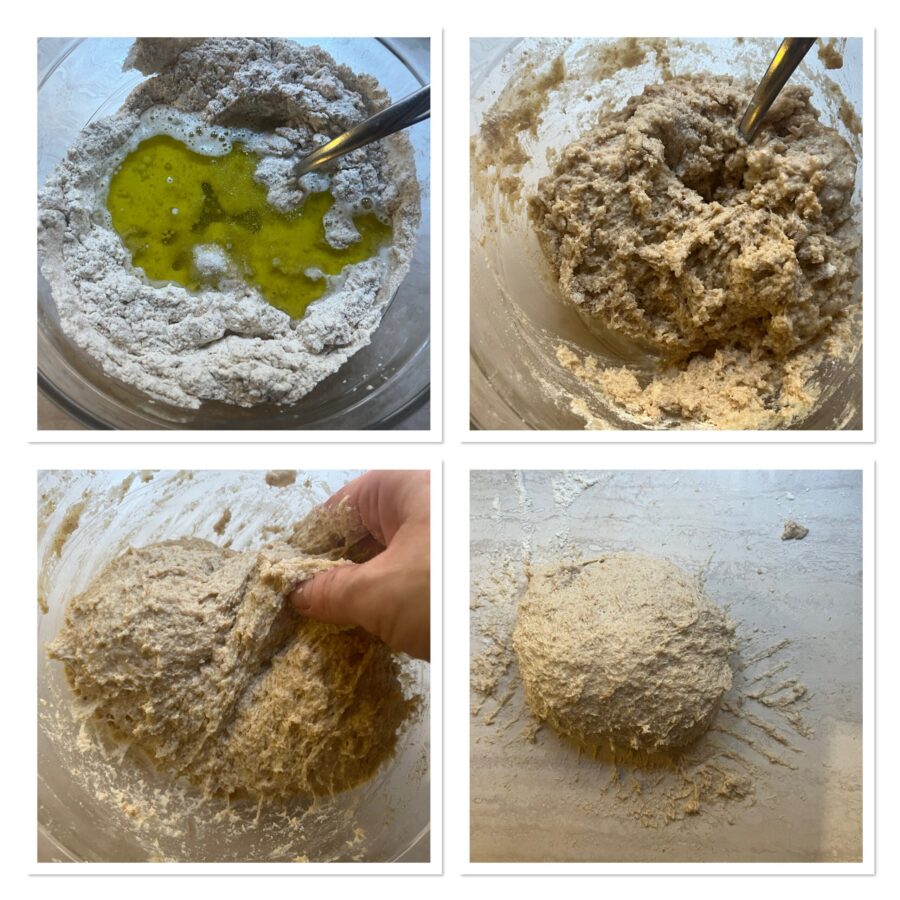
Add the oil and finally the rest of the milk with the salt. Mix everything with a spoon, knead in the bowl for a few minutes, using your hands if you prefer, cover with a kitchen towel and let rest 20 minutes.
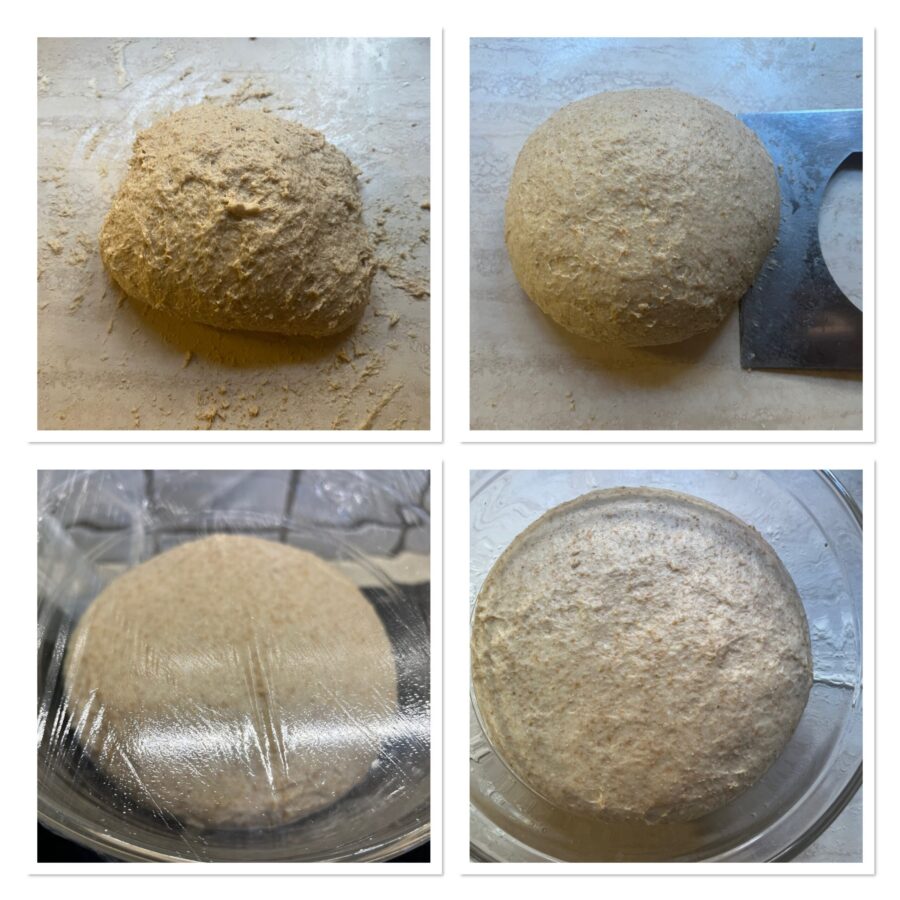
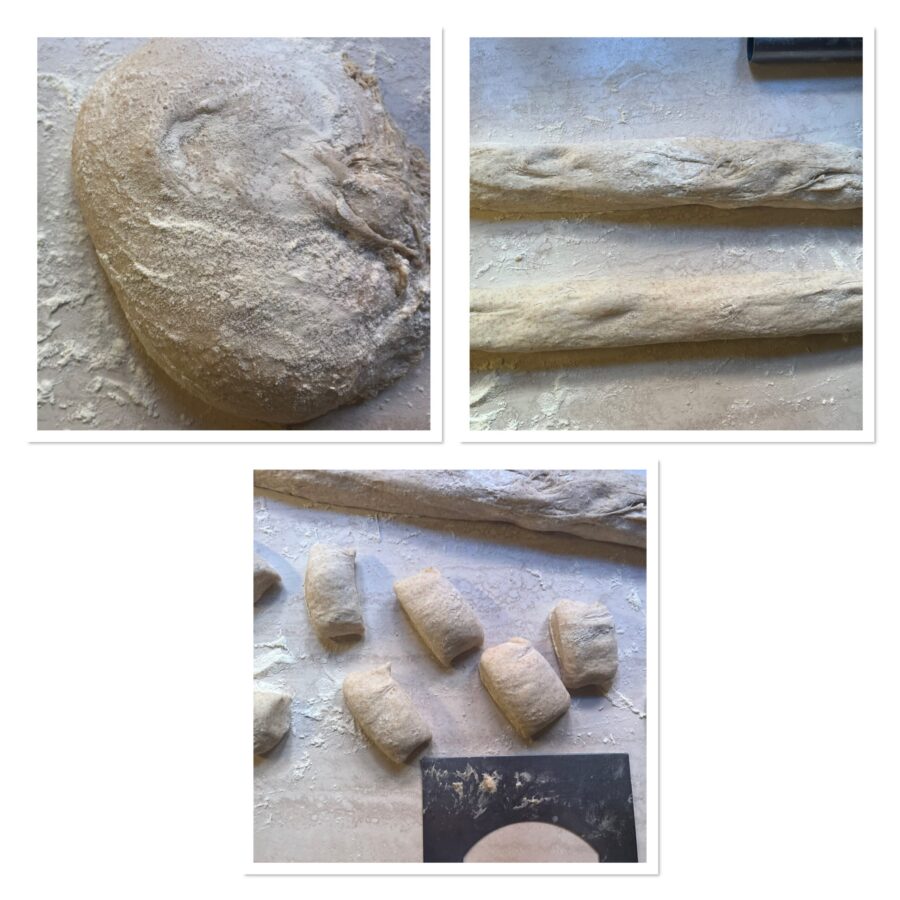
After this time, turn everything out onto a floured work surface and work it until the dough gains structure and is no longer sticky. Do not use too much flour—just a dusting—otherwise the rolls will be tough. Be patient and it will come together.
Shape the dough into a ball and place it in a bowl, cover with plastic wrap and put it in a warm place to rise until doubled in size; the time is indicative but it may take about 2 hours and 30 minutes. If it needs more time, wait for proper fermentation.
Turn the risen dough onto the work surface and, without deflating it too much, stretch it and divide it in two with a bench scraper, forming logs.
Cut the logs into many pieces, cutting them transversely with the bench scraper to form pieces of about 1.8 oz each.
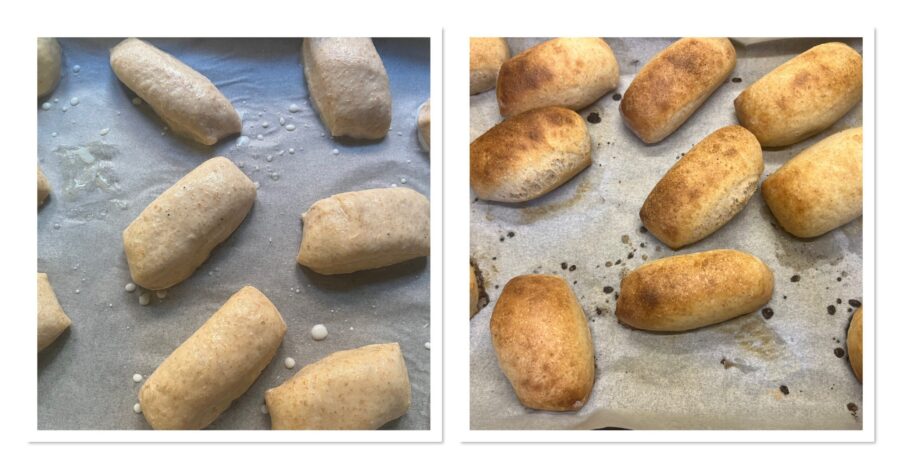
Place the rolls on a baking sheet lined with parchment paper and let rise again in a warm place for 30 minutes.
Take the rolls, which should now be nicely puffed and risen, brush each piece with milk.
Bake in a preheated convection oven at 392°F for 15 minutes or until the desired golden color is reached.
The oil-and-milk rolls are ready; they are delicious warm or at room temperature, can be filled and are great on their own too. They can be stored for 2 days, like any other bread, sealed in a plastic bag. If you wish, you can freeze them in appropriate bags and thaw them as needed to enjoy with sweet spreads, cheeses or cold cuts.
From here you can return to the HOME and discover new recipes!