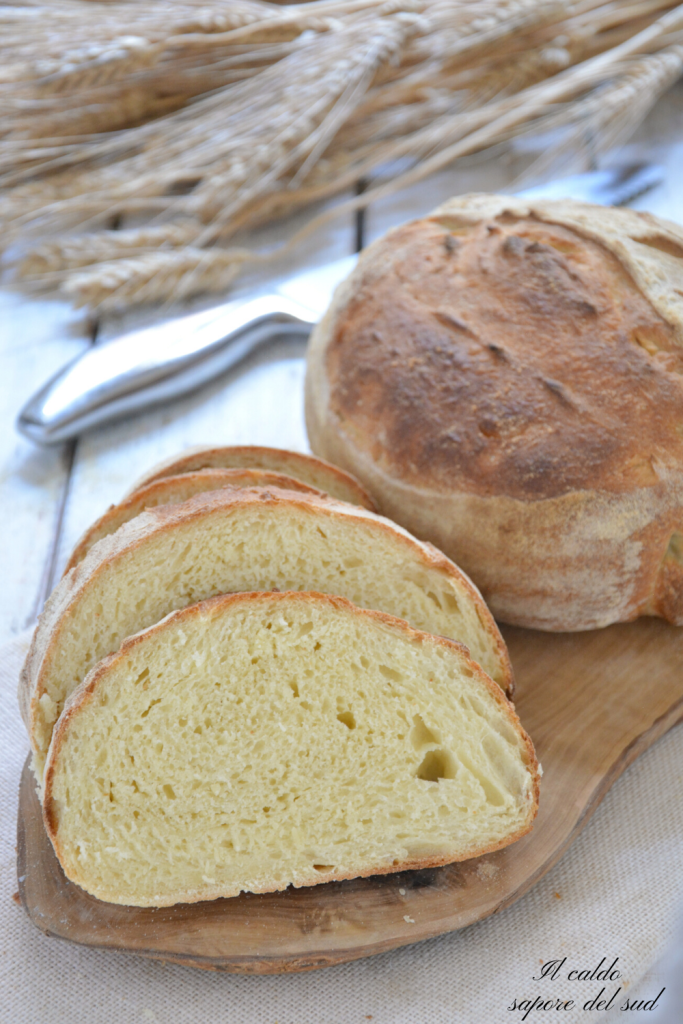
Easy homemade bread with brewer’s yeast, one of the many homemade bread recipes I’ve made over the years. I love homemade bread and I usually make it with a sourdough starter, but every time I publish a recipe my readers ask how to replace it. So this time, just to please everyone, I decided to bake with brewer’s yeast, still using very little and giving the dough a long refrigeration fermentation.
This bread, as you will see in the step-by-step explanation, is very simple to make and gives excellent results. So if you want homemade bread but don’t have sourdough starter, don’t worry — with this recipe you’ll get a great, tasty loaf suitable for the whole family! Want to try it too? Let’s go to the kitchen, but before we start cooking, remember that if you want to stay updated on all my recipes you can follow my Facebook page (here) and my Instagram profile (here)!
Also see:
- Difficulty: Very easy
- Cost: Very economical
- Rest time: 12 Hours
- Preparation time: 1 Hour
- Portions: about 3 lb 12 oz (1.7 kg approx)
- Cooking methods: Oven
- Cuisine: Italian
Ingredients
- 5 cups re-milled durum semolina
- 2 cups Type 0 flour
- 3 1/8 cups water
- 4 tablespoons extra virgin olive oil
- 1 1/2 tablespoons salt
- 1 teaspoon sugar
- teaspoon active dry yeast (or 6 g fresh)
- as needed flour (for dusting the work surface)
Preparation
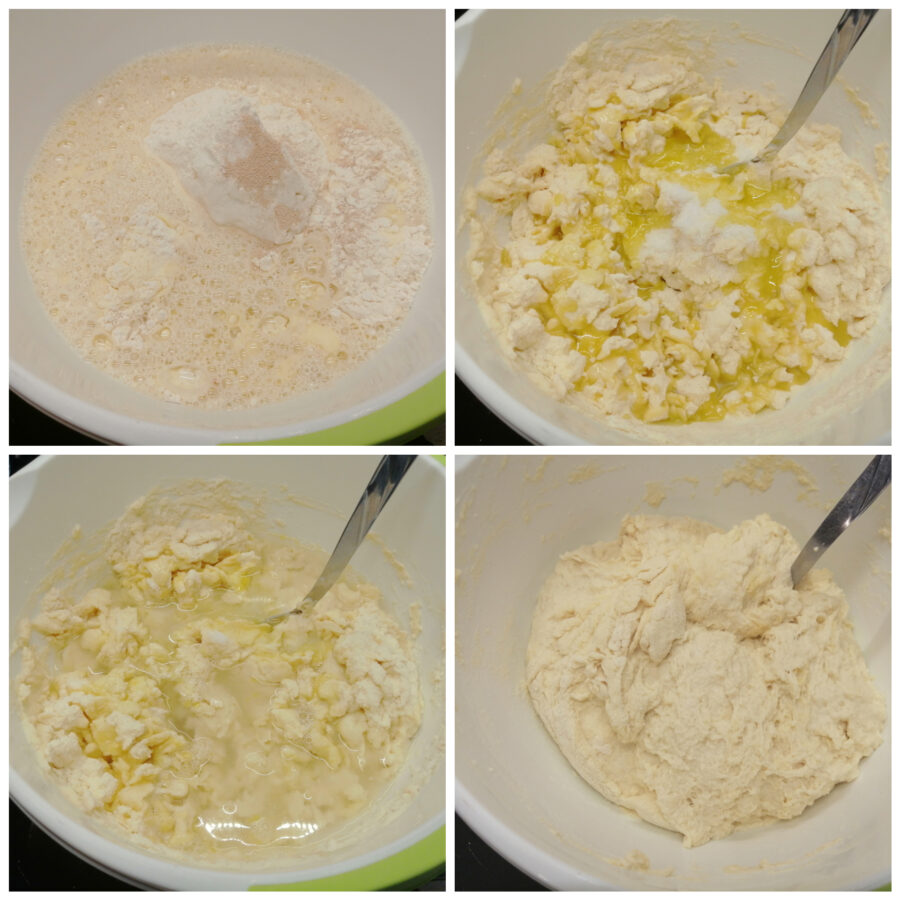
Put the flours into a large bowl, add part of the water and the oil, and mix.
Add another portion of the water and the yeast, dissolve it and mix again, finish with the last portion of water and the salt.
Work for a few minutes with a spoon and set aside for 20 minutes.
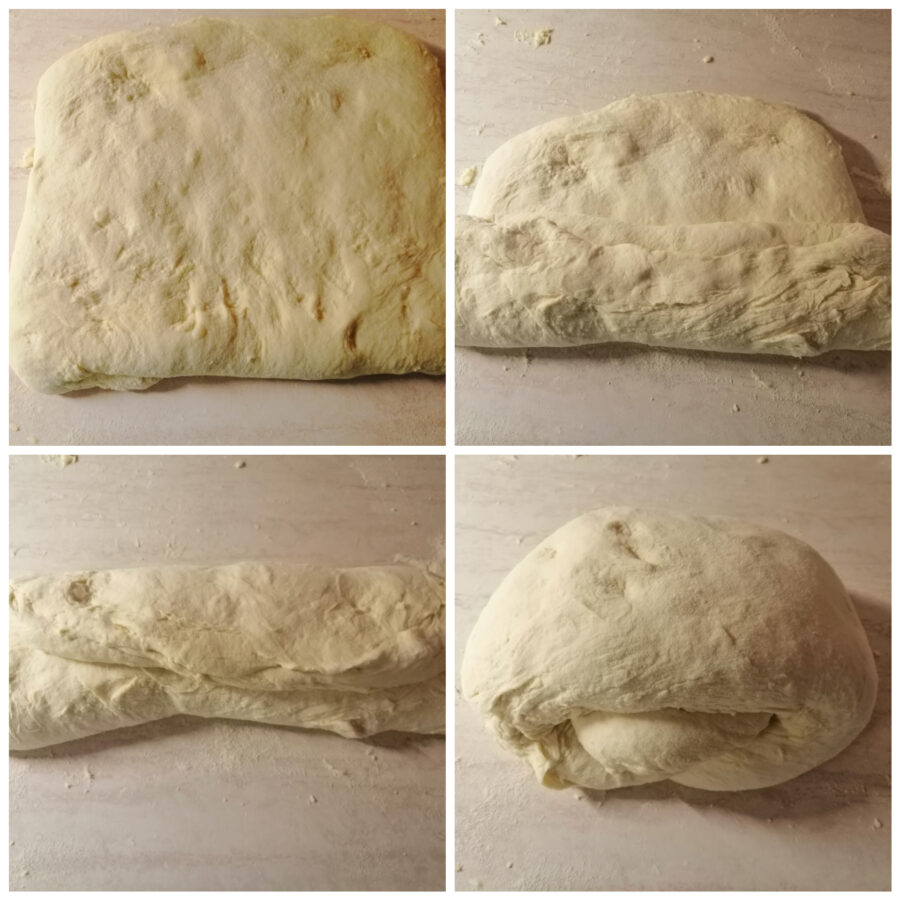
Flour the work surface, turn out the dough which should now be more elastic but still sticky.
Spread it with your hands, do a set of envelope folds and let rest for ten minutes.
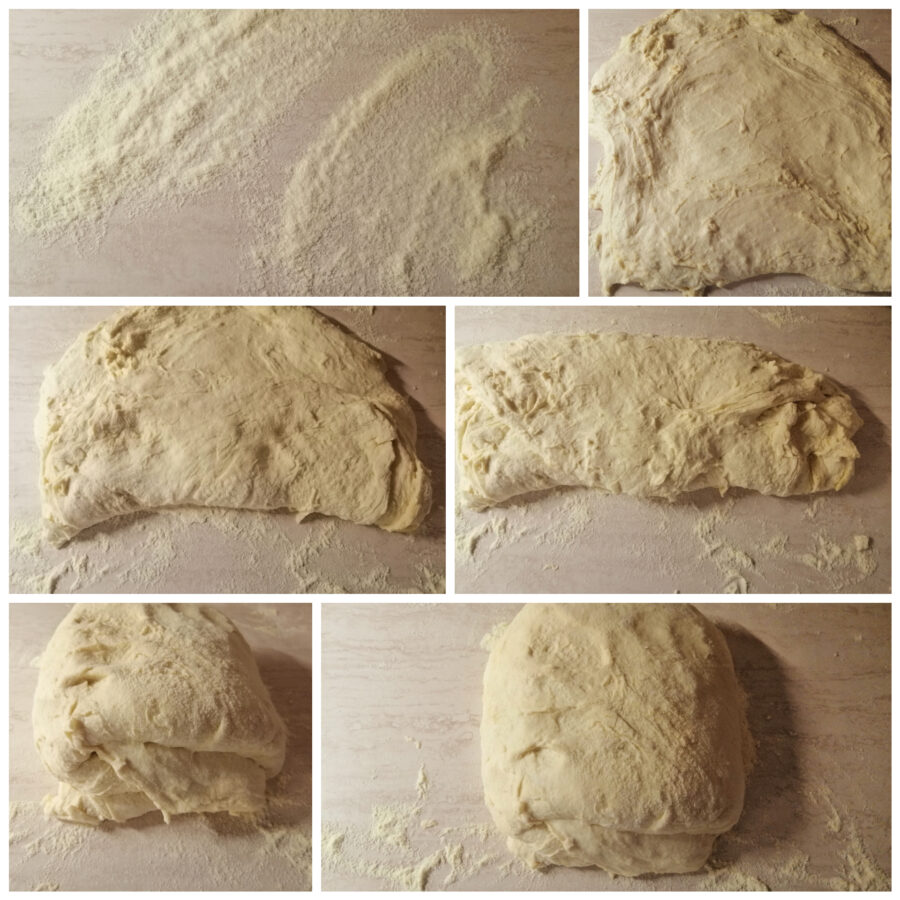
After ten minutes, stretch the dough and repeat the folds as above.
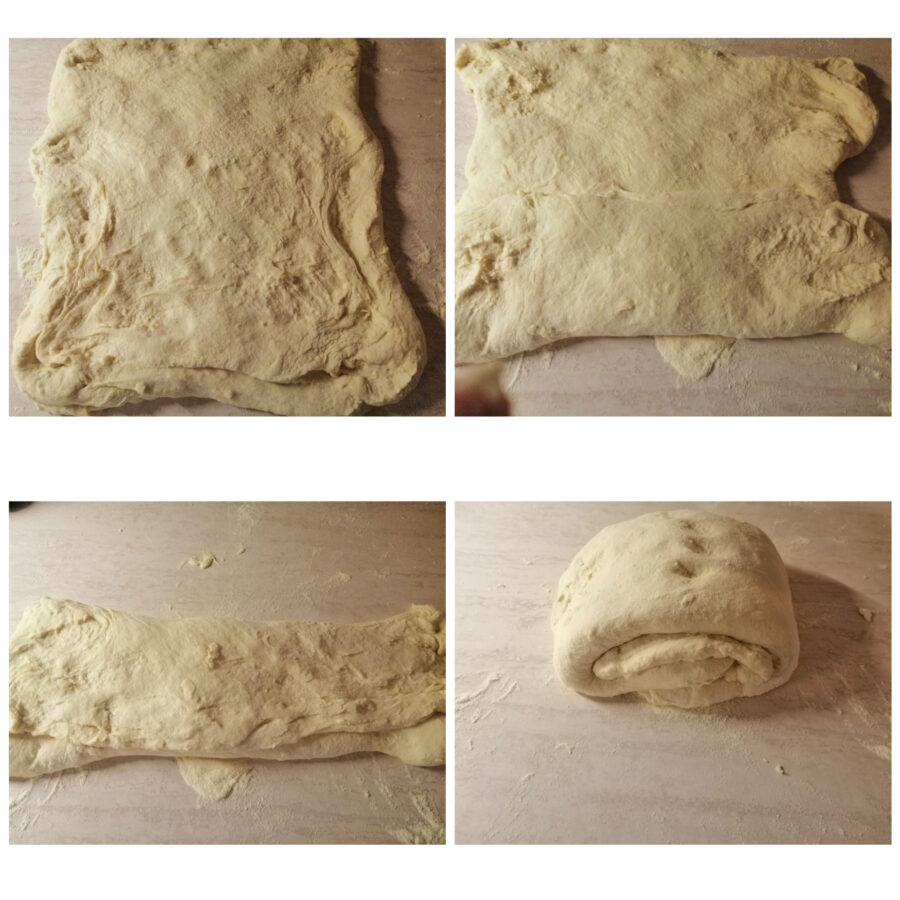
After another ten minutes, repeat the folds;

Wait another ten minutes and do the last set of folds; at this point the dough should be much smoother and more elastic.
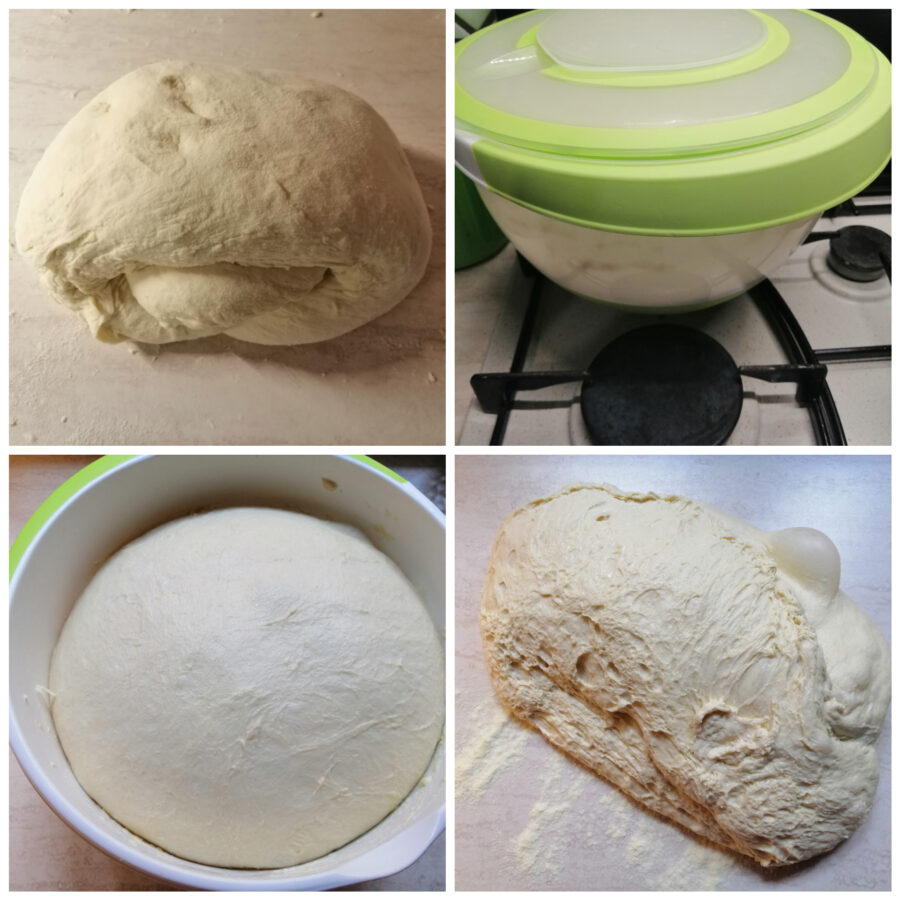
Put the dough back into a bowl and cover with plastic wrap or its lid. If it’s winter (and the house is around 64°F) leave it for two hours at room temperature; in summer half an hour is enough.
After that time, move the bowl to the lower part of the fridge and let it rest for about 12-14 hours.
Times are relative and may vary.
When the dough has doubled in volume, turn it out onto a floured work surface and divide it according to the pieces you want to shape.
I made three loaves, so I divided the dough into three pieces.
Take each piece, stretch it with your hands and roll it onto itself to form a cylinder.
Turn the cylinder 90° and roll again to shape a nice round loaf.
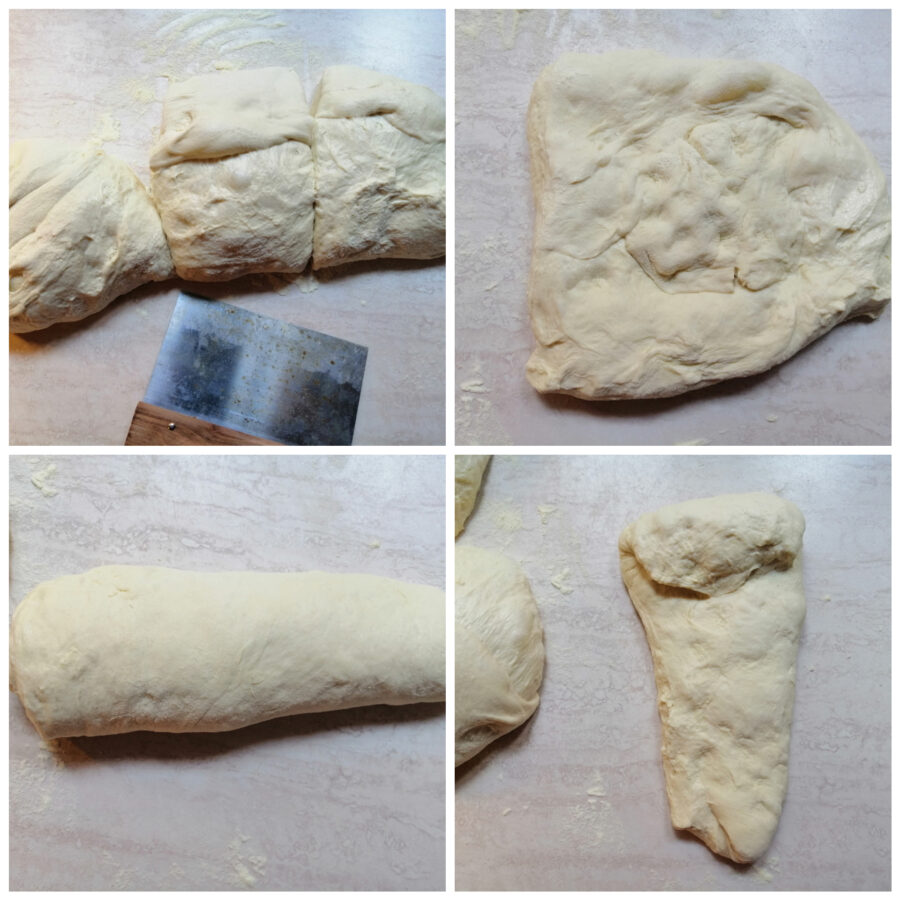
Place the loaves into well-floured proofing baskets or into bowls lined with heavily floured tea towels.
Let them rise at room temperature until doubled, but don’t be strict — this bread can wait an extra hour or two without turning sour…
When you have a nicely puffed loaf, preheat the oven and place a baking sheet on it, preferably a heavy-bottomed one (like cast iron) or a baking stone.
Turn the loaves out onto a floured peel or tray, score them to avoid random splits during baking and slide them onto the hot baking sheet.
Bake in static mode at 446°F for the first twenty minutes, then lower to 392°F for another 20 minutes and finish baking at 356°F for the remaining time.
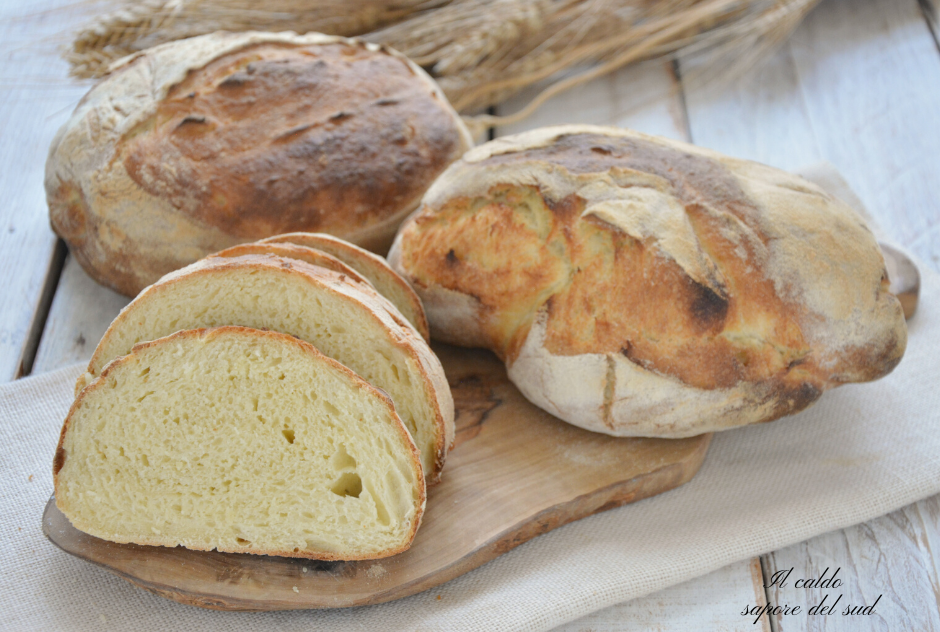
Remove from the oven when they have a nice browned color and if you tap the bottom they will sound hollow like a drum.

The bread is ready — bring it to the table still warm and you’ll make a great impression!
Storage notes and tips
If you want to stay updated on my recipes, follow me on:
Pinterest, YouTube, Twitter and TikTok.
From here you can return to the HOME page and discover new recipes