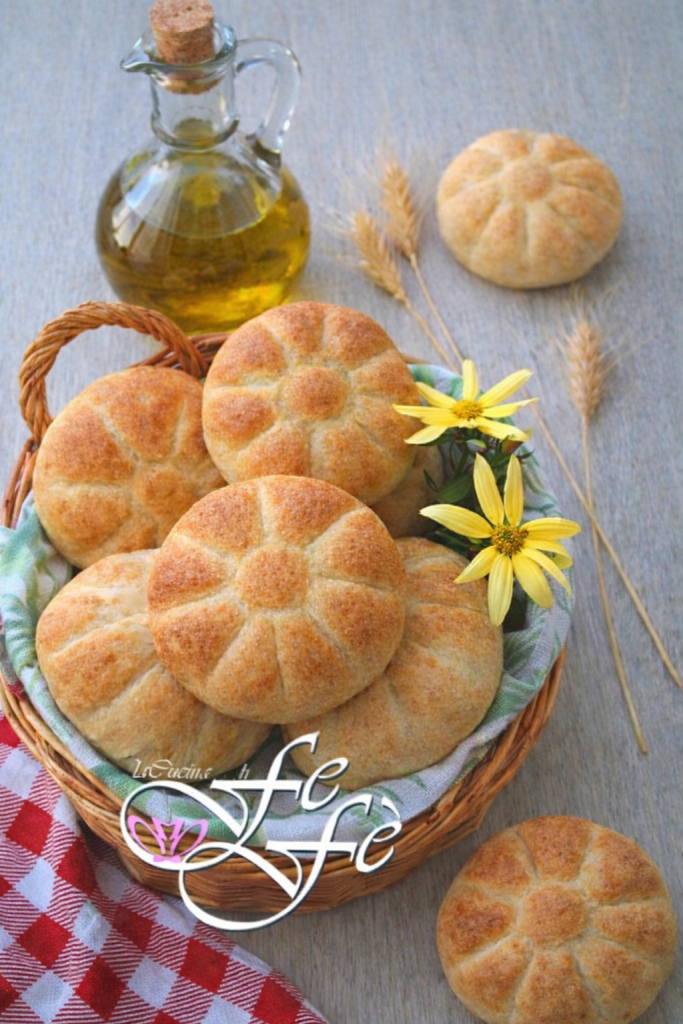
Homemade Bread Rosettes: My Therapy Against Apprehension
In these days of forced isolation, between post-operative recoveries and the emergency we are living through, the kitchen has become my winning weapon. Kneading these super-soft bread rosettes was an act of liberation: I turned anger and bitterness into a scent that smells like hope.
If you too seek refuge in the slow gestures of baking, here is how I made these rosettes with a crispy crust outside and a tender heart inside. The bread rosettes are a traditional type of Roman bread, also known as “michette”, perfect not only to accompany a meal and enrich the table, but also to be stuffed with cold cuts and cheeses.
The Secret of the Flour Mix: Tipo 1 and Strength 350W
To obtain a professional result, I focused on the quality of the ingredients. The secret of this perfect structure lies in the mix between type 1 flour, for a more rustic and fragrant flavor, and strong flour — I recommend Garofalo W 350, the non plus ultra for managing long fermentations.
The Magic of Fermentation
There is no room for haste. The different resting phases allowed the bread to develop a unique aroma. The result? A rosette that, just out of the oven, gives off an indescribable scent, ready to be filled with all sorts of delights.
Other bread recipes that might interest you:
- Difficulty: Easy
- Cost: Medium
- Rest time: 5 Hours 50 Minutes
- Preparation time: 15 Minutes
- Portions: 9Pieces
- Cooking methods: Electric oven
- Cuisine: Italian
- Seasonality: All seasons
Ingredients
⚠ THIS RECIPE CONTAINS ONE OR MORE AFFILIATE LINKS. The products I recommend are the same ones I use in my recipes; buying them through my blog helps support me and my work, and it costs you nothing extra!
- 1 2/3 cups type 1 flour
- 2 1/2 cups 00 flour (W 350 or Manitoba + 3 tablespoons)
- 1 1/4 cups water (lukewarm)
- 0.35 oz fresh brewer's yeast (or about 1 2/3 teaspoons active dry yeast)
- 1 teaspoon sugar
- 1 tablespoon extra virgin olive oil
- 1 teaspoon salt
Tools
- 1 Mixing bowl
- 1 Spoon
- 1 Dish towel
- 1 Baking sheet
- 1 Dough cutter
- 1 Parchment paper
- 1 Bench scraper
The two most beautiful and holiest smells are those of hot bread and earth wet from rain.
(quot. Ardengo Soffici).
Preparation
In a large mixing bowl, dissolve the fresh yeast in the lukewarm water together with the sugar which will activate it. Then add 3 tablespoons of W350 flour.
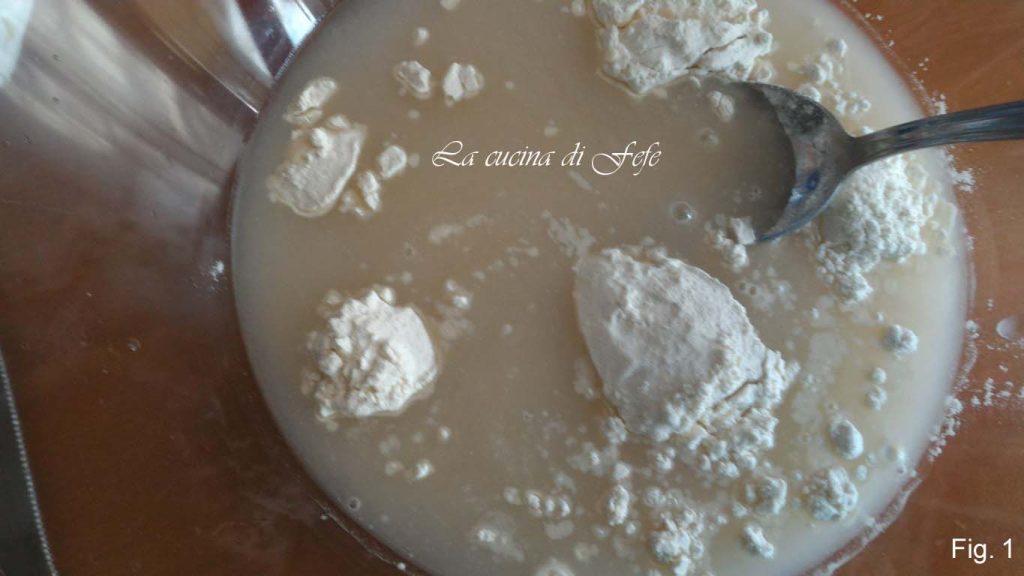
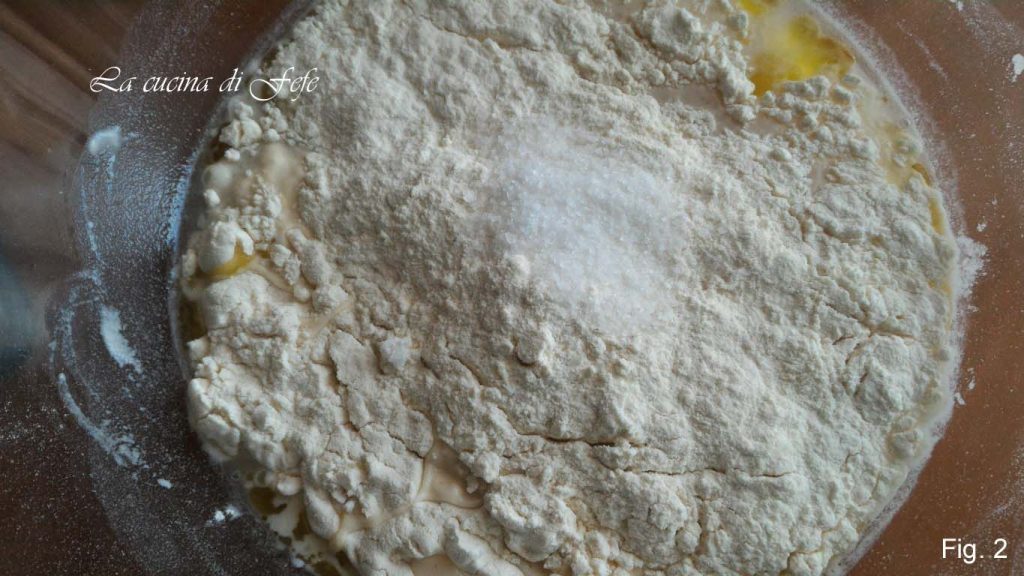
Stir, cover with a dry dish towel and let rest for 20 minutes. Then add the oil, the flours little by little and the salt.
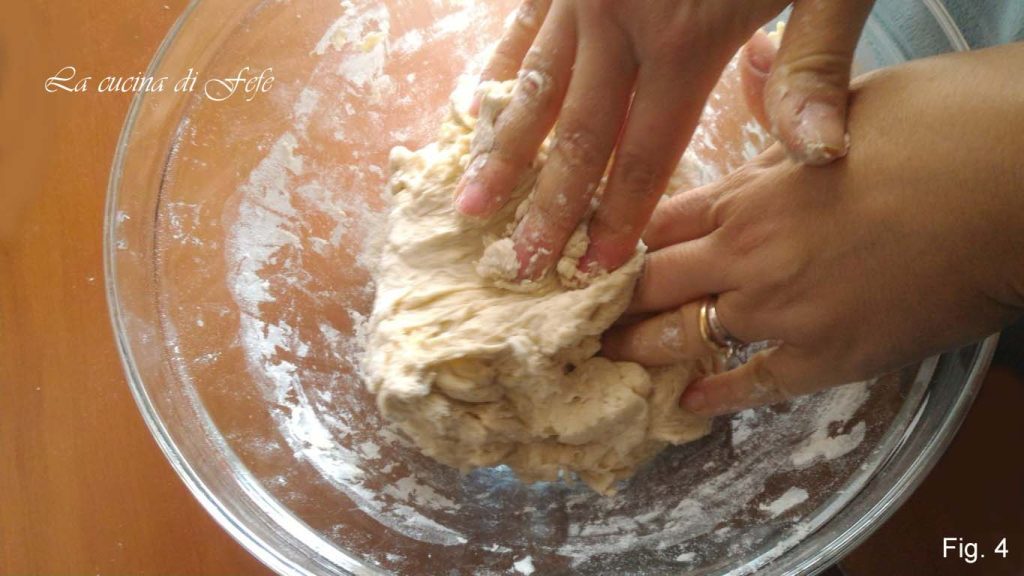
Begin kneading with your hands.
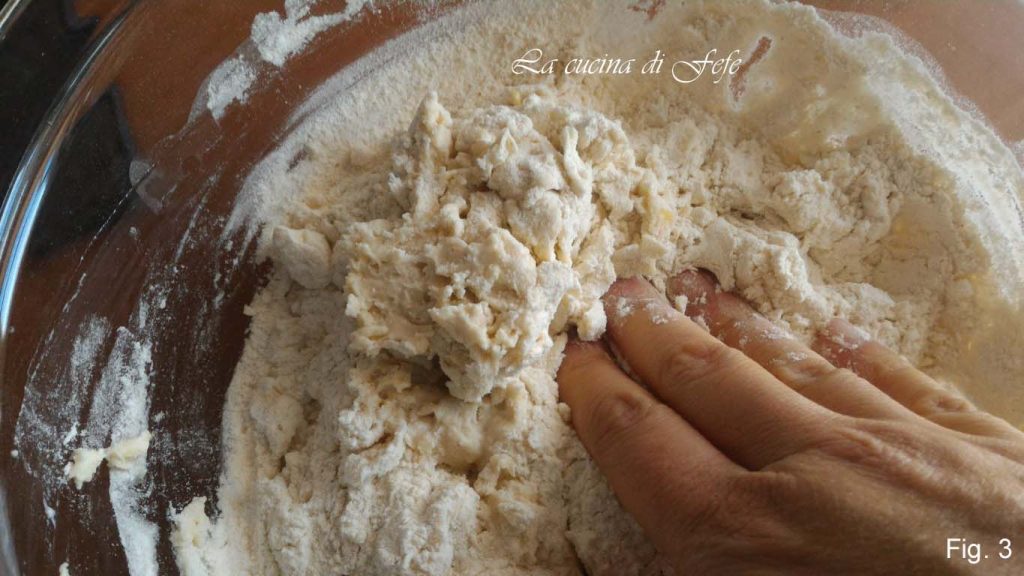
Continue until it gains consistency.
Then transfer the dough to a floured work surface and continue working it until all the flour has been incorporated. If you prefer, you can use a stand mixer to do the job.
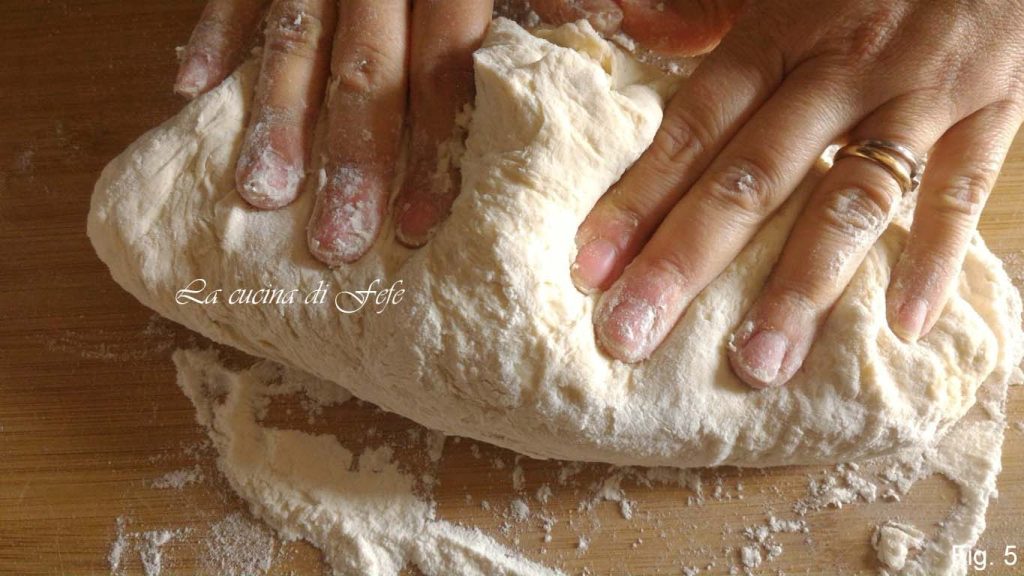
This phase requires a bit of patience: you should obtain a firm and elastic dough.
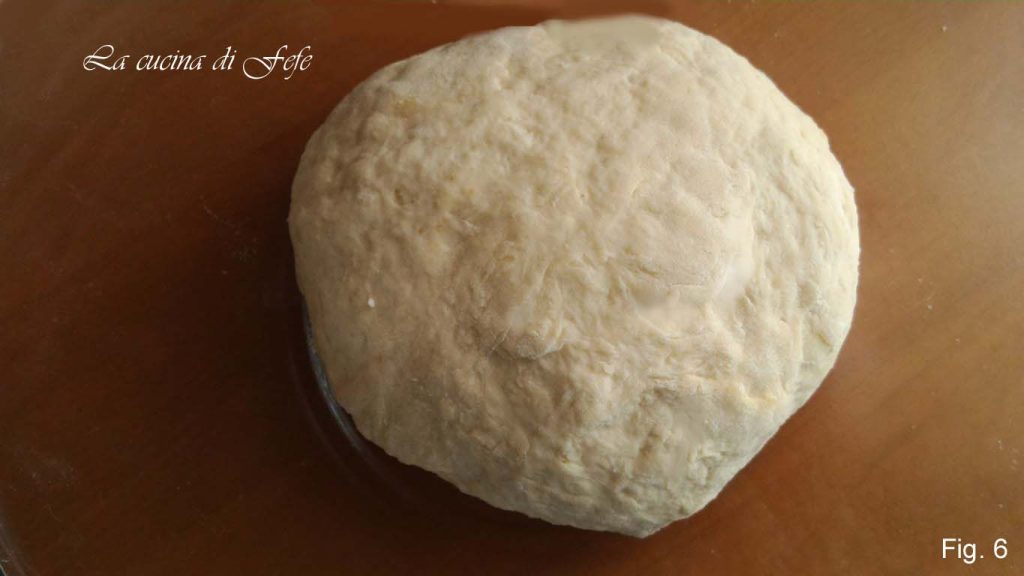
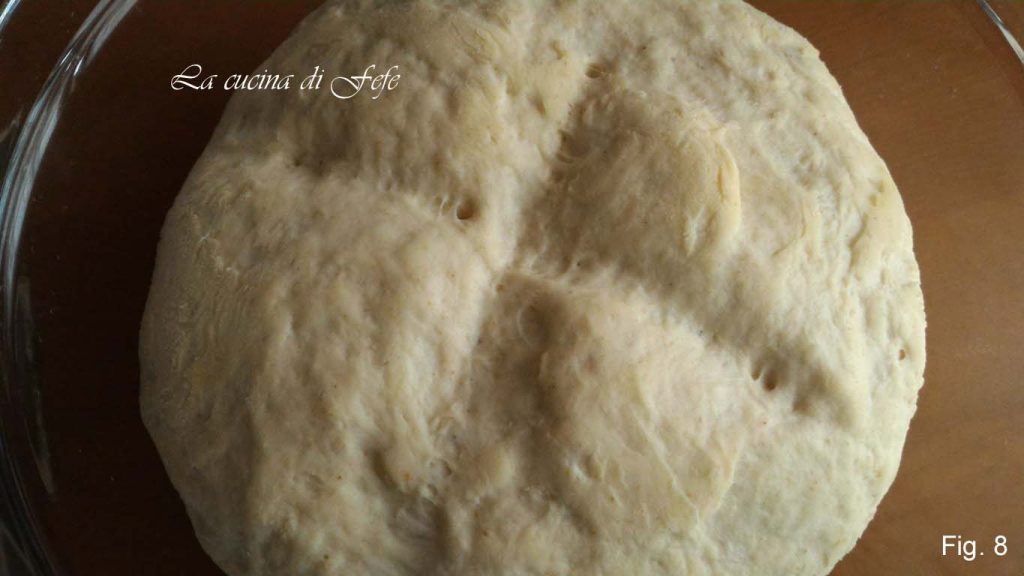
Place the dough ball back in the bowl, score a cross on the surface and let it rise for 2 hours covered with a dish towel.
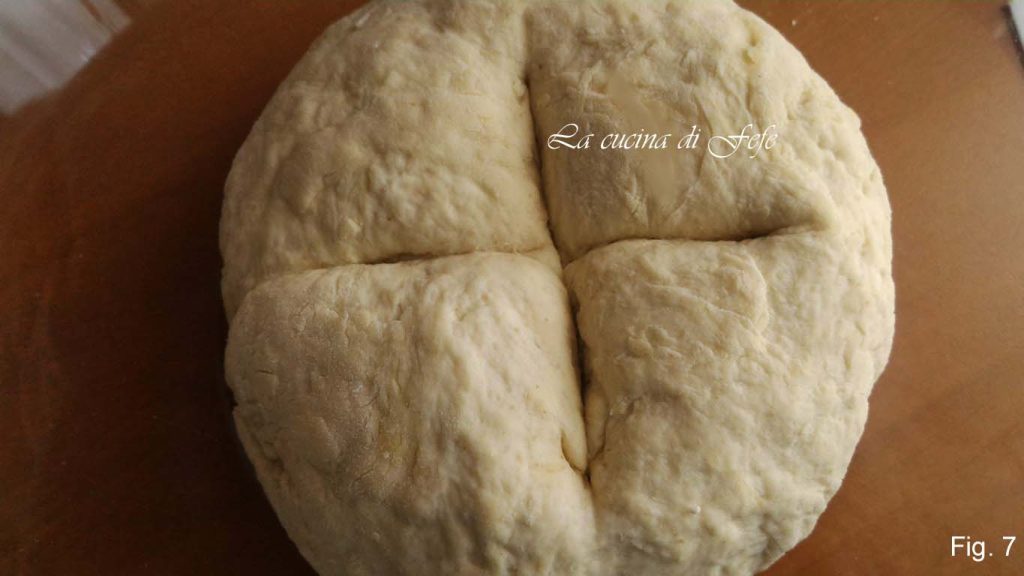
After this time the dough will have doubled in volume.
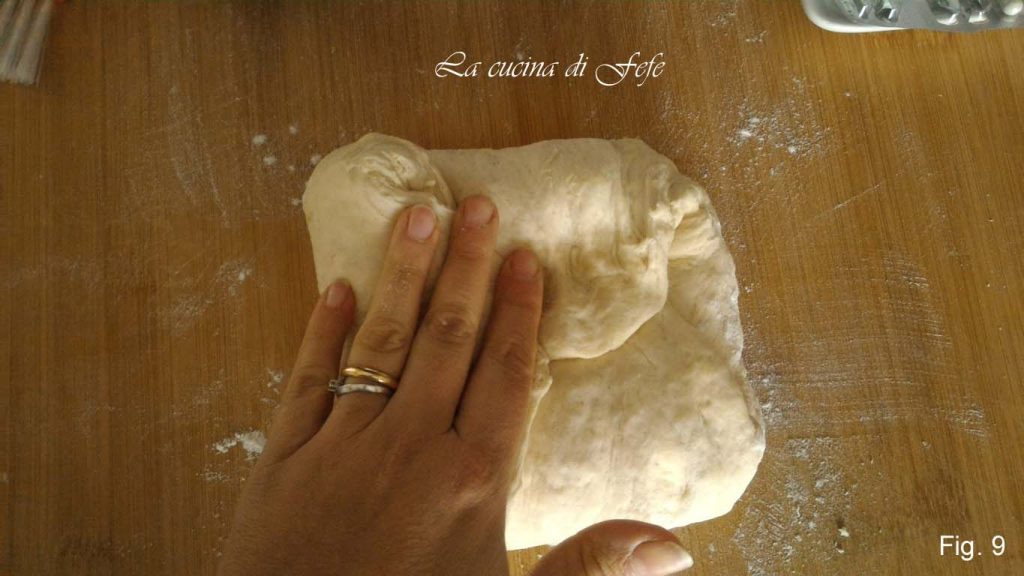
Place the dough on the floured work surface, spread it out with your hands; fold it onto itself toward the center as if it were a sheet — first the top and bottom edges, then the sides. You will obtain a dough ball again. This operation is necessary to improve the bread’s structure.
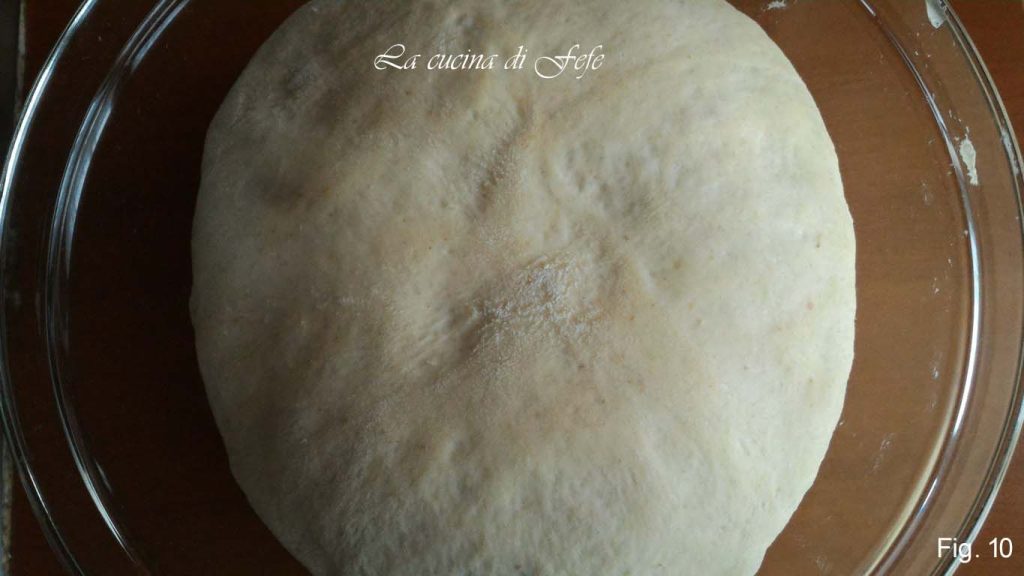
Put the dough ball back to rise covered and away from drafts for 1 hour or until it doubles in volume (fig. 10).
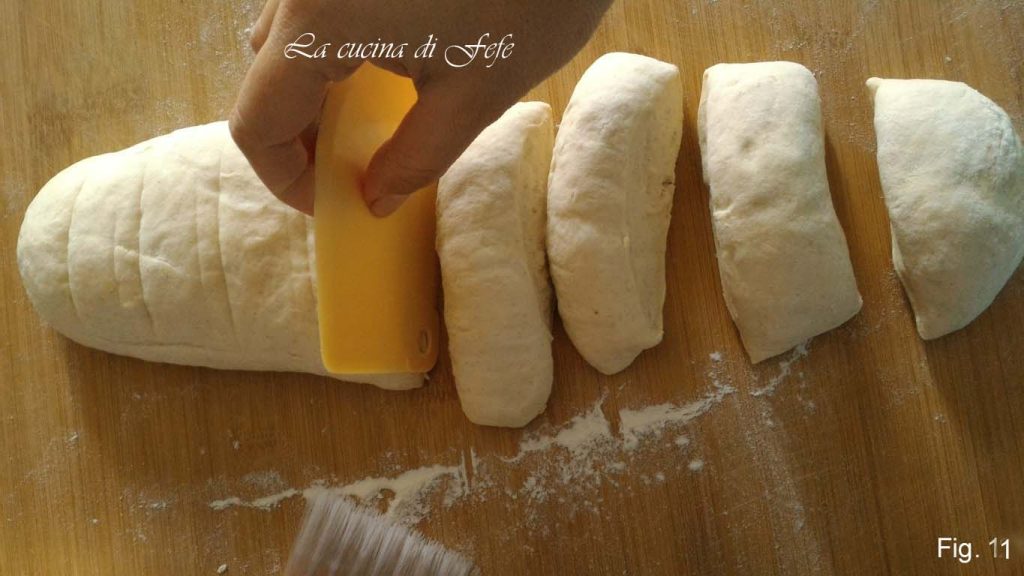
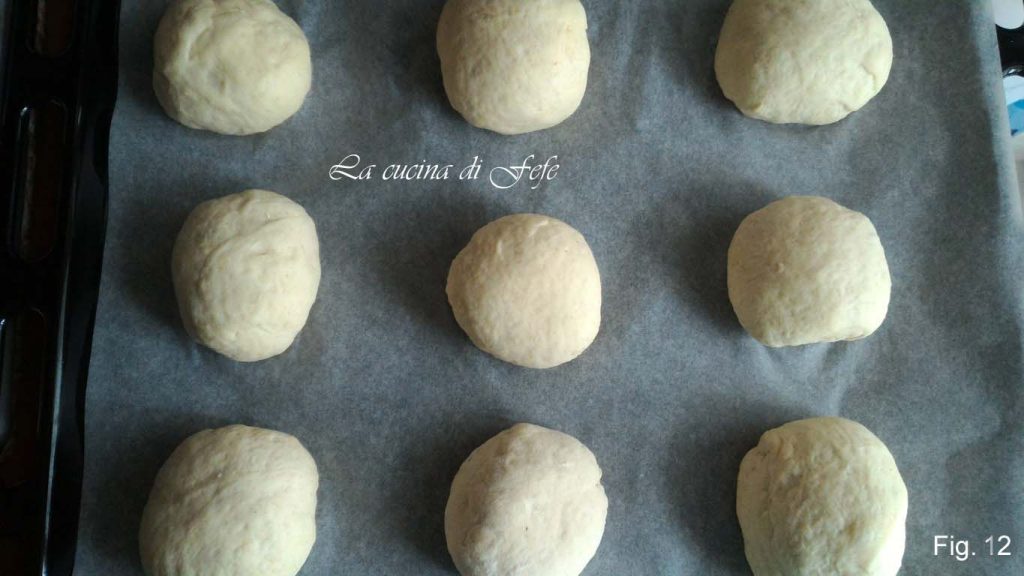
Take the dough again and perform another series of folds, exactly like the previous ones. Let it rise a third time for 2 hours. Then work the dough on the floured surface and form a baton. Divide it into 9 equal pieces using a bench scraper.
Shape into small balls, place them on a baking sheet lined with parchment paper and cover them with a dish towel for a final rise of 30 minutes.
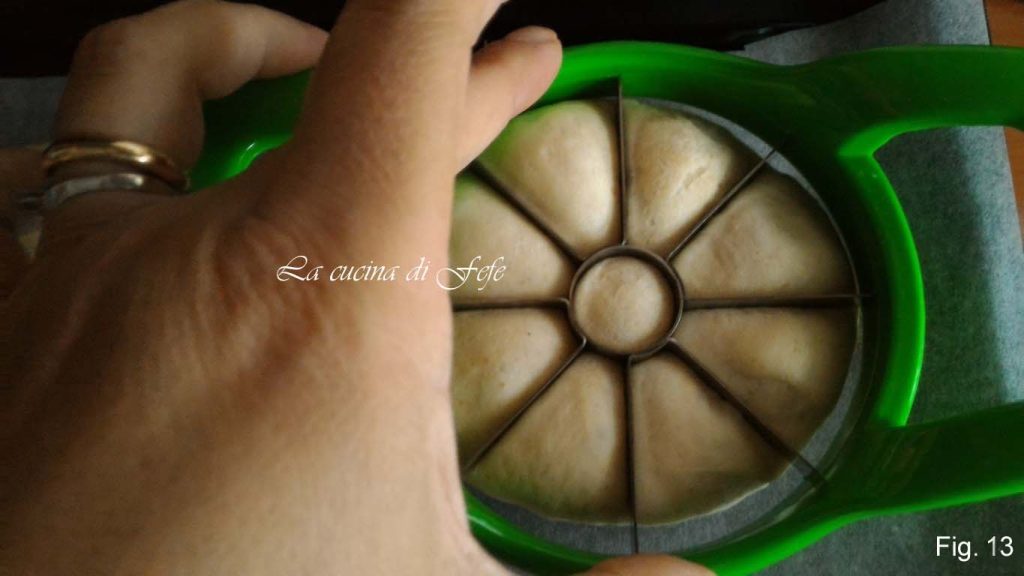
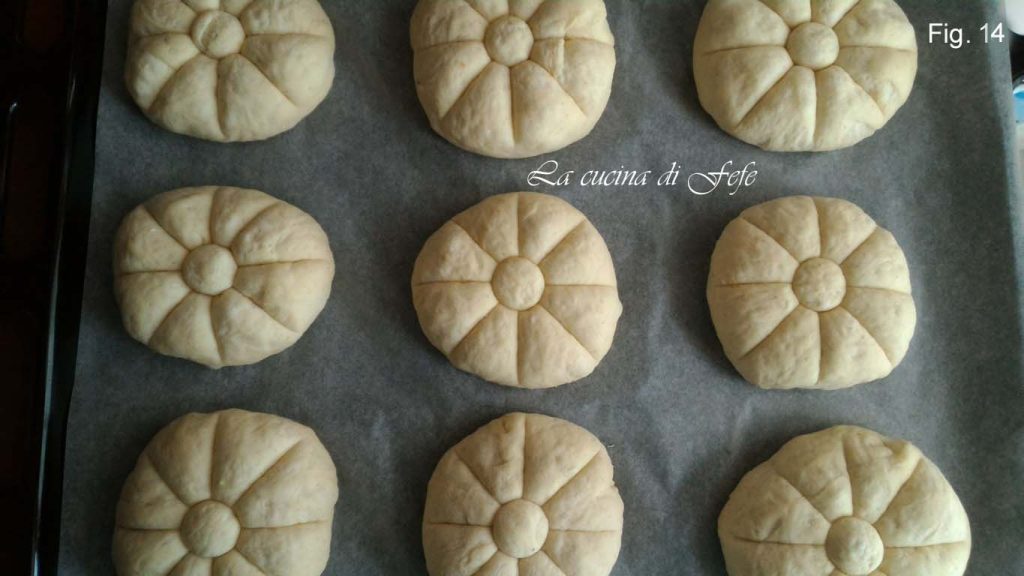
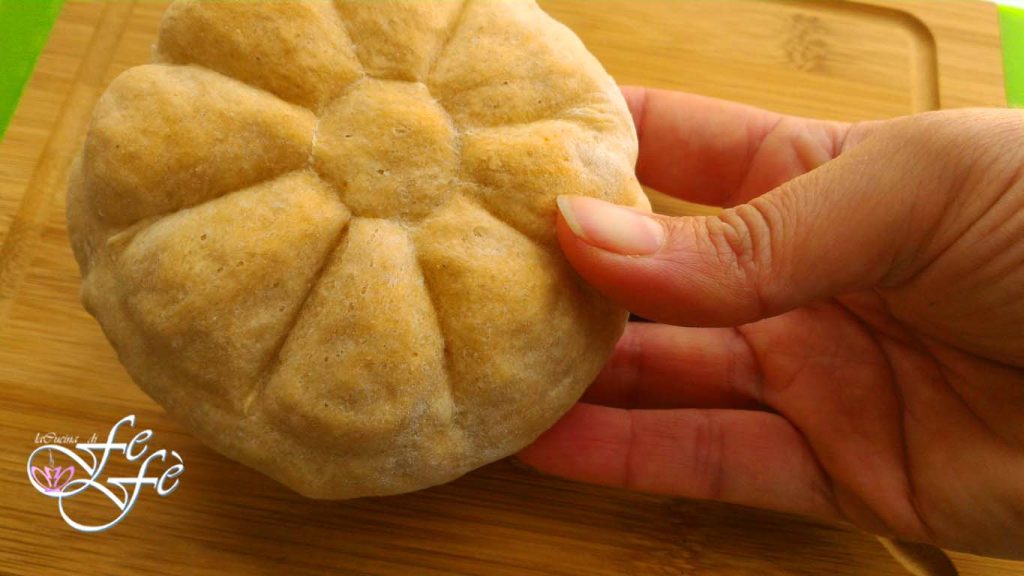
With the appropriate tool — a simple dough cutter will do — shape the rosettes by pressing on the surface down to the bottom but without cutting through. Alternatively, you can use a knife blade to draw the typical rosette lines.
Place in the oven at 446°F for 10 minutes, placing a small pan of water in the lower part of the oven, then lower to 392°F for another 20 minutes.
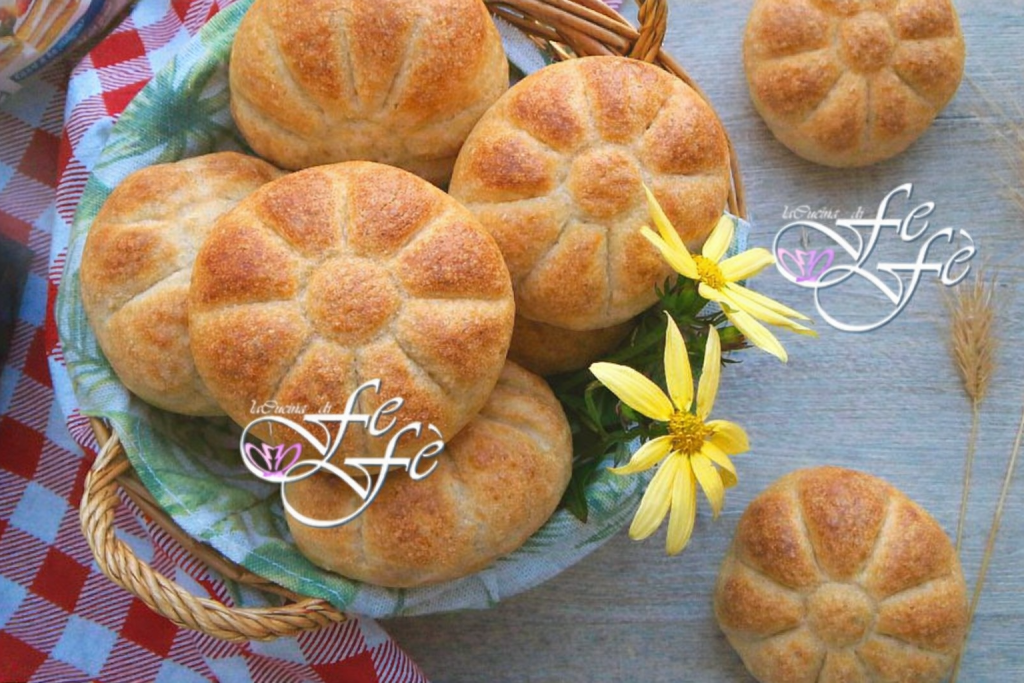
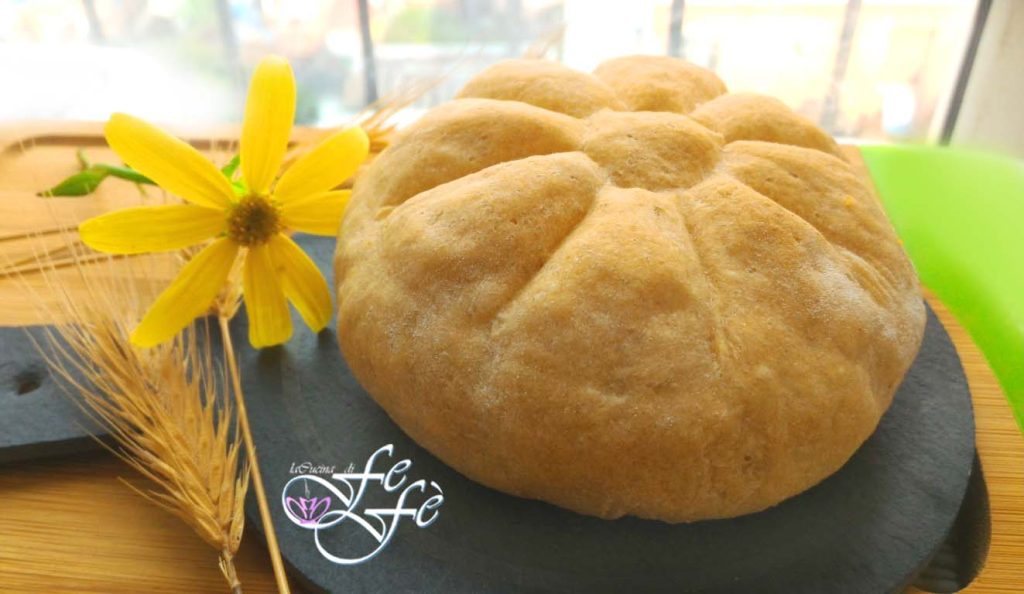
And voilà… the homemade bread rosettes are ready to be enjoyed!
A close-up shot.
Shot of the interior of the rosette.
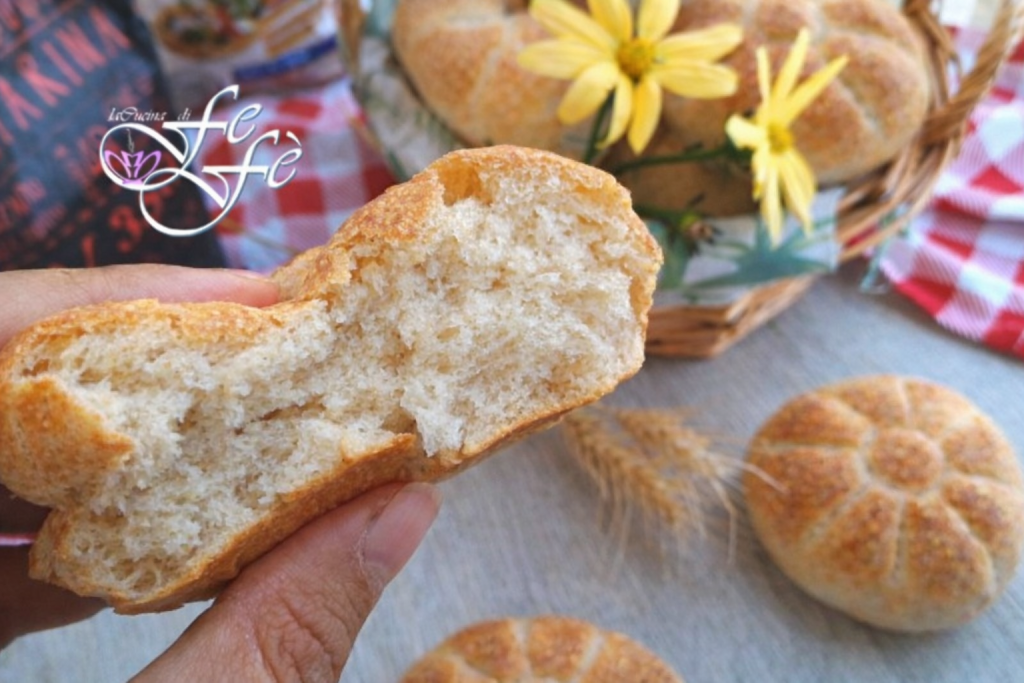
Enjoy your meal from La Cucina di FeFè!
Storage
👉Once completely cooled on a rack, store them at room temperature in a paper bag (the bread bag) and then place that inside a plastic bag. This will keep the crumb tender for about 24 hours.
👉The best method to preserve freshness is freezing. Place them in a freezer bag as soon as they are cold and store them in the freezer. When you want to eat them, put them directly into a hot oven at 356°F for 5-7 minutes: they will become crunchy again as if freshly baked.
1. Why use a 350W flour?
A strong flour like Garofalo W350 is essential to support the gluten network during long fermentations. Without this strength, the bread risks collapsing or not developing the typical internal “holes” of the rosettes.
2. Can I replace Tipo 1 flour?
Yes, but Tipo 1 (less refined than 00) gives that old-wheat aroma and an amber color that makes the crust more flavorful. If you use only 00, you may lose some aromatic complexity.
3. Can I make them gluten-free?
Absolutely yes, although it requires a change of strategy: since you cannot rely on the gluten of the W350 flour, the structure must be supported by balanced mixes. A winning combination is Nutrifree Bread Flour (about 2 1/2 cups) and Caputo Fioreglut (about 1 2/3 cups) to combine flavor and good rise performance. For a rustic touch, you can replace a small portion of the mix (about 50-60 g, roughly 1/3 cup) with buckwheat or sorghum flour to recall the typical scent of Tipo 1 flour. Brush the surface with a thin layer of EVO oil and dust with superfine rice and corn flour before baking; this will help achieve the crunchy golden crust you want.