Homemade Casarecce with the Kenwood: tips and quantities to obtain a rough, porous pasta in the characteristic rolled S-shape, perfect for holding the sauce.
Do you have a Kenwood and a pasta extruder but never know if the dough is right? In this recipe I reveal the perfect measurements and foolproof tricks to make homemade casarecce that are rough, porous and never sticky. Forget doubts about the texture: here is the step-by-step guide for impeccable results.
For these casarecce I used an egg dough made with a mix of re-milled durum semolina and all-purpose flour: this way the pasta is more elastic and holds up better during cooking compared to the version with only semolina and water. The result? A firm texture and a rough surface designed to ‘grab’ the sauce and never let it go.
Unlike the classic hand-rolled sheet, the dough should be intentionally crumbly, almost like wet sand: it is precisely this “coarse” texture that allows the mixer to work effortlessly and create that artisanal roughness that perfectly captures every condiment.
And please, once you’ve finished making the casarecce, don’t rush to clean the extruder! Let the pasta dry slowly, so it will come off in no time and you won’t have any trouble.
As usual, you can find these and other tricks in the Tips and Suggestions section at the bottom of the page.
With these quantities you get a little over 1.1 lb of fresh casarecce. It’s the perfect amount for 4 people: about 4.6 oz of fresh pasta per person (which corresponds to about 2.8–3 oz of dried pasta).
These casarecce are also perfect for those who are lactose-intolerant! If you want to keep the dish light and dairy-free, try dressing them with a homemade arugula pesto or a simple tomato sauce with fresh basil.
But now let’s see together how to make the Homemade Casarecce with the Kenwood. Prepare the ingredients and let’s start!
And if you try them, don’t forget to let me know in the comments on my Facebook page HERE. If you like, give the page a Like: it would make me very happy. See you there.
Gabriella
Other tasty homemade pasta variations:
- Difficulty: Easy
- Cost: Inexpensive
- Rest time: 40 Minutes
- Preparation time: 30 Minutes
- Cooking time: 8 Minutes
- Portions: 4 Servings
- Cooking methods: Stovetop
- Cuisine: Italian
- Seasonality: All seasons
Ingredients
- 1 1/2 cups (8.5 oz) cups re-milled durum wheat semolina
- 1 1/3 cups (5.6 oz) cups all-purpose flour
- 2 eggs (medium)
- 1 tsp water (only if needed, see note below)
Tools
- 1 Stand Mixer
- 1 Pasta Extruder
- 1 Die
- 1 Trays
Steps
First of all, put the re-milled semolina and the flour into the Kenwood bowl. Fit the K-beater (the leaf-shaped one) and turn on at the minimum speed for a few seconds, just enough to mix the two flours.
Lightly beat the eggs in a small bowl and, with the mixer running at speed 1, pour them in a thin stream, very slowly.
The Secret to Success: don’t try to get a smooth ball of dough! The ideal dough for the extruder should have the consistency of wet sand or coarse couscous. It should be crumbly but, if pressed between the fingers, should come together.
Let the dough crumbs rest in the bowl for about 10–15 minutes covered with a kitchen towel.
Meanwhile, mount the Pasta Extruder on the front attachment of the Kenwood, inserting the die for Casarecce.
Tip: if the die is bronze, put it in the freezer for 5 minutes before starting: it will prevent the dough from heating too much during extrusion.
Turn the Kenwood to speed 2 or 3. Insert a handful of crumbs into the hopper and use the pusher gently. When the pasta starts to come out, wait until it reaches a length of about 3–4 cm (about 1 1/4–1 1/2 inches, or to your preferred length) and cut it with a decisive stroke of the integrated knife.
Tip: never put too many crumbs into the hopper at once. To avoid straining the motor and to get a rough pasta, you should always be able to see the white part of the auger of the extruder while it turns.
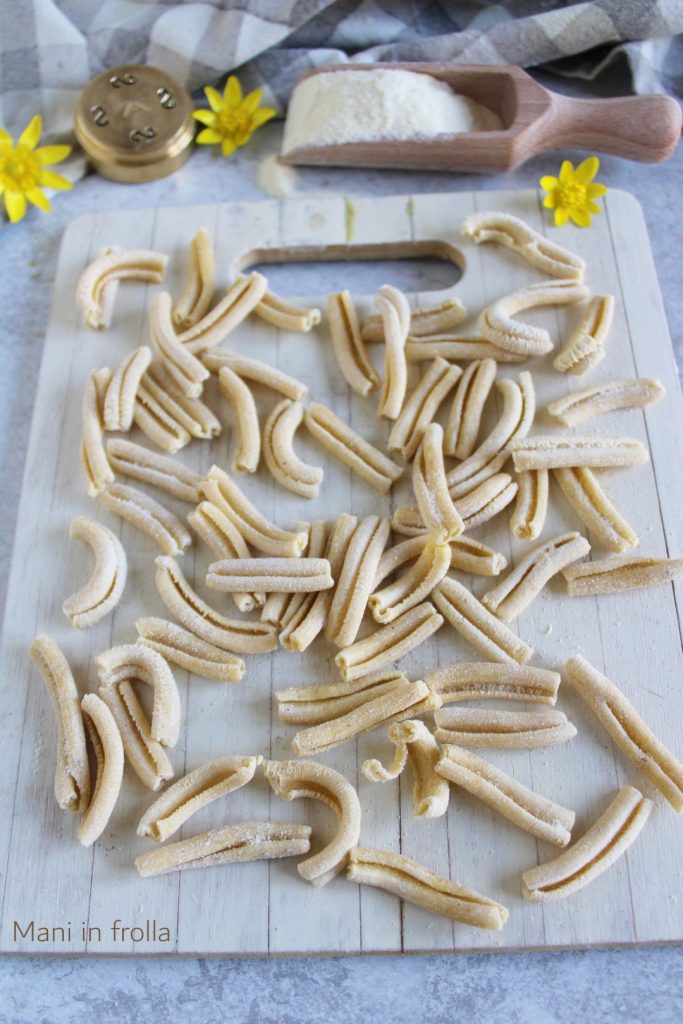
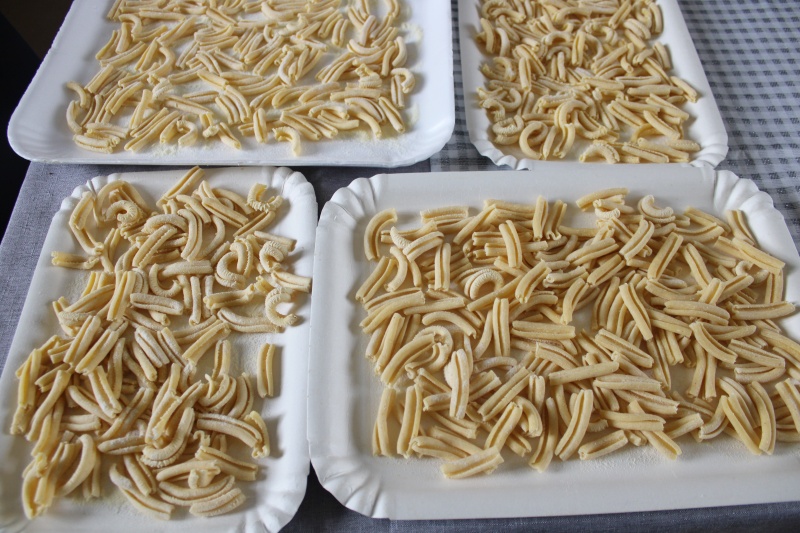
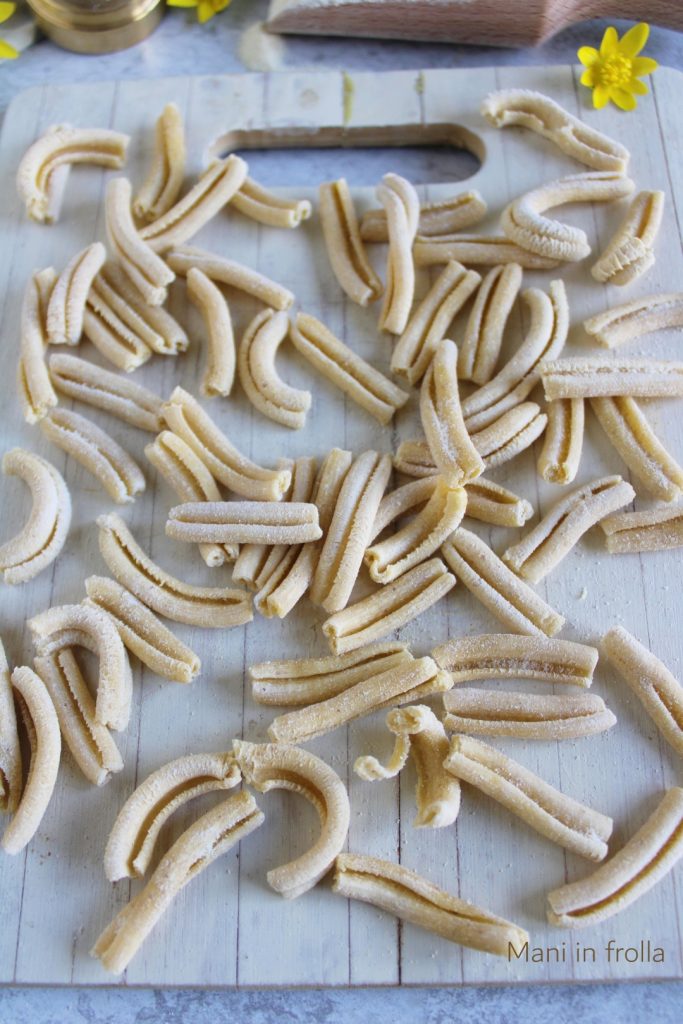
As the casarecce come out, lay them on a tray or pasta frame previously dusted with a little semolina. Let them air-dry for at least 30 minutes before cooking: this step will help the pasta keep its typical “S” shape even during boiling.
Here are the homemade Casarecce ready for cooking. Enjoy your meal!

See you in the next recipe

Storage
If you plan to eat them within 24 hours, let the homemade casarecce air-dry for about 1 hour on a tray generously dusted with semolina. Cover them with a clean cloth or place them in the refrigerator in an airtight container, spaced apart.
Warning: do not pile them up, otherwise the moisture from the eggs will make them stick together and turn into a single block.
If you want, you can also freeze them. Arrange the casarecce on a tray (like the cardboard pastry trays) well separated from each other and put them in the freezer for about 1–2 hours, until they become firm (a “pre-freeze”). Only then can you transfer them to standard freezer bags. This way they will never stick together.
Shelf life: They keep perfectly for 2–3 months.
Tips and Suggestions
For excellent results follow my tips:
– The number one secret is the texture. Do not form a smooth ball like for tagliatelle: the dough should look like wet sand. If it is too compact, the extruder will struggle and the pasta will heat up; if it is too crumbly, the casarecce will fall apart.
– Never overfill the extruder opening. Insert a few crumbs at a time and make sure you can always see the white part of the auger while it is turning. This prevents the motor from straining and the pasta from overheating, losing porosity.
– If you have a bronze die, put it in the freezer for 10 minutes before starting. The cold metal reduces friction and the pasta will come out with sharp edges and a wonderfully rough surface.
– Do not cook the pasta immediately after extrusion. Let it rest on a floured tray for at least 30–60 minutes. This step allows the casarecce to maintain its typical “S” shape even after plunging into boiling water.
– Never wash the die when it is dirty with fresh pasta. Let it air-dry until the residues are completely dry: they will come off with the proper tool or a simple toothpick in a few seconds. And remember: never in the dishwasher!
Have you tried this recipe or do you have any personal tricks with your Kenwood? Write to me in the comments below or on my Facebook page! If you post a photo of your casarecce on Instagram, tag me: I love to see your creations!
IF YOU LIKE MY RECIPES, YOU CAN FOLLOW ME ON MY FACEBOOK PAGE HERE OR ON PINTEREST HERE OR ON INSTAGRAM HERE
And to not miss the next updates, give a nice ‘Like’ to my Facebook page, it will make me very happy! Thank you from the bottom of my heart!
