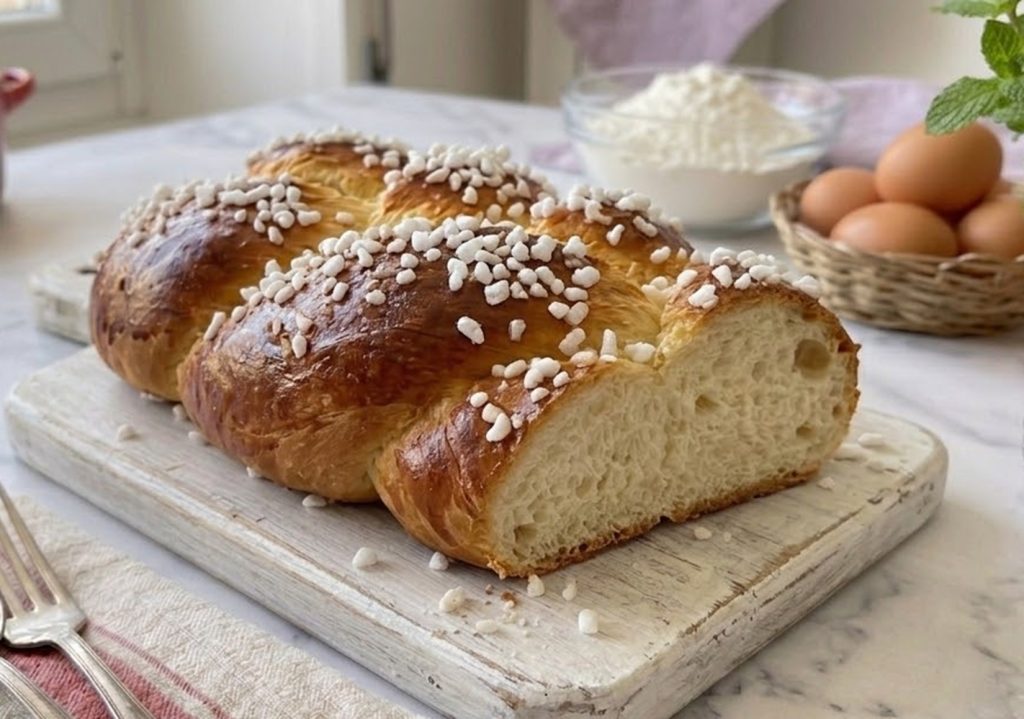
Easter Braid Soft traditional recipe with Pearl Sugar
How to make the Soft Sweet Easter Braid like the baker’s: tricks for a perfect dough
The main problem when preparing an Easter braid is getting a dough that is at the same time cloud-soft but structured enough to keep the braid shape during baking.
Often the cake turns out too compact or, on the contrary, rises unevenly, “tearing” on the surface.
Another common mistake is dryness: without the right precautions, these leavened products tend to harden already the next day.
The secret to solving these problems is the perfect gluten development (adding the butter very slowly) and controlling the temperature during proofing.
Using Manitoba flour guarantees the required strength, while the final rest before the oven ensures the lightness that makes it irresistible at breakfast.
- Difficulty: Easy
- Cost: Very inexpensive
- Rest time: 3 Hours
- Preparation time: 40 Minutes
- Cooking time: 35 Minutes
- Portions: 8
- Cooking methods: Oven
- Cuisine: Italian
Ingredients for Easter Braid
- 2 1/2 cups Manitoba (strong) flour
- 2 1/2 cups Type 0 flour (all-purpose)
- 4.2 oz granulated sugar
- 1 packet active dry yeast (7 g / 2 1/4 tsp)
- 1 tsp vanilla extract
- 3 1/2 tbsp butter (softened)
- 1 tbsp grated lemon zest
- 1 tbsp grated orange zest
- 1 egg
- 1 1/4 cups whole milk
- 1 1/3 tbsp rum (optional)
- 1/2 tsp salt
- 1 egg
- 1 tbsp milk
- as needed pearl (coarse) sugar
Tools
- Stand mixer
- Citrus zester/juicer
- Bowl
- Plastic wrap
- Baking pan
How to make the Soft Sweet Easter Braid
In the bowl of the stand mixer, combine the two flours, the yeast, the egg, the milk at room temperature, the vanilla extract, the rum and the grated lemon and orange zests. Start mixing on low speed using the paddle (K) attachment.
When the mixture is homogeneous, swap the paddle for the dough hook. Continue kneading, adding the softened butter one cube at a time, waiting for the previous piece to be fully incorporated before adding more. Add the salt toward the end. Work the dough until it is smooth, elastic and completely detached from the sides of the bowl (well developed).
Shape into a smooth ball and place it in a bowl covered with plastic wrap. Let it rise in the switched-off oven with the light on until doubled in volume (about 2 hours).
Take the dough, gently deflate it with your hands and divide it into 3 equal parts (weigh them with a scale for precision). From each part form a log of the same length and thickness. Braid them together on a baking sheet lined with parchment paper, tucking the ends down to seal them.
Cover the braid with plastic wrap and let it proof again for 50-60 minutes. After this time, brush the surface with a beaten egg mixed with a tablespoon of milk and generously decorate with pearl sugar.
Bake in a preheated static oven at 356°F for 30-35 minutes. If the surface browns too quickly, cover it with a sheet of aluminum foil for the last minutes. Remove from the oven and let cool on a rack before serving.
Ingredient Notes and Substitutions
Flours: The mix of Manitoba and Type 0 flour is ideal for rise and structure. If you don’t have Manitoba, use a flour with at least 12-13 g of protein.
Aromatics: You can replace the rum with anise or orange liqueur for a different aromatic note.
Sugar: The coarse pearl sugar on top is traditional, but you can also add colored hard-boiled eggs tucked into the folds of the braid before the second proof.
Storage
At room temperature: Store the braid in a food bag or under a glass dome; it will remain soft for 2-3 days.
Freezing: You can freeze the braid already baked (whole or sliced) for up to 1 month. Thaw at room temperature and warm slightly before serving.
Recipe Variations
Chocolate chips: Add about 1/2 cup (80 g) of frozen chocolate chips at the last minute of kneading.
Filled braid: Roll out the three logs, fill them with jam or a spreadable cream, close them into cylinders and then braid them.
Tips
Butter at room temperature: Make sure the butter is really soft but not melted; it should have the consistency of a cream so it integrates without breaking the gluten network.
Toothpick test: Every oven is different—check doneness by inserting a wooden toothpick into the center: it should come out dry.