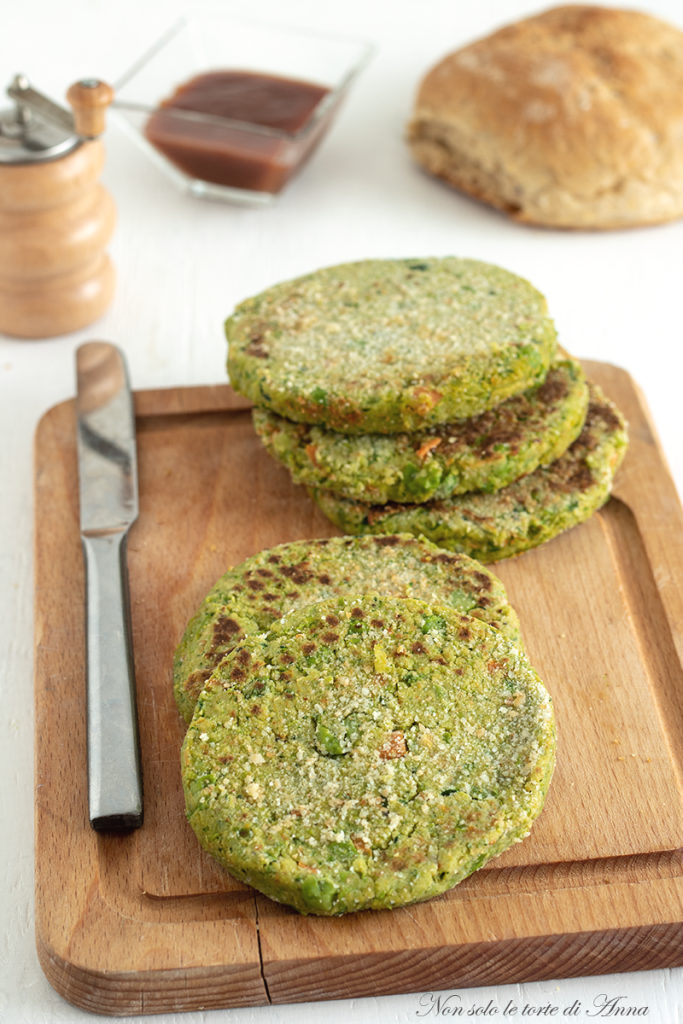
Are you looking for an original idea for a light, healthy but flavorful main course? Zucchini and pea burgers are the perfect solution!
These homemade vegetable burgers are a real revelation: crispy on the outside and tender inside, they please everyone, vegetarians and non-vegetarians alike.
They are ideal for a quick family dinner or to get the little ones to eat vegetables in a fun and colorful way.
Forget packaged products: making them with fresh ingredients takes very little effort and the result is infinitely better. You can enjoy them plated with a fresh salad or use them to fill a gourmet sandwich with your favorite sauces.
Below I leave you other veggie burger recipes and then, as always, right under the photo find out how to prepare the Zucchini and Pea Burgers!
See you soon with the next recipe, Ana Amalia!
- Difficulty: Very easy
- Cost: Very inexpensive
- Preparation time: 15 Minutes
- Cooking time: 15 Minutes
- Portions: 4 People
- Cooking methods: Stovetop
- Cuisine: Italian
- Seasonality: Spring, Summer
Ingredients to make zucchini and pea burgers
- 1 1/2 cups frozen peas (or fresh)
- 2 zucchinis (medium)
- 1 shallot
- 1 egg (large)
- 5 tbsp grated Grana Padano
- 4 tbsp breadcrumbs
- 2 pinches salt
- to taste black pepper (ground (optional))
- 1 sprig parsley (chopped)
- to taste mint (fresh)
Tools
- 1 Grater
- 1 Kitchen scale
- 1 Frying pan
Preparation of zucchini and pea burgers
Preparing the vegetables: Start by washing the zucchinis and grating them with a coarse grater.
Squeeze them well with your hands or a clean cloth to remove excess water from the vegetables.
Meanwhile, blanch the peas in salted water for about 5-7 minutes (if you use canned peas, simply drain them well).
Making the mixture: In a large bowl, combine the grated zucchinis and the peas.
If you prefer a smoother texture, you can lightly mash the peas with a fork.
Add the egg, the Grana Padano, the chopped herbs and a pinch of salt and pepper.
The right consistency: Mix everything well and add the breadcrumbs one tablespoon at a time.
The goal is to obtain a mixture that can be shaped with your hands, not too sticky but not too dry either.
Shaping and cooking: Take portions of the mixture and form balls, then gently flatten them to create the burger shape.
On the stovetop: Heat a drizzle of oil and cook the burgers for about 4-5 minutes per side, until a nice golden crust forms.
In the oven: Place them on a baking sheet lined with parchment paper, brush them with a little oil and bake at 392°F for about 20 minutes, turning them halfway through cooking.
Storage, tips and variations for zucchini and pea burgers
Storage: how to?
In the refrigerator: You can store cooked burgers in an airtight container for 2 days. Reheat them briefly in a pan or in the oven to restore crispness.
In the freezer: These burgers freeze very well! You can freeze them raw, separating them with pieces of parchment paper. When ready to eat, cook them directly from frozen, slightly increasing the cooking time.
Secrets for a perfect result
Squeeze the zucchinis: This is the most important step! If the zucchinis remain too watery, the burger risks falling apart during cooking.
Resting: If you have time, let the mixture rest in the fridge for 30 minutes before shaping the burgers: they will be much easier to handle.
Fun variations
Melty center: Insert a cube of provola or mozzarella in the center of the burger before sealing it: the surprise effect will please everyone!
Vegan style: You can replace the egg with a boiled mashed potato and use nutritional yeast flakes instead of cheese.
Spices: Try adding a pinch of turmeric or curry to the mixture for an exotic, colorful touch.
📸 Now it’s your turn!
These burgers prove that eating healthy doesn’t mean giving up flavor! I’m curious to know how you’ll serve them: in the classic bun with tomato and lettuce or as a light main course?
Leave me a comment: Tell me if you liked the recipe and which variations you tried!
Share your photos: If you make them, tag me on social media, I love seeing your dishes.
💻If you want to see more recipes you can return to HOME
📲If you don’t want to miss any recipes you can follow me on my Facebook Page, just turn on notifications and you’ll see how many new recipes every day.
Frequently Asked Questions (FAQ)
Can I use flour instead of breadcrumbs?
Yes, but breadcrumbs help absorb the moisture from the vegetables better and give a more pleasant texture. Alternatively, you can use chickpea flour for a gluten-free version.
Can I cook them in an air fryer?
Absolutely yes! 356°F for about 12-15 minutes, spraying them with a little oil halfway through cooking.