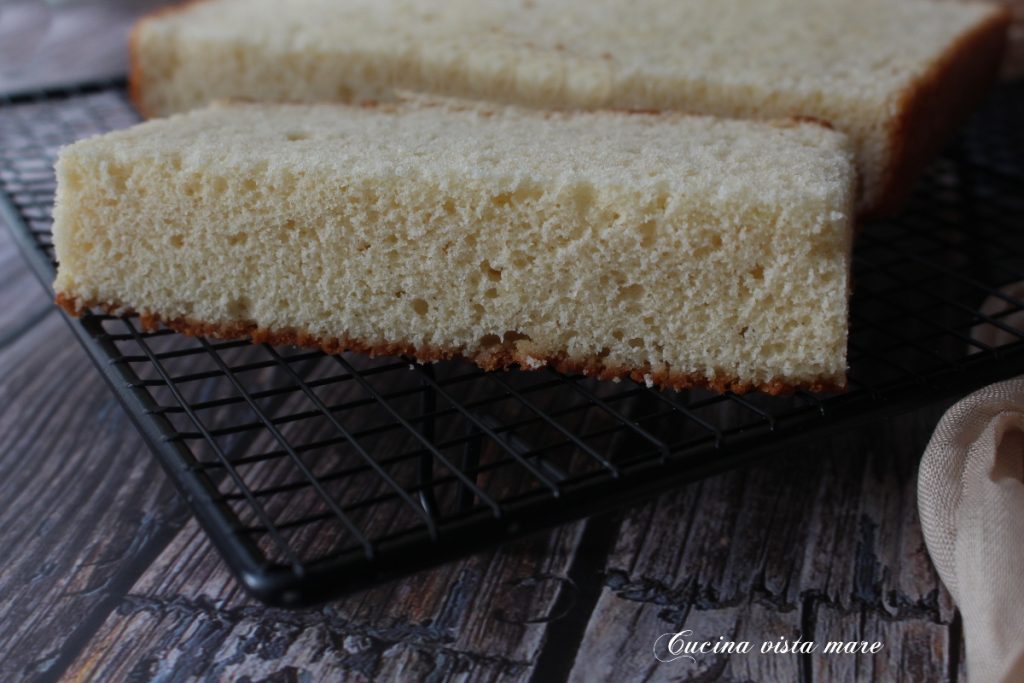
The Molly cake for filling is a basic cake — one of those recipes you need to learn. It’s a cross between a chiffon cake and a sponge cake. It’s soft but not too soft. It’s compact but not too compact. It’s perfect for making multi-tiered filled cakes that will then be crumb-coated and decorated. It’s tender, moist, doesn’t crumble, doesn’t dome while baking and holds the weight of fillings and crumb coat well. It doesn’t need a soaking syrup, and despite that it’s pleasant to eat, but I recommend brushing it with a few tablespoons of milk to moisten it a bit and obtain the “perfect” texture. The Molly cake is also delicious as is. On its own. Pure. It becomes a delightful snack cake.
For the recipe I followed the proportions from UNICORNS EAT COOKIES.
The original recipe for this cake belongs to Molly Coppini (that’s why it’s called Molly cake), a very famous Italian cake designer.
Don’t miss

- Difficulty: Medium
- Cost: Medium
- Rest time: 10 Minutes
- Preparation time: 35 Minutes
- Cooking time: 50 Minutes
- Portions: 1 Piece
- Cooking methods: Oven, Electric oven
- Cuisine: Italian
- Seasonality: All seasons
Ingredients
The eggs are weighed without shell: 225 grams (about 8 oz) correspond to four large eggs or four and a half medium eggs.
- 1 1/2 + 1 tbsp cups heavy cream
- 4 large eggs eggs (at room temperature (225 g / 8 oz total))
- 1 7/8 cups granulated sugar
- 3 cups all-purpose flour (type 00 equivalent)
- 1 packet baking powder
- 1 pinch salt
- 1 1/2 teaspoons vanilla extract
Tools
The knife with spacers is one of the best purchases I ever made: it allows you to obtain a perfect cut.
- 3 Bowls
- 1 Hand whisk
- 1 Kitchen scale
- 1 Stand mixer Kitchen Aid Artisan
- 1 Spatula
- 1 Baking pan rectangular 7.9 x 11.8 x h 3.9 inches Decora
- 1 Toothpick Cake tester
- 1 Knife with spacers
- 1 Cooling rack
Steps
Crack the eggs into a bowl, whisk them briefly with a whisk and let them acclimate to bring them to room temperature.
Whip the cream with electric beaters: it should reach a firm but soft, semi-whipped consistency.
In a bowl weigh the flour, add the sifted baking powder and mix.
Line the pan with parchment paper: cut the base precisely and cut a strip long and as high as the pan’s sides. Butter the pan and press the parchment well. If you want to see the steps, there is a tutorial in the article “How to line a pan with parchment paper“.
In the stand mixer bowl beat the eggs with the sugar for 3–4 minutes until pale and frothy, then fold in the sifted flour in two additions using the whisk at medium speed. Also add the salt and the vanilla extract.
Use a spatula to fold the batter and check that there are no lumps left on the bottom.
Finally fold in the cream in three additions using a spatula and gentle upward motions from the bottom to the top.
Pour the batter into the pan, lift it and give a few sharp taps on the work surface to remove any bubbles inside. Using a skewer or a sushi skewer make circular movements inside the batter: this helps remove any remaining air bubbles.
Bake in a preheated oven at 320 °F for 50–60 minutes.
Once baked (do the skewer test — it should come out dry) remove the cake from the oven, let it cool for 10 minutes, then unmold it from the pan and let it cool completely on a cooling rack.
Notes
From the original recipe there are baking suggestions: place the pan on the rack in the second slot from the bottom. Put a baking sheet on the topmost rack. This covering helps distribute the heat evenly and avoids forming a dome on the cake. I tried the suggested baking method but in my oven after 50 minutes the cake was still soft and I had to extend the baking time. So when I made the cake again I used the classic baking instructions for my oven for cakes: third rack from the bottom and no covering. The cake baked within the expected time and no dome formed.
If you want to freeze it to get ahead when preparing a complex cake (also recommended by UNICORNS EAT COOKIES): cut it into layers and wrap each layer in plastic wrap with a sheet of parchment between layers, stacking a maximum of three layers. Insert a note with the preparation date and the cake name and wrap with a second layer of plastic. Place it in the freezer making sure it is free all around to avoid being crushed.
For a three-tiered cake you will need at least one and a half times this recipe. I preferred to make two cakes so I could be sure of perfect baking. I simply cut them in half to obtain four parts: three I used for a three-tier cake and the fourth we ate for breakfast.
