Viennetta-style ice cream cake, a refreshing, easy, and at the same time very delicious dessert. I made the Viennetta ice cream cake for my niece’s birthday. She had already celebrated her birthday at the university with all her friends, but she wanted to do something with the family, so as soon as she returned, we organized a nice lunch at home. We prepared a classic mixed Calabrian appetizer, hot, not to be confused with the classic cheese and cold cuts platter. I made meatballs, fritters, couscous salad, and also chicken salad, and to conclude a good fresh and creamy dessert. The Viennetta ice cream cake is ideal for celebrating a summer birthday, but it also works well in spring or autumn days. The good thing is that when it thaws, it doesn’t melt like classic ice cream, because it’s made in a way that holds well even when defrosted. Recreate the Viennetta-style ice cream cake yourself, it’s super easy and truly delicious, approved by my niece and the entire crew.
- Difficulty: Very easy
- Cost: Medium
- Rest time: 5 Hours
- Preparation time: 20 Minutes
- Portions: about 8 servings
- Cooking methods: Stovetop
- Cuisine: Italian
- Seasonality: All seasons
Ingredients for Viennetta-style ice cream cake
- 7 oz dark chocolate
- 10 hazelnuts optional
- 1.25 cups fresh cream or whipping cream
- 5.3 oz condensed milk
- 1 tsp wildflower honey
- 3.5 oz whipping cream or fresh cream
- as needed chopped hazelnuts
Tools for preparing Viennetta ice cream cake
- 1 Small pot
- 1 Pot
- 1 Bowl
- 1 Electric whisk
- 1 Springform pan
- 7 Parchment paper
Steps to Prepare Viennetta-style ice cream cake
Let’s prepare 6-7 sheets of parchment paper, each about 12 inches long, as we need to cut out chocolate discs of about 7 inches, so it’s better to have them larger to handle and move them better.
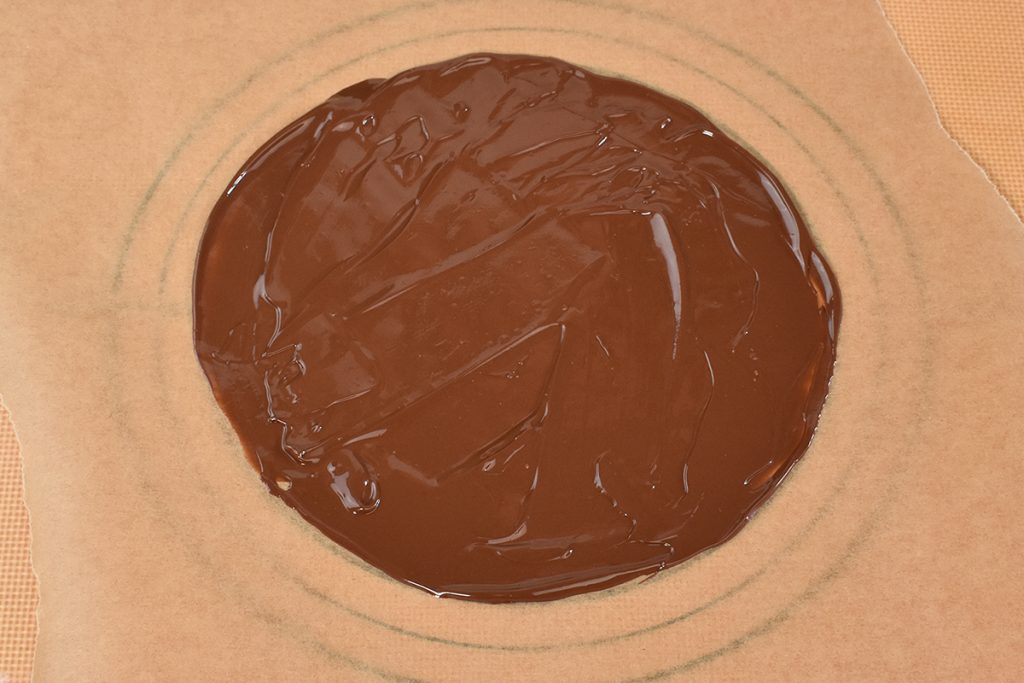
Let’s melt about 7 oz of dark chocolate. We melt it in a bain-marie, so we can manage it better. To melt it in a bain-marie, we place it in a tall and narrow saucepan, and then place this saucepan in a larger pot filled halfway with water. The chocolate should not come into contact with the water.
We bring the two pots, one inside the other, onto the stovetop over medium heat, so as to heat the water slowly without bringing it to a boil. We gradually stir the chocolate with a silicone spatula until the chocolate is completely melted.
When the chocolate is well melted, we place a spoonful of chocolate in the center of the sheet and gradually spread it with a spatula to form a 7-inch circle. If needed, we add more chocolate. Make sure to use a small amount of chocolate for each layer so that you can make many thin ones. They will be easier to cut and will make your ice cream cake more delicious.
To make precise layers of 7 inches, we draw a circle, using the size of the springform pan, on the side where we won’t place the chocolate. Use a strong color so that it’s visible from the other side when we flip the sheet, or more simply place a sheet with the drawn circle or a silicone mat underneath the parchment paper, with pre-drawn circles.
I also prepared a thicker chocolate layer for the base, to which I added some chopped hazelnuts once the chocolate was spread in a circle, just to enrich it a bit.
Gently transfer the sheets with chocolate to a flat surface without overlapping them, so they cool slowly.
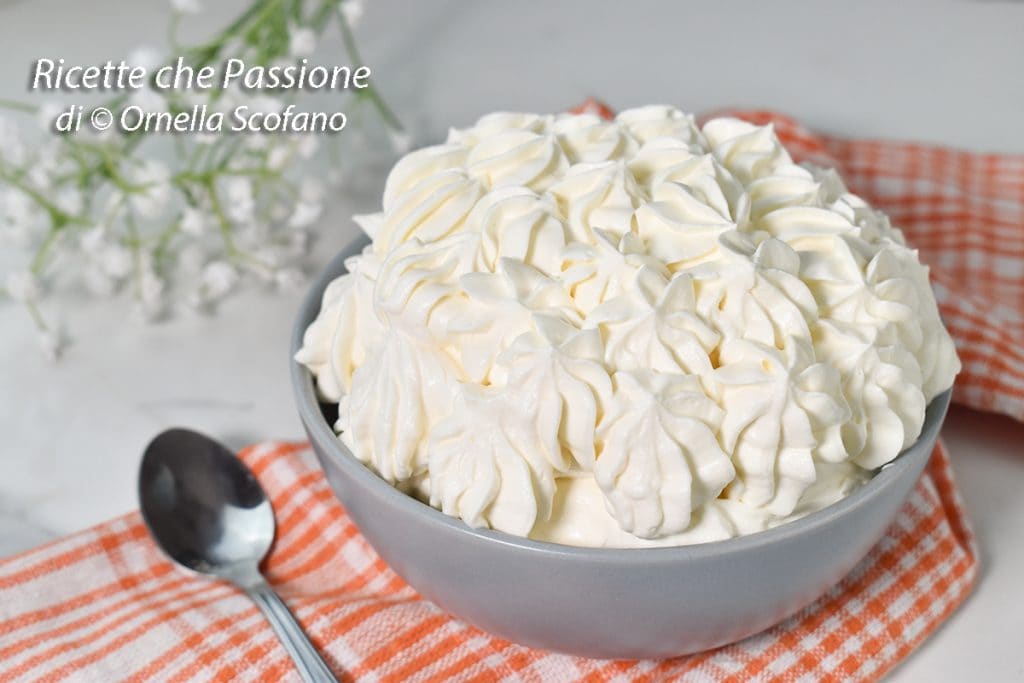
Whip 1.25 cups of cream, you can use sweetened whipping cream, milk, or vegetable-based, but also fresh cream. You can also whip all 1.5 cups and set aside 0.25 cups already whipped to use for decorations later.
To the 1.25 cups of whipped cream, add the condensed milk and a teaspoon of honey, and mix well to obtain a firm cream. Adjust with powdered sugar if needed if you used unsweetened cream, but do not use cooking cream as it is not suitable.
Line an 18 cm (7 inch) ring mold with a sheet of parchment paper, leave the edges protruding from the mold, then it will be easier to remove from the mold and discard the parchment paper.
Place the first chocolate disc on the base, the one with hazelnuts, and slightly thicker. If the disc is too large, measure the excess parts with the mold and cut them with a knife.
Place the first layer of paradise cream on the chocolate layer. A couple of tablespoons, distribute it and cover with a second chocolate disc, which is gently removed from the parchment paper.
Continue this way to make the layers, finishing with a chocolate layer. Now cover with plastic wrap and place in the freezer, we need to freeze our cake completely before proceeding to decorate it.
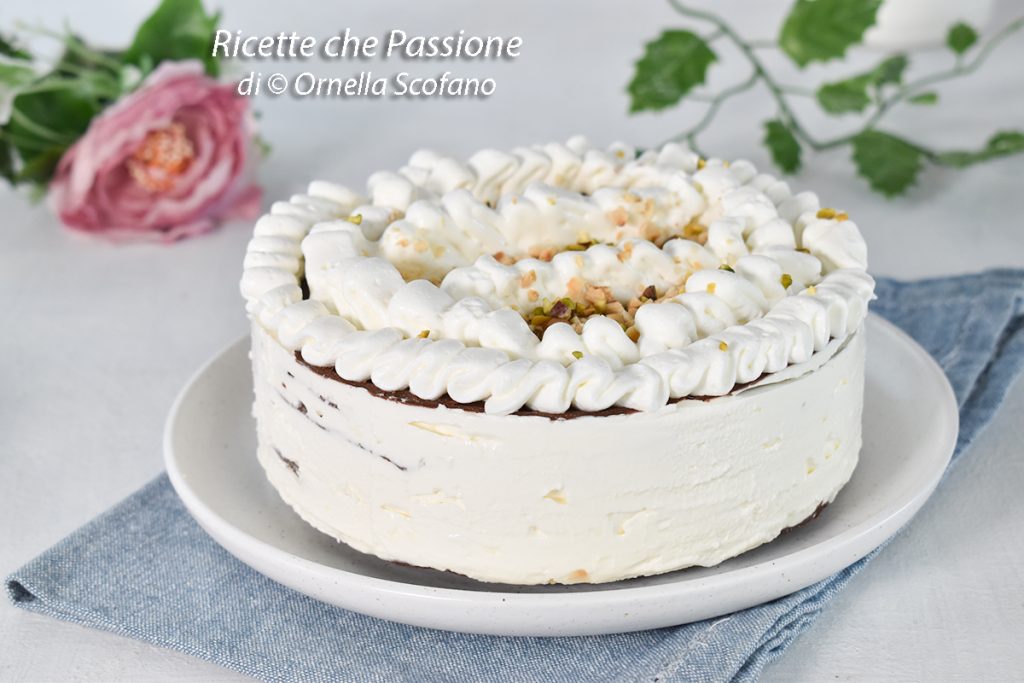
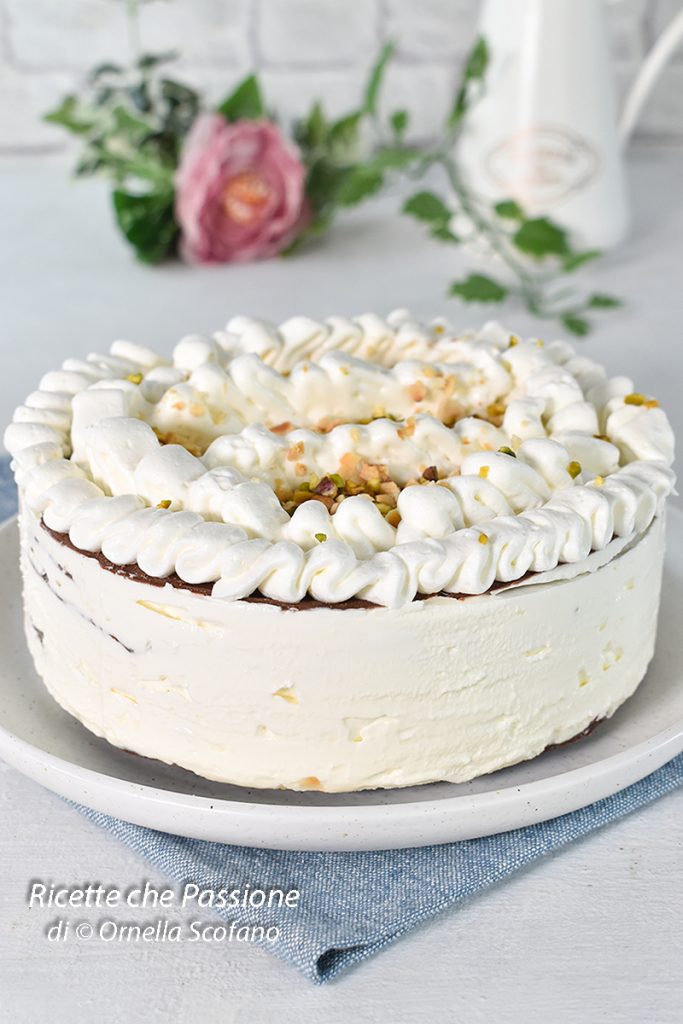
When the Viennetta-style ice cream cake is completely frozen, remove it from the mold, remove the parchment paper from the base, and place it on a serving plate. Decorate with the cream set aside, using a piping bag with a flat nozzle, to make a folded cream strip along the entire circumference, as seen in the photo and better in the video. Then decorate as desired. Also, add some chopped hazelnuts or pistachios.
Let it freeze again before serving. Decorate quickly without letting it thaw.
It is important to serve it immediately after removing it from the freezer, so you’ll have perfect slices because, being well frozen, the chocolate cuts better, meeting the resistance of the still-frozen cream. Of course, the texture is perfect even when frozen, as it doesn’t need to rest outside the fridge before serving. Prepare it because it’s really delicious and also simple to make.
If you want to receive my recipes, follow me also on social media, on the page FACEBOOK, Pinterest and Instagram, remember you can leave a comment, here or on social media, and if you try one of my recipes, send me your photo, you can also find me on YouTube: Ornella Scofano Ricette che Passione. Go back to the HOME.