Gingerbread at Christmas is truly a must-have; this fragrant and versatile dough is also known as gingerbread. Gingerbread is typical of England, North America, and Northern Europe. It is mainly prepared during the Christmas holidays, making it perfect for creating little people, festive shapes, and houses. A dough based on spices like ginger, cinnamon, nutmeg, and cloves. Easy to make, with an intense aroma and unique taste. Gingerbread will truly win everyone over, so I recommend trying it. You can let your imagination run wild to create many things; in the oven, it will remain perfect, adding a festive atmosphere to the house! It will be beautiful and fun to decorate all the creations with white or colored icing, maybe together with the little ones!
See how many creations:

- Difficulty: Easy
- Cost: Medium
- Rest time: 2 Hours
- Preparation time: 25 Minutes
- Portions: 35/40 cookies
- Cooking methods: Oven
- Cuisine: English
- Seasonality: All seasons
Ingredients for Gingerbread
- 3 cups all-purpose flour (If needed, also 400g "Depends on the egg weight")
- 2 teaspoons ground cinnamon
- 2 teaspoons ground ginger
- 1/2 teaspoon ground cloves
- 1/2 teaspoon nutmeg
- 1 egg
- 6 oz brown sugar
- 1 pinch salt
- 1/2 teaspoon baking soda
- 1/2 cup wildflower honey
- 2/3 cup butter
- 1 1/4 cups powdered sugar (If needed, also 180g)
- 1 egg white
- 1 teaspoon lemon juice (a few drops)
- as needed food coloring
Tools
- 1 Mixer
- 1 Sieve
- 1 Stand Mixer
- 1 Piping Bag
- Cookie Cutters
- 1 Rolling Pin
- 1 Parchment Paper
- 1 Cooling Rack
Steps for Gingerbread
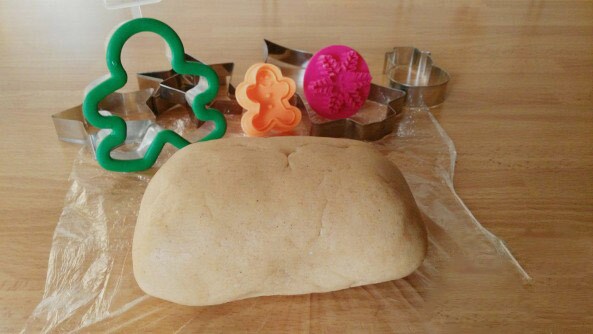
To prepare the gingerbread dough, always start a couple of hours in advance, as it will need to rest in the fridge for a minimum of 2 hours. If desired, it can be made the day before and kept in the fridge for up to four days. Otherwise, it can be frozen in special food bags and kept for up to a month, to be used as needed.

In the mixer (or, if you prefer, knead by hand on a work surface), put the sifted flour, add all the spices, the butter cut into pieces, and the honey. Also add the baking soda, the egg, and start kneading. If using a mixer or stand mixer, set it to medium speed. When a ball forms, the dough is ready; if it’s too sticky, add a bit more flour, adjusting as needed. Once you have a compact and smooth dough, let it rest in the fridge wrapped in plastic wrap for at least two hours.
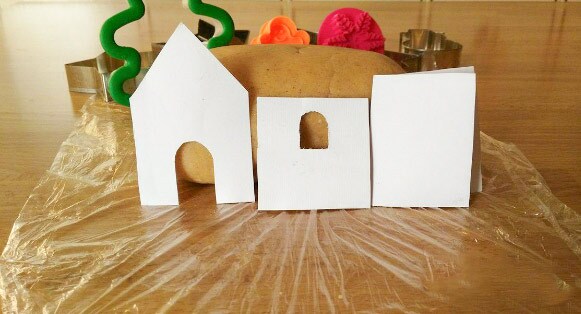
If you don’t have cookie cutters, you can create the Christmas house meanwhile; choose the measurements you prefer and trace them onto a cardboard, then cut the house shape. Three sides will be needed to make the cut on the dough and simplify the work.
You can also find the house shape ready-made here; I created the shapes on cardboard, as I needed small houses to use as placeholders.
Roll out the dough:
To make the work easier, always work the dough with a bit of flour on the work surface, or if you prefer, on a sheet of parchment paper. Use the cutters to carve the Christmas shapes you like best, place them on a baking sheet lined with parchment paper, and bake at 350°F (static mode) for about 15 minutes; remove the cookies from the oven as soon as they become golden and let them cool on a cooling rack.
The temperature and cooking time are always indicative, so adjust according to your oven.
To prepare the house, cut out all the parts and place them on a baking sheet, bake at 350°F. Once the cookies have cooled, prepare the royal icing and start assembling the house.ICING PREPARATION:
Put all the ingredients: egg white, powdered sugar, and lemon drops, in a stand mixer or with an electric whisk and whip until stiff peaks form. If you like colored icing, just add a few drops of food coloring. Once ready, pour it into a piping bag and decorate the cookies, a little creativity is all you need!
The icing will also be used to assemble the houses; indeed, it will serve as a sort of glue to keep all the parts tightly joined.
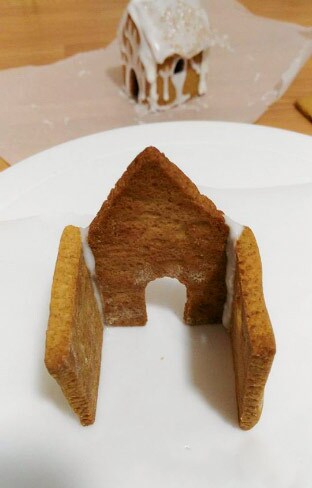
Start by applying a generous amount to the sides and join the cookies, allowing it to dry well. Make sure the royal icing is well set; otherwise, the drying time doubles, and it tends to drip.
If the parts don’t hold at first, just use a support to help keep them still; I used two espresso cups. Make sure the icing adheres like glue.
As soon as the icing has dried and the parts are well secured, assemble the roof with more icing, then let it dry thoroughly. Now the house is ready; let your creativity loose and decorate with sprinkles or other items; aren’t they beautiful!
You can use them as centerpieces, placeholders, along with many gingerbread men, but believe me, they are also perfect as gift ideas!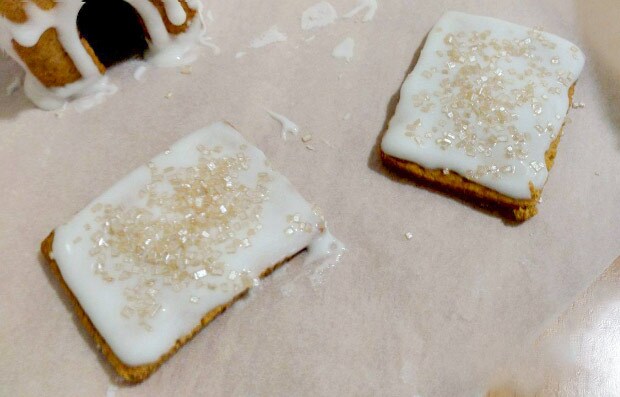
Create the gingerbread men.


Storing Gingerbread
The gingerbread dough can be prepared and stored in the fridge for up to 4 days; if desired, it can also be frozen to be used as needed.
The cookies should be stored in a tin box or glass jar; the houses can be wrapped in food gift bags if they are to be given as gifts.