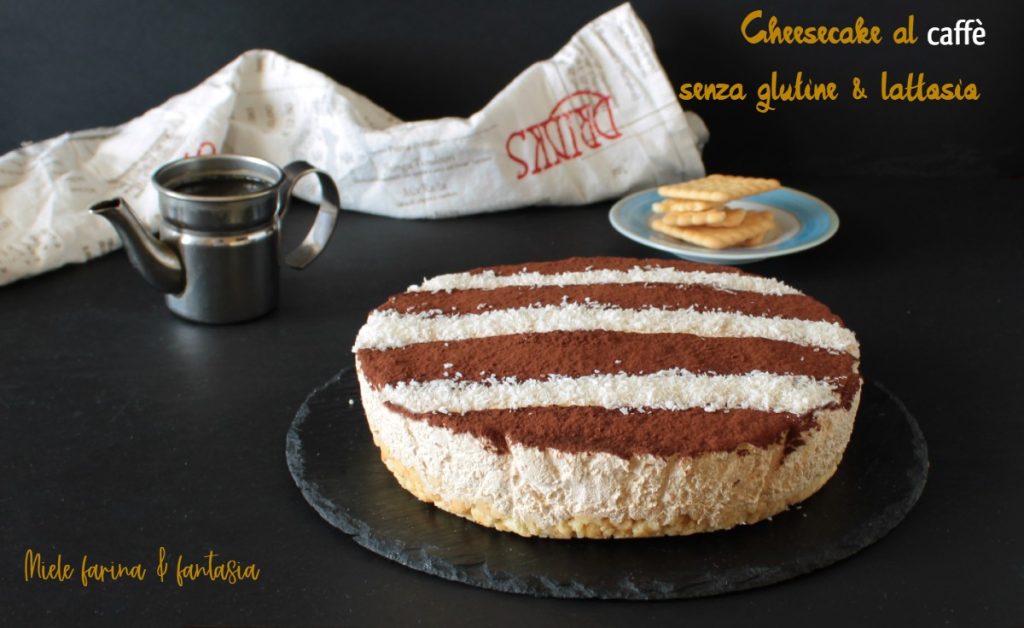
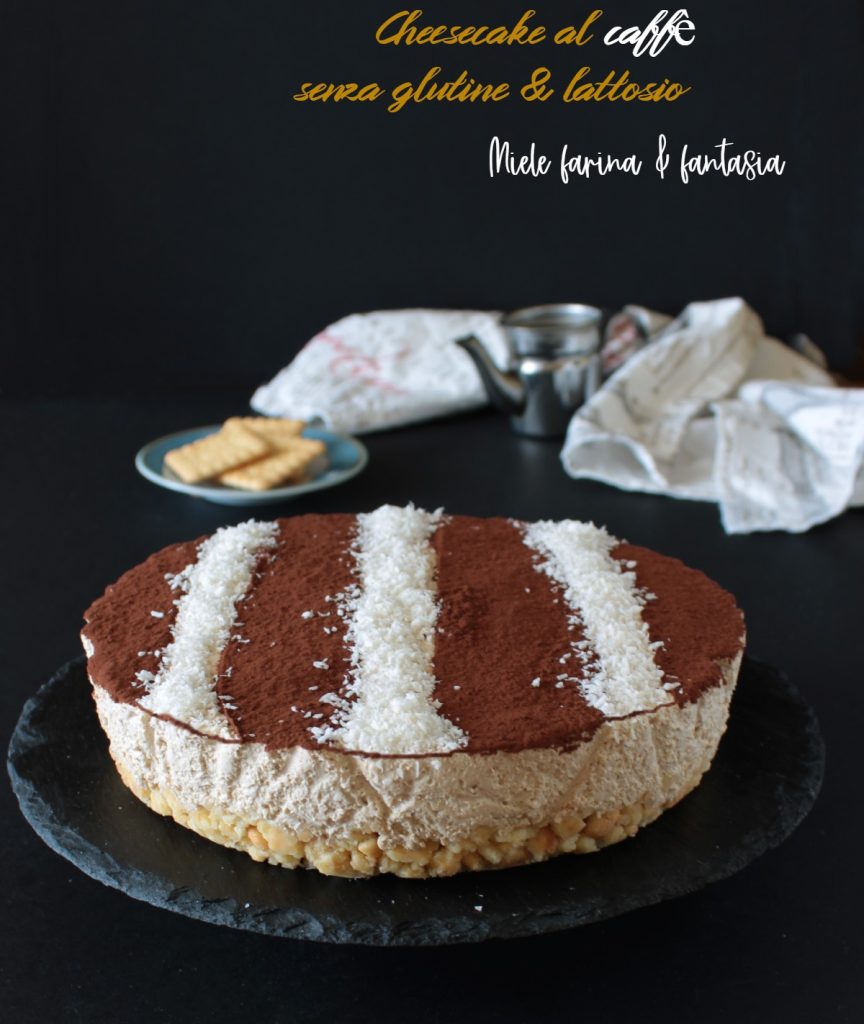
The coffee cheesecake, with its extra touch given by the presence of bitter cocoa and coconut, is a delicious and aromatic cake that requires no cooking. It contains neither gluten nor lactose, so it can be eaten by those with specific dietary needs. We can prepare it for special occasions, Sunday lunch, or a buffet. The coffee cheesecake, in addition to being very delicious, is a dessert that plays with textures, from the enveloping softness of the fragrant cream to the not overly crunchy base of cookies.
- Difficulty: Very easy
- Cost: Cheap
- Rest time: 6 Hours
- Preparation time: 30 Minutes
- Portions: 8
- Cooking methods: No cooking
- Cuisine: Italian
- Seasonality: Fall, Winter, and Spring
Ingredients
- 7 oz gluten-free dry cookies
- 3.4 oz melted lactose-free butter
- 1/2 teaspoon Strega liqueur (optional)
- 0.85 cup lactose-free whipping cream (or vegetable cream)
- 4.4 oz lactose-free coffee yogurt
- 1 teaspoon gluten-free instant coffee
- 7 oz lactose-free cream cheese
- 3 tablespoons gluten-free powdered sugar
- to taste gluten-free cocoa powder
- to taste grated coconut
- 3 strips of parchment paper
Tools
- 1 Whisk
- Pans
- 1 Meat Tenderizer
- 1 Spatula
- 1 Container cake carrier
Steps
Let’s start preparing the base of our cheesecake.
1) Place the ingredients in front of you: butter, liqueur, and cookies.
2) In a bowl, crumble the cookies more or less finely (with your hands or a meat tenderizer), but do not reduce them to powder.
3) Melt the butter, flavor it with the liqueur, and immediately pour it over the cookies. Mix until the butter is perfectly incorporated and then transfer it into a 8-inch round pan (with or without removable bottom) already lined with parchment paper (making sure the edges of the paper stick out so that the cake can be removed without problems).
4) Using a meat tenderizer or your hands, press the cookies very well, eliminating any spaces and air bubbles, so that the base has a uniform thickness. Place the pan in a cake carrier or cover it with plastic wrap and put it in the fridge for 2 hours to firm up the cheesecake base.
Prepare the coffee cream
5) Take the cookie base out of the fridge after two hours. Dissolve a teaspoon of instant coffee in the yogurt, stirring well to enhance the aroma and flavor of the cream. Begin to whip the cream (if using pre-sweetened vegetable cream, add only one tablespoon of powdered sugar) and as soon as it starts to thicken, add the powdered sugar, yogurt, and cream cheese and whip for a few more moments until you get a fluffy and firm cream to pour over the cookie base.
6) Spread the cream with a spatula or the back of a spoon and level it. Put the cake back in the fridge, well sealed in the cake carrier or with plastic wrap. Now all that’s left is to wait for the cream to firm up enough and all the aromas and flavors to blend. I always recommend preparing this type of dessert at least a day in advance, to fully appreciate it in all its goodness.
For the decoration
a) Cut 3 (or more) strips of parchment paper 8 inches long and 1.2 inches wide.
b) Remove the cold cake from the pan and place it on the serving plate, removing the parchment paper underneath.
c) Using a sieve, dust it with plenty of cocoa powder.
d) Place the three strips of parchment paper on the cheesecake very gently, spacing them as desired.
e) Let the coconut fall slowly in the spaces between one strip of paper and the other; finally, slowly remove the strips of paper. You can put it back in the fridge or serve it immediately.
Bon appetit