Have you had an intense workout and need a complete dish to regain energy? Recommended by my nutritionist, I offer you a balanced and complete dish, essential for muscle recovery and restoring energy. After an intense training session, the body needs specific nutrients to promote tissue repair and replenish glycogen stores. A well-structured meal should include a combination of carbohydrates, proteins, and healthy fats, as well as essential vitamins and minerals.
READ ALSO
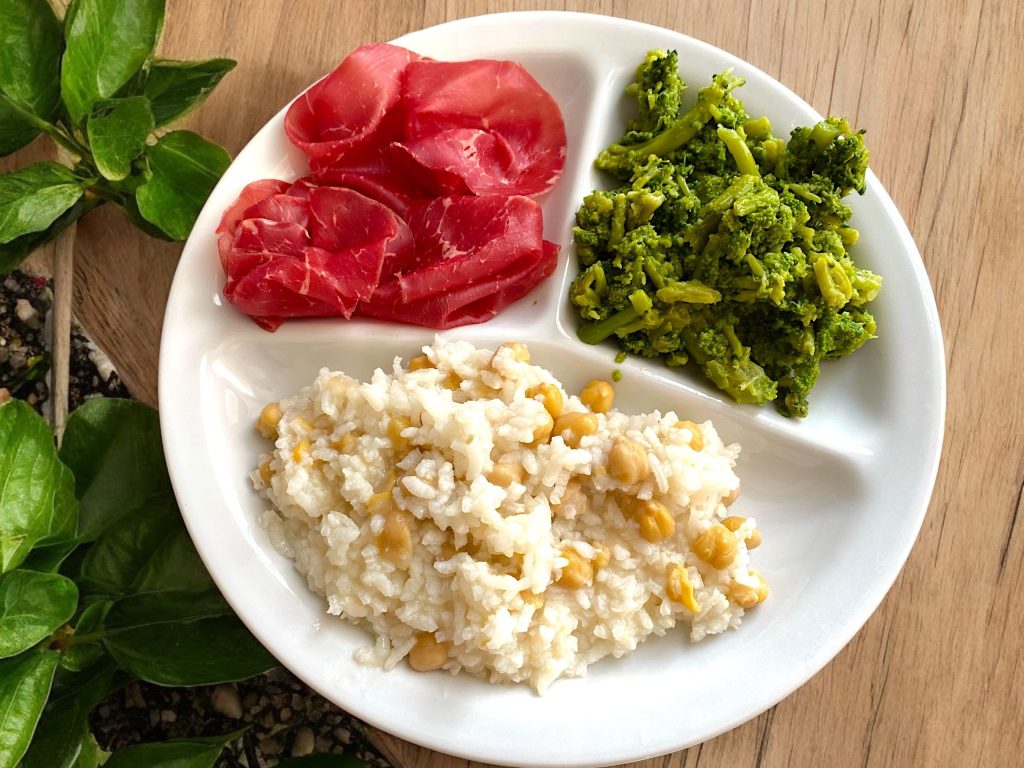
THE PLATE CONSISTS OF:
Carbohydrates
Carbohydrates are crucial after a workout as they provide the energy needed for recovery. Consuming complex carbohydrates, such as whole grains or legumes, helps restore glycogen stores in the muscles. It is advisable to include a source of carbohydrates in the post-workout meal to maximize recovery and improve performance in future sessions. Additionally, carbohydrates promote the production of insulin, a hormone that helps transport nutrients into muscle cells, thus promoting protein synthesis and muscle repair.
Proteins
Proteins are essential for muscle repair and growth. After a workout, the body enters a catabolic state, and protein intake helps reverse this process. It is important to choose high-quality protein sources, such as lean meat, fish, eggs, or legumes, to ensure an adequate intake of amino acids. Ideally, consume a portion of proteins within 30-60 minutes after training, as this is the period when muscles are most receptive to nutrient absorption.
Healthy Fats
Although fats should not be the main component of the post-workout meal, including a small amount of healthy fats can be beneficial. Sources like avocado, nuts, or olive oil provide essential fatty acids that support overall health and can help better assimilate fat-soluble vitamins. However, it is important not to overdo it with fats, as they can slow down digestion and the absorption of nutrients necessary for immediate recovery.
Vitamins and Minerals
Finally, do not forget the importance of vitamins and minerals in the post-workout meal. Fresh fruit and vegetables not only provide antioxidants that help combat oxidative stress caused by exercise but also provide essential fibers and micronutrients for general well-being. Including a variety of colors on the plate ensures a broad spectrum of nutrients, contributing to a balanced and healthy diet.
In summary, a balanced post-workout plate should be composed of complex carbohydrates, high-quality proteins, healthy fats, and a variety of fruits and vegetables. This combination not only promotes muscle recovery but also supports overall health and long-term well-being.
SOME OF MY RECIPES:
- Difficulty: Very Easy
- Cost: Economical
- Preparation time: 10 Minutes
- Portions: 2 People
- Cooking methods: Boiling, Instant pot
- Cuisine: Italian
- Seasonality: All Seasons
Ingredients for Balanced Post-Workout Plate
To compose a balanced post-workout plate:
- 5 oz Arborio rice
- 3.5 oz dry chickpeas (or a can of pre-cooked canned chickpeas)
- 7 broccoli (fresh or frozen)
- 1.75 oz bresaola (or unsalted raw or cooked ham)
Tools
- Rice Cooker
- Steamer
How to Prepare a Balanced Post-Workout Plate
Here is how to steam rice to achieve perfect results:
How to Steam Rice
Ingredients:
1 cup of rice (basmati, brown, or white)
1.5 cups of water (amount may vary depending on the type of rice)
A pinch of salt (optional)
Instructions:
Rinse the rice:
Place the rice in a strainer and rinse it under cold running water.
This step removes excess starch and prevents the grains from sticking together.
Prepare the steamer:
If using an electric steamer with a grains compartment, use it.
If you have a traditional steamer, place the rice in a heat-resistant bowl that fits inside the steamer.
Add water:
Put the rice in the bowl or compartment and add the necessary water.
Generally, for each cup of rice, use 1.5 cups of water.
Cooking:
Turn on the steamer and cook the rice for the indicated time: White rice: 20-25 minutes
Brown rice: 35-40 minutes
If your steamer model has a timer, set it according to the type of rice you are cooking.
Check the cooking:
At the end of the time, check that the rice has absorbed all the water and is tender.
If necessary, add a little water and extend the cooking time by a few minutes.
Rest:
Let the rice rest for 5 minutes with the lid closed.
This allows the grains to settle and achieve an even consistency.
Fluff and serve:
Use a fork to fluff the grains and serve the rice hot as a side or base for other dishes.
With this technique, the rice will be fluffy, well-cooked, and perfect for any recipe. Let me know if you need further details!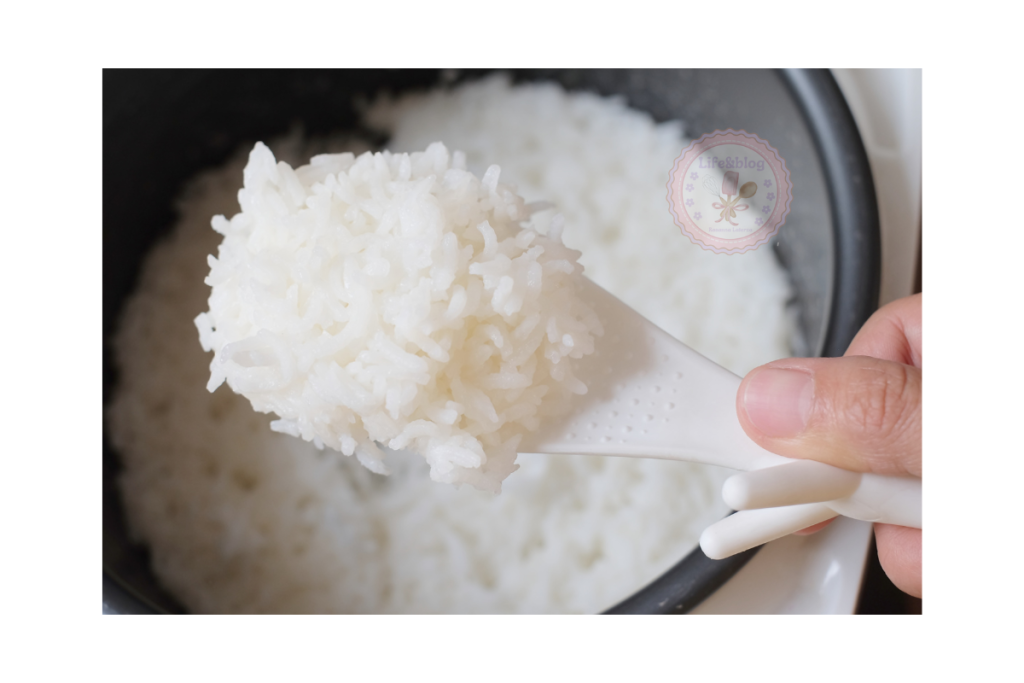
Here is a simple guide for cooking rice in a pot to get perfect grains:
Steps:
Rinse the rice:
Rinse the rice under cold running water to remove the starch.
This helps prevent the grains from sticking during cooking.
Measure water and rice:
For each cup of rice, use two cups of water (white rice).
For brown rice, increase the ratio to 2.5 cups of water per cup of rice.
Put the rice in the pot:
Pour the rice and water into a pot. Add a pinch of salt, if desired.
Bring to a boil:
Cover the pot with a lid and bring the water to a boil over medium-high heat.
Lower the heat:
When the water boils, lower the heat to the minimum.
Cover the pot with the lid, leaving it slightly open to prevent the water from overflowing.
Cooking:
White rice: 15-18 minutes
Brown rice: 35-40 minutes
Let cook until the water is completely absorbed and the rice is tender.
Rest:
Turn off the heat and let the rice rest in the pot with the lid closed for 5-10 minutes.
This allows the grains to settle and become fluffy.
Fluff and serve:
Use a fork to fluff the rice.
Serve it hot as a side dish or base for your favorite dish.
Useful Tips:
For extra flavor, you can cook the rice in vegetable broth or add spices like turmeric or bay leaf during cooking.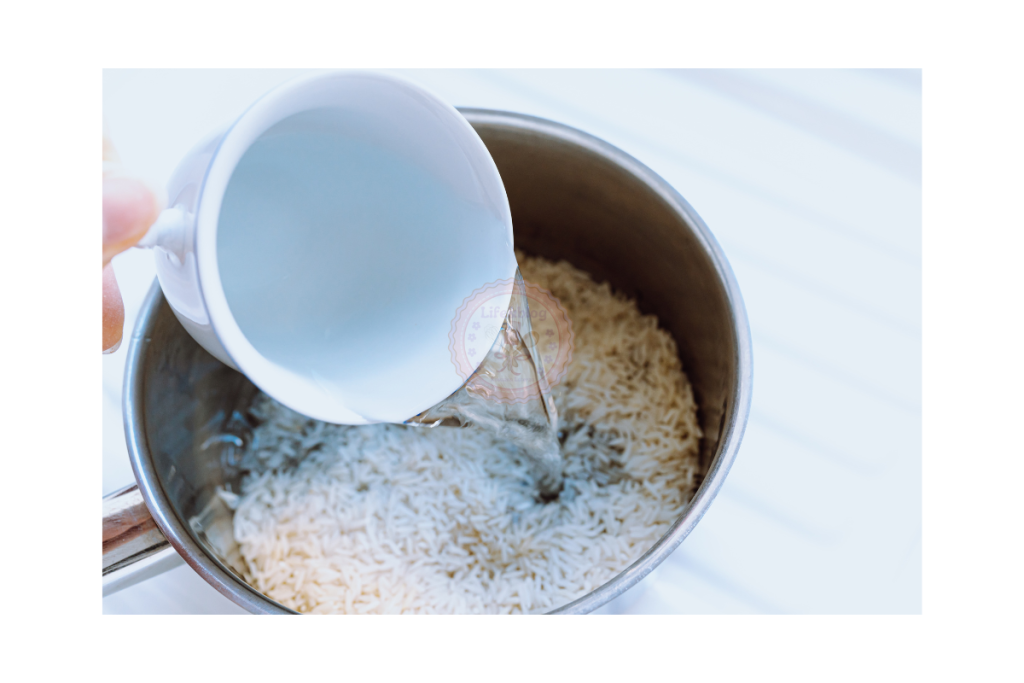
Here is a comprehensive guide for cooking chickpeas, starting from dry ones or using canned ones:
How to Cook Dry Chickpeas
Ingredients:
200 g of dry chickpeas
Water as needed
1 teaspoon of baking soda (optional)
Salt to taste
1. Soaking
Time: 8-12 hours (preferably overnight).
Rinse the chickpeas under running water to remove any impurities.
Place them in a large bowl and cover them with plenty of water (at least 3 times the volume of the chickpeas).
Add a teaspoon of baking soda to soften the skin (optional).
2. Preparation for cooking
Drain and rinse the soaked chickpeas.
Transfer them to a large pot and cover with fresh water (about twice their volume).
3. Cooking
Bring the water to a boil, then lower the heat and let simmer.
Cooking time: Regular chickpeas: 60-90 minutes
Chickpeas soaked with baking soda: 45-60 minutes
Check occasionally and remove the foam that forms on the surface.
4. Seasoning
Salt only in the last 10-15 minutes of cooking to prevent the chickpeas from becoming hard.
Once cooked, drain them and use in your favorite recipes.
How to Cook Chickpeas in a Pressure Cooker
Reduced cooking time:
Place the soaked chickpeas in the pressure cooker with water (cover them with at least 2 inches of water).
Cook for 20-25 minutes from the whistle.
How to Use Canned Chickpeas
Canned chickpeas are already cooked, so they only need to be rinsed well to remove the preservation liquid. You can use them directly in salads, soups, or other recipes.
Useful Tips:
Freezing: Once cooked, you can freeze the chickpeas in single portions along with some of their cooking water. They keep for up to 3 months.
Spices: Add bay leaf, rosemary, or garlic during cooking for an aromatic touch.
Texture: If you prefer them creamier (e.g., for hummus), extend cooking slightly.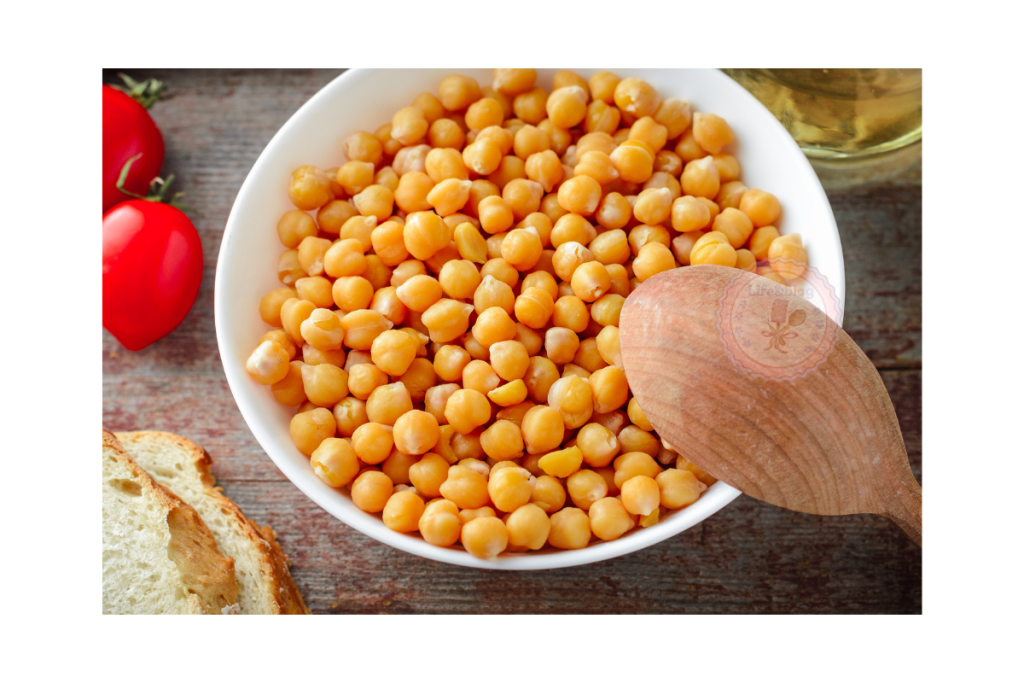
Steaming and boiling vegetables are two common methods that can affect the flavor and nutritional value of your dishes. Here’s a concise list for each method:
Steaming:
Advantages: Better preserves vitamins and minerals, reducing the loss of water-soluble nutrients like B vitamins and vitamin C.
Tools: Use a steaming basket placed over a pot of boiling water.
Cooking times:
Broccoli: 5-7 minutes
Carrots: 10-15 minutes
Zucchini: 5-7 minutes
Potatoes: 15-20 minutes (cut into pieces) [19, 20].
Boiling:
Advantages: Traditional method, simple and fast.
Disadvantages: Greater nutrient loss, especially if vegetables are cooked for too long or in too much water [13, 14].
Tips: Cook in as little water as possible and for a limited time to preserve nutrients.
Cooking times:
Spinach: 3-5 minutes
Chard: 3-5 minutes
Potatoes: 15-20 minutes
Carrots: 10-15 minutes.
In summary, if you want to maximize the nutritional value of vegetables, steaming is the best choice. However, if you prefer boiling, try to limit the cooking time and the amount of water used. Experiment with both methods to find what best suits your tastes and needs!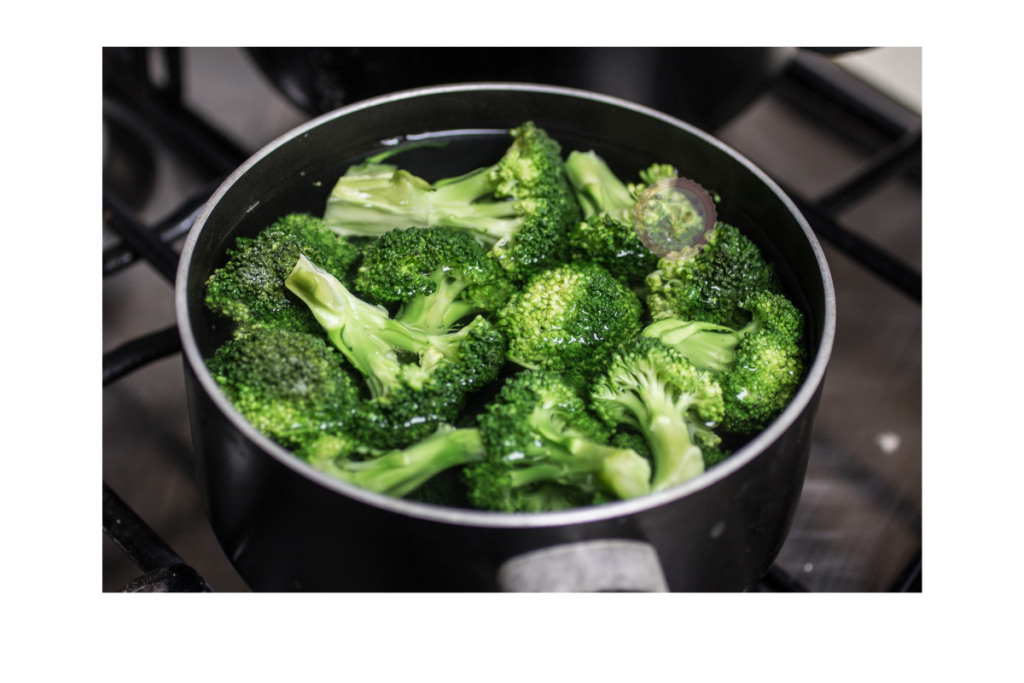
Arrange the plate harmoniously and.. Enjoy your meal!!

Variations and Notes
Add a drizzle of oil and some parmesan flakes for an extra touch of flavor. This dish is rich in proteins and vitamins, thanks to the presence of vegetables.
You can also add avocado for a creamy texture and a healthy fat intake. This dish is very versatile and can be personalized with seasonal vegetables.
You can also add avocado for a creamy texture and a healthy fat intake. This dish is very versatile and can be personalized with seasonal vegetables.
