The Stuffed Picanha in Air Fryer is a truly original and tasty recipe. I have always prepared this dish with veal, but upon the advice of my trusted butcher, I tried this cut of meat and what to say… a real surprise! The meat turned out very tender and flavorful.
The Picanha is a typical cut of Brazilian cuisine that corresponds to the rump cap, used for grilling. A well-executed gamble that I recommend you try!
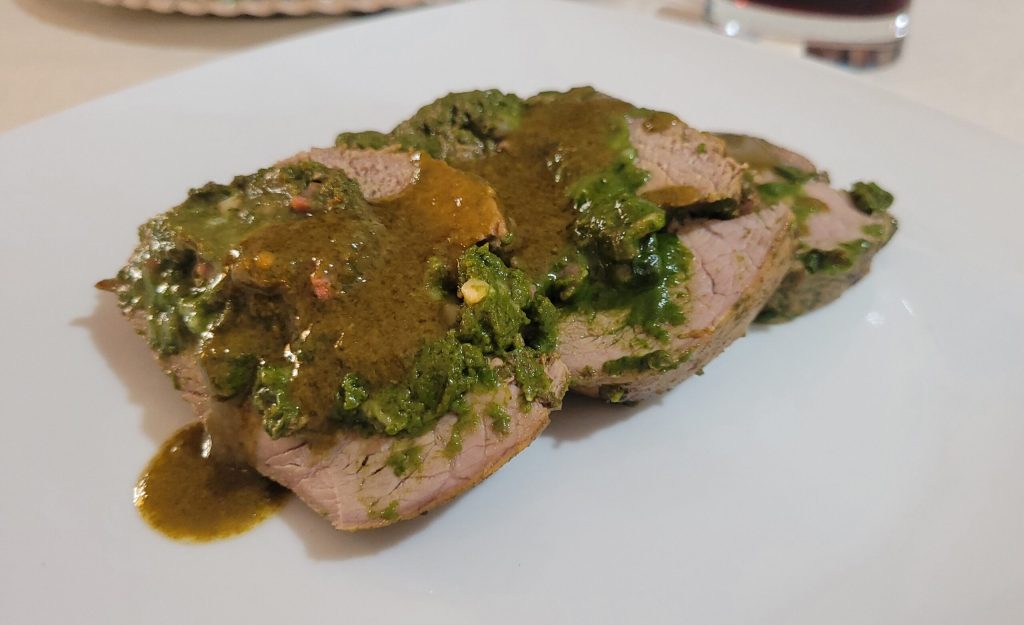
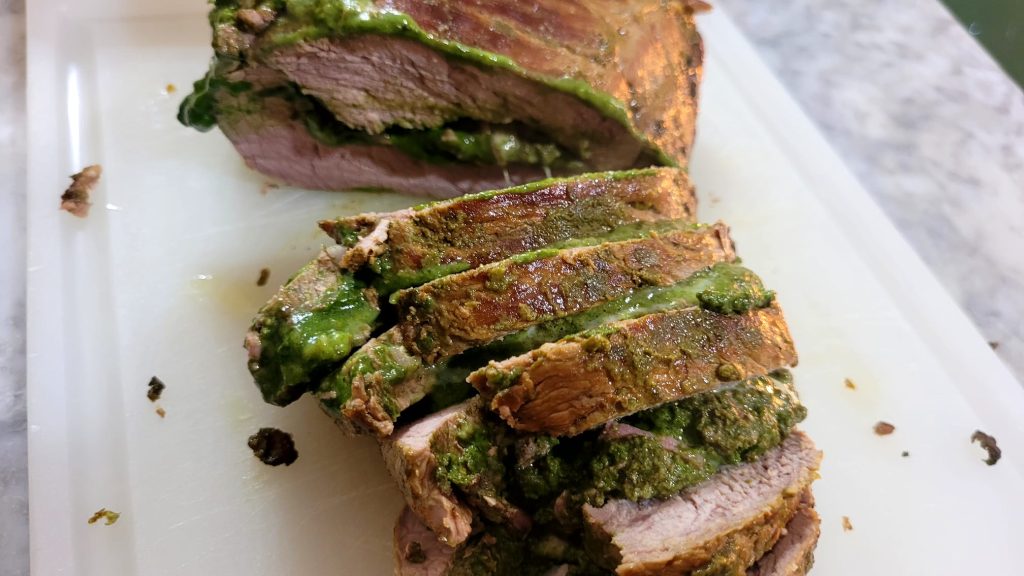
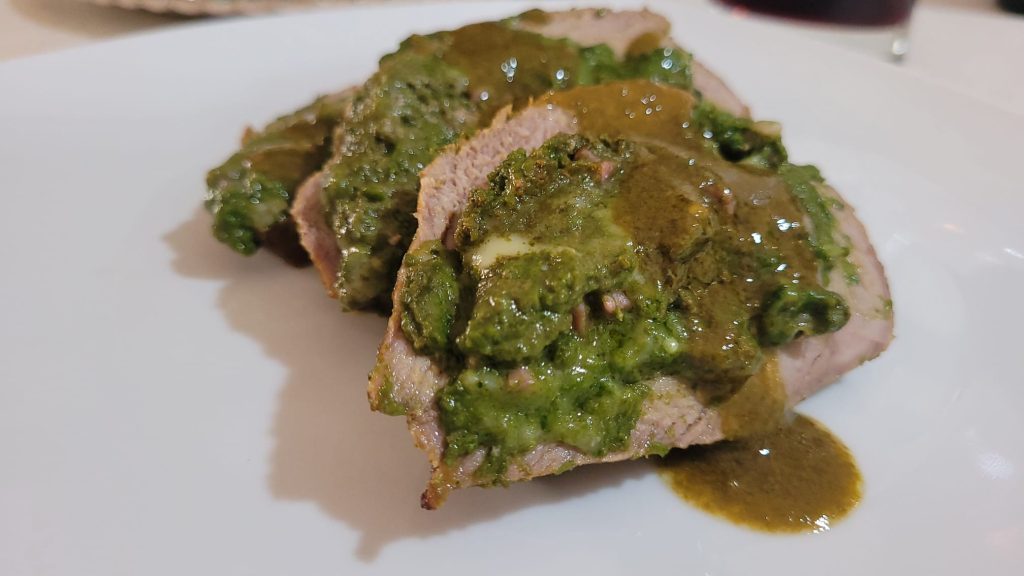
For the filling of the Picanha in Air Fryer I used fresh spinach, sweet pancetta, grated Grana Padano, and PDO Fontina. I sealed it in a pan with oil and butter and finished cooking it in the fryer in 55 minutes!! Quite a quick cooking time for a 2.6 lbs cut!! The stuffed Picanha should be served sliced and accompanied with the sauce, made from the cooking juices, thickened in a small pot with a bit of cornstarch.
You can prepare this dish as a second course for Christmas or New Year’s lunch, I assure you that you’ll make a great impression!
With my Ninja Combi I always get excellent results, often avoiding pans and ovens, like for the Beef Diaphragm and for the Crispy Chicken
Now let me take you to the kitchen and explain how to prepare the Stuffed Picanha in the air fryer.
Also check out these recipes that might interest you👇🏻
- Difficulty: Easy
- Cost: Medium
- Rest time: 15 Minutes
- Preparation time: 30 Minutes
- Portions: portions for 2.6 lbs of meat
- Cooking methods: Air Frying, Stovetop, Oven
- Cuisine: Italian
- Seasonality: All seasons, New Year
Ingredients
Ingredients for Stuffed Picanha in air fryer
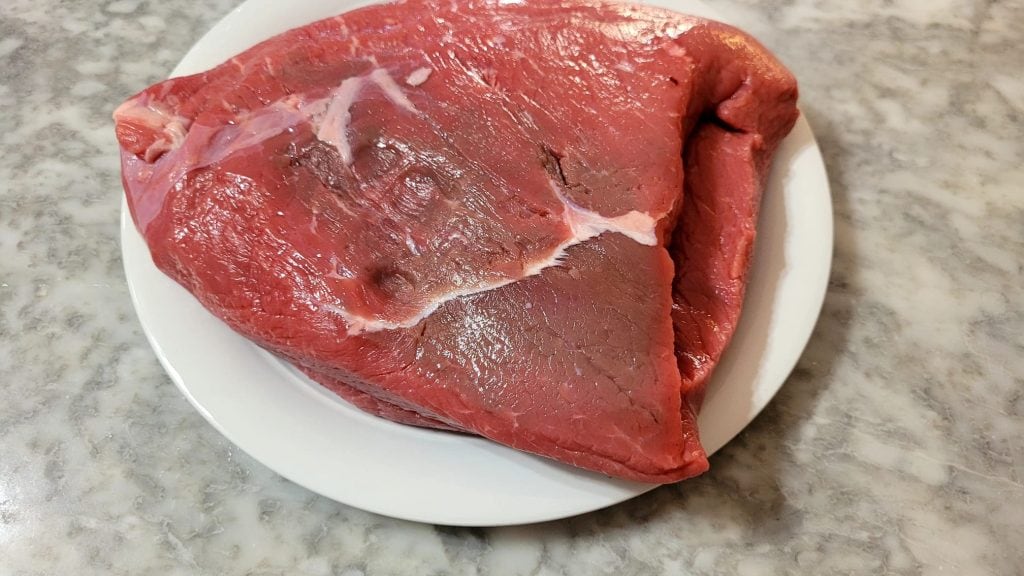
- 2.6 lbs picanha (with pocket)
- 4 cloves garlic
- 1 sprig sage
- 4 oz butter
- 5 tablespoons extra virgin olive oil
- to taste salt and pepper
- 1 broth cube
- 2 glasses white wine
- 7 oz spinach (fresh)
- 1 clove garlic (or 2 small ones)
- 2.8 oz Grana Padano grated
- 4.2 oz Fontina
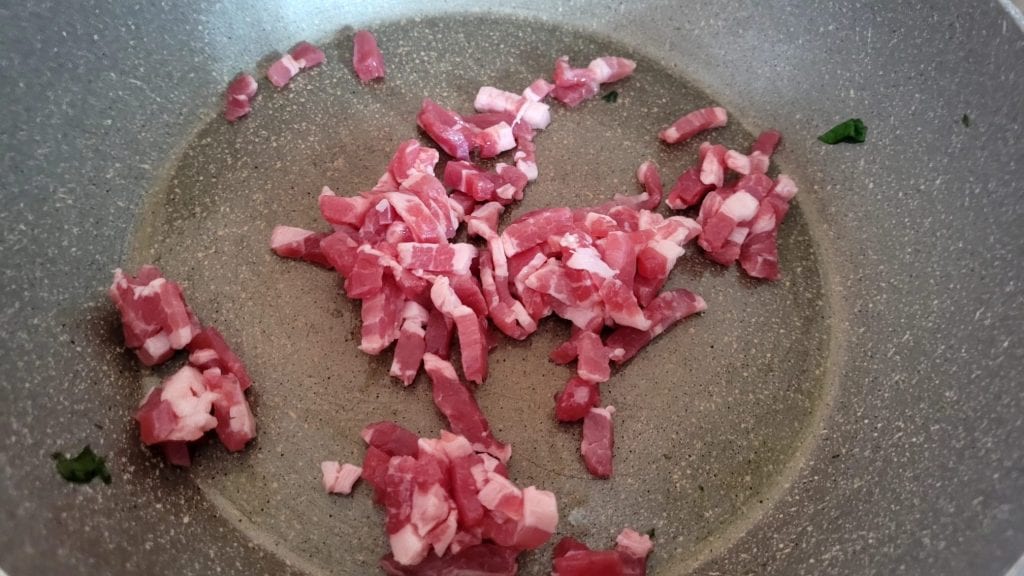
- 3.5 oz sweet pancetta (diced or sticks)
- to taste salt and pepper
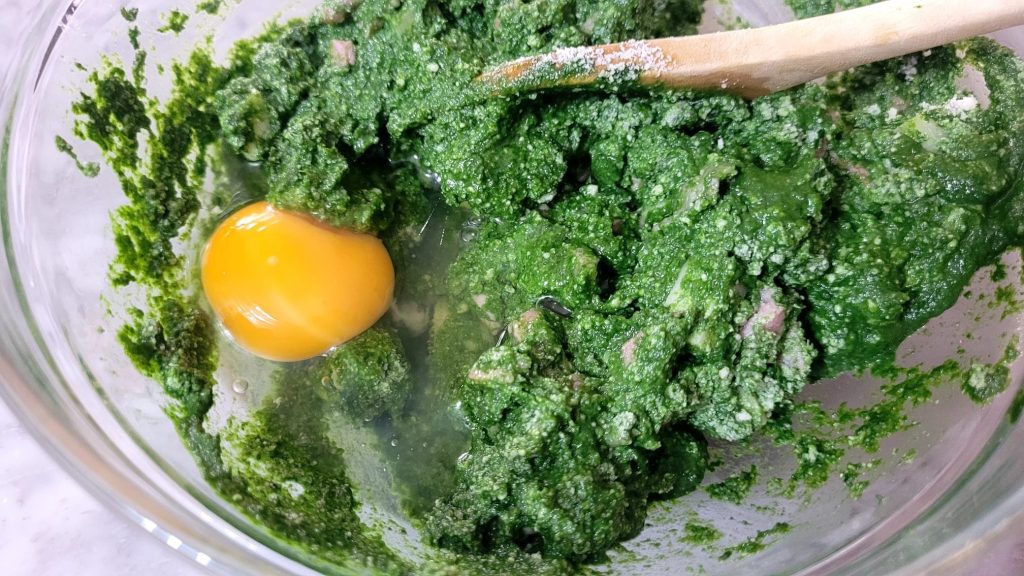
- 1 egg
- to taste extra virgin olive oil
- Cooking juices
- 2 teaspoons cornstarch
Tools
What you need to prepare the Picanha in air fryer
- 1 Pan
- 1 Immersion Blender
- 1 Bowl
- 1 Pan
- 1 Air Fryer
- 1 Needle
- 1 Thread
- 1 Small pot
- 1 Hand whisk
- 1 Cutting board
- 1 Knife
Steps
How to prepare Stuffed Picanha in Air Fryer
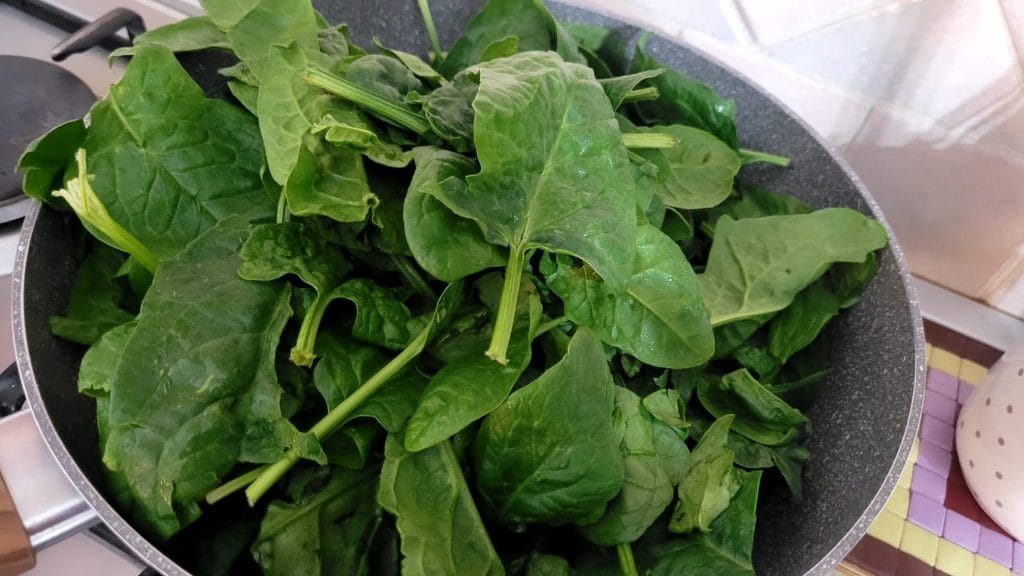
Start with preparing the spinach which should be cooled, wash and dry them
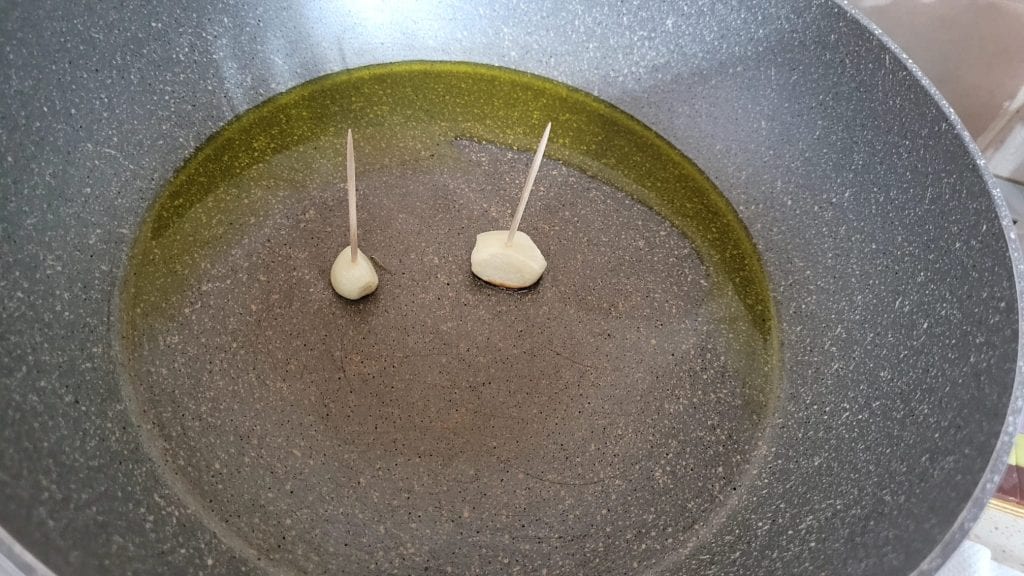
In a pan, brown the garlic with a generous drizzle of oil
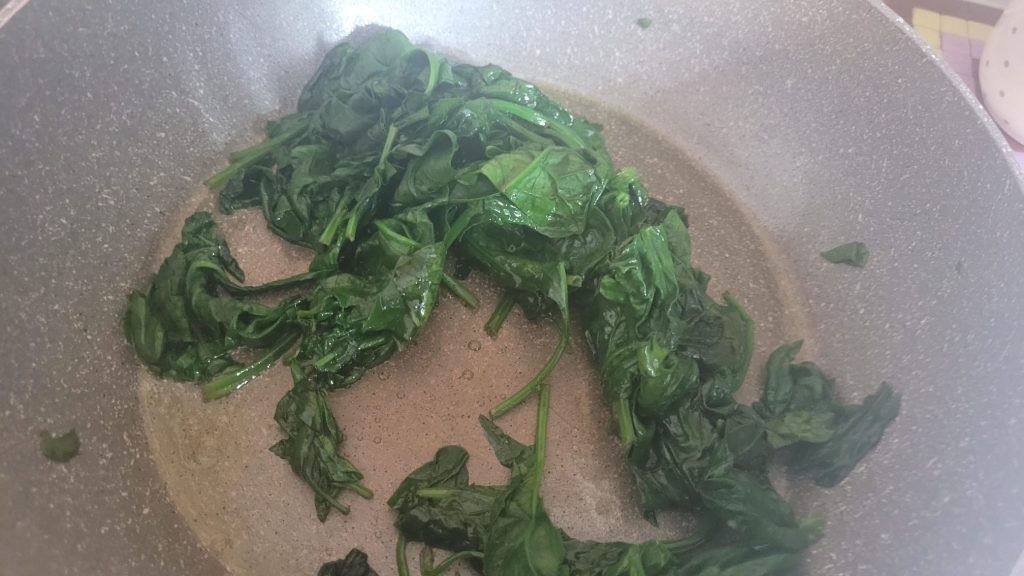
Add the spinach, cook over medium heat, covered with a lid, stirring occasionally
Remove the garlic and let them cool. Transfer them to a measuring cup and blend with an immersion blender
In the same pan, sweat the pancetta for a few minutes
In a bowl, combine the spinach, grated Grana Padano, pancetta, Fontina previously diced, egg, a pinch of salt and pepper. Mix well
Take your Picanha, if possible have your butcher prepare the pocket
Stuff the picanha with the spinach mixture
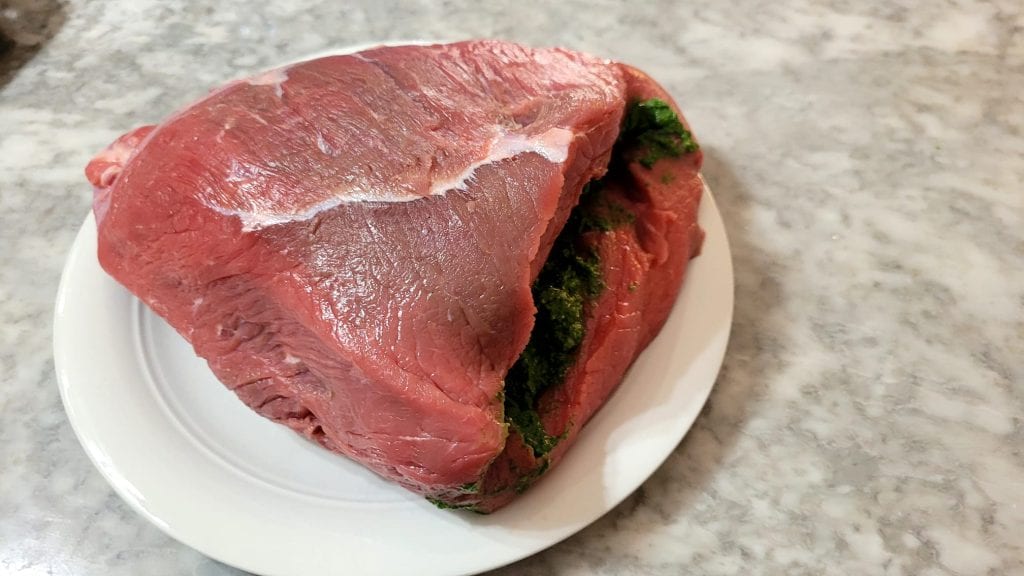
Sew the opening with needle and thread, you won’t struggle because the meat is really tender
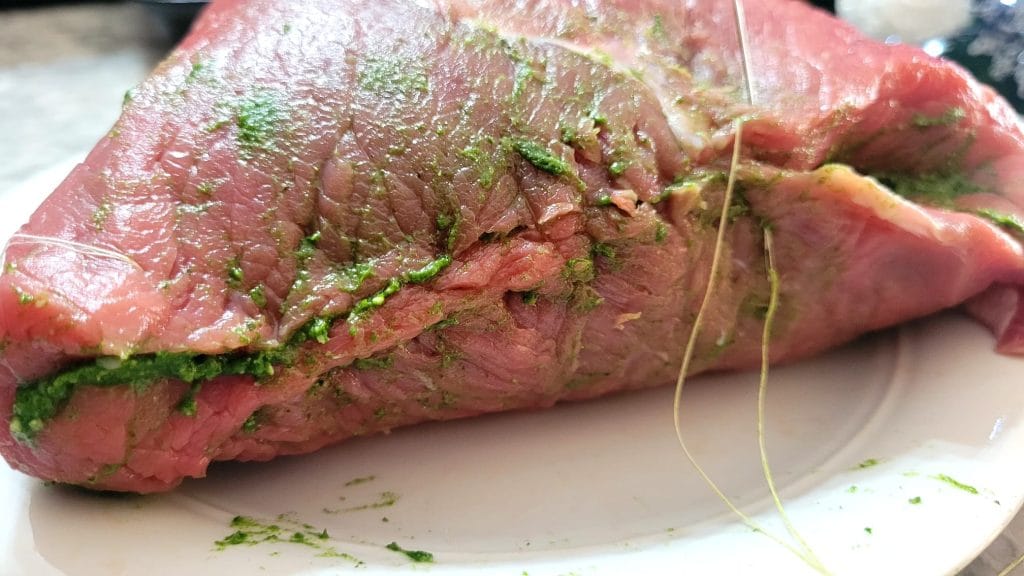
Sewn Picanha

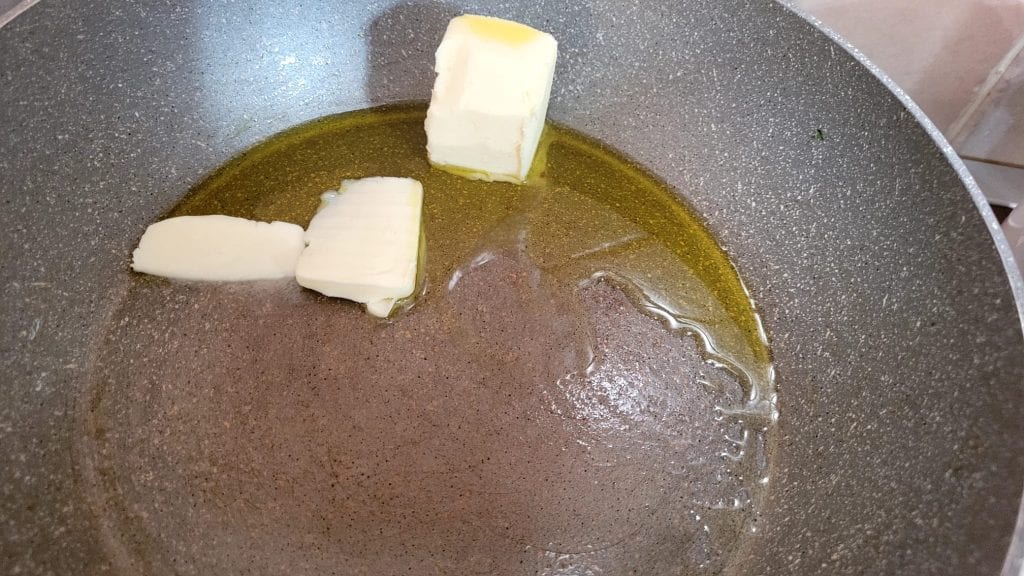
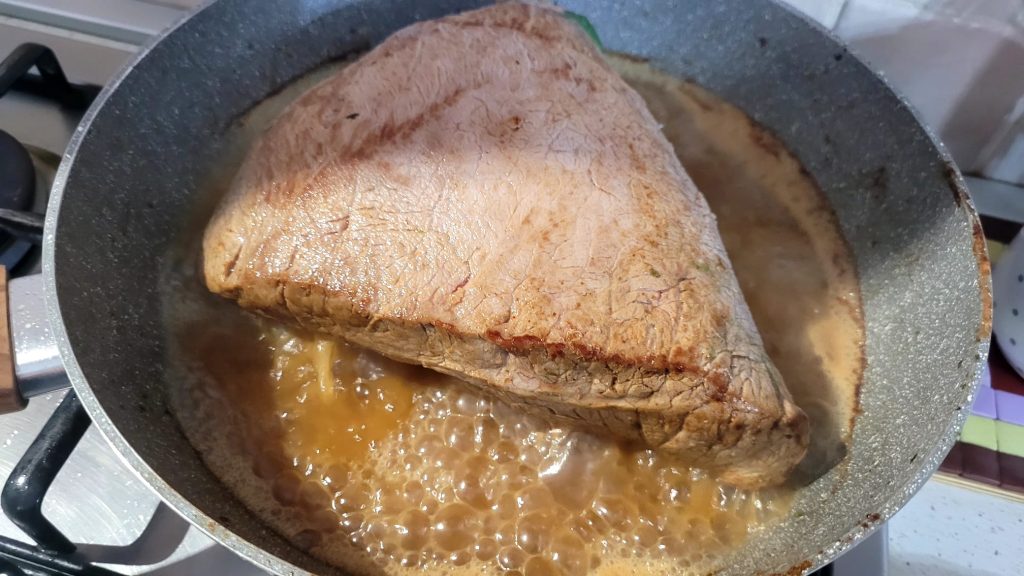
In a large pan, melt the butter and oil
Brown the picanha over high heat for 15 minutes
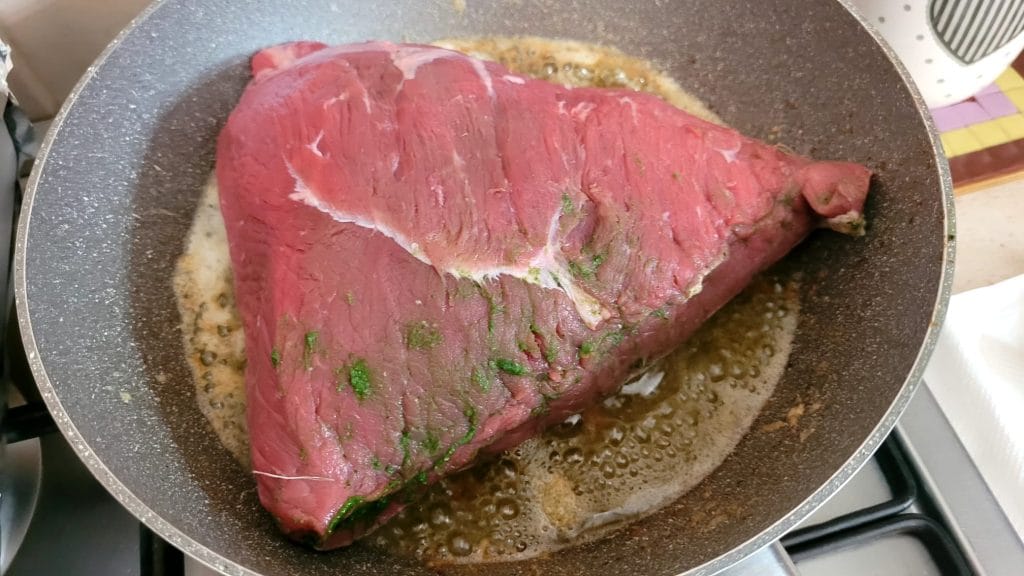
Turn it and let it brown evenly
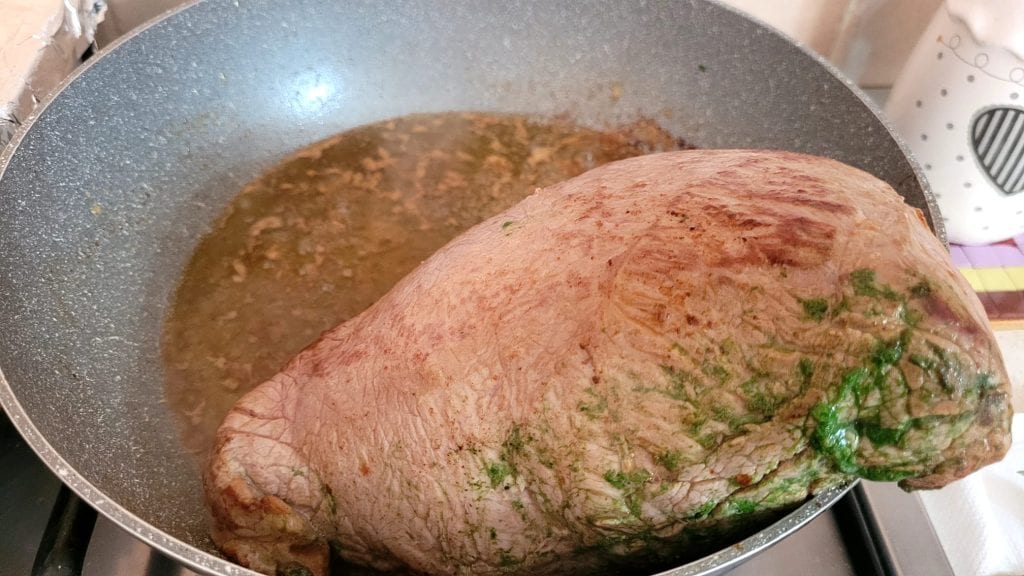
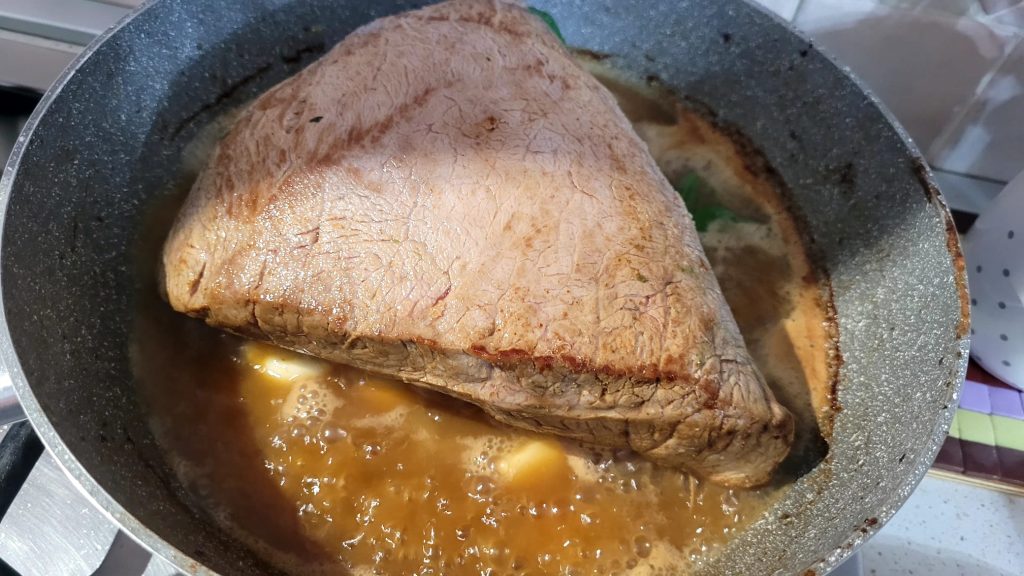
Wet with the 2 glasses of wine and let it evaporate
Add the peeled garlic cloves and the previously washed sage, and let it flavor for 5 minutes, turning the meat
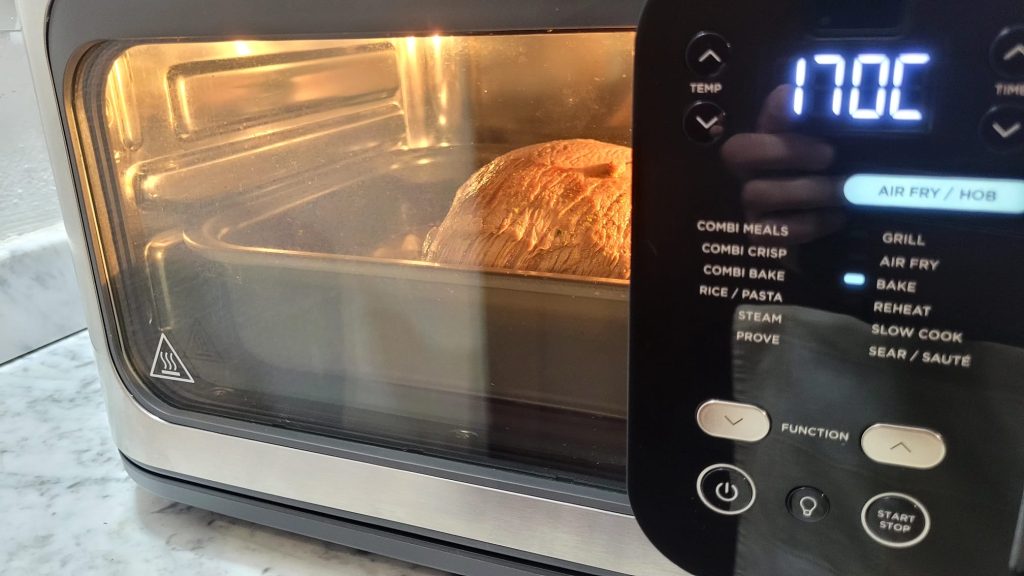
Transfer the meat to a baking dish or directly into the fryer basket, with its juice add 1 cube and half a glass of water
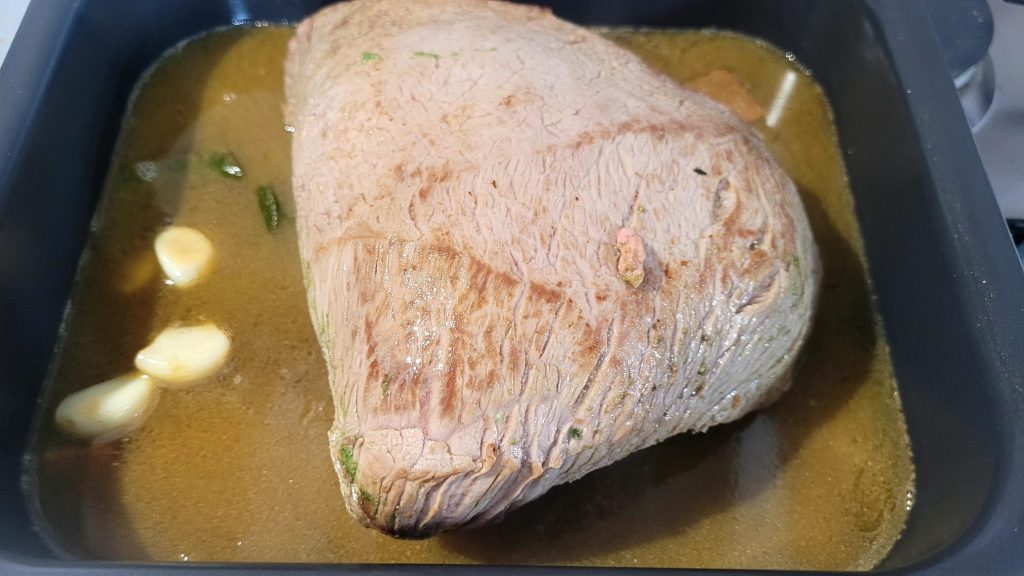
Insert the dish into the fryer and cook at 340°F for 55 minutes, basting the meat from time to time with its cooking juices, you can also turn it during cooking
Remove the picanha from the oven, let it cool slightly, remove the thread, and transfer it to the cutting board to slice
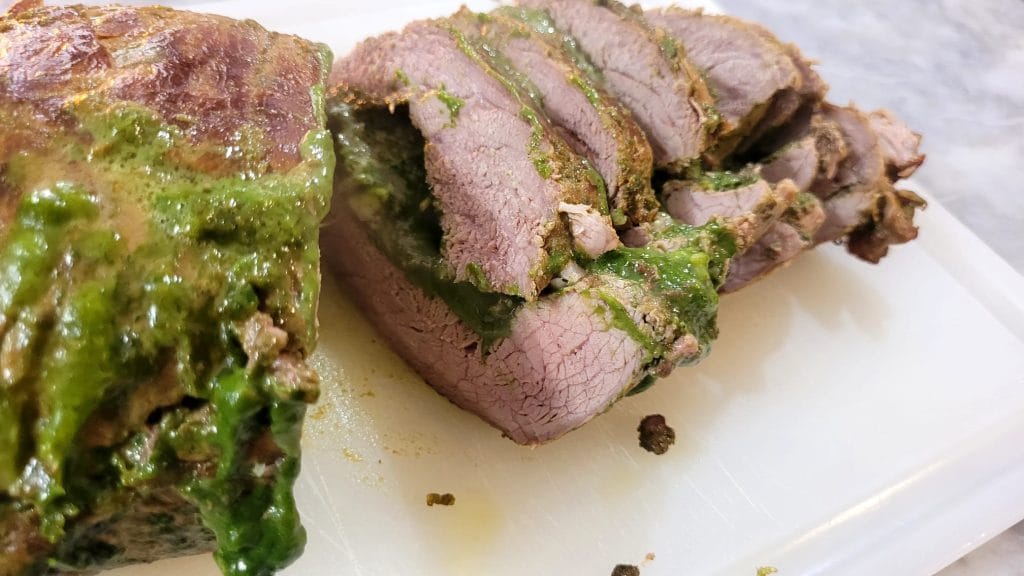
Cut the slices not too thin
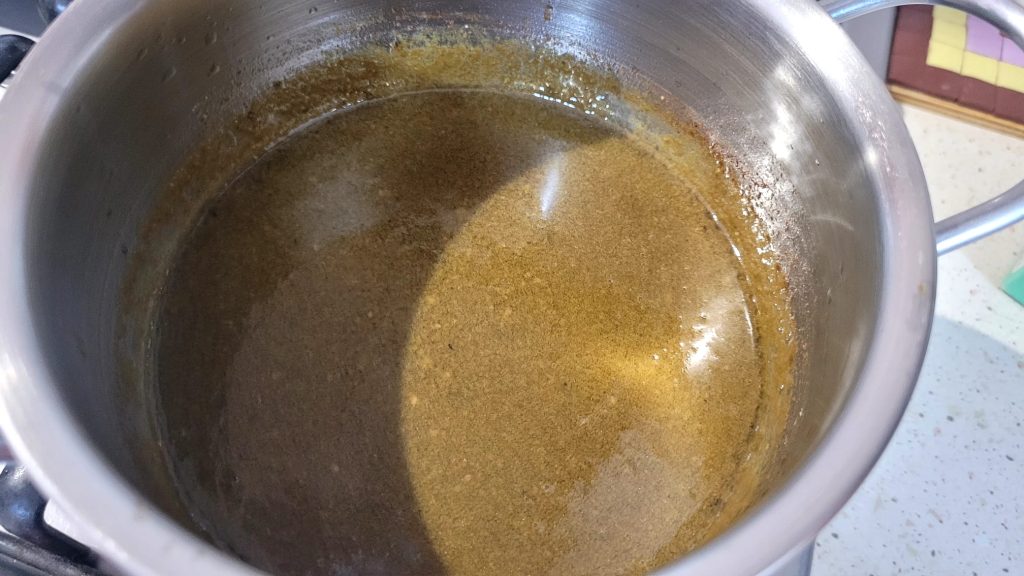
Remove the sage and garlic cloves and transfer the cooking juices to a small pot adding two tablespoons of cornstarch and a bit of pepper
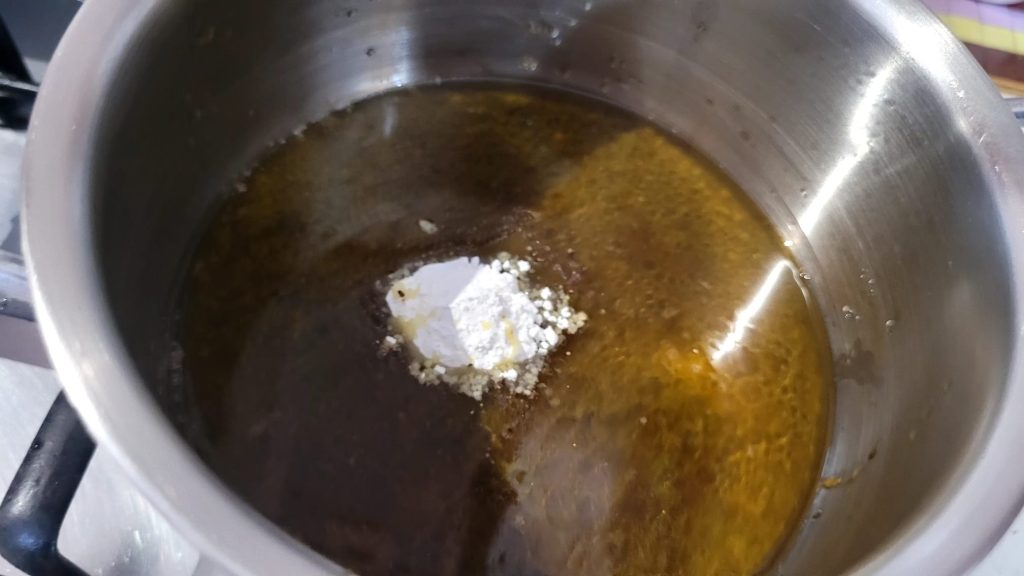
Stir with a whisk and let it thicken slightly
Distribute the slices of stuffed picanha onto individual plates and drizzle with the sauce.
Did you like this recipe? You can rate it by giving lots of stars 🌟🌟🌟🌟🌟 after the tips section!
Follow me on Facebook too! Here’s my page👉🏻 Amiche Friggy e Non Solo
and join my Facebook group ➡️I’ll snatch a recipe from you
Follow the Amiche Friggy e Non Solo channel on WhatsApp to stay sempre updated by clicking the red link👉🏻 Amiche Friggy e Non Solo WhatsApp Channel or activate push notifications in the box you find inside the recipe, you will be notified every time I publish something new😊
You can also find me on Instagram – YouTube – TikTok
If you want to discover all the other recipes on my Blog click to return to the Home
Tips and Storage of Picanha in air fryer
You can prepare the filling the day before and store it in the refrigerator in an airtight container. You can store the cooked picanha in a container or in a baking tray covered with cling film or aluminum foil in the refrigerator for 2 days or frozen already sliced. The sauce can be reheated before serving.
You can use this filling to stuff other cuts of meat such as veal or beef topside.
The Stuffed Picanha in the air fryer is perfect served with a mixed salad
FAQ (Questions and Answers)
Can I cook the Stuffed Picanha in the oven?
You can cook the Stuffed Picanha in the oven if you don’t have an air fryer, preheating to 355°F for 1 hour and 15/20 minutes, checking the cooking by pricking the meat with the tines of a fork
