ADVENT COOKIE CALENDAR
I’ll be honest: it’s been more than a month that panettone, pandoro and Christmas recipes are already appearing in supermarkets and online, and the only effect they’ve had on me was to get me fed up before the countdown even began.
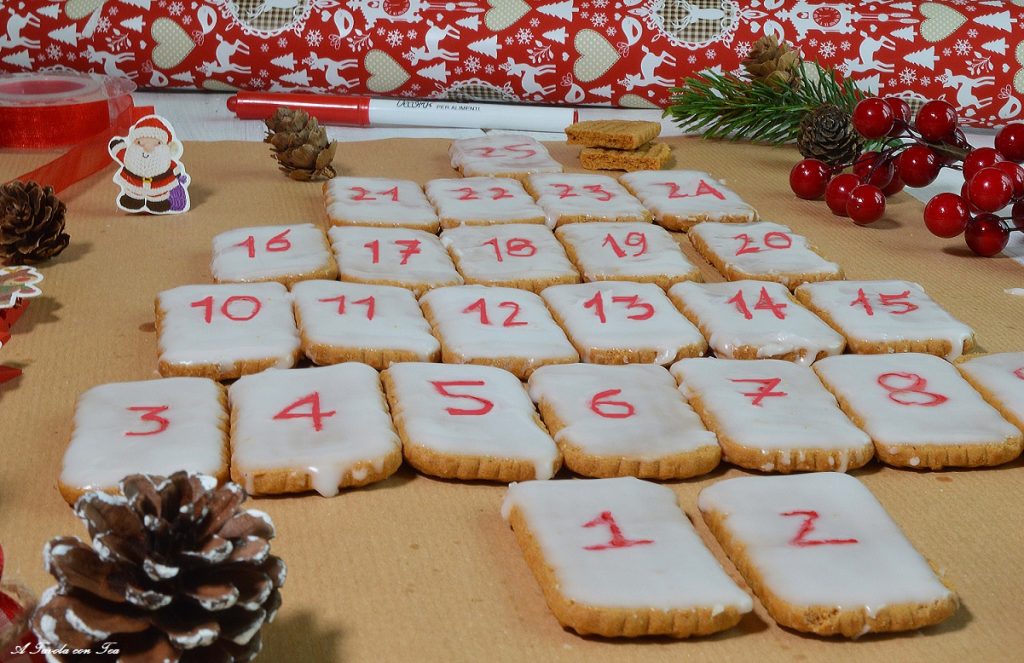
I still remember, as a child, the sweet anticipation for Christmas that started on the first of December (not November!!!) with the traditional advent calendar: each day marked by a little door hiding sweets or small gifts to be opened day after day until Christmas Eve.
To reconcile with the tradition and dive into the most classic Christmas ritual, I had to become a child again and I decided to make a homemade Advent Calendar.
What I made is composed of many small spiced cookies decorated with sugar icing that you can number using food coloring.
Alternatively, if you’re good at drawing you can decorate them with typical Christmas icons such as snowflakes, little Christmas trees, angels, reindeer, etc…
Or simply, to add a touch of color, cover the cookies with colored fondant and lots of sprinkles.
Have fun personalizing your advent cookies with the shapes and colors you prefer and get help.
Kids will love preparing, decorating and, above all, eating these cookies.
- Difficulty: Very easy
- Cost: Inexpensive
- Preparation time: 20 Minutes
- Cooking time: 15 Minutes
- Portions: 25 cookies
- Cooking methods: Oven
- Cuisine: Italian
Ingredients for the cookies
- 2 1/2 cups all-purpose flour
- 4.4 oz butter (about 1/2 cup)
- 3.5 oz brown sugar (packed) (about 1/2 cup)
- 3 tbsp honey
- 2 tsp ground ginger
- 1 1/2 tsp nutmeg (ground)
- 1 tsp baking soda
- 1 1/2 tsp ground cinnamon
- 3.5 oz powdered sugar (confectioners') (approx. 3/4 cup)
- as needed water
Preparation: ADVENT COOKIE CALENDAR
First, preheat the oven in static (conventional) mode to 356°F (180°C). Then proceed to prepare the dough. In a large bowl combine the flour, baking soda and the spices (ginger, cinnamon and nutmeg). Separately, in a non-stick pan melt the butter and then add the sugar and the honey, all over low heat, stirring continuously so it doesn’t burn (you can also melt the butter in the microwave if you have one). It will take about 2 minutes, just enough for the sugar to dissolve. At this point remove from the heat.
Pour the melted butter with the sugars into the bowl with the dry ingredients and mix until you form a homogeneous, compact dough. Let the dough rest in the refrigerator for at least 30 minutes wrapped in plastic wrap before rolling it out.Take the dough back out. Place it on a lightly floured work surface. Work it lightly to make it elastic again. Roll the dough with a rolling pin until it reaches about 1/4 inch thickness (5 mm). Using a knife or a pizza cutter, cut many small rectangles about 1.2 x 0.8 inches (3 x 2 cm). Place the cookies on baking sheets lined with parchment paper leaving a little space between each one. Bake in the conventional oven at 356°F (180°C) for about 12 minutes, or until slightly golden. Let them cool before removing them from the baking sheet.
Meanwhile prepare the sugar icing (I’ll give you the simple water-based icing recipe). First, place the powdered sugar in a bowl, then add 2 tablespoons of water and whisk the mixture until you obtain a smooth consistency. This will give you a fairly thick icing which is what we need to decorate our cookies. Transfer the icing into a piping bag or a small cone you can make at home by rolling parchment paper. At this point place the cookies on a rack and start decorating them with the icing. Once finished, let them dry for at least 1 hour. Finally, using edible food markers write on the cookies the numbers needed for your calendar. Your homemade Advent Calendar is ready.
STORAGE
These cookies, being iced, will certainly last for the whole period needed to reach the 25th!
TIP
If you prefer, you can color the sugar icing by adding food coloring.
You can also use this recipe to make cookies to hang on the Christmas tree.
In that case, if you want to hang them as decorations, you should make the hole at the top of the cookies as soon as you take them out of the oven while they are still warm.
Always remember to let the shortcrust dough rest in the refrigerator for at least 30 minutes before rolling it out and shaping the cookies.