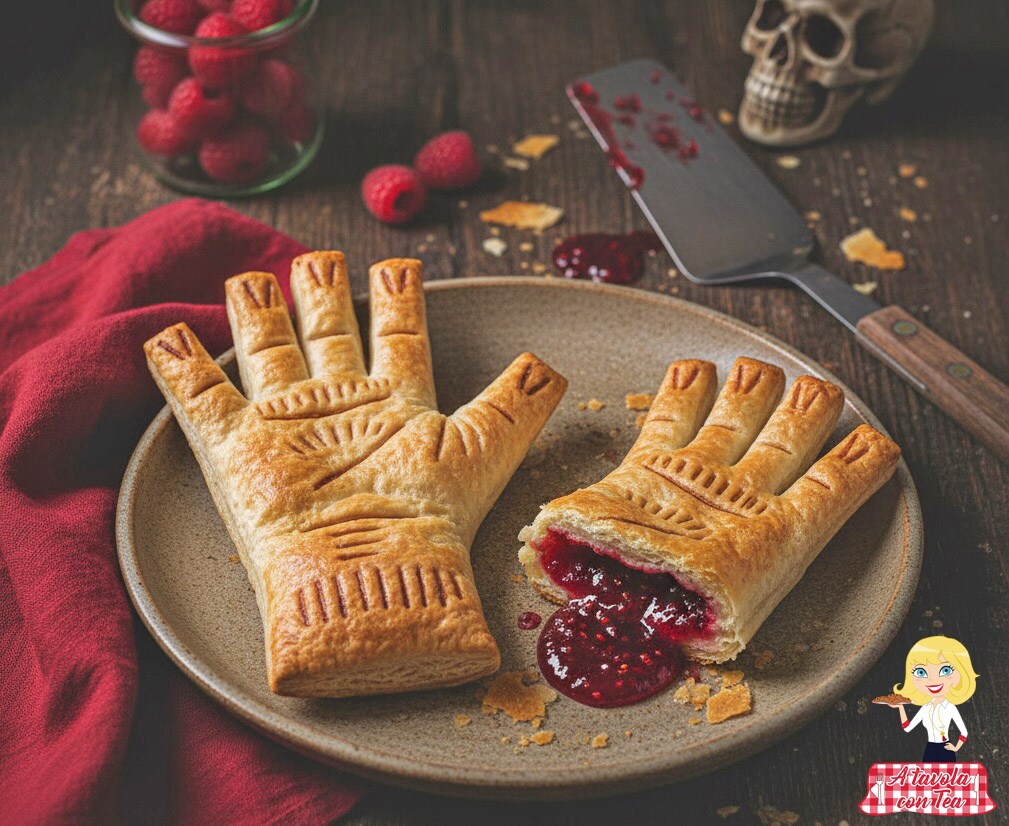
Bloody Puff Pastry Hand: when the “Wow” effect has never been so easy
If there’s one thing I’ve learned in the kitchen, it’s that visual impact often wins over complexity. And on Halloween, the impact must be macabre, fun, and above all, quick to make!
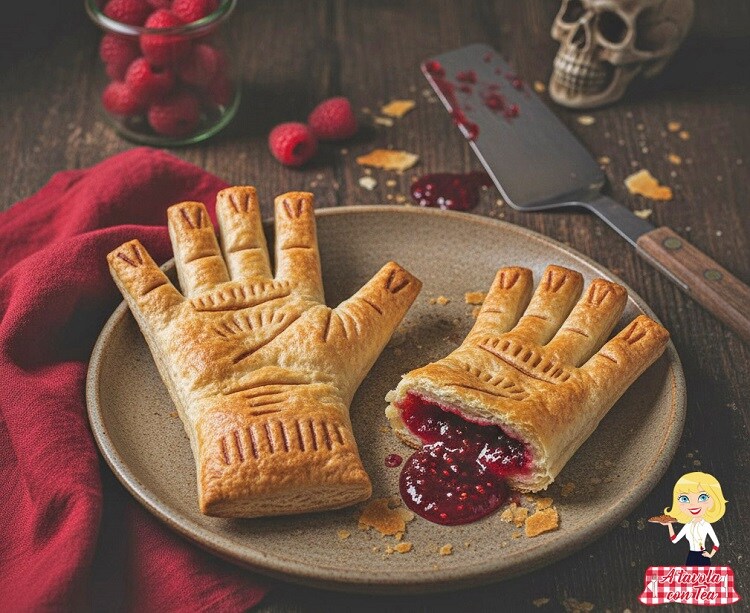
That’s why I love this recipe: the Bloody Puff Pastry Hand proves that you can create a scream-worthy centerpiece using ingredients you already have in your fridge.
You know, to create the step-by-step photos of this recipe, I “used” my son, who had a blast drawing the outlines and deciding where to place the “wound” cuts! It was a fun moment, and that’s the spirit I want to convey to you.
However, even though it seems simple, there’s a small technical hitch to overcome. The most common mistake is overfilling the pastry or poorly sealing the edges.
You risk the filling (raspberry jam) spilling out during baking, not only making a mess of the oven but ruining the final effect. The hand ends up “exploding” prematurely, losing the surprise effect.
My method solves this problem with two foolproof tricks.
First: leave at least a 1 cm (about 1/2 inch) border when filling, and seal it perfectly by pressing well with your fingertips.
Second: never cut the pastry all the way through when creating the nails or wounds; just score the top layer.
Thanks to these details, the puff pastry base (which we use ready-made for zero stress!) transforms into a large, sweet, crunchy, and golden pocket.
The filling remains trapped and the raspberry jam will only slightly ooze out, creating that deliciously creepy splatter effect when cut. Get ready to film your guests’ reaction: guaranteed success!
- Difficulty: Very Easy
- Cost: Very Cheap
- Preparation time: 10 Minutes
- Portions: 4
- Cooking methods: Oven
- Cuisine: Italian
Ingredients for 2 Bloody Hands
- 1 roll puff pastry
- 80 g raspberry jam
- 1 egg yolk (for brushing)
- water (to seal the edges)
Tools
- Knife
- Round tip nozzle
- Brush
Detailed Procedure for Bloody Puff Pastry Hand
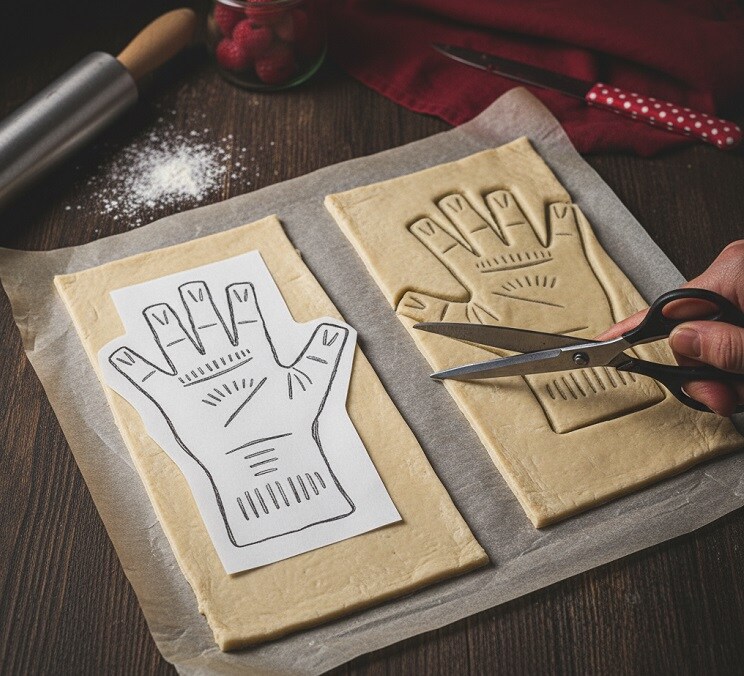
Preheat the static oven to 420°F (215°C). Draw the outline of your hand (or use a plastic glove) on a sheet of paper and cut it out to create the template. Unroll the puff pastry on its parchment paper. Lay the template on the pastry and, with a sharp knife, cut out two perfectly identical hand shapes. Remove the excess pastry.
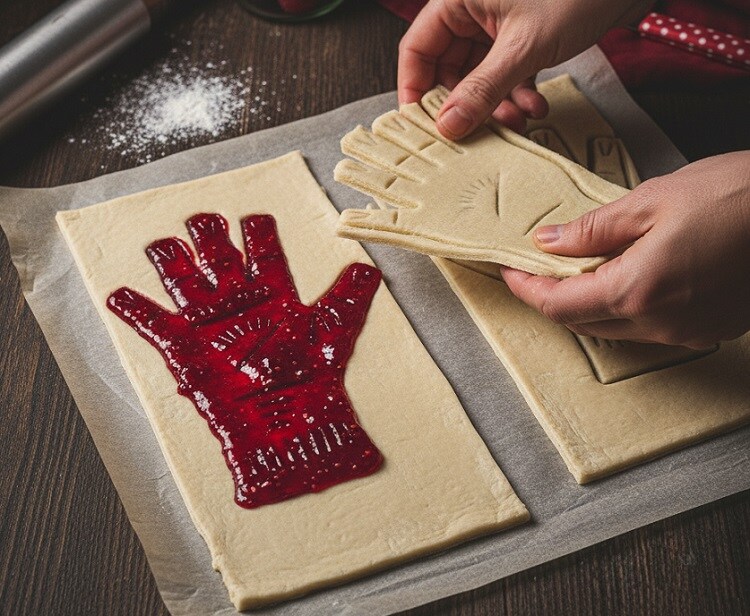
Brush the edges of one of the pastry shapes with a bit of water. Pour the raspberry jam in the center of the silhouette (leaving a free border of about 1/2 inch). Cover with the second puff pastry shape, perfectly matching the edges. Seal the edges by gently pressing with your fingertips, ensuring there are no openings.
Use the rounded part of a pastry nozzle (or the back of a teaspoon) to draw the nail shapes, gently pressing on the fingertips. Make small horizontal cuts along the fingers and palm to simulate skin folds or wounds, being careful not to cut through the pastry completely.
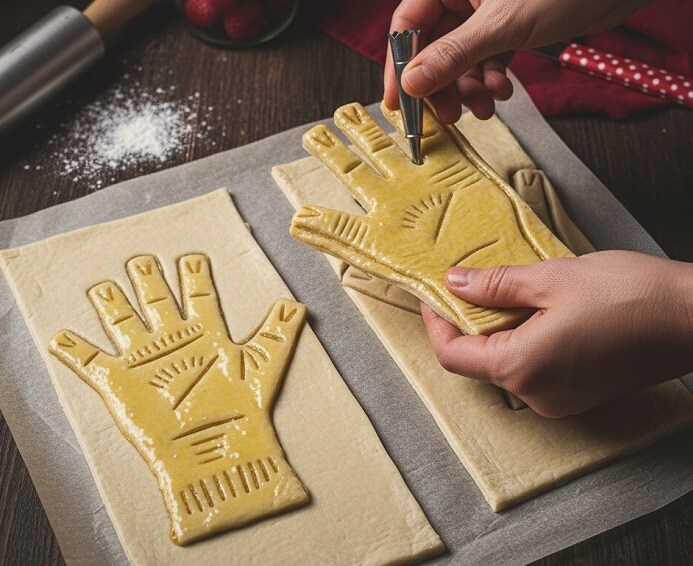
Beat the egg yolk with a teaspoon of water and brush it evenly over the surface of the filled hand: this ensures a beautiful golden brown. Bake in the preheated static oven at 420°F (215°C) for about 15-20 minutes, or until the pastry is well puffed and golden.
Remove from the oven and let cool slightly before serving. For an ultra-macabre effect, at the moment of cutting (or before serving), spread another layer of jam on the wrist as if it were severed. Serve immediately and enjoy the scare!
Ingredient Notes and Substitutions
Puff Pastry: For an even crunchier and buttery result, you can use round puff pastry and join two edges with the excess to create the second hand, or use shortcrust pastry for a more crumbly but less puffy base.
Jam: Raspberry Jam is ideal for color and consistency. Great alternatives are Black Cherry Jam or a berry reduction (slightly thickened on the stove).
Egg Yolk: If you don’t want to brush with egg yolk, you can use whole milk or cream for glazing, but the browning won’t be as intense.
Storage
The Bloody Puff Pastry Hand is a sweet (or savory) treat to be consumed the same day for maximum crunchiness.
It can be stored at room temperature for $1-2$ days, but the pastry will tend to soften. It is not recommended to freeze it once cooked.
Alternatives and Variants
Savory Version (Zombie Puff Pastry Hand): Replace the jam with 100 g of Tomato Sauce (reduced on the stove to thicken) and 50 g of Cream Cheese (such as grated provolone or well-dried mozzarella). Add oregano and a pinch of salt to the filling.
Muddy Chocolate Hand: Replace the jam with 100 g of Nutella or spreadable chocolate cream. The blood effect won’t be needed, but you can decorate with hazelnut crumbs for a “dirt” effect.
Extra Scenic Details: Use a fine brush to draw black nails with black food coloring or a touch of Nutella after baking.
Usage and Pairings
This hand is the highlight for the Halloween buffet, serving as either a sweet or savory starter depending on the filling:
Sweet Pairing (Raspberries): Serve it as dessert finger food with a glass of Moscato d’Asti wine or a non-alcoholic raspberry cocktail (“blood”).
Savory Pairing (Tomato/Cheese): Accompany it with a bowl of spicy red sauce for dipping and a glass of amber beer or a Campari-based cocktail.
Origins and History of the Recipe
This recipe has no historical or regional origins; it is a classic example of modern Thematic Cuisine and Visual Food. The technique of using puff pastry to create three-dimensional shapes is ancient, but the idea of modeling it into a “severed hand” is a phenomenon born and spread thanks to social media and food blogs in the 2000s, becoming a Halloween must. Its popularity stems from the fact that it combines a recognizable macabre icon (the hand) with the quick execution of ready-made puff pastry.
FAQ (Questions and Answers)
1. Can I prepare it in advance?
It’s best not to bake it more than a few hours in advance, because the pastry loses its crunchiness. You can prepare the two filled pastry shapes, brush with yolk, and freeze them raw on the baking sheet. Take out of the freezer half an hour before baking and bake directly.
2. The jam leaked from the edges. What did I do wrong?
The filling leaked because the edges were not sealed well. Make sure the water (or yolk) acted as glue between the two layers and that you pressed carefully around the entire perimeter of the hand. Also, don’t overdo the amount of jam.
3. If I don’t have a nozzle, how can I make the nails?
No problem! You can use the back of a teaspoon to gently press the fingertips, or simply cut and shape the nails with a small knife before placing the second shape on top. The detail is important!