CHOCOLATE LAVA CAKE: Super Easy Recipe, Baked in Oven for 14 Minutes or in Air Fryer
Problem No. 1: How to get the soft center without the cake breaking or being raw? SOLVED!
The biggest challenge with lava cake is the baking: often the center remains raw and liquid, but the edge is too dry, or everything is fully cooked, losing the lava cake effect
The Solution (Secrets to a Liquid Core):
The Temperature (The Butter Trick): Melting the butter and chocolate together in a double boiler ensures a rich and glossy base. It is crucial, however, to cool this mixture completely before adding the eggs, otherwise the eggs will cook immediately, compromising the final texture of the cake.
The Caution (No Convection Oven): Use a static oven at 350°F. The convection oven would cook the edges too quickly, creating excessive thermal shock that makes the cake rubbery and hard to unmold.
The Experiment (The Initial Test): The perfect baking time is 13-14 minutes, but you need to test with your oven: the edge should be set, but the center, when touched, should still be soft and wobbly. This is the only way to ensure the molten core will flow out!
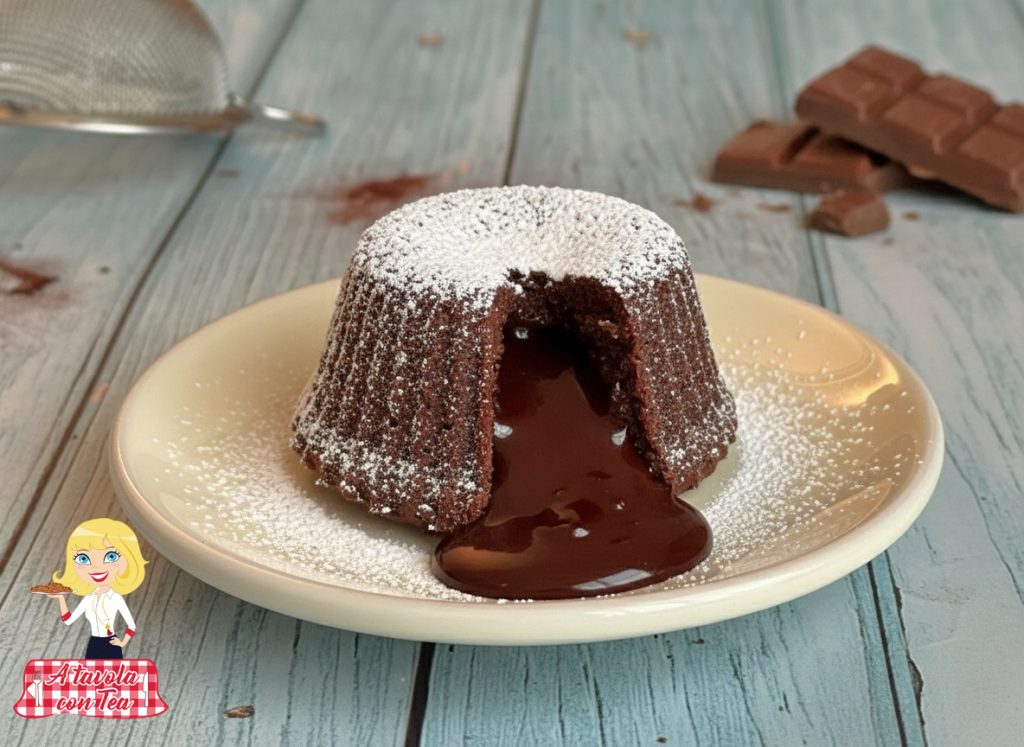
The Chocolate Lava Cake (or Lava Cake) is the perfect dessert to end a dinner, to be eaten immediately while hot, without any delay.
- Difficulty: Easy
- Cost: Very Cheap
- Preparation time: 15 Minutes
- Portions: 8 cakes
- Cooking methods: Oven, Air Frying
- Cuisine: Italian
Ingredients for CHOCOLATE LAVA CAKE
- 8.5 oz 55% dark chocolate
- 11 tbsp butter (soft + as needed to butter the molds)
- 3/4 cup granulated sugar (Must almost completely dissolve in the warm mixture)
- 4 eggs (whole)
- 1/3 cup all-purpose flour
- 1 pinch salt
- unsweetened cocoa powder (to coat the molds)
- powdered sugar
- strawberries
- strawberry jam
Tools
- Kitchen Scale
- Saucepan
- Bowl
- Whisk
- 8 Ramekins
- Oven
Procedure for CHOCOLATE LAVA CAKE
Chop the Chocolate: Chop the dark chocolate into pieces.
Melt: Melt the chopped chocolate in a double boiler along with the pinch of salt. When the chocolate is almost completely melted, add the butter cut into small pieces and melt until you get a single smooth and glossy mixture.
Sugar: Add the granulated sugar to the mixture and continue to mix until it is almost completely dissolved.
Cool Down (CRUCIAL): Transfer the mixture to a bowl and let it cool for 10-15 minutes, until it reaches room temperature.Eggs: Once the mixture is at room temperature, add the 4 whole eggs and blend well using a whisk.
Flour: Finally, add the sifted all-purpose flour and mix energetically to remove any lumps in the mixture.Prepare the Molds: Butter and flour the aluminum or ceramic ramekins. You can use all-purpose flour or sifted unsweetened cocoa for a more intense color.
Pour: Pour the batter into the ramekins, filling them about ¾ full.
Bake in Oven: Bake in a preheated static oven at 350°F for about 13-14 minutes on the middle rack.
Baking Test: It is important that when you take them out, the edge is well-cooked and set, but the inside is still raw and wobbly.
Hot Serving: Once out of the oven, serve immediately by flipping the cake upside down onto the serving plate. Decorate with a dusting of powdered sugar. It’s possible to achieve a great result also using an air fryer, reducing time and energy consumption.
Ramekins: Use reusable ceramic or aluminum ramekins that fit well in your air fryer basket.
Preheating: Preheat the air fryer to 350°F.
Cooking Time: Cook at 350°F for 10-12 minutes.
Monitoring: The air fryer is more powerful than the oven, so start checking the consistency at 10 minutes. The cake is ready when the surface is matte and the edges are firm, but the center is still soft to the touch.
Ingredients Notes and Substitutions
Dark chocolate
Milk or white chocolate
This will change the taste and texture, potentially making the core less dense.
Butter
Margarine or vegetable oil (in reduced amount)
If replaced with oil, use about 80% of the butter’s amount (e.g., 130g oil). The texture might be less rich.
All-purpose flour
Cornstarch (Maizena)
Perfect for a gluten-free version. The starch helps bind without overly developing gluten.
Sugar
Fine brown sugar
Gives a slightly caramelized note. Do not use liquid sweeteners as they may alter the balance of the batter.
FAQ (Questions and Answers)
1. Can I prepare the batter in advance?
Answer: Absolutely yes, it is recommended! You can prepare the batter even a day before and store it in buttered and floured ramekins, covered with plastic wrap, in the fridge. The next day, bake directly from the fridge (you might need one or two more minutes of baking) for an even more melt-in-your-mouth center.
2. Can I use a convection oven?
Answer: It is not recommended. The static oven ensures more even baking, allowing the edges to cook well while the center remains liquid. If using convection, lower the temperature to 340°F and reduce the baking time by about 1-2 minutes, monitoring closely.
3. How can I unmold the cake without breaking it?
Answer: The trick is to act immediately after baking! Let it rest out of the oven for no more than 30 seconds. Then, flip the ramekin onto the plate and gently tap the bottom: it should come out easily. Remember to butter and flour the molds perfectly before pouring the batter.