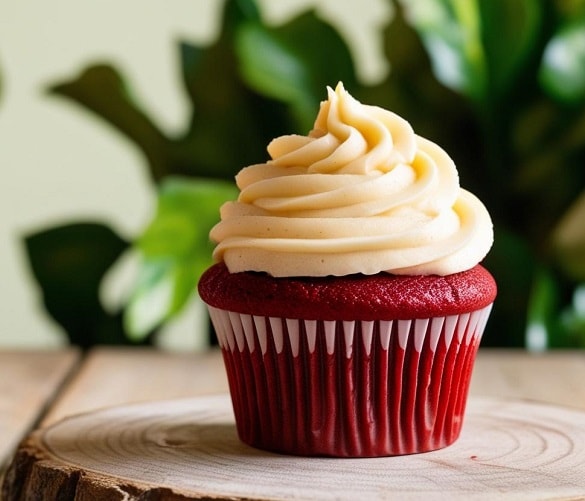
RED VELVET CUPCAKE
Do you desire a dessert that is a true feast for the eyes and a delight for the palate? The Red Velvet Cupcakes are the answer! These adorable single servings capture all the magic of the famous American cake, the Red Velvet Cake, but in a convenient and irresistible format. Their unmistakable intense red color, “velvet,” contrasts magnificently with the fluffy cloud of vanilla cream cheese frosting, creating a visual effect that captures at first glance.
Don’t be fooled by the sophisticated appearance: preparing the Red Velvet Cupcakes is surprisingly easy and quick. The batter, similar to that of muffins, is made by mixing dry and liquid ingredients simply with a whisk. The key to their extraordinary lightness and softness lies in the use of only egg whites, which enhance the bright red color, and oil instead of butter, making them incredibly soft and less heavy.
In just 15 minutes of baking, you will have perfect little cakes ready to be filled and decorated. The finishing touch is the cream cheese frosting, here reinterpreted to be more delicate and less cloying. We replaced traditional butter with a mix of mascarpone and whipped cream, ensuring an enveloping and light-tasting cream.
Perfect for any occasion, from dessert buffets to delicious snacks, and ideal for celebrating special occasions, the Red Velvet Cupcakes will surprise everyone with their vibrant color and delicate vanilla flavor. Prepare them and give a moment of pure sweetness!
- Difficulty: Very easy
- Cost: Economical
- Preparation time: 30 Minutes
- Portions: 12 cupcakes
- Cooking methods: Oven
- Cuisine: Italian
- Energy 461.01 (Kcal)
- Carbohydrates 37.62 (g) of which sugars 23.73 (g)
- Proteins 5.24 (g)
- Fat 33.79 (g) of which saturated 7.58 (g)of which unsaturated 9.27 (g)
- Fibers 0.53 (g)
- Sodium 194.77 (mg)
Indicative values for a portion of 60 g processed in an automated way starting from the nutritional information available on the CREA* and FoodData Central** databases. It is not food and / or nutritional advice.
* CREATES Food and Nutrition Research Center: https://www.crea.gov.it/alimenti-e-nutrizione https://www.alimentinutrizione.it ** U.S. Department of Agriculture, Agricultural Research Service. FoodData Central, 2019. https://fdc.nal.usda.gov
WHAT YOU NEED TO PREPARE RED VELVET CUPCAKES
- 1/4 cup plain yogurt
- 2 tsp lemon juice
- 1/4 cup whole milk
- 1 1/3 cups all-purpose flour
- 2/3 cup granulated sugar
- 2 tsp unsweetened cocoa powder
- 1/2 tsp baking soda
- 1 pinch fine salt
- 1 egg white (from a medium egg)
- 1/2 cup vegetable oil
- 1/2 tsp white wine vinegar
- 3/4 tsp red food coloring (in gel)
- buttermilk (see ingredients above to prepare it)
- 250 g mascarpone
- 150 g cream cheese
- 3/4 cup heavy cream
- 2/3 cup powdered sugar
Tools
- 3 Bowls
- Hand whisk
- 12 Cupcake liners
- Muffin pan
- Electric whisk
- Piping bag
HOW TO PREPARE RED VELVET CUPCAKES
First, I recommend preparing the faux buttermilk. To do this, pour the yogurt, milk, and lemon juice into a bowl and mix with a hand whisk. Then cover the bowl with plastic wrap and let the mixture rest at room temperature for about 15 minutes.
While the buttermilk rests, start the red velvet mixture. In a bowl, mix all the dry ingredients: sifted all-purpose flour, sugar, sifted cocoa, baking soda, a pinch of salt, and mix with a hand whisk.
In another bowl, combine the liquid ingredients: egg white, vegetable oil, vinegar, food coloring, and the buttermilk that has been resting. Mix, always with a hand whisk, until you get a smooth and homogeneous mixture.
At this point, pour the liquid ingredient mixture into the bowl containing the dry ingredients and mix with the hand whisk until everything is combined. Check the color shade, and if you think the mixture is not red enough, you can add a few more drops of coloring.
Place the cupcake liners inside a muffin pan and distribute the mixture inside them, using a piping bag. You don’t need to fill them entirely, just up to ¾ of their capacity (more or less 50 g of mixture each).
Bake in a preheated static oven at 350°F for about 20 minutes. Cooking times may vary slightly depending on the type of oven. Before removing them, do the toothpick test. Once ready, take them out and let them cool completely.
While the cupcakes are cooling, prepare the frosting. To do this, pour the cream cheese, mascarpone, fresh cream, and powdered sugar into a bowl. Beat everything with electric whisks until you get a well-whipped and firm mixture.
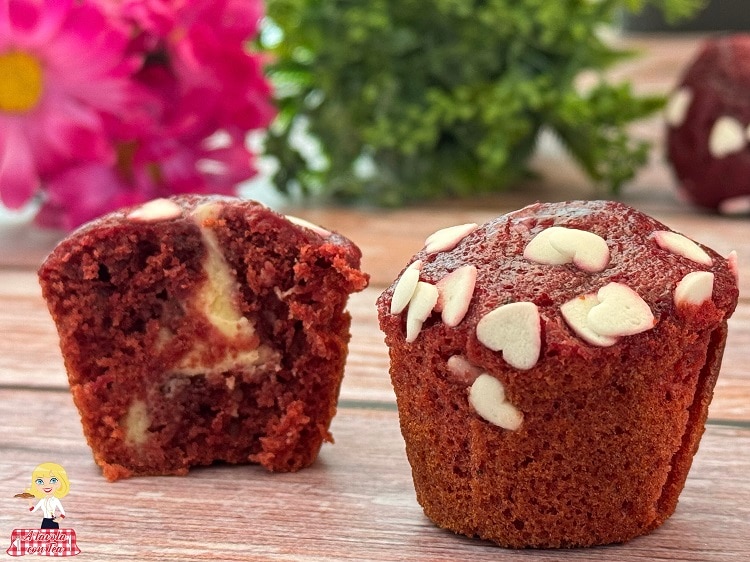
Now you can decide whether to decorate the cupcakes only on the surface by creating the classic swirl with a piping bag with a serrated nozzle or also fill them inside with the cream cheese frosting. If you want to fill them inside, you will have to create an opening for the filling by making a hole in the center of the cupcake (I recommend doing it on the bottom to not spoil the appearance). I usually use a skewer toothpick, but the back of a spoon is also fine. Then insert the tip of the piping bag all the way to the bottom and squeeze as much filling as possible. Let them rest in the fridge for at least 1 hour before serving.
HOW TO MAKE PERFECT RED VELVET CUPCAKES: NOTES AND TIPS
BUTTERMILK: Buttermilk is essential for the flavor and texture of these red velvet cupcakes. Not only does it interact with the baking soda in the batter to help the muffins rise and give them a soft and tender crumb, but it also adds that delicious flavor that is essential for the taste of Red Velvet. Since it’s not easy to find buttermilk in Italy, you will find the ingredients and the procedure to make it at home in the recipe. Low-fat plain yogurt and skimmed milk are preferred, but classic plain yogurt and whole milk will also work as an alternative.
COCOA POWDER. Do not eliminate this ingredient, even if present in a small amount, because it is necessary to give the classic Red Velvet flavor to these muffins. Its small dose will not make them be mistaken for chocolate muffins.
FROSTING: Usually, frosting for red velvet cupcakes is made only with cream cheese and butter, but sometimes it can be a bit heavy. For this reason, I slightly modified the recipe and made the cream cheese frosting with: Philadelphia, fresh cream, and mascarpone for a more delicate and less cloying texture and flavor.
FOOD COLORING: To get a nice bright red color, I recommend using good quality gel food coloring (for example, I use Decora, the link is HERE). The colorants you find in the supermarket, although cheap, are of poor quality. The preference for gel coloring over powder is because it dissolves and mixes better in the mixture.
BAKING POWDER: In the preparation of cupcakes, baking powder is not used, but a mix of baking soda and vinegar that allows the cupcakes to rise and strengthen the color. Rest assured, the taste of vinegar disappears during baking.
BATTER: Just like for muffins, the cupcake batter should not be overworked. Simply mix the ingredients with a hand whisk, it does not need to be a whipped mixture.
BUTTER CREAM – ORIGINAL RED VELVET CUPCAKE FROSTING
The original American recipe for red velvet cupcakes includes frosting enriched with butter to achieve a more compact texture and sweet flavor. If you prefer to make this version of the frosting, you will need: 120 g of softened butter, 250 g of Philadelphia, 600 g of powdered sugar, 1 teaspoon of vanilla essence. To prepare it, you need to work the softened butter with the powdered sugar using electric whisks. When well whipped, add the cream cheese and vanilla essence. Work again until you get a smooth and compact cream. The butter frosting can be used immediately or stored in the fridge for a maximum of 1 day.
STORAGE
Once baked, red velvet cupcakes keep in the fridge, closed in an airtight container for a maximum of 2 days. If you decide to decorate the surface, I recommend doing so just before eating them.
CURIOSITY
Literally, red velvet means red velvet. The origins of this dessert are American, and it seems that it was served at the “Waldorf Astoria Hotel” as early as the early 1900s, a dessert that didn’t take long to become known worldwide. The first version of the original American red velvet recipe did not include the use of food coloring, and the batter took on the typical red color simply due to the chemical effect of the cocoa powder mixture with the acidic ingredients used, namely vinegar and buttermilk. Over time, the recipe has been perfected, and today, to ensure a perfect result and achieve a bright red color, red food coloring is added to the mixture.
Alternatives and Variants of the Recipe
These cupcakes are already perfect as they are, but here are some ideas to vary on the theme:
Mini Red Velvet Cupcakes: Use smaller liners and reduce the baking time to about 10-12 minutes, keeping the same temperature.
With Chocolate Filling: Before baking, you can insert a square of white or dark chocolate in the center of each cupcake for a melted heart.
Citrus Aroma: Add the grated zest of half a lemon or half an orange to the batter for a citrus note that pairs well with coconut.
Butter Frosting (Traditional): If you prefer the more classic frosting, you can replace the mascarpone and cream with 200g of softened butter, beaten with 250g of powdered sugar and 150g of cream cheese. The result will be denser and sweeter.
Adding Chocolate Chips: You can add 50g of white or dark chocolate chips to the batter for a richer texture.
FAQ (Questions and Answers)
Is red food coloring essential? Can I omit it or use less?
Food coloring is essential to achieve the characteristic red velvet color that distinguishes Red Velvet Cupcakes. Without it, the cupcake would be a light brown (given by the cocoa), losing its iconic appearance. You can try using less coloring if you prefer a softer tone, but for the “true” Red Velvet, an adequate dose is recommended for visual impact.
Can I replace the vegetable oil with melted butter in the batter?
Though traditional Red Velvet Cake recipes sometimes include butter, for cupcakes in this version, it is not advised to replace the vegetable oil with butter. The oil helps make the cupcakes exceptionally soft and moist, as well as not “masking” the red color. Butter would tend to make the batter denser and less soft.
My frosting is too runny/doesn’t whip well. What can I do?
If the frosting is too runny or doesn’t whip well, the most common cause is that the ingredients were not cold enough, or that the cream and mascarpone were not whipped correctly. Ensure that mascarpone, cream cheese, and cream have been in the refrigerator for at least 4-6 hours. If it’s already too runny, you can try refrigerating the bowl for 15-20 minutes and then whip again. In extreme cases, you might add a small amount of extra powdered sugar (one tablespoon at a time) to help give structure, but don’t overdo it to avoid making it too sweet.