
Do you crave a focaccia that’s crispy on the outside and soft and elastic inside?
Then you must try MY GENOVESE FOCACCIA!
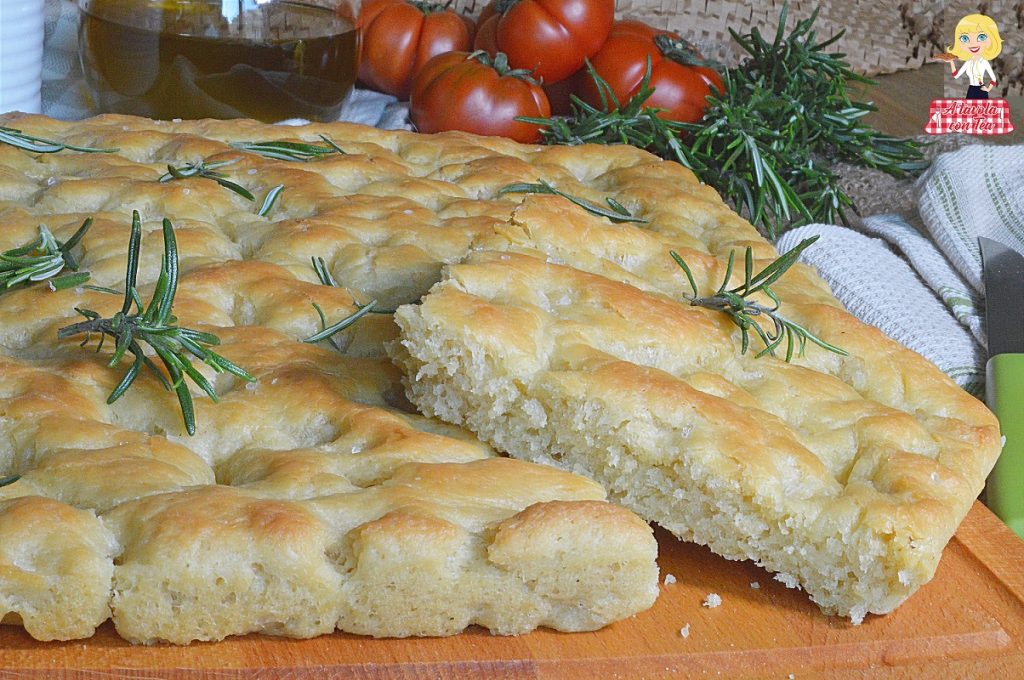
The Genoese focaccia, as everyone knows, is one of Liguria’s specialties and for us from Genoa it’s almost an addiction that can cause withdrawal!
Its hallmark are the little “dimples” full of dressing and that soft inside consistency, almost elastic, while at the same time the surface is crisp.
Finding the perfect or well-tested recipe isn’t easy and after numerous attempts I finally found one that satisfies me and is the one I usually prepare (for the recipe click here https://blog.giallozafferano.it/atavolacontea/ricetta-focaccia-genovese-fatta-in-casa/ ).
Given that the baker’s version will continue to be the best due to the oven (but you can’t fix that) I must say the result is excellent.
What, however, didn’t fully satisfy me, although the taste is very good, was the inability to obtain that particular focaccia texture… you know when you pull a strip of focaccia from both ends and it seems almost elastic?
That’s it!!!! My son Filippo, a great expert and admirer of focaccia, insists the difference is that most bakers use lard in the dough, and maybe he’s not entirely wrong.
So I decided and tried some changes, some due to necessity (I only had Manitoba flour which, moreover, has its “scientific” reasons — see notes below) others out of a desire to experiment. No wonder I called it MY GENOVESE FOCACCIA.
I added a “secret” ingredient normally not included in the recipe and replaced most of the water with milk!
If you don’t trust me ask my neighbor who, since he tasted it, always asks me for some!
Try both and tell me what you think.
I almost forgot: it’s by far better to use natural sourdough, however realizing that not everyone has the time and desire to use it, if you want to prepare it with brewer’s yeast click here https://blog.giallozafferano.it/atavolacontea/ricetta-focaccia-genovese-fatta-in-casa/.
For other LIGURIAN and GENOVESE recipes also see:
- Difficulty: Medium
- Cost: Very inexpensive
- Rest time: 20 Hours
- Preparation time: 30 Minutes
- Cooking time: 20 Minutes
- Portions: 1 rectangular baking pan measuring approximately 12 x 16 in
- Cooking methods: Oven
- Cuisine: Italian
Ingredients
- 3.5 oz sourdough starter
- 7/8 cup Manitoba flour
- 3 tbsp + 1 tsp water
- 5 7/8 cups Manitoba flour
- 8.5 oz sourdough starter
- 1 tbsp fine salt
- honey (1 tablespoon)
- 1/3 cup extra virgin olive oil
- 1/3 cup water
- 1 1/2 cups whole milk
- 1 1/2 tbsp butter (my grandmother's secret ingredient)
- 2 tbsp water
- 2 tbsp extra virgin olive oil
- fine salt (about 1 tsp)
- coarse salt (about 2 tsp to sprinkle on the surface)
Tools
- Bowl
- Small saucepan
- Baking pan
Preparation
First of all, refresh your sourdough starter.
Take it out of the fridge, bring it to room temperature, then take 100 g (about 3.5 oz) of it and mix it with 100 g (about 7/8 cup) of Manitoba flour and 50 ml (about 3 tbsp + 1 tsp) of water.
Let the “starter” rest until it doubles in volume (about 4/5 hours).
In a bowl put the honey and dissolve it with 30 ml (2 tbsp) of water.
When it has dissolved, add the refreshed sourdough starter (240 g — about 8.5 oz) and mix with a spoon until well combined.
Meanwhile warm the milk (it should not boil, just warm) with the knob of butter (20 g — about 1 1/2 tbsp).
In a separate bowl make a well with the flour, add the starter mixture, 70 ml (about 1/3 cup) of extra virgin olive oil and start mixing with a spoon, gradually adding first the remaining water (40 ml total remaining, about 3 tbsp + 1 tsp) and then the milk with the butter (in total 350 ml — about 1 1/2 cups).
NOTE: The dough shouldn’t be too sticky but smooth, so regulate the liquids by pouring them little by little while you continue to mix. I always start with 320 ml of milk and then check as I add liquid the consistency. You may not need to use it all.
Finally add the salt, then transfer the dough to the work surface and continue kneading until it is smooth, soft and homogeneous.
Once the dough is made, put it back in the bowl and let it rise until doubled in volume (about 12 hours).
When it has doubled in volume, place it on the work surface and, applying pressure with your hands on top of the dough, stretch it, then fold it in three as if forming a package.
Stretch the dough again using pressure from your hands and make more folds; repeat this operation four times.
Finally shape the dough into a rectangle, cover it with a damp cloth and let it rise for about 2 hours.
After the resting time, transfer the dough to a pan well oiled with extra virgin olive oil and, using your fingertips, spread the dough on the pan; be careful not to stretch the dough, just press with your fingertips.
Brush the surface with the emulsion of water, oil and salt and create the characteristic dimples with your fingertip pads; let rise again for about 1.5 – 2 hours.
Bake in a preheated static oven at 410°F (210°C) for about 15 – 20 minutes.
One minute before the end of baking, take it out of the oven, brush the surface with a little extra virgin olive oil and return it to the oven until fully cooked.
Once baked, place the focaccia to cool on a rack.
NOTES
WHY I USED MANITOBA FLOUR
Manitoba flour is a strong flour and its main characteristic is a high W value above 350 (W > 350).
Thanks to this peculiarity it is also suitable for more complex processes, especially for the preparation of leavened pastry products or products requiring long kneading times.
The longer a recipe requires rising times, the more necessary it is to use a flour with a high W; in this way the flour offers better hydration and is able to retain carbon dioxide produced during fermentation more effectively.
WHAT THE MILK AND BUTTER DO
What normally differentiates a homemade focaccia from one bought at the baker’s is primarily the different elasticity. The homemade version is always a little more “bready” and less “focaccia-like.” In the past, bakers used lard as an ingredient, which certainly helps in this respect by making the dough richer and more elastic.
That prompted me to use milk with a little melted butter inside, an alternative that is certainly lighter than lard but gives a touch of “fatness” to the dough, and indeed the result confirmed it.
STORAGE
Genoese focaccia should be eaten still warm, straight from the oven. In any case it’s also delicious cold, but it should be consumed on the same day otherwise it becomes dry and hard.
If you have leftovers you can freeze them; when needed just let them thaw at room temperature and put them back in the oven or toaster for 2-3 minutes to make them crispy again.
TIPS AND VARIATIONS
The recipe is calibrated for a rectangular baking pan measuring approximately 12 x 16 in; if you use a larger or smaller pan adjust accordingly, always keeping in mind that the dough thickness for an optimal result should be about 1 cm raw (about 3/8 in).
OTHER FOCACCIA RECIPES
1) GENOVESE FOCACCIA https://blog.giallozafferano.it/atavolacontea/ricetta-focaccia-genovese-fatta-in-casa/
2) BLACK 7-GRAIN FOCACCIA https://blog.giallozafferano.it/atavolacontea/focaccia-nera-ai-7-cereali/