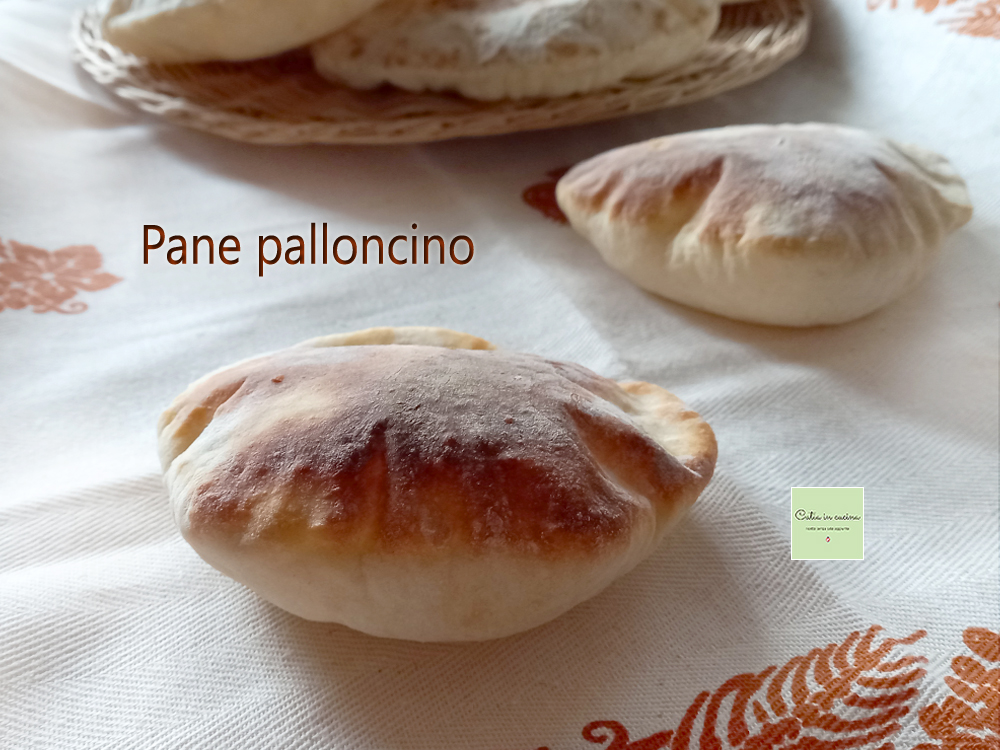
The recipe for balloon bread is one I’ve been chasing for years, trying it in all possible versions for years.
I’ve often shown on the FB page photos of my numerous experimental balloon breads. Of all of them, even those that refused to ‘balloon’. 😃 Yes, the failed balloon is a recurring issue with this type of bread, but the determination to achieve the perfect balloon bread never fades; you always try again.
And the beautiful thing is that you can make them practically with any dough, whether it’s leavened or not.
In the beginning, years ago, when these balloon buns seemed like an impossible magic to reproduce, I used a leavened dough with yeast, a recipe very popular online and therefore well-tested, which actually worked well for me more or less always, though not always.
Then, when I threw myself heart and soul into the world of sourdough, I stopped buying yeast, and from that moment – with solid sourdough first and with liquid sourdough later – I diligently tried to achieve the same good result using sourdough instead of yeast. There, I must say, I was stuck for a while, because sometimes the sourdough leavened doughs betrayed me. My inexperience with sourdough always made me have a thousand doubts, and I never knew if these magical balloon breads would turn out better with active yeast or with excess, so I tried and tried again, each time with different combinations, and then blamed the sourdough for my contrasting results.
When I discovered that balloon bread can also be made without yeast, it was a breakthrough.
Using a very simple dough made only of flour and yogurt (or kefir) and with baking soda instead of yeast, the balloon can still be obtained.
And so, after years, I realized that all three versions are valid and that the success of the balloon actually doesn’t depend on the dough. Balloons work with any dough and, at the same time, have their challenges with any dough.
Today, finally, after years, I tell you everything I’ve understood about this balloon bread, with its strengths and weaknesses, and I invite you to dive headfirst into this adventure.
You’ll discover that it will become a passion, a real competition with yourself in search of the balloon bread that didn’t succeed the previous time. And if you succeed, the next time you’ll still want to try again, out of curiosity to witness that little magic again.
Start rolling up your sleeves because by next Monday I have a delicious recipe ready for you to fill them with! 😉
👇 Other ideas:
- Difficulty: Medium
- Cost: Cheap
- Rest time: 30 Minutes
- Preparation time: 15 Minutes
- Portions: 4
- Cooking methods: Stovetop, Oven
- Cuisine: Italian
- Seasonality: All seasons
Ingredients (for 3 different doughs)
- 1 1/4 cup flour (type 1 or 0)
- 1/3 cup water
- 1/4 cube fresh yeast (or 2 g of dry yeast)
- 1 1/4 cup flour (type 1 or 0)
- 1/4 cup liquid sourdough
- 1/4 cup water
- 1 tsp extra virgin olive oil (optional, sometimes I add it, and sometimes I don't)
- 1 1/3 cup type 0 flour
- 1/2 cup milk kefir (or natural Greek yogurt)
- 1 pinch baking soda (optional)
Tools
- Bowl
- Board
- Rolling Pin
- Kitchen Spatula
- Pan
- Oven
Steps
All three doughs are prepared in a similar way: for convenience, I recommend combining the ingredients in a bowl and, after an initial mix, transferring it all to a cutting board or pastry board to knead more comfortably.
All three doughs (especially the first and third) must rest for 30 minutes, after which it’s advisable, although optional, to let the buns rest again before rolling them out.
For doughs with sourdough, the resting time should be evaluated according to your experience with your sourdough, as the difference between active yeast and tired yeast can vary the resting time significantly. In any case, wait for the leavening to activate and the dough to rise a bit (but not much), typically for a couple of hours. If using excess, 3-4 hours may be needed.
With the amounts I’ve indicated in the ingredients, you get 4-8 buns depending on size: to achieve a medium-sized balloon bread, roll out dough disks about 6 inches in diameter, about 4 inches for smaller buns.
Below are the details of the individual procedures.
Dough with fresh yeast:
Place the flour, water, and crumbled fresh yeast (or dry yeast) in a bowl.
Knead briefly, then transfer the mixture onto the pastry board and knead by hand for a few minutes until a well-mixed dough ball is obtained.
Cover the dough ball and let it rest for half an hour.
Divide the dough ball into small buns. If desired, let them rest again, always covered, for another 15-20 minutes.
Roll out each bun with a rolling pin to obtain dough disks of uniform thickness and not too thin (about a quarter-inch thick).
Flour the pastry board and rolling pin if the dough is soft. If it sticks to the rolling pin or board, the dough tears, compromising the balloon’s success.
Dough with sourdough (liquid sourdough):
Place the flour, water, and liquid sourdough in a bowl.
Knead briefly, then transfer the mixture onto the pastry board and knead by hand for a few minutes until a well-mixed dough ball is obtained.
Cover the dough ball and let it rest for about 2 hours (or more, even 3-4 hours, using excess), until leavening is initiated.
Divide the dough ball and let the dough balls rest again, always covered, for another 15-20-30 minutes (evaluate by sight, I know it may sound strange but using sourdough it’s not uncommon).
Roll them out with a rolling pin to obtain dough disks of uniform thickness and not too thin (about a quarter-inch thick).
Flour the pastry board and rolling pin if the dough is soft. If it sticks to the rolling pin or board, the dough tears, compromising the balloon’s success.
Dough with yogurt (or kefir) without yeast:
Place the flour and yogurt in a bowl.
Briefly mix with a spoon, then add half (or even just the tip of a) teaspoon of baking soda. Baking soda is not essential (especially if using kefir instead of yogurt) but gives an extra boost to balloon formation.
Transfer the mixture onto the pastry board and knead by hand until a well-mixed dough ball is obtained.
Cover the dough ball and let it rest for half an hour.
Divide the dough ball and let the dough balls rest again, always covered, for another 15-20 minutes.
Roll them out with a rolling pin to obtain dough disks of uniform thickness and not too thin (about a quarter-inch thick).
Flour the pastry board and rolling pin if the dough is soft. If it sticks to the rolling pin or board, the dough tears, compromising the balloon’s success.
Some cook balloon bread in the oven and some in a pan, and among the latter, some cook it with a lid and some without.
Of course, I’ve done all the possible tests, and I can affirm that balloons work both in the oven and in a pan, both with the lid and without.The cooking method doesn’t compromise the balloon unless there are gross errors in the oven temperature or pan heating. If something goes wrong, the variables can be the most varied, but they are usually small details that, precisely because they are small, are often underestimated.
Later, under the heading “The balloon bread doesn’t puff: why and how to solve it” I’ll leave you some useful tips.
Pan cooking:
For cooking, a non-stick pan is fine, although I prefer to use a crepe pan, or the (always non-stick) griddle for cooking flatbread.
Heat the pan and place 3-4 small dough disks or just one if large.
After about a minute, the dough will start to puff up.
Wait until the balloon is fully formed, then gently turn each bun with a spatula.
Total cooking time from 4 to 5 minutes, depending on the pan’s temperature and the heat (I recommend medium or medium-low flame) and personal taste (if a soft or crunchy balloon bread is preferred).
Oven cooking:
For oven cooking, the time is about the same as pan cooking: about 5 minutes at 390-430°F.
The advantage of the oven over the pan is that in a single baking, more buns can be cooked, always considering their size and the oven’s size.
I make this clarification about the oven’s size just in case you, like me, are in the habit of using a small oven, like the Sfornatutto. Those who always use the traditional oven may consider it a superfluous note, but we Sfornatutto-addicted know that the capacity is minimal, practically similar to that of the pan, i.e., 3-4 small buns or just one, if large, as in the example I show in the following picture, a balloon that practically occupies the entire oven. 😃
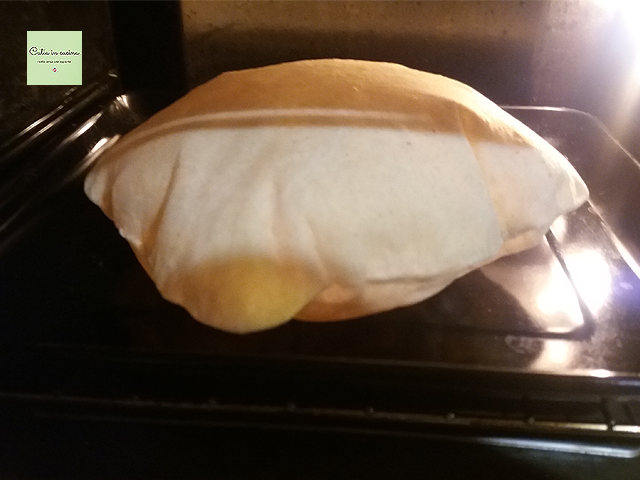
So the choice between pan and oven cooking can be considered based on certain evaluations, as well as personal preferences.
Differences between oven and pan cooking:
In the oven:
– it is more convenient; they cook on top and bottom without having to turn the buns
– it is faster because more buns can be baked in a single batch
– it requires a bit of attention because the 4-5 minutes of cooking pass quickly if not monitored, risking distraction and overcooking
– in the oven, they usually turn out crunchier.
In the pan:
– cooking is immediate, as the pan has a very short heating time, therefore preferable when few pieces are to be cooked
– usually, the buns turn out softer
– extending the cooking time makes them crunchy only in the central part in contact with the pan, but be careful with burns.
Here’s a small list of cases:
1) No balloons are obtained, not even one. A rare case, but it can happen.
If no balloons appear, it may be due to a dough problem:
– dough worked too little, so too coarse
– insufficient or no dough rest
– dough left to rest uncovered, causing it to dry on the surface.Or it may depend on incorrect dough handling:
– dough rolled out too thin or with breaks or holes, even small ones.It’s important that the dough is smooth and doesn’t have breaks or cracks because in that case, the air escapes, and obviously, the balloon doesn’t form (or it forms but then deflates right after).
2) The balloon only inflates halfway.
In this case, it’s unlikely to be a dough problem; it’s more likely:
– dough rolled out unevenly, i.e., a bit thin in one spot and thicker in another
– dough rolled out too thin, or conversely, too thick
– breaks or imperfections in the rolled-out dough
– residue or crumbs of dough stuck to the dough3) The balloon forms but then deflates; it doesn’t stay inflated.
Usually, balloon bread cooked in the oven tends to stay inflated because the dough dries more (which is why it turns out crunchier), while pan cooking leaves the bun softer and therefore retains more moisture, which then causes the bun to collapse if not eaten immediately and left to cool.
In conclusion, deflation in some cases should be considered normal.
Or it can deflate because we inadvertently poked it while turning it; it can happen. 😊
If you like it crunchy, bake your balloon bread in the oven.
The crunchy version can be filled by gently breaking the top crunchy part with the tip of a knife, turning the bun into a container, or bowl, to insert the preferred filling.
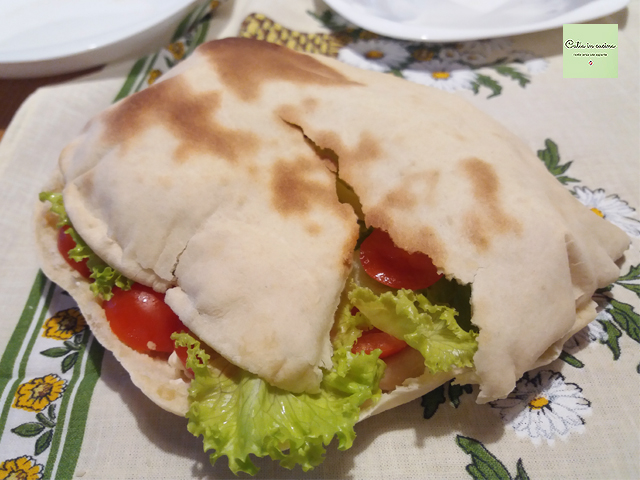
But the softer version is perfect for filling and eating like a sandwich.
It can be filled like a regular sandwich by opening it or cutting it in half. But the best and most convenient way to fill it and then eat it is by cutting a small part with scissors, like this:
This pocket is also obtained if the balloon is slightly inflated or if it is completely deflated. In fact, although it is less scenic to present at the table, the deflated balloon is easier to fill and more comfortable to eat while holding it. It doesn’t open, doesn’t break, and doesn’t let a crumb of filling fall while eating.
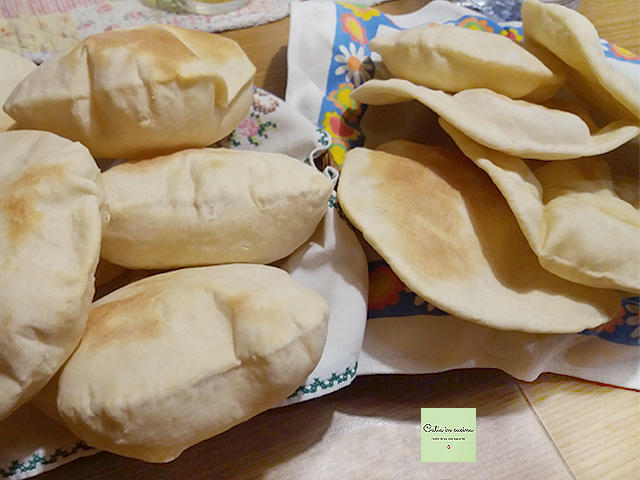
The crunchier versions are a treat to see, they make a nice centerpiece, and they’re great to eat on their own, like a crunchy snack or crackers. When filled, they become a beautiful centerpiece or nice appetizer.
And for the fillings… let your imagination run wild! 😃
Salt-Free Tips
 As with all my homemade breads, this balloon bread, in all its versions, is salt-free.
If you are interested in reducing or eliminating salt, always remember to:
▫ Gradually decrease the salt, the palate must get used to it gradually and should not notice the progressive reduction.
▫ Use spices. Chili, pepper, curry, nutmeg, cinnamon, cloves, cumin…
▫ Use aromatic herbs. Basil, parsley, oregano, thyme, sage, marjoram, rosemary, mint…
▫ Use seeds. Sesame, pine nuts, almonds, walnuts…
▫ Use spicy vegetables or fruits. Garlic, onion, lemon, orange…
▫ Use my salt-free vegetable granules and gomasio.
▫ Prefer fresh foods.
▫ Avoid cooking in water, prefer methods that do not disperse flavors (griddle, foil, steam, microwave)
▫ Avoid bringing the salt shaker to the table!
▫ Occasionally allow yourself a break from the rule. It is good for mood and helps to persevere.
If you don’t want, or can’t, give up salt:
▫ You can still try my recipes by salting according to your habits.
Follow me!
In my new WhatsApp channel and on Instagram, on the Facebook page, on Pinterest and in my two groups: Catia’s Group, in the Kitchen and Beyond and Just What I Was Looking For! and if you like… subscribe to my Newsletter.
In my new WhatsApp channel and on Instagram, on the Facebook page, on Pinterest and in my two groups: Catia’s Group, in the Kitchen and Beyond and Just What I Was Looking For! and if you like… subscribe to my Newsletter.
In my new WhatsApp channel and on Instagram, on the Facebook page, on Pinterest and in my two groups: Catia’s Group, in the Kitchen and Beyond and Just What I Was Looking For! and if you like… subscribe to my Newsletter.
