For the last birthday we celebrated in the family, I experimented with a new version of my now classic cheesecake: a chocolate cheesecake in stracciatella style, with a decoration of knife-chopped chocolate.
But… that’s not it, no no, that’s not the chocolate cheesecake I want to tell you about today! 😆
I’m still owing you the previous version! Actually, two previous versions: that is, two chocolate cheesecakes made in the past months whose photos were, actually were, parked in the archive of “recipes waiting to”. So I decided no more parking, I removed the photos from there and transferred them here, because it’s time to share it, this chocolate and hazelnut cream cheesecake.
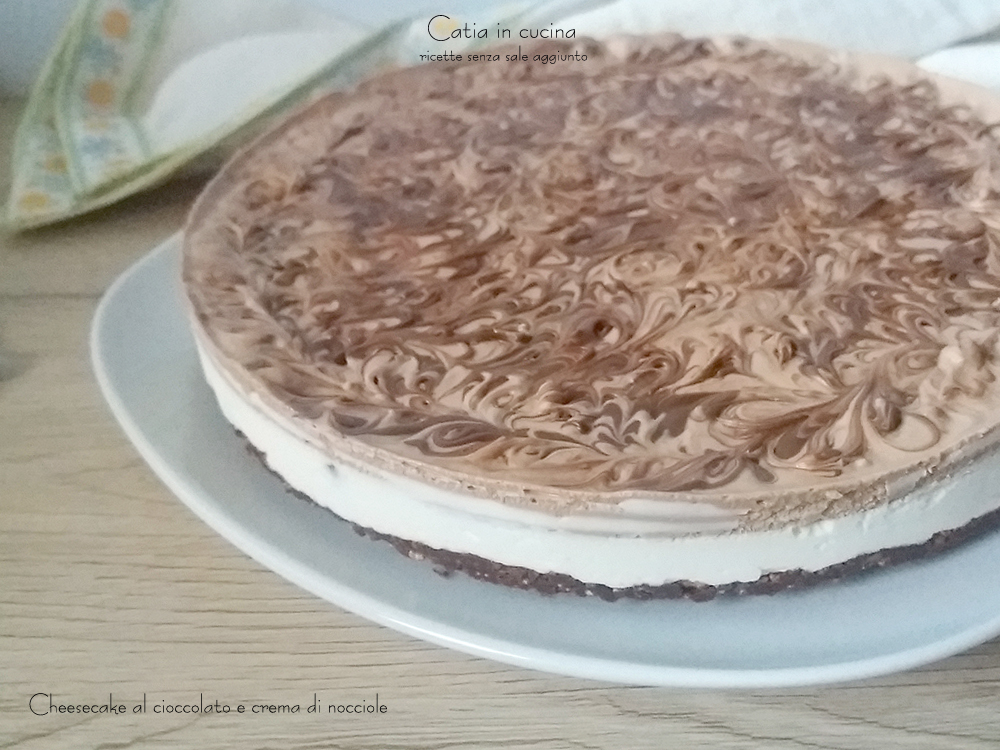
Here it is, this is it:
It’s a chocolate cheesecake, because it contains chocolate in the base and chocolate chips in the cream, but it’s also a hazelnut cream cheesecake, because it contains hazelnut cream in the second layer of cream and in the decoration.
The cream is different from that of the previous cheesecakes because in addition to the indispensable cream and the spreadable cheese that I sometimes use and sometimes don’t, I used mascarpone instead of kefir or Greek yogurt, which I usually add in my cheesecakes.
The base is an evolution of the puffed rice base I made for the strawberry sauce cheesecake.
I explained there that puffed rice in a simil-chocorì version is loved a lot by my kids but doesn’t excite me, so in the next two cheesecakes, precisely the two I’m talking about today, I replaced puffed rice with puffed amaranth, much smaller and, in my opinion, more suitable. Plus, I also added cookies: after all, cookies are always the best for cheesecake bases.
But the most evident characteristic of today’s cheesecakes is the decoration: a marbled design for which I took inspiration from a recipe from my friend Luisa.
The first time I tried this decoration, it turned out exactly like this:
Of course, it’s not perfect (and when is it ever 😀 ), but it looked good at my house, and that’s enough for me.
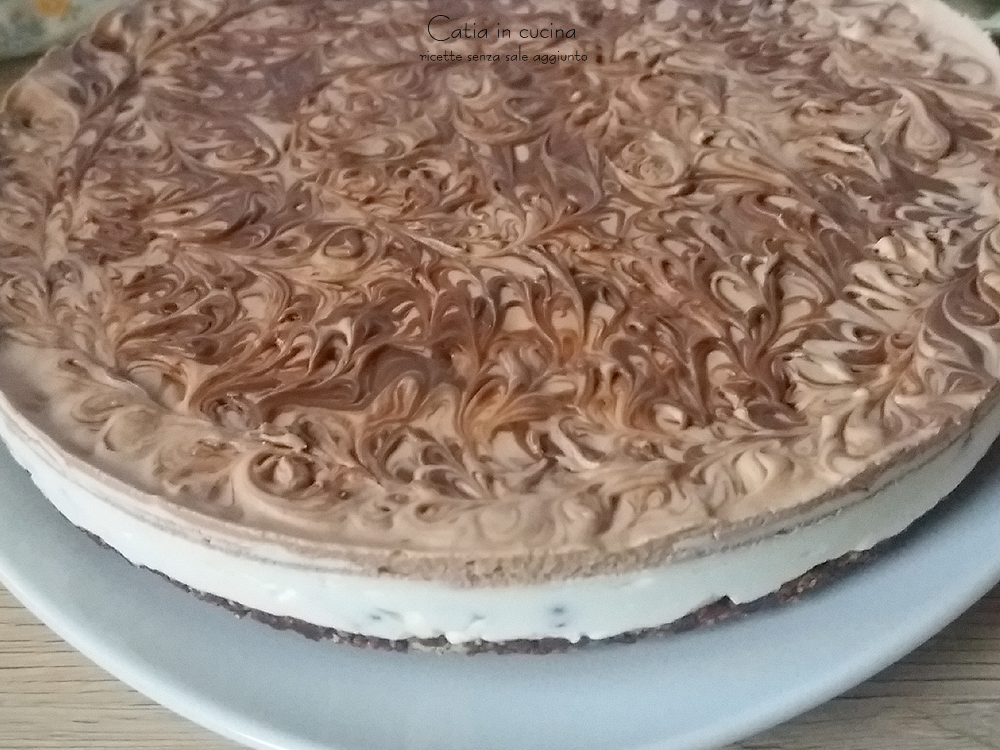
Anyway, after some time I repeated it.
Like this:
Does it look better to you? To me, yes. 🙂
But like all things, it’s also a matter of taste: nicer decoration, but less Nutella used. And this is also a detail to consider, since we’re talking about tastes. Aesthetic and otherwise.
Certainly, it’s a decoration that can be further improved (by someone more patient than me, yes, I have no doubt about it). But for now, I’m content with this level, at least until I decide to take a pastry or decoration course! 😀
〰〰〰
- Difficulty: Easy
- Cost: Cheap
- Rest time: 1 Hour
- Preparation time: 30 Minutes
- Portions: 8
- Cooking methods: No-cook
- Cuisine: Italian
- Seasonality: All seasons
Ingredients
- 2.8 oz cookies (shortbread like abbracci)
- 0.7 oz puffed amaranth
- 1.4 oz butter
- 5.3 oz dark chocolate
- 1 cup cup heavy cream for whipping
- 3.5 oz mascarpone
- 3.5 oz cream cheese
- 1.8 oz powdered sugar
- 3.5 oz chocolate chips
- 2.8 oz hazelnut cream
- 3 tablespoons hazelnut cream
Tools
- Mixer
- Springform Pan
- Parchment Paper
- Skewers
- Rolling Pin
Steps
Prepare a 9-inch (maximum 9.5-inch) springform pan and line the base only with parchment paper. Not the sides.
Prepare the base:
Finely crumble the cookies: crush them with the rolling pin or grind them in the food processor.Melt the butter and chocolate together in the microwave (or in a bain-marie if preferred). For the microwave, proceed as follows: cut chocolate and butter into pieces, place them together in a glass bowl, run the microwave for one minute, remove the bowl from the microwave and stir, repeat the operation a couple more times, totaling 3 minutes (adjust based on the power used and the size of the chocolate pieces).
It’s important to stir, as the butter melts before the chocolate.In a bowl, mix the puffed amaranth with the cookie crumbs and pour in the melted chocolate. Stir with a spoon to mix well.
Butter and chocolate can also be melted separately and then mixed into the cookie and amaranth mixture separately: I tried and noticed no difference in the base’s success.Spread the obtained mixture on the base of the springform pan already covered with parchment paper and level it with the back of a spoon.
Place in the freezer for 15-20 minutes.
Prepare the filling:
Whip the cream, sweetening it with 1.8 oz of powdered sugar.When the cream is whipped, add the mascarpone and blend at low speed to combine with the cream. Then repeat with the cream cheese.
Divide the cream into two parts (not equal parts).
Add to one of the parts, preferably the smaller one, the hazelnut cream and mix gently to incorporate it.
Add to the rest of the cream cheese mixture (the white one without Nutella) the chocolate chips and gently mix them with a spoon.
Honestly, I added the chocolate chips before dividing the cream into two, but I don’t recommend it because I found that during decoration, the chocolate chips can interfere with the skewer.Distribute the two creams:
Remove the now-cooled base from the freezer and spread the white cream with chocolate chips. Level it with a spoon.Place in the freezer for 15-20 minutes.
During this time, keep the Nutella cream part in the fridge.When after 15-20 minutes the surface of the first cream layer is sufficiently firm, remove it from the freezer and pour the second cream layer. Level it well with a spoon.
The purpose of this double freezer process is to obtain two distinct cream layers, one white with chocolate chips and a darker one with Nutella.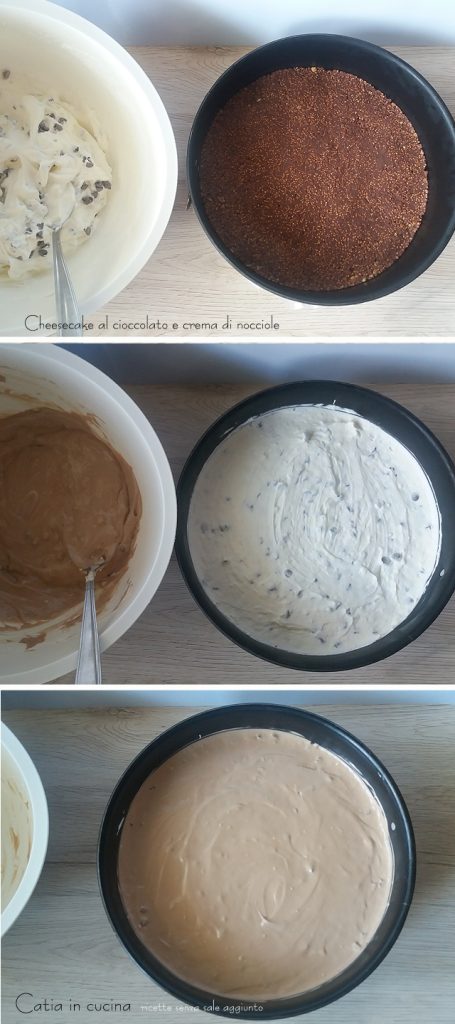
Proceed with the decoration:
On the second layer, distribute 2 or 3 tablespoons of hazelnut cream irregularly, in spots or threads or concentric circles, in any way your imagination suggests.
With the tip of a skewer, or toothpick, or any other stick, create whirls, circles, flowers, or imaginative designs you invent, simply by passing over the hazelnut cream spots.Once the decoration is complete, place in the freezer to chill. After an hour in the freezer, your chocolate and Nutella cheesecake can be served.
If you prefer to freeze it, before consuming, leave it at room temperature for 20-30 minutes (the time naturally depends on the ambient temperature).
The base will remain crunchy and crumbly, in tasty contrast with the creaminess of this delicious dessert.
And now… try it yourself! Grab a skewer and have fun!
Enjoy!
Follow me!
In my new WhatsApp channel and on Instagram, on the Facebook page and Pinterest, in my two groups: Catia’s group, in the kitchen and beyond and Just what I was looking for! and if you like… subscribe to my Newsletter.
In my new WhatsApp channel and on Instagram, on the Facebook page and Pinterest, in my two groups: Catia’s group, in the kitchen and beyond and Just what I was looking for! and if you like… subscribe to my Newsletter.
