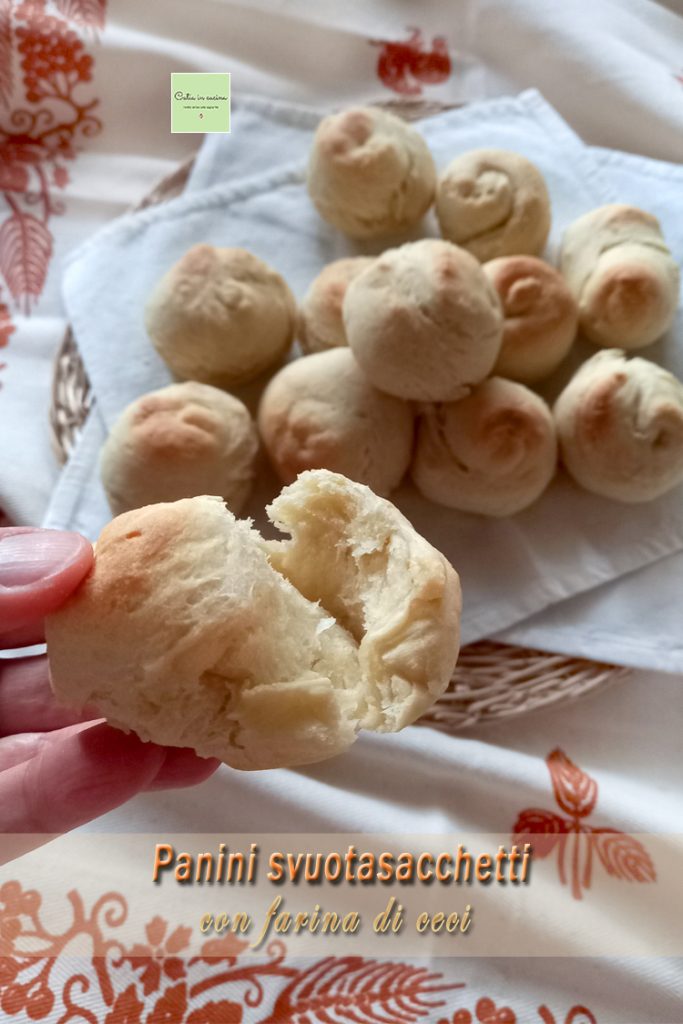
Do you have some open bags of flour that you don’t know how to use? Great! Then I have the right recipe for you, try making these empty the pantry rolls! 🤩
I made these rolls three times in one week, the first time because I wanted to finish three bags of flour, one of which was chickpea flour that had been floating around the kitchen for a while, and I didn’t know how to use it. We liked them so much that the next day I bought chickpea flour specifically to make them again (twice in a row 😃). They’re simple rolls, but that little addition of chickpea flour gives them an extra touch that makes a difference.
Today the Light and Tasty column reopens after the Christmas break, and as tradition dictates, we dedicate the first edition to anti-waste or recycled recipes. As always, you will find the recipes of my colleagues linked at the bottom of these empty the pantry rolls, the only recycled/anti-waste recipe I unveiled this year during the holiday season.
Well yes, unlike previous years, this year I didn’t have almost anything available to recycle because I didn’t cook anything for Christmas! For the first time in decades, we ate outside the home! And for Boxing Day, we went to eat at my mom’s. I had hoped for New Year’s Eve, and then on January 6th, that something would be left over, but oh nothing, we finished everything, nothing was left! 😃😁
However, between one festive day and another, I did quite a bit of kneading, and I made several batches of bread including these delicious empty the pantry rolls. And here I am talking about them because, as always, the recipes that come together quickly are the ones that give me the most satisfaction!
Are you ready to read the recipe?
👇 Then, if you want to vary, using the same flours you can also make these other rolls: 👇
- Difficulty: Easy
- Cost: Economical
- Rest time: 16 Hours
- Preparation time: 15 Minutes
- Portions: 25 Pieces
- Cooking methods: Oven
- Cuisine: Italian
- Seasonality: All Seasons
Ingredients
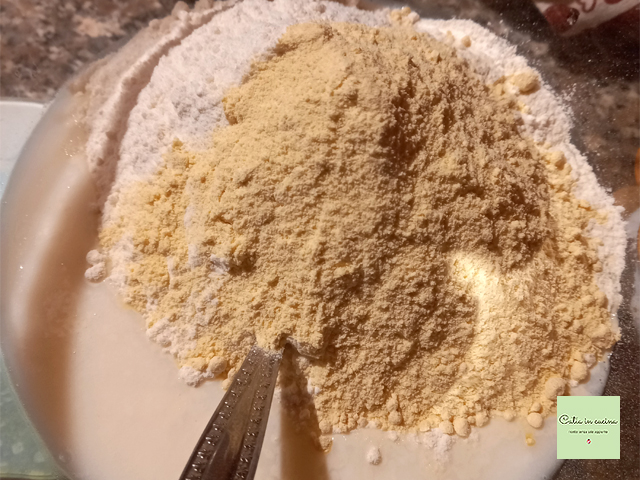
- 14.1 oz mixed flours (I used 0 flour for pizza + manitoba)
- 2.8 oz chickpea flour
- 4.9 oz liquid sourdough starter
- 8.8 oz water
- 2 teaspoons extra virgin olive oil
Tools
- Bowl
- Spoon
- Baking Tray
- Parchment Paper
Steps
Pour the liquid sourdough starter and water into a bowl and dissolve the starter well.
Add the three flours and mix with a spoon until a soft mixture is obtained.
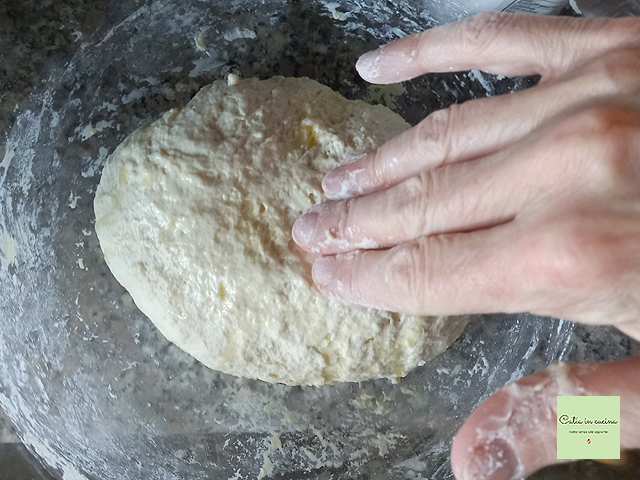
Continue working the dough by hand quickly, for at least 5 minutes, but better 10, and in any case until the dough ball, when worked, detaches from the sides of the bowl.
👉 If the dough ball is too soft – it can happen depending on the flours used – add a little flour at a time as needed.
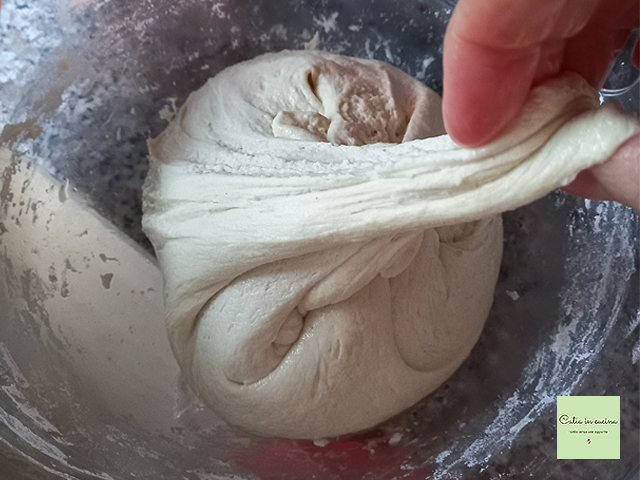
Once the dough ball is ready, grease it with oil (just a little) over the entire surface, especially where it touches the bowl.
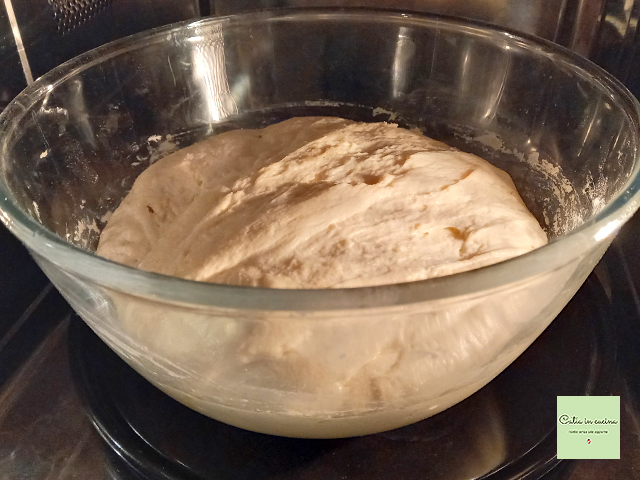
Place the bowl in a sheltered place (in the oven or inside the microwave). During the first hour of rising, make folds in the bowl two or three times every 20-30 minutes.
Let rise until doubled in size for about 8 hours (I kneaded in the evening, so overnight).
Once doubled, you can proceed with forming the rolls and baking, but to let the dough mature better, cover the bowl with cling film (or even just a plate) and put it in the fridge for a few hours.
👉 The resting time in the fridge doesn’t need to be strict, the three times I made this recipe I varied between 6 to 12 hours.
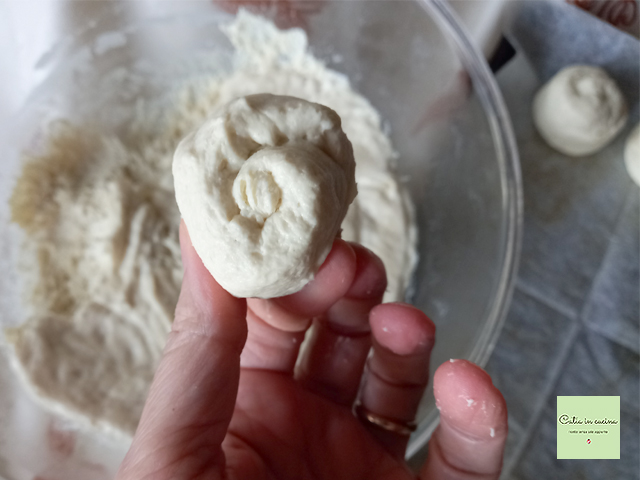
Take the bowl out of the fridge, and while the dough is still cold, take small portions of it.
👉 Since it’s a rather soft dough, it is helpful to handle it while cold so it doesn’t stick to your fingers.
👉 You can get between 20 to 25 rolls, depending on size.
Gently handle each portion of dough, trying not to flatten it too much, to form small rolls or small spirals.
In the meantime, turn on the oven.
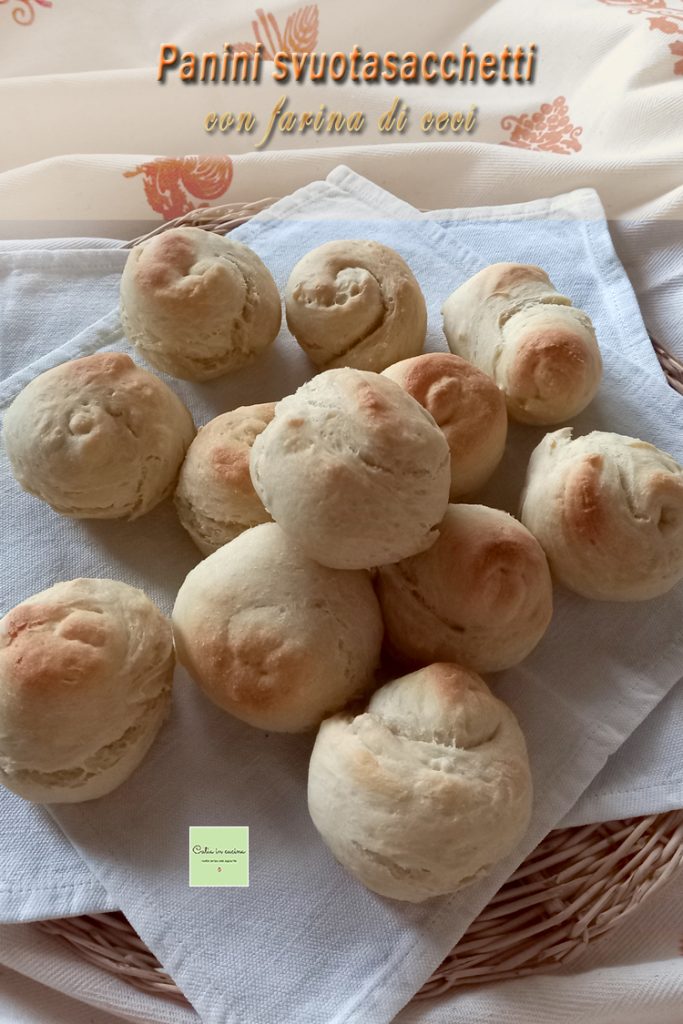
Place the empty the pantry rolls on a baking tray or a baking sheet lined with parchment paper and bake them at 392°F for 20-25 minutes, a variable time depending on the size of the rolls and how golden you prefer them.
☝ The photos shown in this recipe refer to the very first trial (the actual emptying of the pantry), when the rolls turned out medium-small, and I took them out of the oven slightly golden (for fear, later unfounded, that they would harden). On the third trial, I greatly reduced the size of the rolls, making them mini rolls, and let them brown for a few more minutes. They turned out perfect. 😋
I recommend trying them warm, the crispy crust is irresistible!
As always, every time I repeat a recipe I rarely replicate it exactly the same, so with these three batches of rolls I tried to:
– use chickpea flour in increasing amounts, the first time 55 g (more or less a gram, that is what was in the almost empty bag), then I increased to 70 g and finally the third time 80 g. My infallible family jury decreed 55 g not very noticeable, and 70-80 g the right amount, with the chickpea flour flavor appreciable without overwhelming
– replace part of the water (100 g) with kefir (but yogurt is fine too). Since I always have surplus kefir at home, it’s a habit of mine to use it in leavened doughs. The rolls came out great both with just water and with kefir, the version with kefir was perhaps slightly less crispy and softer, but in that case (second trial) I had made the rolls larger than the previous time, so the variables were two, the comparison was not… let’s say… entirely scientific 😄😅😁
Ok, and after this technical news, from the column “science in the kitchen by the ounce”… that’s all! Returning you to your regularly scheduled programming! 😄
Salt-Free Tips
 What I cook without salt you already know, right? 😉 Ah, perhaps one thing I don’t often repeat here is that in my group I have created Guides where I collect articles and links dedicated to healthy eating and, specifically, to studies and investigations on salt and its use (and/or abuse), so… join! 🙂
If you are interested in reducing or eliminating salt, always remember to:
▫ Gradually reduce the salt, the palate needs to get used to it slowly and should not notice the progressive reduction.
▫ Use spices. Chili pepper, pepper, curry, nutmeg, cinnamon, cloves, cumin…
▫ Use aromatic herbs. Basil, parsley, oregano, thyme, sage, marjoram, rosemary, mint…
▫ Use seeds. Sesame, pine nuts, almonds, walnuts…
▫ Use spicy vegetables or fruits. Garlic, onion, lemon, orange…
▫ Use my vegetable granules without salt and gomasio.
▫ Prefer fresh foods.
▫ Avoid cooking in water, prefer cooking methods that do not disperse flavors (grill, foil, steam, microwave)
▫ Avoid bringing the salt shaker to the table!
▫ Occasionally allow yourself to break the rule. It’s good for the mood and helps you persevere.
If you don’t want, or can’t, give up salt:
▫ You can still try my recipes by salting them according to your habits.
Follow Me!
In my WhatsApp channel and on Instagram, on the Facebook page, on Pinterest and in my two groups: Catia’s group, in the kitchen and beyond and Exactly what I was looking for! and if you like… subscribe to my Newsletter.
Other Light and Tasty Recipes:
I’ll leave you with the delicious Light and Tasty anti-waste recipes of my colleagues! 👇
Carla Emilia: Onions with Maple Syrup
Claudia: Dessert with Leftover Panettone and Skyr
Daniela: Risotto with Pomegranate and Lemon Zest
Elena: Cake with Fresh and Dried Fruit
Milena: Savory Pie with Escarole, Pumpkin, and Taggiasca Olives
