An unconventional recipe, this liver fritters in netting. Certainly from my own perspective, given my dietary habits in recent years leaning towards vegetarianism.
But this is a traditional recipe. And despite everything, I am very attached to culinary traditions. They remind me of my childhood, and the Romagna of my childhood, customs, grandparents, the life of those years.
Moreover, as a traditional recipe, more traditional than this is not possible. Because it’s not an everyday recipe, but it’s typical of that tradition, not to mention necessity, which was the slaughter of the pig. Which here in Romagna happened and happens, for those who still do it, in the month of January.
A poor dish, therefore, and typical of peasant families, typical of when nothing was thrown away from the pig, and when there was no fear of fat dripping in the pan, indeed, when that was exactly the good part.
To be honest, the traditional recipe from here (by ‘here’ I mean yes my ‘Romagna south of Rimini’, but with further precise localization in the places of my parents’ origin – it’s very important to specify that for culinary matters the ‘territory’ here does not extend beyond the family one!) – the traditional recipe from here, I was saying, involves cooking over coals, on the grill, so that the fat drips.
I wanted to try, honestly, but setting up a charcoal cooking for just four liver fritters… well, it wasn’t for me, so in the end, I cooked it in a pan, and pondered the possibility of baking them, then for the same reasons avoided that as well.
But even cooked like this in a pan, they turned out very good! 😋
〰〰〰
For other traditional Romagna recipes on the blog, check these out: 👇
- Difficulty: Medium
- Cost: Economical
- Preparation time: 5 Minutes
- Portions: 4
- Cooking methods: Stovetop
- Cuisine: Italian
- Seasonality: Winter
Ingredients
- 4 liver fritters wrapped in netting
- 8 leaves bay leaves
- 1 sprig rosemary
- 1 clove garlic (optional)
Tools
- Stainless Steel Pan
How to Cook Liver Fritters in Netting
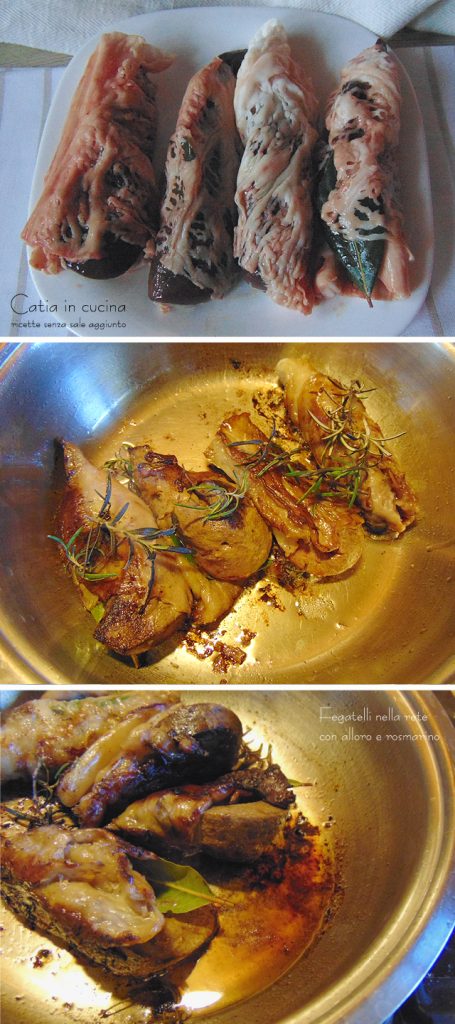
Place the liver fritters directly in the pan (I used a stainless steel casserole, but a non-stick pan can also be used).
Optionally add a chopped garlic clove, I didn’t use it but I’ll add it next time.
As soon as the bottom of the pan heats up, the netting begins to sizzle. At this point, you can turn the liver fritters.
Turn them on all sides, cooking them a few minutes per side so that the entire netting becomes toasted.
Add the rosemary, then place the lid on, but leave it ajar, not completely closed.
Cook the liver fritters for about twenty minutes, or a few minutes more, on low heat, checking and turning them from time to time.
Halfway through cooking, I removed the fat that had accumulated at the bottom of the pan with a spoon.
In the three photos below, I show you the 4 liver fritters in the netting with bay leaf inserted inside, photographed before cooking, then a photo when I added the rosemary, finally the photo of the fat that I later removed.
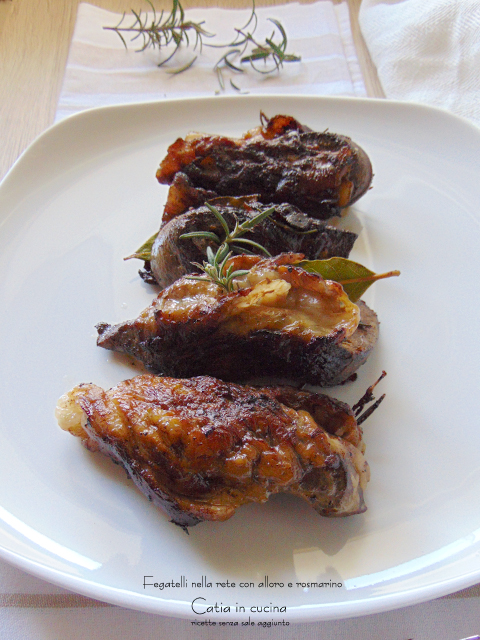
Serve the liver fritters hot, accompanied by your favorite side, such as roasted potatoes, mashed potatoes, or cooked vegetables (I ate them with a nice fresh salad).
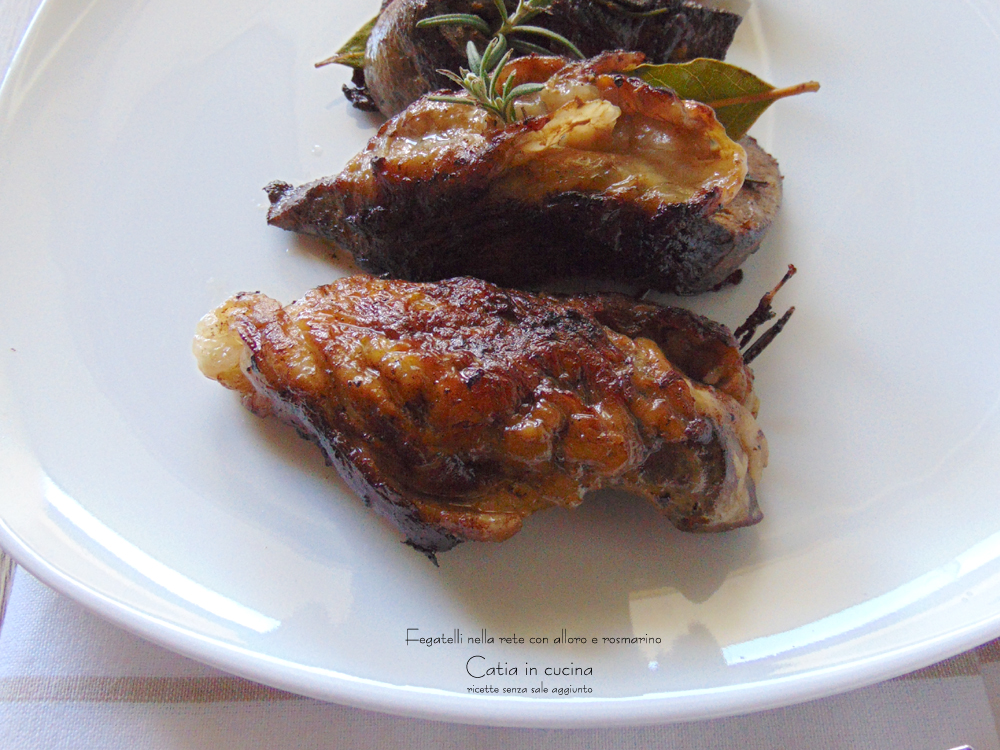
The liver was very good, tender and flavorful, completely without salt.
The advantage of the netting is exactly this, to season, soften, and protect the liver from scorching.
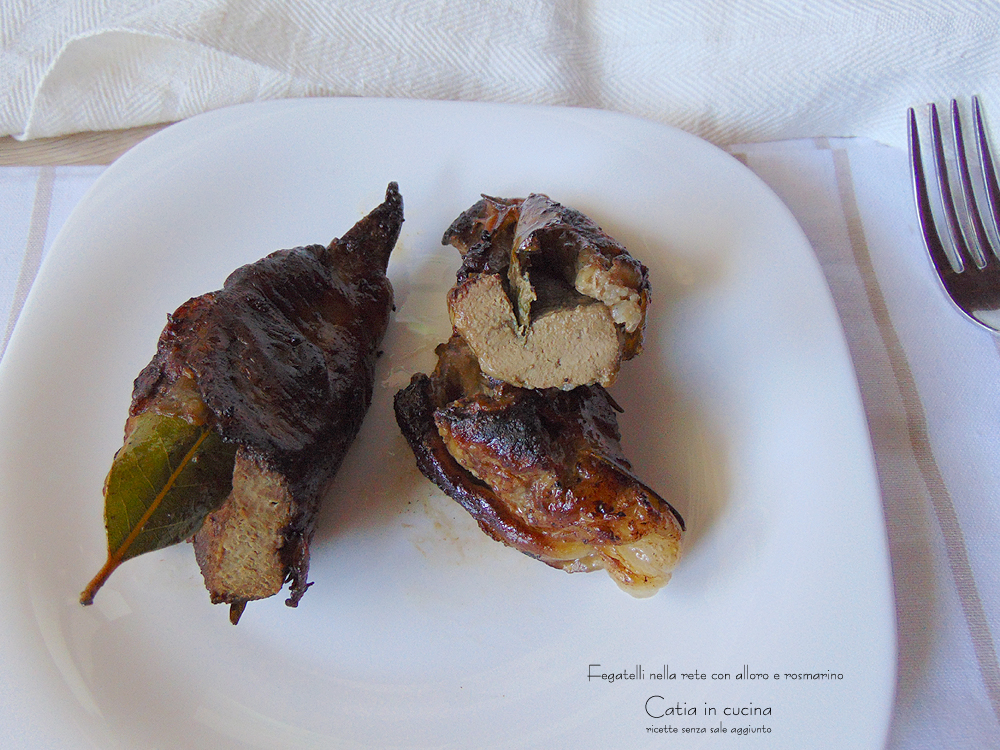
I know some people eat the netting too, I tasted it where it was well toasted and crispy, but I must admit that for my taste it is a bit too fatty and I didn’t eat it, but I liked the liver very much, but on that, I had no doubts, I’ve always liked it since I was a child. Yes, I liked liver even as a child, what a strange child I was, my daughter always tells me!Here is how the liver looks inside, well-cooked but tender:
Salt-Free Tips
 I’ve written a few lines ago, but I’ll repeat it with pleasure: these liver fritters in netting cooked in a pan with bay leaves and rosemary are completely without added salt. Delicious!!
If you’re interested in reducing or eliminating salt, always remember to:
▫ Gradually decrease the salt, the palate must get used to it slowly and not notice the progressive reduction.
▫ Use spices. Chili, pepper, curry, nutmeg, cinnamon, cloves, cumin…
▫ Use aromatic herbs. Basil, parsley, oregano, thyme, sage, marjoram, rosemary, mint…
▫ Use seeds. Sesame, pine nuts, almonds, walnuts…
▫ Use spicy vegetables or fruit. Garlic, onion, lemon, orange…
▫ Use my salt-free vegetable granules
▫ Prefer fresh foods.
▫ Avoid cooking in water, prefer cooking that doesn’t disperse flavors (griddle, en papillote, steaming, microwave)
▫ Avoid bringing the salt shaker to the table!
▫ Allow yourself sometimes to break the rule. It’s good for the mood and helps perseverance.
If you don’t want or can’t give up salt:
▫ You can try my recipes anyway, salting according to your habits.
Follow Me!
In my new WhatsApp channel and on Instagram!
As always, you can also find me on my Facebook page, on my Pinterest boards, in my two groups: Catia’s group, in the kitchen and beyond and Just what I was looking for! and if you like… subscribe to my Newsletter.
As always, you can also find me on my Facebook page, on my Pinterest boards, in my two groups: Catia’s group, in the kitchen and beyond and Just what I was looking for! and if you like… subscribe to my Newsletter.
