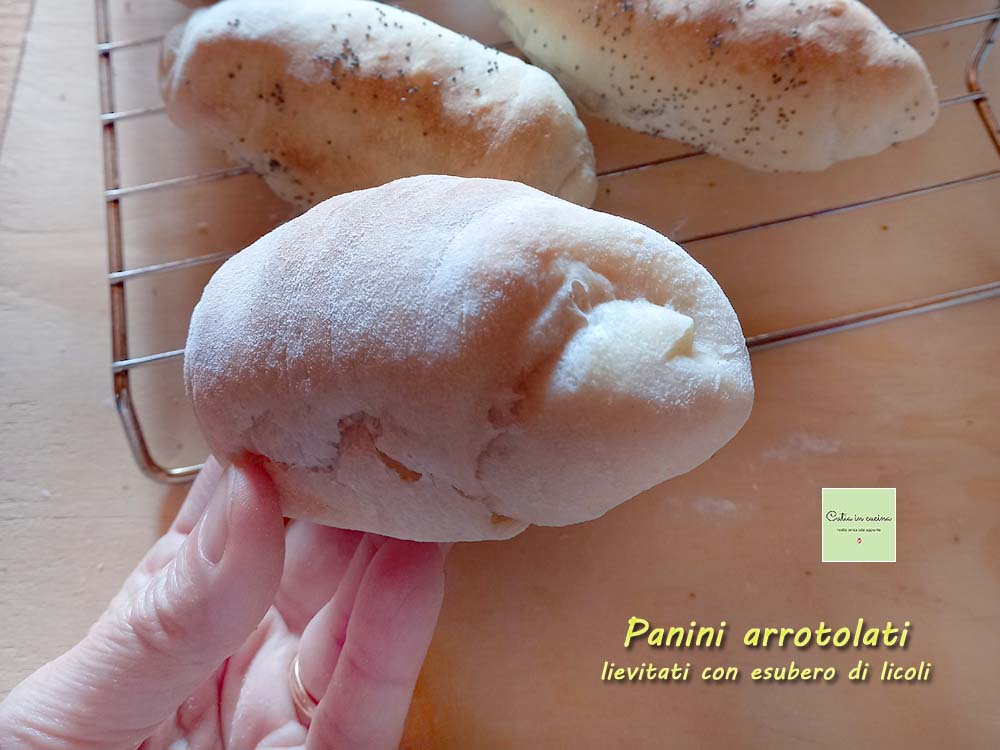
I often make these rolled buns, practically every time I have excess liquid sourdough starter. When I don’t have new ideas and don’t know how to use the discard, I quickly put flour, water and discard into the stand mixer — five minutes for a very simple dough that works great for a focaccia, skillet flatbreads, or even better for buns. Like these.
With the buns everything is quicker: a few minutes in the mixer, a quiet rise that doesn’t need me because it does everything on its own, and finally a quick rolling and into the oven.
It’s a basic dough, made with common flours, no folds, no autolyse, no perfect shaping, no salt (that one was easy 😃) and almost no oil. Had I added more oil I could have called them olive oil buns (😃) but better not — sometimes I add oil by eye, which could even mean less oil… so it’s safer to just call them rolled buns!
That’s it, there’s nothing more to say about these buns, except that they always disappear quickly here!
I leave you the link to a short video I made of these buns, which is among the videos on my Facebook page 👉 you can watch it by clicking here.
👇 Below I also leave you recipes for some of my other buns — a few more ideas are always useful!
- Difficulty: Easy
- Cost: Very inexpensive
- Rest time: 8 Hours
- Preparation time: 10 Minutes
- Portions: 8-10
- Cooking methods: Oven
- Cuisine: Italian
- Seasonality: All seasons
Ingredients
- 2 cups Type 1 flour
- 2 cups Manitoba flour
- 2/3 cup liquid sourdough starter (specifically discard)
- 1 cup water
- 1 1/3 tbsp extra virgin olive oil
Tools
- Stand mixer Russell Hobbs
Steps
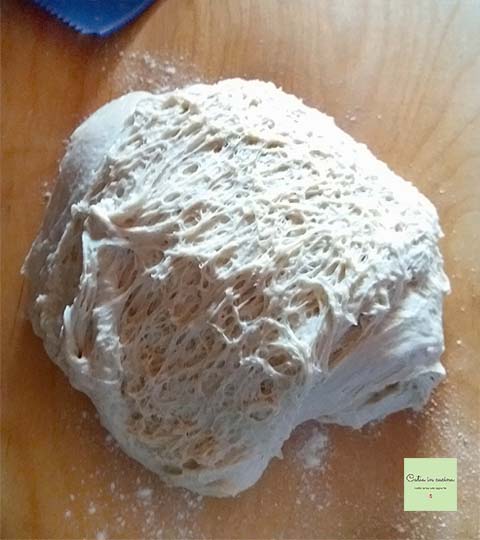
Put all the ingredients into the bowl of the stand mixer and start at low speed (I usually use speed 2). In a few minutes the dough will come together and develop gluten.
☝ As always, the amount of water may vary because flours don’t all absorb the same way. It’s better not to add it all at once but to start with 200 g (about 3/4 cup) and then pour the rest little by little.
Cover the bowl with plastic wrap (or a plate or lid will do).
Wait for the dough to double in size (for rising times see the end in: Notes).
When the dough has doubled, transfer it to the cutting board or work surface.
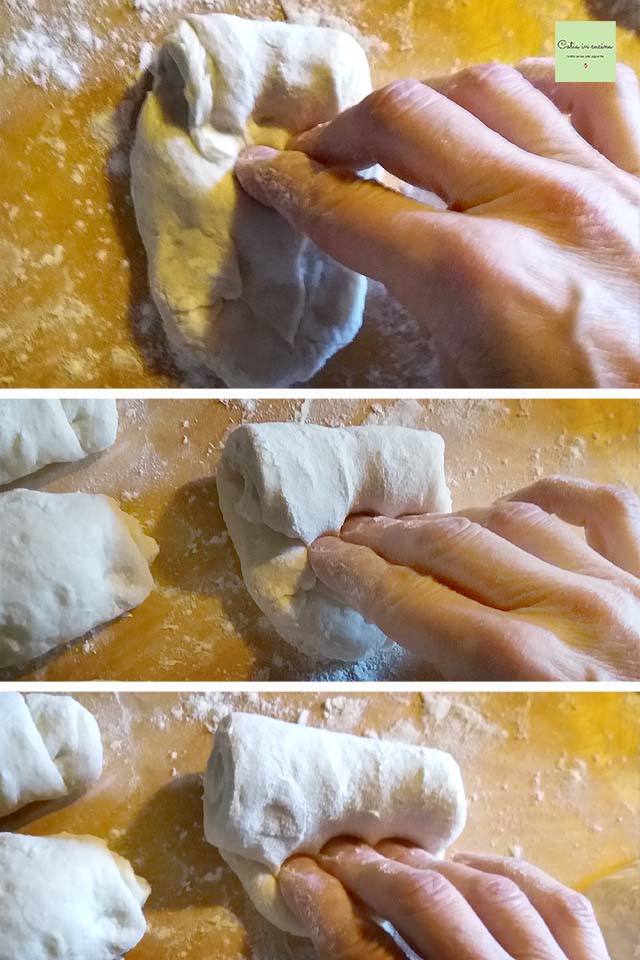
Divide the dough into 8-10 pieces depending on how large or small you want your rolled buns.
Flour the work surface well and flour each dough piece.
Flatten each piece of dough with your fingertips to form roughly a rectangle.
Roll the dough starting from the short side.
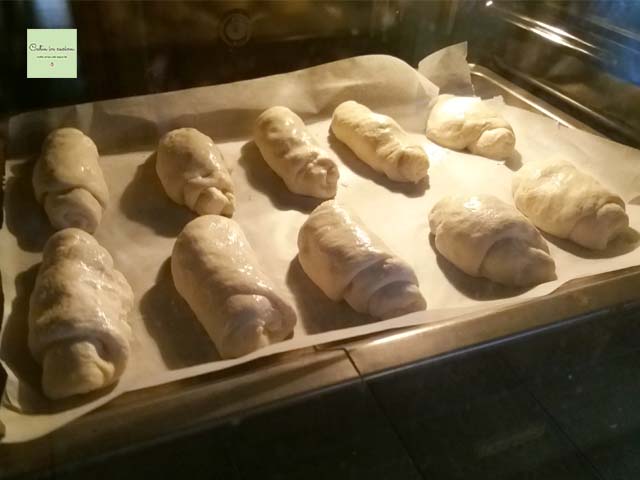
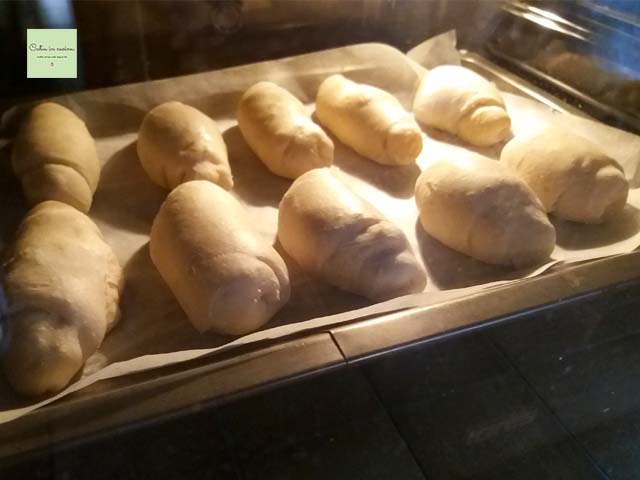
Place the rolled buns on a baking sheet lined with parchment paper.
Moisten the surface of each bun with milk or water (optional).
Bake at 392°F for 15 minutes (if the buns are small) or 20 minutes (if larger).
Here are the rolled buns just put in the oven:
After about 10 minutes:
After 20 minutes, when baking is complete:


They’re great filled…

…but also just enriched with walnuts, hazelnuts, sesame seeds, poppy seeds. Or with a sweet touch like raisins or chocolate chips. 😋

☝ As always when using sourdough, the rising time cannot be indicated precisely because it depends on various factors, mainly room temperature and the activity of the liquid starter. If the starter is very active and has been refreshed recently, and if it’s warm, it should rise in 6-7 hours. It can be helpful to place the bowl in the (turned-off) oven with the oven light on, or inside the microwave. When using discard the times lengthen and can vary depending on the activity (or better said inactivity) of the discard; I have observed very different times, from 8 to 12 hours.
☝ I often bake the buns when the dough is ready, without resting in the fridge, but quite often I put it in the fridge for a few hours (usually overnight). With these methods: if I decide to mix in the late afternoon or evening, and depending on how the fermentation goes, when it’s time to go to bed I put the dough in the fridge regardless of how many hours it has already risen (I prefer not to leave the dough unattended since I can’t monitor it). Then I take it out of the fridge one or two hours before the planned baking (naturally always considering how long it rose the day before) (it sounds complicated to explain but trust me in practice it’s much less complicated! 😉).
Tips for unsalted bread
 The unsalted bread can also be made as a bun 😉 also because then you can be more creative with the fillings and, if needed, you have more freedom to decide on the spot how to enrich the dough.
If this is your first time here and you don’t know that I cook without salt, I invite you to read the article where I tell my experience: Cooking without salt, my journey. 😊
If you are interested in reducing or eliminating salt, always remember to:
– Reduce salt gradually; the palate needs time to adapt and shouldn’t notice the progressive reduction.
– Use spices. Chili, pepper, curry, nutmeg, cinnamon, cloves, cumin…
– Use aromatic herbs. Basil, parsley, oregano, thyme, sage, marjoram, rosemary, mint…
– Use seeds. Sesame, pine nuts, almonds, walnuts…
– Use pungent vegetables or fruit. Garlic, onion, lemon, orange…
– Use my unsalted vegetable granulate and the gomasio.
– Prefer fresh foods.
– Avoid boiling cooking methods that dilute flavors; prefer cooking that preserves flavors (griddle, en papillote, steam, microwave).
– Avoid bringing the saltshaker to the table!
– Allow yourself an occasional indulgence. It lifts the mood and helps you persevere.
If you don’t want, or cannot, give up salt:
You can still try my recipes seasoning them according to your usual habits.
Follow me!
On my new WhatsApp channel and on Instagram, on my Facebook page and Pinterest, in my two groups: Catia’s group, in the kitchen and beyond and Exactly what I was looking for! and if you like… subscribe to my Newsletter.
On my new WhatsApp channel and on Instagram, on my Facebook page and Pinterest, in my two groups: Catia’s group, in the kitchen and beyond and Exactly what I was looking for! and if you like… subscribe to my Newsletter.
