Since the first year of my blog, nearly nine years ago, every year around Christmas, I’ve promised myself to write the recipe for our traditional Romagna-style cappelletti, the ones my mom has always made, always the same way.
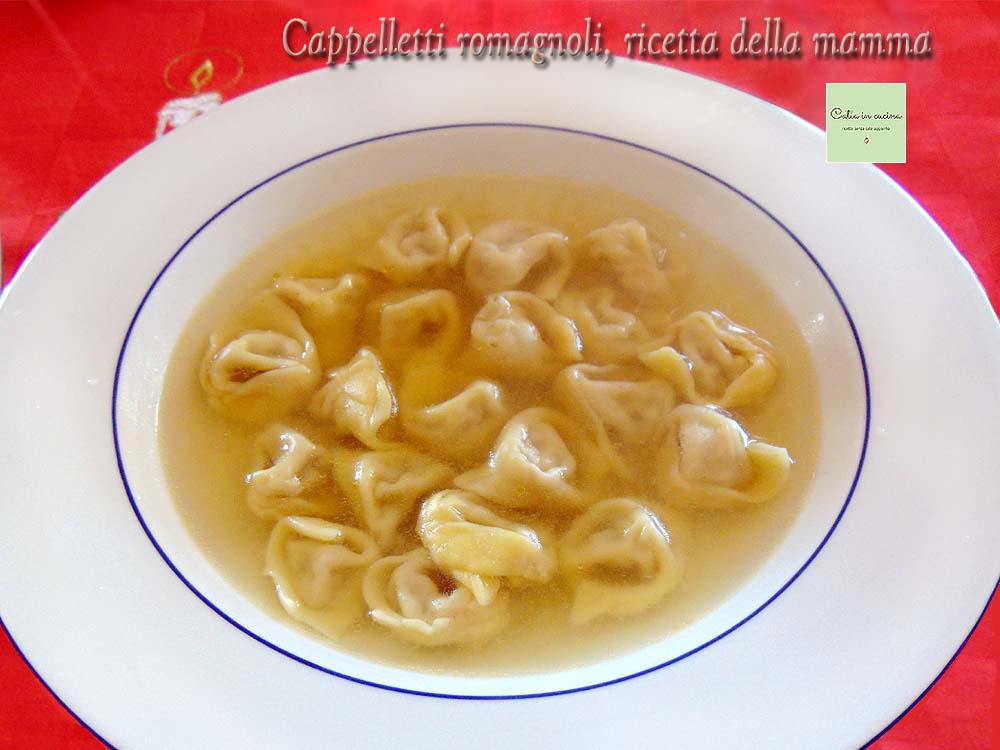
Here, cappelletti are the quintessential stuffed pasta (for broth), an indispensable first course at Christmas lunch, often repeated on New Year’s Day and at Easter.
Every year, for eight years, on Christmas Day, I’ve photographed my plate of cappelletti in broth, promising myself that yes, this year I’ll write the recipe! But each year, I gave up. Sometimes because of lack of time, sometimes because spring arrives in the blink of an eye, and it already seems ‘out of season’ for a broth recipe.
Other times, for a reason that might make you smile now, but I’m sure some of you will understand: have you ever seen the arguments on social media that sometimes arise in the comments on certain recipes? They usually happen with traditional recipes.
When talking about traditional recipes, even minimal differences can lead to endless debates. I think the truth for some recipes is that every family has its own version, in the truest sense of the word. But this should be a reason for exchanging ideas, recipes, and advice, not for parochial quarrels, don’t you think? So, sometimes I’ve thought, why should I expose my mom’s recipe to everyone? Let everyone keep their own recipe, and everyone’s happy. And year after year, I’ve postponed the decision to the following year.
About ten days ago, my daughter asked me for the recipe.
She organized an early Christmas lunch at her university apartment with her study group, consisting of boys and girls from various regions, each bringing their own regional specialty. Someone made the broth, someone made erbazzone, others brought salumi from Campania and caciocavallo, and Flavia brought grandma Vanda’s Romagna-style cappelletti copied from my little notebook.
She then told me that making the cappelletti turned into a team effort (🤩). Someone was rolling out the dough with a rolling pin, while others took turns closing the cappelletti, while the broth was cooking, and everyone took turns helping the one on the other side of the table who was preparing the dessert.
And in the end, the result was excellent. Sure, rolling the dough by hand requires, indeed, skill 😀, so maybe it didn’t turn out as thin as grandma would recommend, but who knows, maybe… a pasta machine could be a good gift idea for these eager young cooks!
So, that day, my daughter and her friends confirmed and put into practice my vision, and the recipe of our traditional cappelletti took, for me, a quality leap.
If I had written this recipe earlier, I would have dedicated this introduction to the farming world, I would have cited the stories my dad often tells us about the old days, and I would have shared his memories of when the filling for cappelletti wasn’t a matter of dispute between those who use two types of meat and those who use three, because it was simply made “with the meat that was available”.
This modest aspect of traditional recipes should always be remembered. Back then, the choice of ingredients depended, for most but not all, on availability, not on strict adherence to ‘official’ recipes.
Today, as I’m writing this, that our recipe – so much ours that it’s titled in my notebook “Mom’s Cappelletto Filling” – has become, even just for a day, a collective recipe, to be prepared together among twenty-somethings from all over Italy, is something I really like. It might be trivial, but I like it.
That’s why I’ve finally decided to write the recipe.
And it so happened to be the right recipe for the Light and Tasty column, today dedicated to Christmas.
Enjoy! 🌟🌟🌟
〰 〰 〰
- Difficulty: Medium
- Cost: Medium
- Preparation time: 1 Hour
- Portions: 8
- Cooking methods: Stove
- Cuisine: Italian Regional
- Region: Emilia-Romagna
- Seasonality: All Seasons
Ingredients
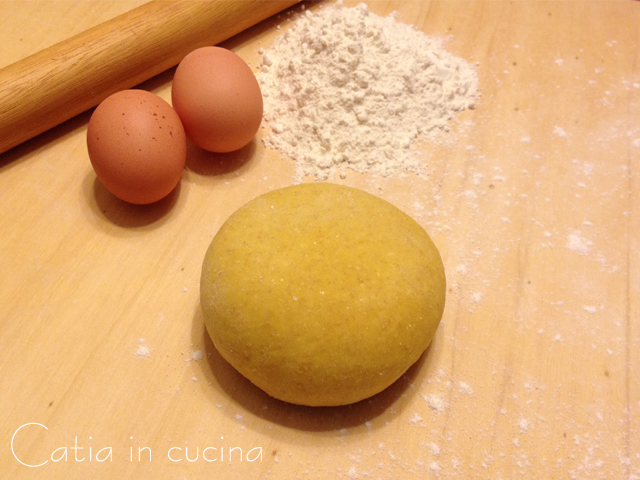
The quantities are approximate; in my notebook, it says ‘about’ in front of each ingredient, and it says ‘a lot’ for parmesan, and it doesn’t state how much egg pasta is needed. Usually, for 8-10 people, we make a dough with 6 eggs, but I advise you not to focus on precise weights; if you make more… remember that they can be frozen. 😉
- homemade egg pasta
- 10.5 oz beef (lean, like muscle)
- 1.8 oz pork loin
- 1.8 oz chicken or capon breast
- 1.8 oz cheese (like caciotta) (I'll explain more in the procedure)
- grated Parmesan (two handfuls)
- lemon zest
- nutmeg
- (salt) and pepper
- 1 egg (optional)
Tools
- Rolling Pin wooden
- Pastry Wheel cutter
Steps
Grind the three types of meat using a meat grinder (if desired, passing it twice).
👉 Alternatively, you can have it ground directly by the butcher at the time of purchase.
Cook the meat in a pan, stirring with a spoon, without browning it. A few minutes are enough; it should be cooked but white, not seared.
👉 Some people cook it by adding oil or butter; I don’t add anything, cooking it as is, because using a non-stick or steel pan, added fats can be avoided. In the case of a steel pan, you just need a pinch of attention: keep the heat low and move the meat quickly with a spoon.
Once cooked, pour the meat into a bowl and add the cheese.
👉 A note on the cheese: here, we have ‘cappelletti cheese,’ which is also called ‘piada cheese’ (because it’s traditionally used, and very suitable, for both purposes). It’s a type of soft caciotta cheese.
Mix with a fork (if desired, with hands) and season with a sprinkle of pepper (and optionally salt, but I don’t), a good grating of nutmeg, and lemon zest.
👉 I like the taste of lemon zest to be quite present (while my mom uses a bit less than I do).
Finally, add the egg. It’s not essential; it aims to make the filling more compact, but it can be omitted if the filling is well ground.
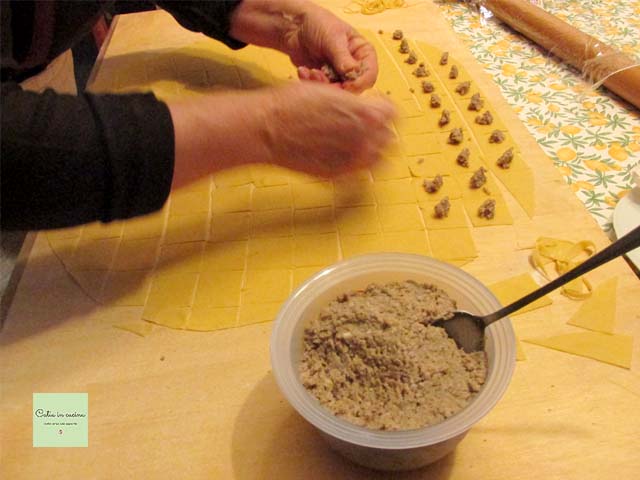
Set the filling aside (in a covered bowl or container) and proceed with making the egg pasta.
The filling doesn’t have a particularly photogenic color when seen alone, but paired with the color of the egg pasta, it becomes beautiful, to me. 😀
PS: the hands in motion are my mom’s, grandma Vanda’s 🙂
Even though with the previous photo I’ve spoiled the final look of the egg pasta, in this case rolled out with a rolling pin and then cut into squares, I leave you a couple of pieces of information:
First of all, I repeat here –> the link to the basic recipe to which I refer you, so I spare you the repetitions.
Additionally, two tips I find useful, not only for cappelletti but in general for all stuffed pasta:
1. Roll the pasta thinly. According to grandmothers’ tradition, the thinner the pasta, the better. It can be rolled out either by hand or with a pasta machine, electric or manual.
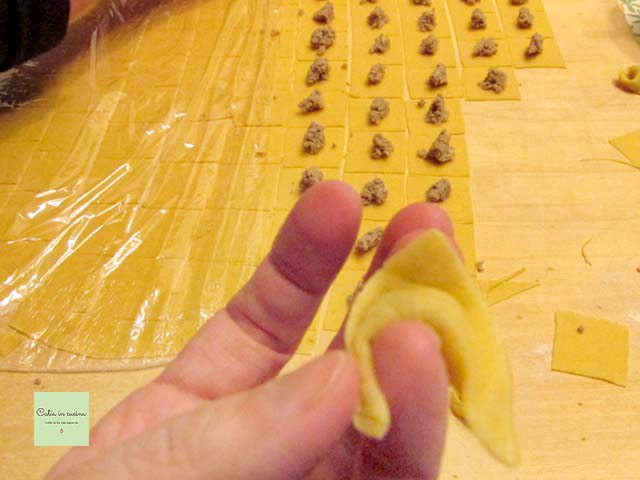
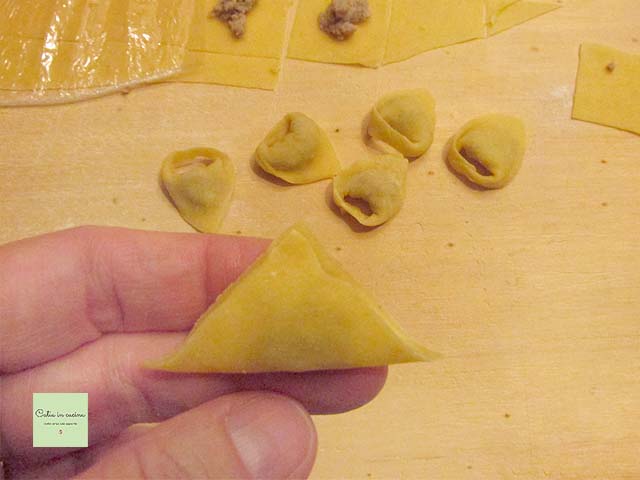
2. While making the cappelletti (and if not working with more hands to speed up), it is advisable to cover the rolled-out pasta (already cut into squares) with a sheet of cling film to prevent it from drying out.
👉 If the pasta dries, it becomes very difficult to seal the cappelletti. Alternatively, I suggest rolling out little pasta at a time (keeping the rest closed with cling film or under a bowl) to avoid giving it time to dry.
Below, I show you a photo where you can see the cling film on the already cut squares. In the foreground, you can also admire my not-so-successful attempt (luckily out of focus!) to make a cappelletto as small as a tortellino by closing it around the pinky. 😀
After rolling out the pasta, cut it into squares of approximately 1.18 – 1.57 inches per side.
👉 You can cut it with a pastry wheel or knife, as you wish. There are also special wheels that cut the squares directly, but personally, I’ve never found them convenient; I prefer using the pastry wheel. If desired, using a fluted wheel, you can obtain cappelletti with scalloped edges (I’ll show you the photo at the end of the recipe).
🌟 The size of the squares is subjective, according to taste or family tradition. In my father’s family, cappelletti used to be large, while in my mother’s family, they were made smaller (but not as tiny as the Bolognese tortellini).
Place “a pinch” of filling on each square of pasta.
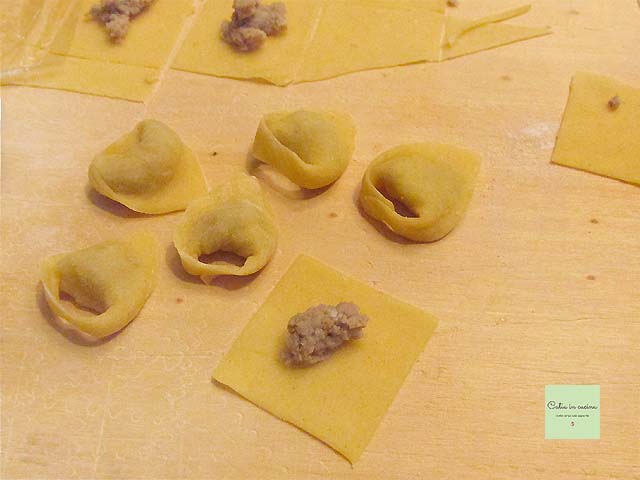
Fold the square into a handkerchief.
Seal the entire edge by pinching it between your thumb and index finger.
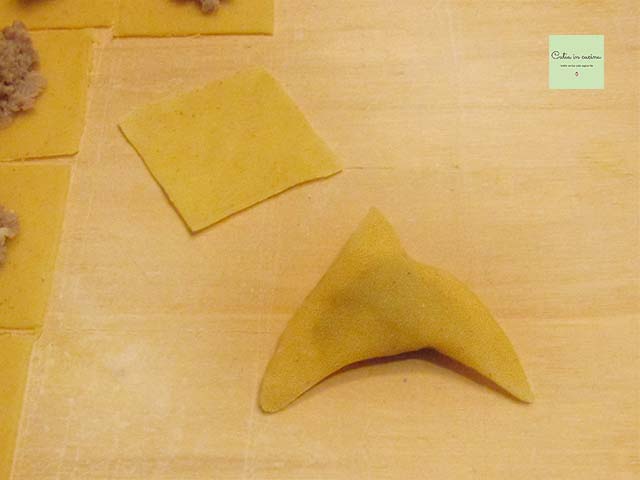
Close the two ends by pinching them together or overlapping. Again, each family uses the method they prefer.
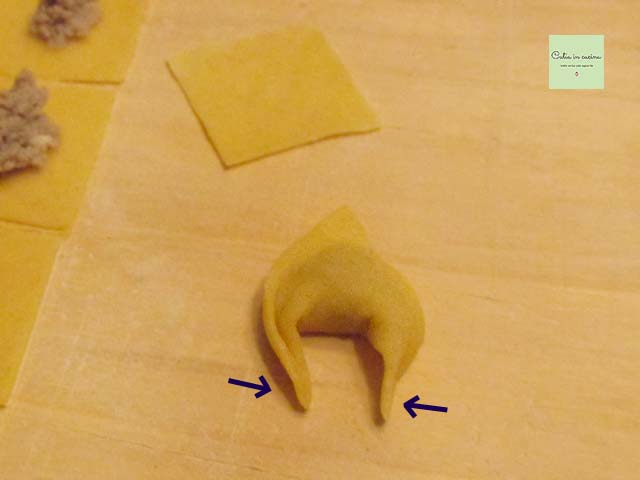
We usually close them by turning them around the index finger, except for personal experiments like you’ve seen a few photos back. 😊
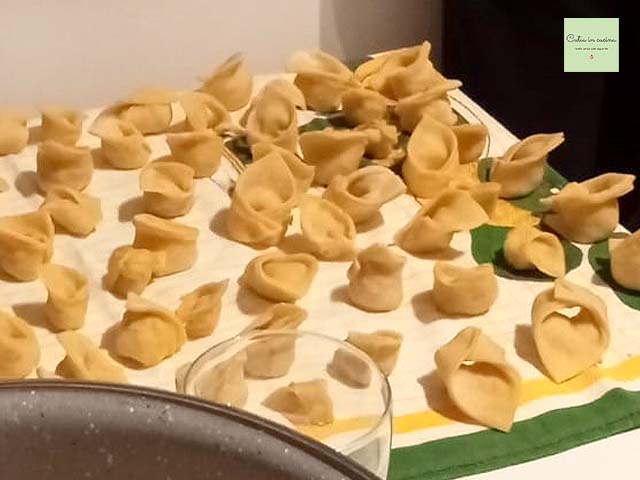
And here are the cappelletti made by Flavia and her friends. A first work worthy of applause. 💛 (Next time, they’ll also learn to make them all the same! 😃).
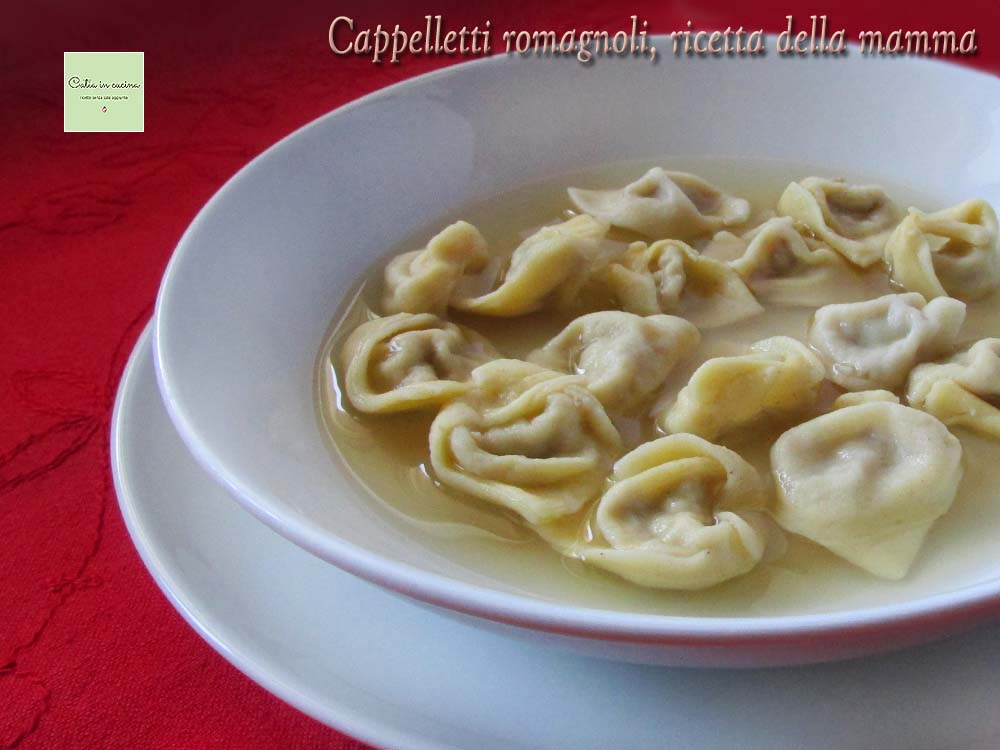
Homemade cappelletti are predominantly cooked in meat broth.
The Christmas Day broth, made especially for the cappelletti, includes, in addition to the classic broth meat, the addition of capon. (In my future plans is also publishing the broth recipe, will our heroes succeed? 😀)
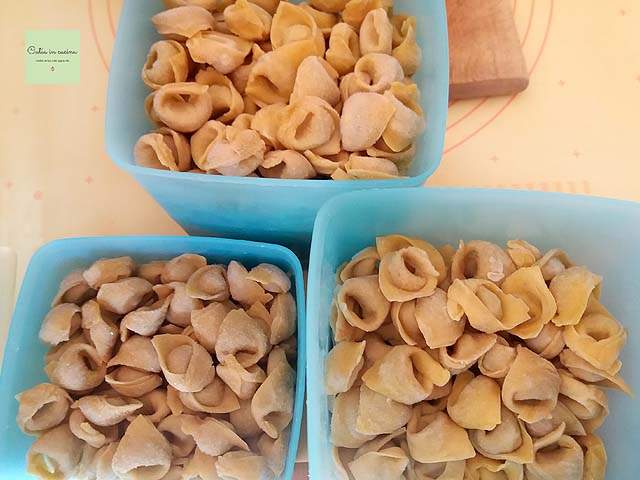
For storage, I would distinguish between before and after cooking.
Before cooking: if made on the same day of consumption, it is sufficient to place the cappelletti on trays without overlapping them, possibly covering them with a cloth. If made in advance, it’s advisable to freeze them. In this case, I recommend putting them in the freezer directly with the tray, then, once frozen, transferring them to a bag or container. (Like for gnocchi).
After cooking: if there’s leftover after cooking, I recommend removing them from the broth and letting them drain before placing them in a container; otherwise, if they remain in the broth, they will become mushy and expand by the next day.
If you want to recycle leftovers in an alternative way, make them like this 👉 crispy, as I suggested in this recipe.
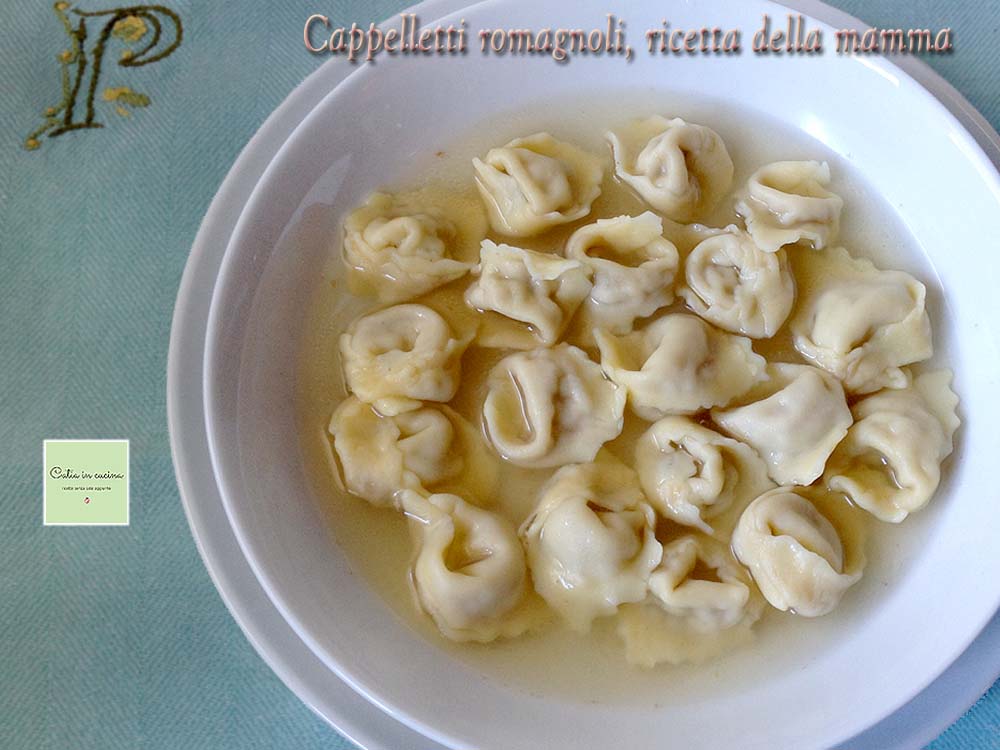
Finally, last photo but not least, the photo I mentioned at the beginning of the process: cappelletti with a fluted edge. I really like them cut this way. 🙂
Salt-Free Tips
 Salt-free tips, as you know, cannot be missed even when we talk about traditional recipes. In the ingredient list, I put salt in parentheses as I always do when it’s a recipe not mine but of my mom or grandma, out of respect for the original recipe.
Let me just remind you not to overdo salt-rich foods and check out my tips listed below… even on Christmas Day! Please! 😉
If you’re interested in reducing or eliminating salt, always remember to:
– Decrease salt gradually; the palate needs to get used to the gradual reduction without noticing it.
– Use spices. Chili pepper, pepper, curry, nutmeg, cinnamon, cloves, cumin…
– Use aromatic herbs. Basil, parsley, oregano, thyme, sage, marjoram, rosemary, mint…
– Use seeds. Sesame, pine nuts, almonds, walnuts…
– Use spicy vegetables or fruit. Garlic, onion, lemon, orange…
– Use my salt-free vegetable granule and gomasio.
– Prefer fresh foods.
– Avoid cooking in water; prefer methods that don’t disperse flavors (grill, foil, steam, microwave)
– Avoid bringing salt shakers to the table!
– Occasionally allow yourself a break from the rule. It boosts morale and helps to persist.
If you don’t want, or can’t, give up salt:
You can still try my recipes by salting according to your habits.
Follow Me!
In my new WhatsApp channel and on Instagram, on the Facebook page and Pinterest boards, in my two groups: Catia’s group, in the kitchen and beyond and Just what I was looking for! and if you like… subscribe to the Newsletter.
Today’s Light and Tasty Recipes:
And here are the Christmas recipes from my colleagues:
Carla Emilia: Swordfish and Salmon Rolls
Daniela: Whole Wheat Honey Cookies Without Butter
Elena: Gratinated Scallops
