We have reached the last appointment of the season with Light and Tasty, and I decided to bid farewell to the column with the recipe for wild plum jam that I prepared in recent days. This last recipe of the season (we will resume in September) is a free theme, that is, freely dedicated to summer, so a homemade jam seems perfect to me, don’t you think?
It’s so nice in summer to accumulate colorful jars, filled with the fruits that summer gives us in abundance!
And if these fruits then grow on their own, filling, really filling, the branches of two trees that stand there waiting to be relieved… what could be more beautiful to do than to pick them?
This fantastically good wild plum jam literally absorbed a couple of my days, and not because it’s demanding to make, quite the opposite! But because the discovery of this fruit ignited my curiosity so much that looking for news and information on wild plums, or wild prunes, or little wild plums, or sloe, or… how many names does this fantastic fruit have???, was one of the things I did with great interest these days. And it was a topic of conversation with various people, both live (mom, kids, husband, friends) and online, particularly on the Facebook page and in the group.
In short, I believe I have gathered enough information to pass on to you. 😊
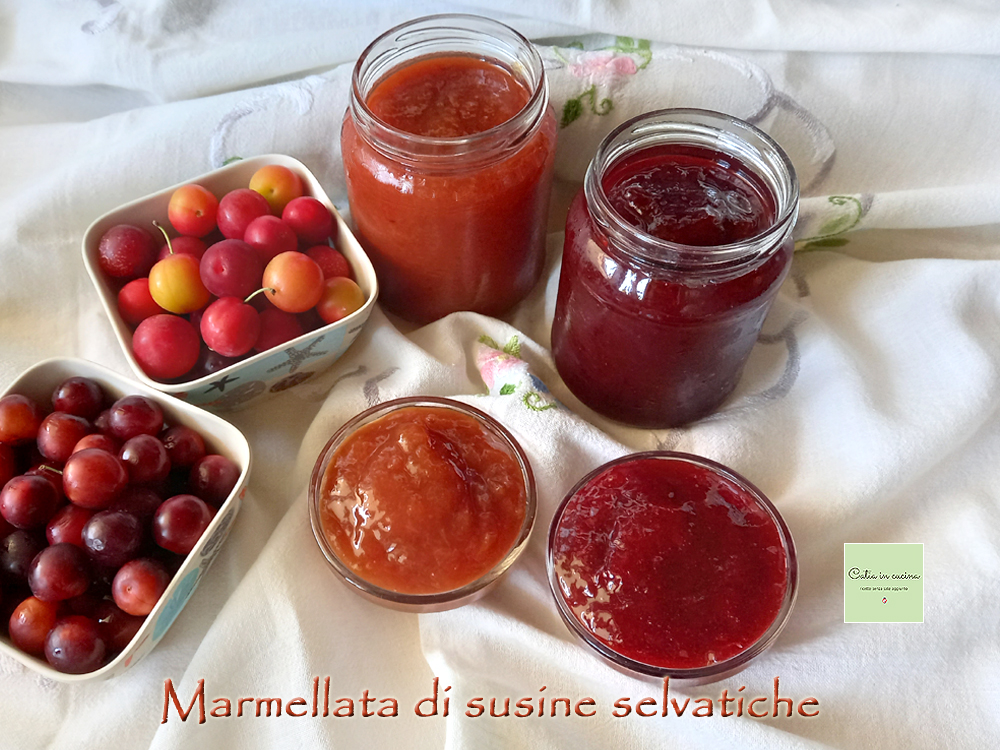
First of all, here are the wild plums we picked: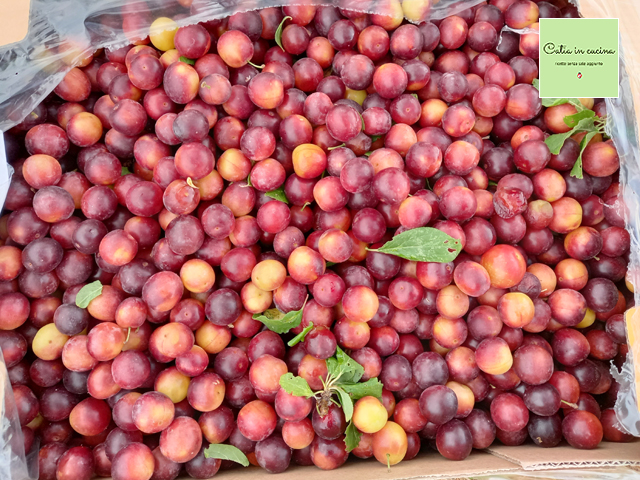
This is actually just part of the plums we picked from the two plum trees located on my brother’s land, two trees that seem identical at a glance, whose fruits appear the same at first sight (except for some different color shades) but which taste completely different. 😁 One of the trees produces sweet plums, the other produces tart plums. Both varieties are small and round, the tart ones are mostly red (and some yellow and pink), the sweet ones are mostly pink and yellow (but some also red). That’s why we realized they weren’t two identical trees only after tasting them.
My first doubt was: Are they wild plums or are they plums that needed care or treatments they didn’t get (such as pruning, thinning, or things like that)?
This doubt reveals my – indeed our family’s – limited knowledge of plums and fruit tree management in general, but if among you reading this there are any experts, I gladly accept further clarification beyond what I found by relying on Saint Google, where I found images of various wild plums that undoubtedly resemble ours. Additionally, some friends from the group helped, like Francesca who told me that in France these plums are called Mirabelle, and the photos I found further confirmed that our plums are of this variety (or at least one of the two trees should be).
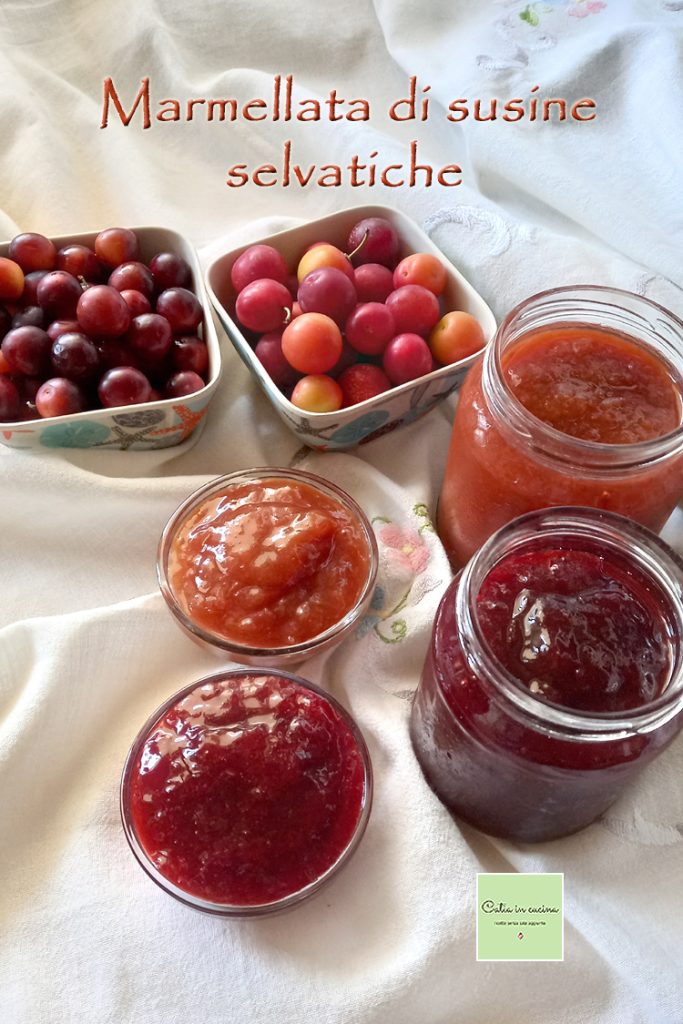
The jam made from these wild plums is fantastically good and different. That is, the two trees produced different jams, of different colors and sweetness.
The tree with sour red fruits gave us a very red jam, almost like cherry jam! While the tree with yellower fruits produces a sweet jam, so much so that it could even be made without sugar. In fact, mine turned out sweet even though I used only 100 grams of sugar per kilo of fruit.
On the other hand, the red plums remain tart. I tried with 100 grams of sugar, then with 200, then 300. I stopped at 300 grams because I don’t usually use a lot of sugar in my jams, but I could have added another 100 (to please my sweet-toothed daughter!, while we like it even if a bit tart).
So dear friends, decide how much sugar to use in your wild plum jam! 😁 My advice is to taste the fruits! Then if they are very tart use no less than 300 grams of sugar per kilo of plums, but if they are sweet try with just 100 grams and you will see what a delicious jam you will get!
Oh, I almost forgot! I made this wild plum jam by cooking it in the microwave, as I am now used to doing for all my jams. Have you ever tried it? It’s a smart way that allows you not to overheat the kitchen! 😉 Try it! 😁
👇 Here you can find more of my jams, all cooked in the microwave 👇
- Difficulty: Easy
- Cost: Very cheap
- Rest time: 1 Hour
- Preparation time: 5 Minutes
- Portions: jars: 2
- Cooking methods: Microwave
- Cuisine: Healthy
- Seasonality: Summer
Ingredients
- 2.2 lbs wild plums
- 3.5 oz sugar (or 10.5 oz if the plums are tart)
- 1 apple (small, 3.5 oz)
Tools
- Microwave
- Immersion Blender
- Bowl glass microwave-safe
- Colander or skimmer
Preparation
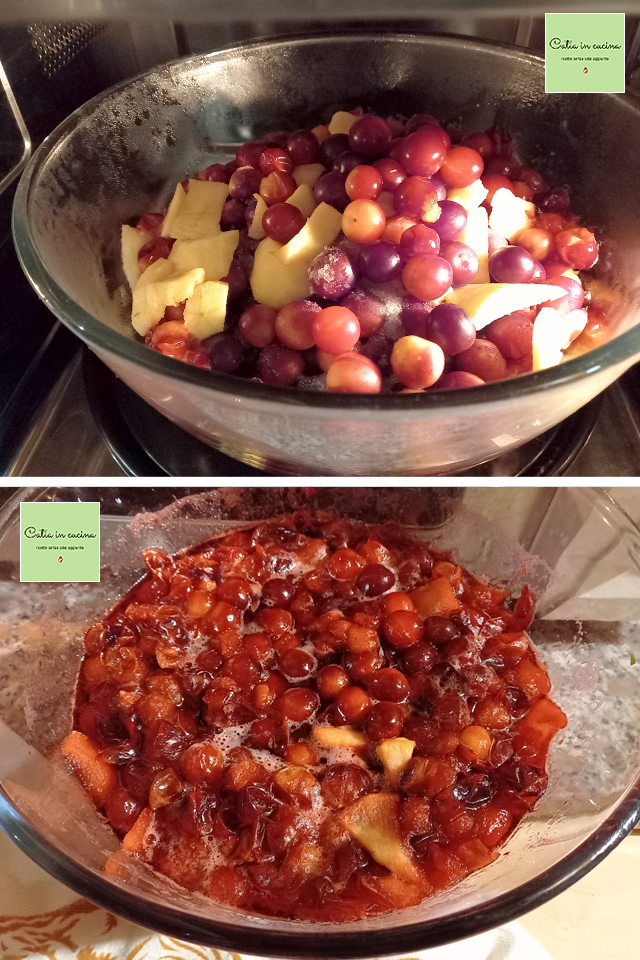
Wash the plums and place them in a large glass container (without a lid).
Consider that the container should be half full.
Peel and cut the apple into pieces and add it to the plums (including the core and seeds).
Add the sugar (10.5 oz for the tart-skinned red plums and 3.5 oz for the sweet plums).
Start the microwave at maximum power.
Check the cooking from time to time to prevent the foam produced from overflowing the container. In these cases, stop the microwave and stir.
Cook for the desired time.
At this stage, 20 minutes of cooking are sufficient, considering that after the resting time and passing through a sieve, an additional 10 minutes of cooking are useful (I will explain in more detail later).
After the 20 minutes of cooking, let it rest inside the microwave for at least an hour.
Immediately after cooking, the jam is not yet ready: the plums are still separate from each other, the liquid is abundant, the skins are clearly visible, but after resting, the mixture thickens, both because resting completes the cooking and because of the thickening effect given by the apple.
At this point comes the most tedious task: removing the pits.
The best thing is to have a colander with large holes: you pour everything in there and stir with a spoon until the pulp and skins have passed through the holes while the seeds remain in the colander.
For those, like me, who only have colanders with small holes, you’ll need a bit more patience and use what you have at home, like a spatula or a slotted spoon like the one I show you in the photo:
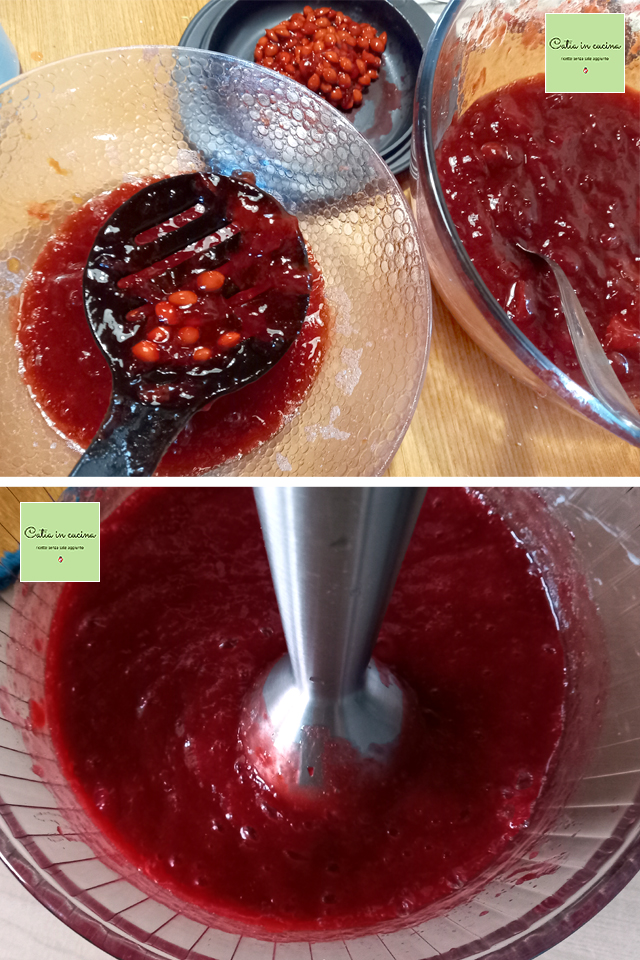
After completing the sieving operation, briefly blend the mixture with an immersion blender. This step is not essential if you prefer a chunky jam, but I always do it because it thickens better for me. And because I prefer that the skins are not too noticeable (with the immersion blender, the fibers of the skins remain, for the benefit of our stomach).
At this point – depending on the liquid released by the fruit, which is obviously not all the same – assess the consistency of the jam and decide if it needs to be thickened a bit. In my case, it could have been useful, so I put it back in the microwave for about ten minutes, then after another 10 minutes of resting time, I jarred it while hot in glass jars.
Remember that jars and lids must be sterilized and dried before use. They can be sterilized by boiling them in a pot of water for about 15 minutes, or in the microwave by putting two fingers of water in the jars and running the microwave for 2-3 minutes after the water starts boiling. In the second case, the lids should be boiled separately in a small saucepan on the stove. (I have never tried putting them in the microwave, being metallic I have never dared. Has anyone of you done it?).
For jam preservation, the filled jars (up to about 1 cm from the rim) should be well closed with the lid and boiled for about 20 minutes in a pot full of water (protected by a cloth placed between one jar and another). After boiling, let them cool inside the water, then store them in a dark and sheltered place, ideally a cellar if you have one.
With a kilo of wild plums, I obtained two medium-sized jars (plus a bowl) so, if you plan to consume the jam in a short time, sterilization may not be necessary for such a small quantity. You can store the jars in the refrigerator for several days, that is, for the time needed to finish one jar by eating the jam for breakfast and then using the second jar to make a pie. 😉
Visit me on social media!
If you want to chat a bit, remember that you can also find me on my Facebook page, and you can join my group -> The group of Catia, in the kitchen and beyond. Additionally, you can visit my Pinterest boards and the Instagram profile, and also subscribe to my Newsletter and my new WhatsApp channel
If you want to chat a bit, remember that you can also find me on my Facebook page, and you can join my group -> The group of Catia, in the kitchen and beyond. Additionally, you can visit my Pinterest boards and the Instagram profile, and also subscribe to my Newsletter and my new WhatsApp channel
The Light and Tasty column will meet you again in September. Wishing you a good summer, now it’s time to enjoy the recipes from my colleagues! Here they are!
Carla: Squid with Lemon
Daniela: Raspberry and Basil Granita
Elena: Peach Galette with Lemon Verbena
Flavia: Basmati Rice Salad with Fresh Salmon and Avocado
Franca: Almond Ice Cream
Mary: Light Cake with Yogurt and Peaches
Milena: Summer Fruit Cream
Serena: Fish Pasta
