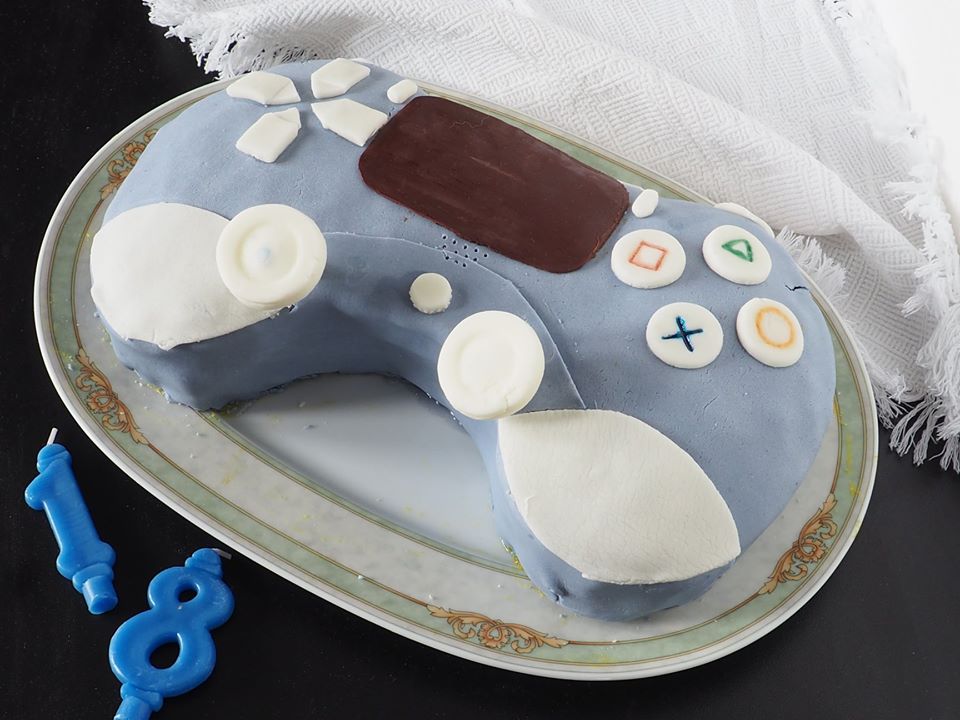
And once again, the moment has arrived this year. I was expecting it, but it always seemed so far away, and yet you turn around for a moment and realize that 20 years have passed! Now you’re grown up, but to me, you will always and only be my child. We made this cake two years ago for his 18th birthday; since he’s passionate about video games, we wanted to surprise him by preparing the PS4 Controller Cake, and I must admit, we managed to amaze him. Still, a world of best wishes. P.S. I will post the cake for the 20 years soon!!
Make sure to follow the page FACEBOOK, my account INSTAGRAM and the YOUTUBE CHANNEL.
Here you can find the links to other birthday cakes:
- Difficulty: Easy
- Cost: Cheap
- Preparation time: 2 Hours
- Portions: 10 People
- Cooking methods: Oven
- Cuisine: Italian
- Seasonality: All seasons
Ingredients
- 2 1/2 cups All-purpose flour
- 1 cup Sugar
- 6 Eggs
- 1 packet Gluten-free baking powder
- 3 cups Milk
- 4 eggs (medium)
- 3/4 cup Sugar
- 3/4 cup All-purpose flour
- 1 packet Vanillin (0.4 g)
- 4 cups Powdered sugar
- 2 tbsps Water
- 1 tsp Gelatin sheets
- 2 tbsps Wildflower honey
- 1 1/2 tbsp Butter
- to taste Limoncello
- to taste Water
- to taste Food coloring (powder or gel)
- 1 oz Chocolate
Preparation
Separate the egg whites from the yolks, place the egg whites in a mixer, and beat them until stiff peaks are formed.
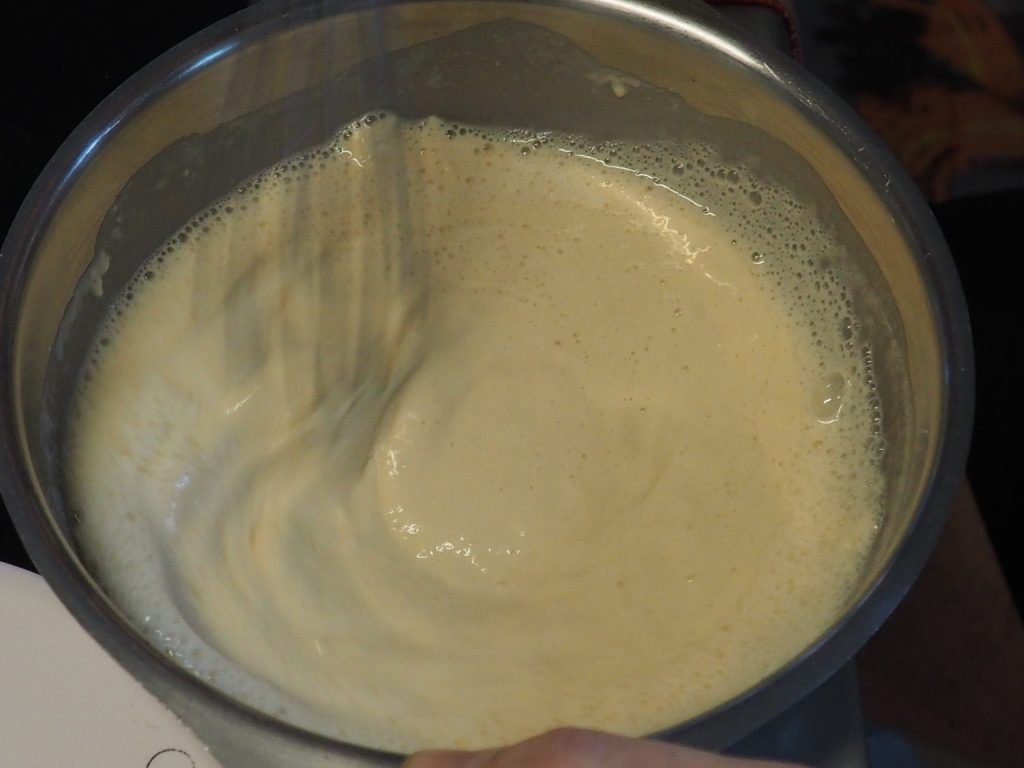
In a bowl, add the yolks with the sugar and beat well with a whisk until they are whipped.
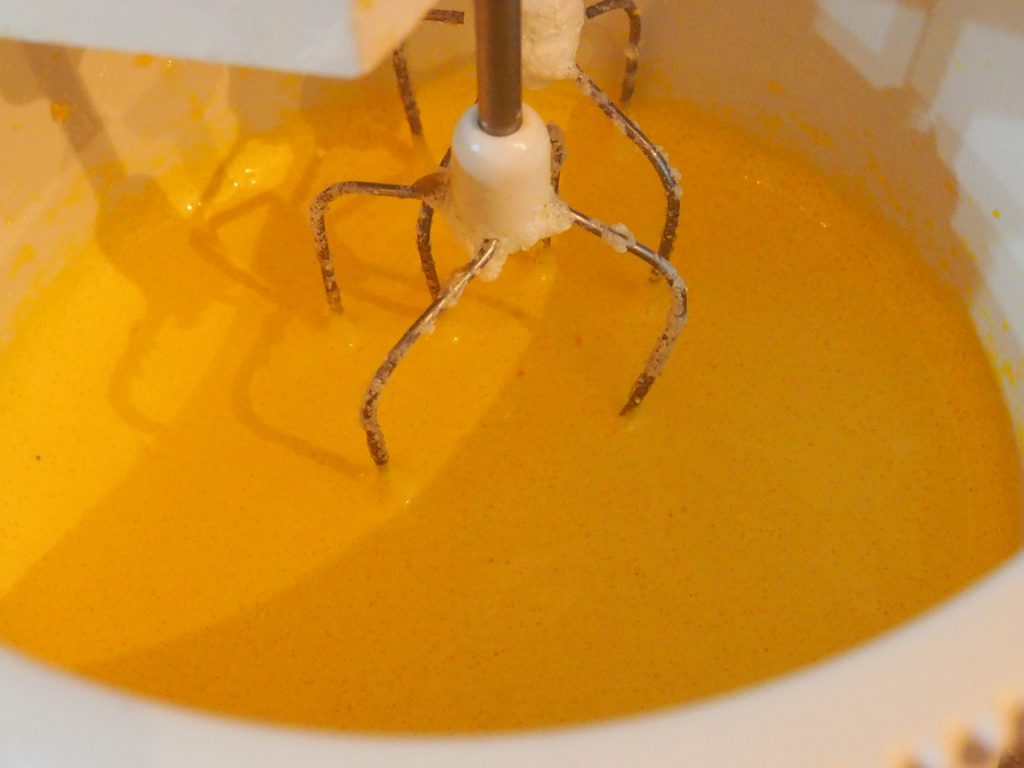
At this point, gently combine the beaten yolks with the egg whites, trying not to deflate them.
Now add the sifted flour and baking powder, again gently without deflating the egg whites.
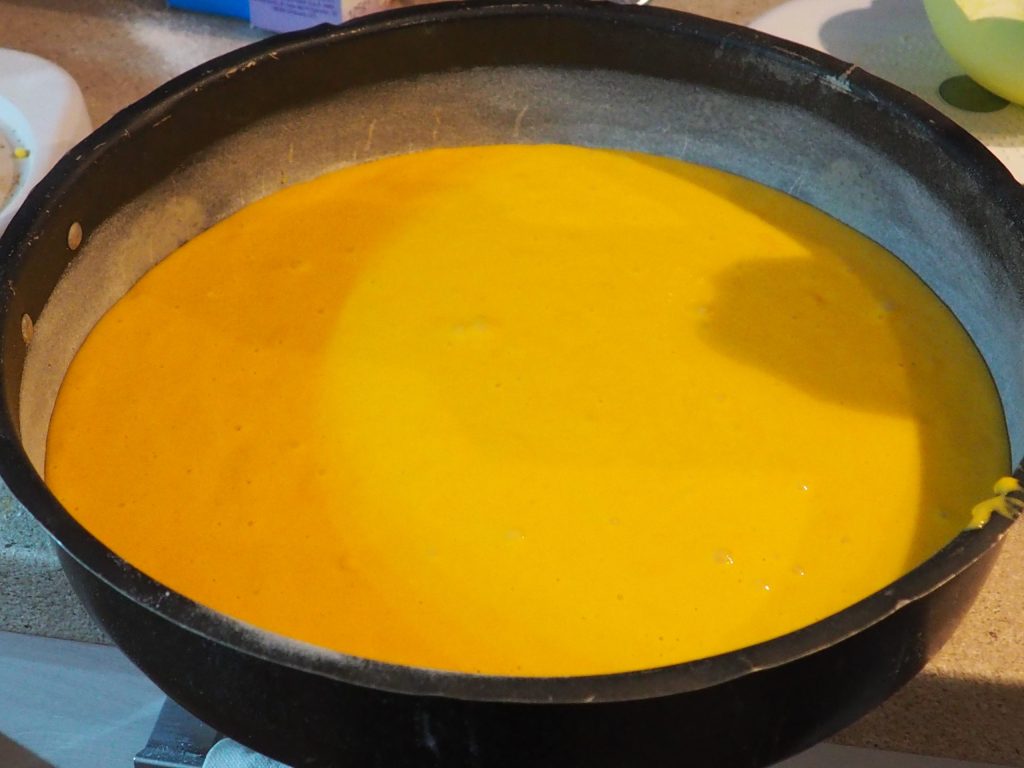
Spray a 12-inch diameter pan with cooking spray (cake release) and flour it, pour the mixture into it, bake at 350°F for about 30 minutes.
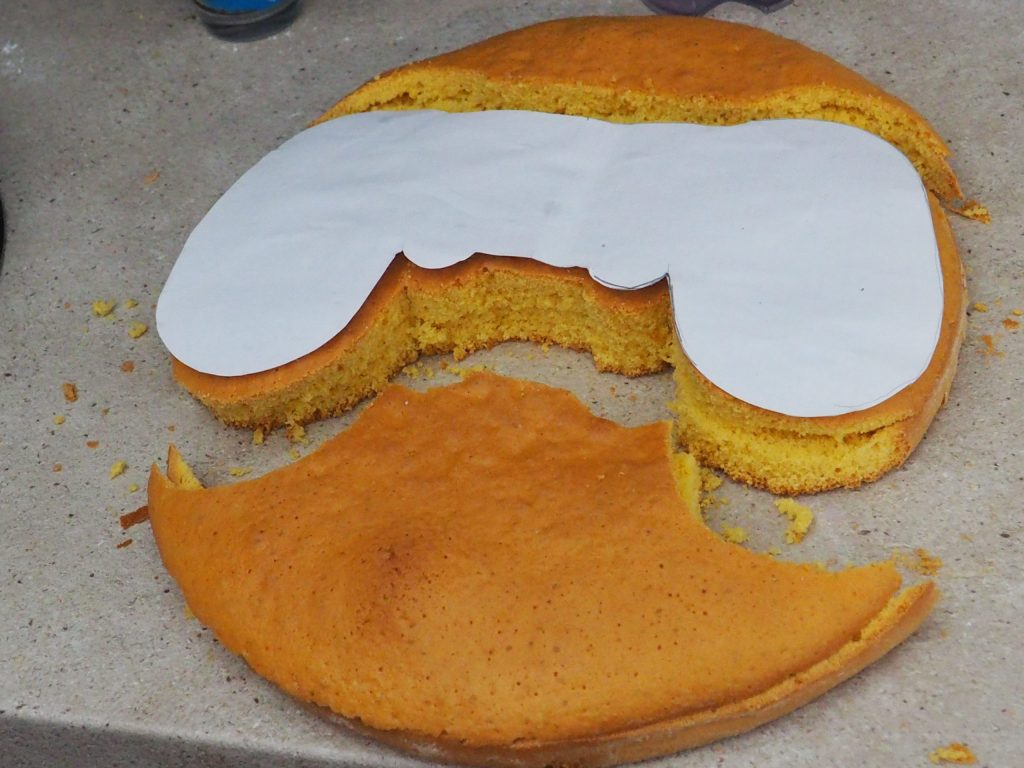
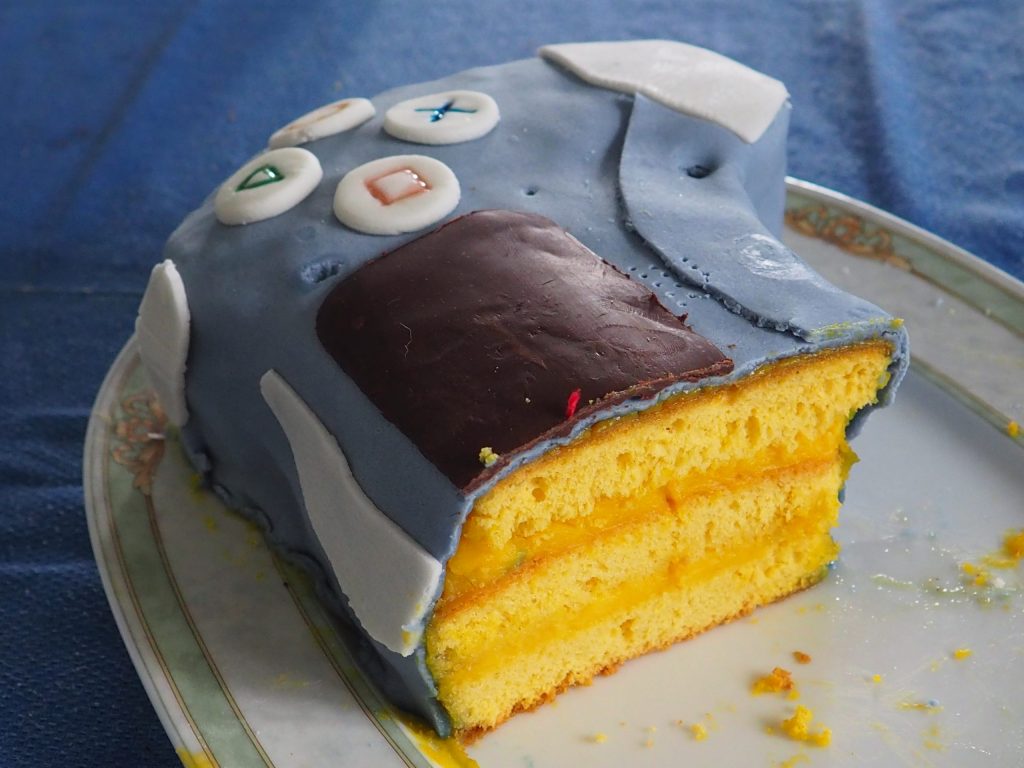
Once cooled, cut the sponge cake into two layers.
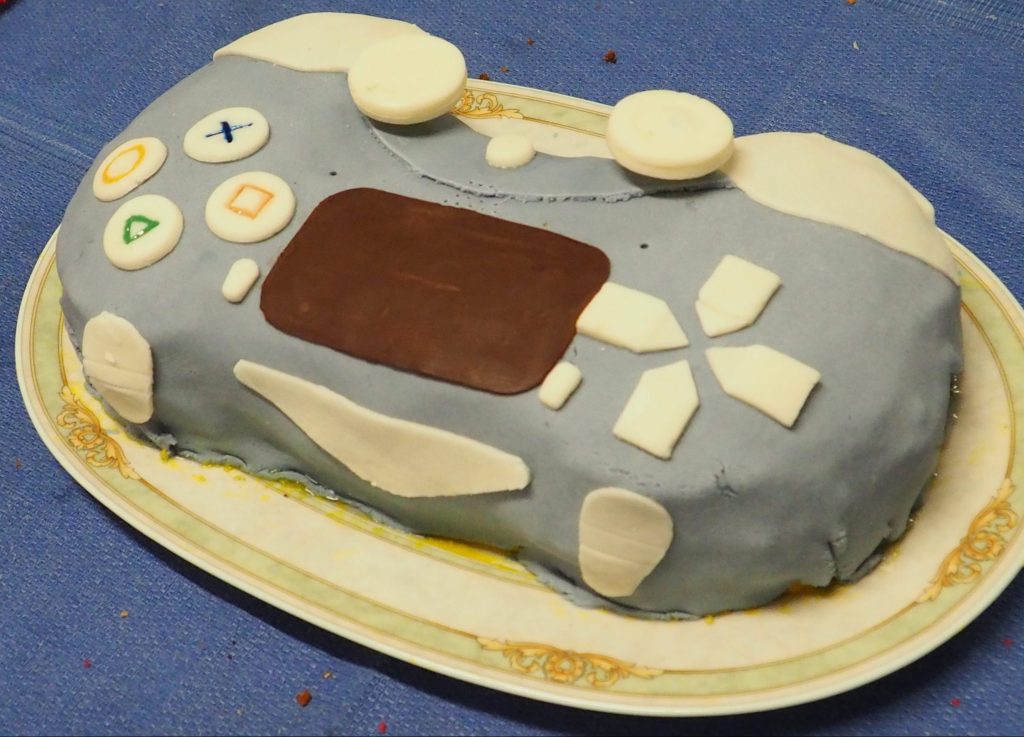
Draw the shape of the PS4 Console on a piece of paper, place it on the cake, and cut out the outline.
The remaining sponge cake will be used to create the third layer.
For the custard recipe, click here, but follow the quantities indicated in this recipe.
Put the gelatin sheets in a small bowl with 1 1/2 oz of cold water and let them rehydrate.
Now take a bowl, sift the powdered sugar and place it inside
At this point, put the rehydrated gelatin in a small saucepan and place it on the stove, add the honey, the butter cut into small pieces and let it melt over low heat.
It will only take a minute or two.

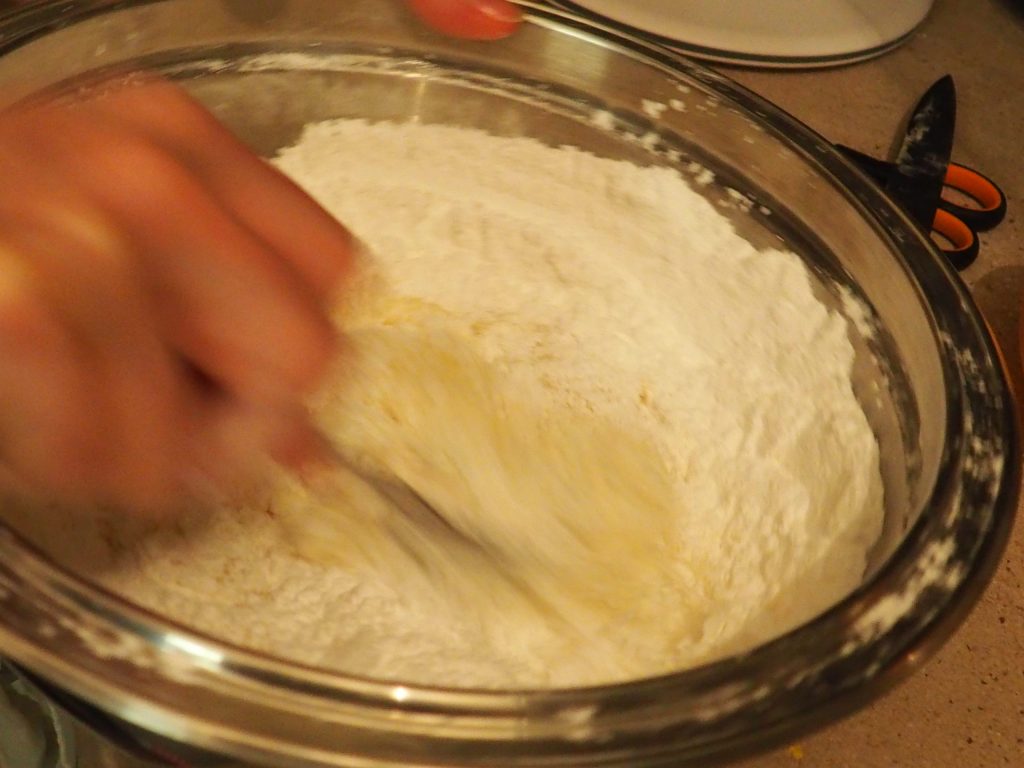
Pour the hot liquid into the bowl with the powdered sugar, trying to place it in the center.
Use a fork to start incorporating the powdered sugar with the liquid.
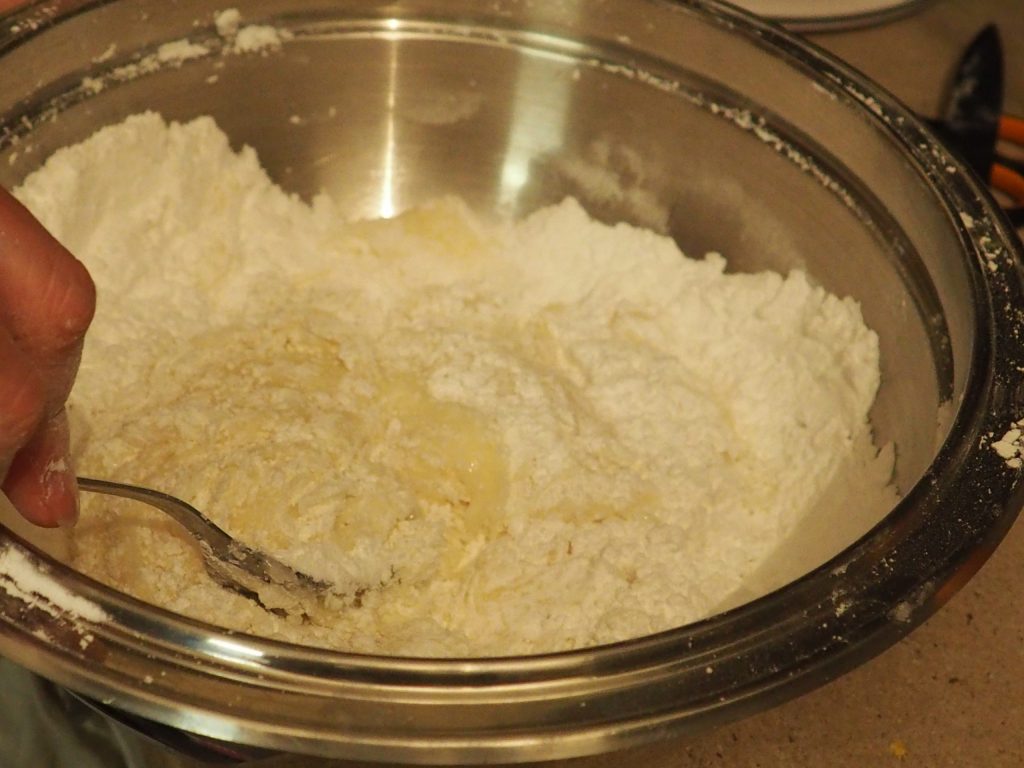
Then continue kneading with your hands.
If the dough is sticky, clean your hands with more powdered sugar.
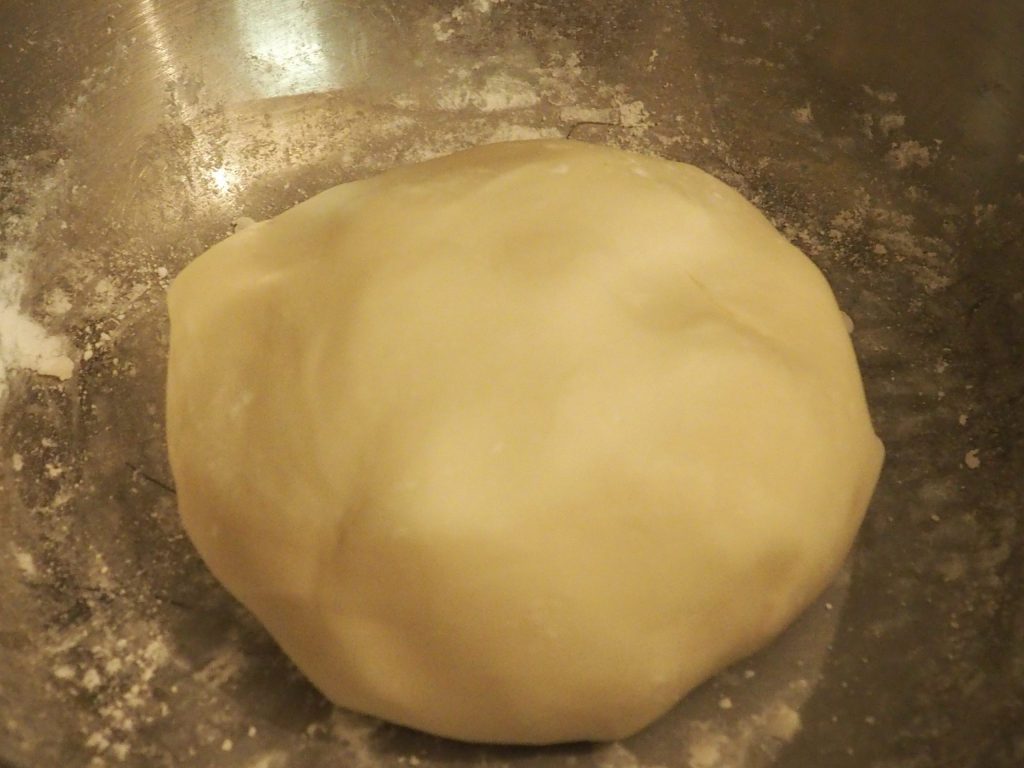
Even if the fondant is a little sticky, do not add more sugar.
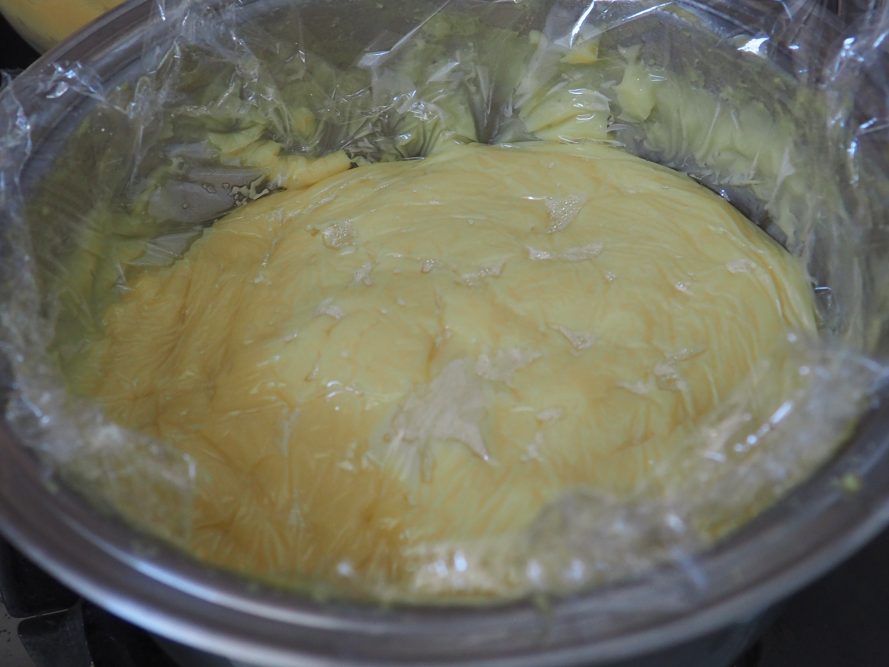
At this point, divide the fondant into two parts, one larger and one smaller (the smaller one about 5 oz).
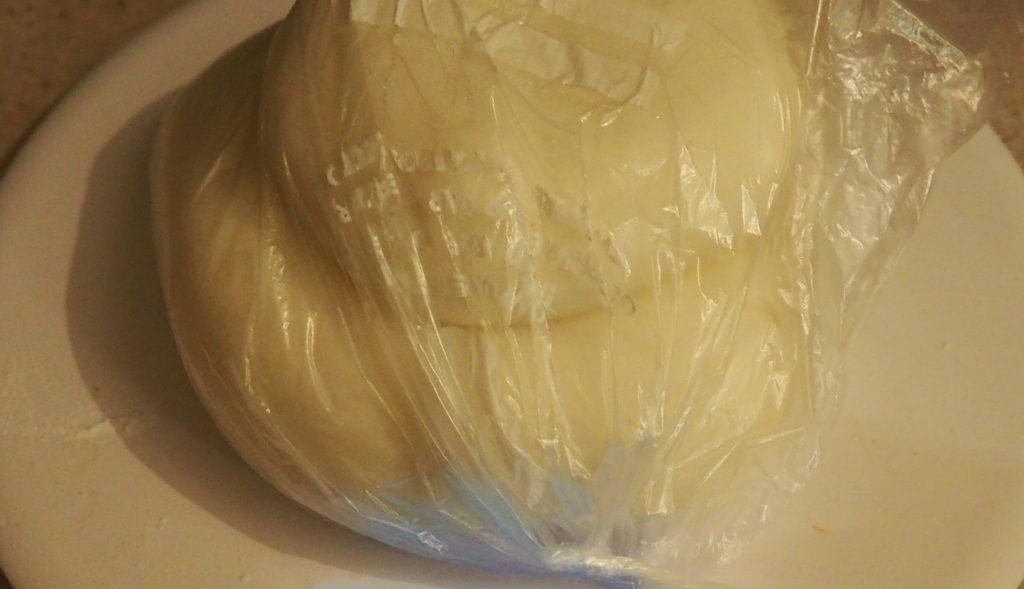
Wrap the two balls in plastic wrap and then in a freezer bag.
Let it rest for at least two hours before using.
Color the larger portion with food coloring in powder or gel, choosing the color you prefer.
Leave the smaller portion white.
Mix limoncello with water in a small bottle, if you prefer a lighter soak, increase the amount of water and decrease the limoncello.
Place the first layer of the cake on a large plate, soak the surface with the soak, put a generous layer of custard.
Now soak the layer obtained from the remaining cake piece, place it on top of the custard-covered one.
Cover it with plenty of custard, but do not use it all, save a few tablespoons aside.
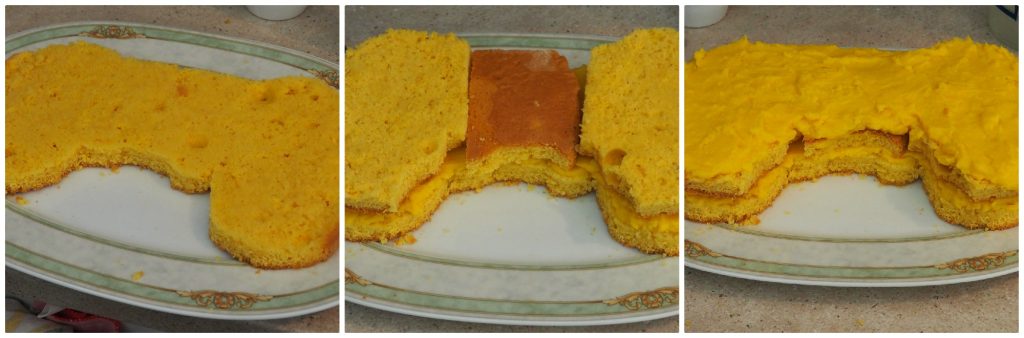
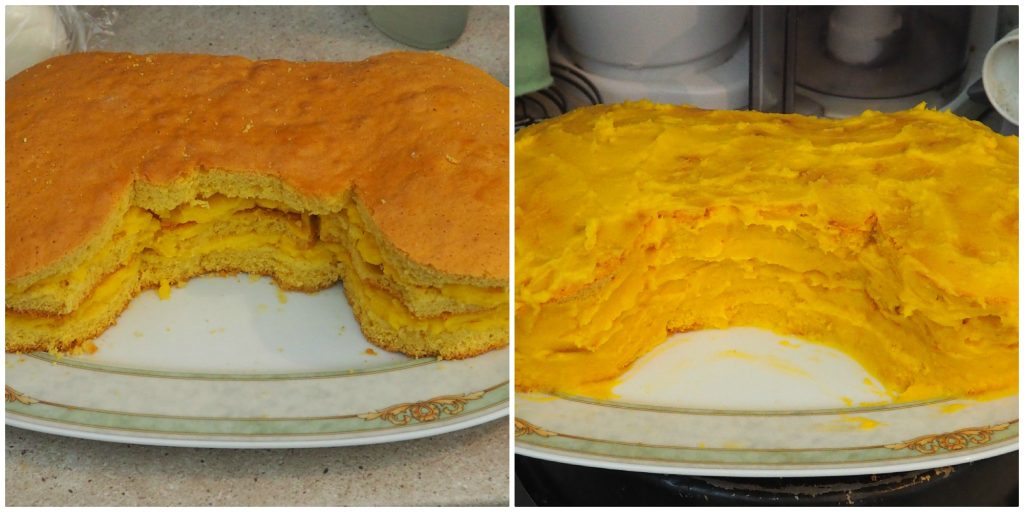
Place the last layer of cake, but first soak it with the remaining soak.
Cover the entire surface of the cake with the remaining custard
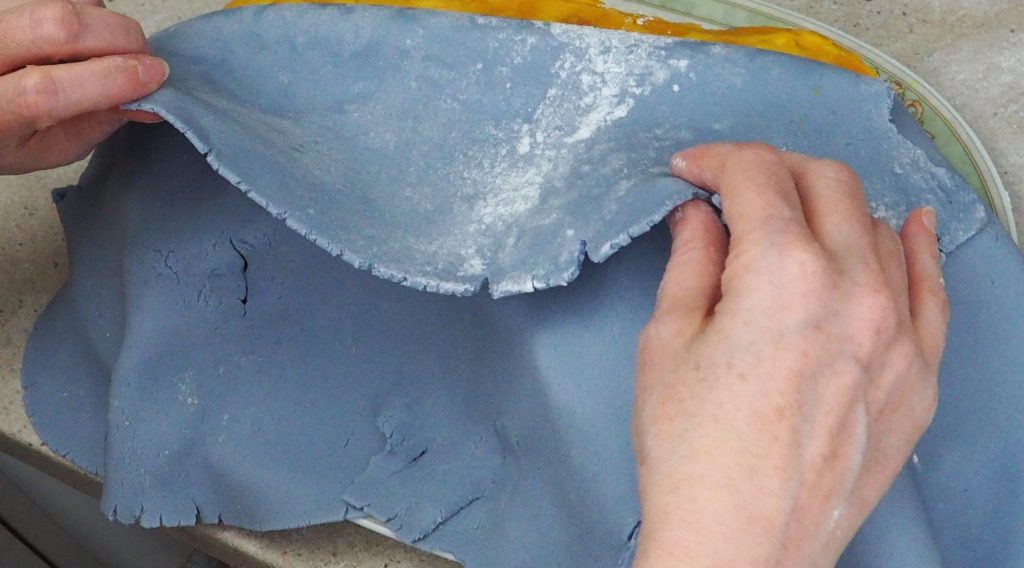
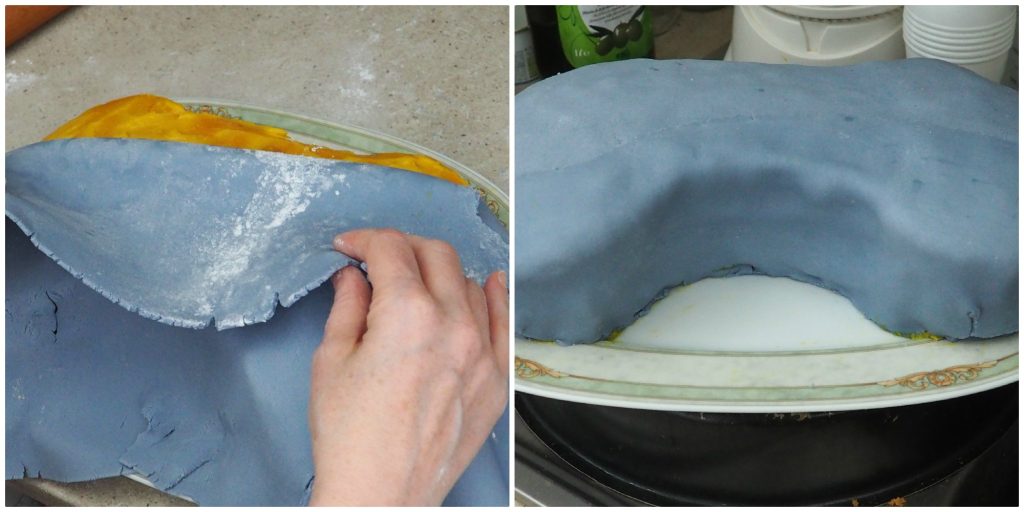
Roll out the colored fondant with a rolling pin, it should be quite thin.
Now cover the entire cake with the fondant, making sure it adheres well to the surface of the cake.
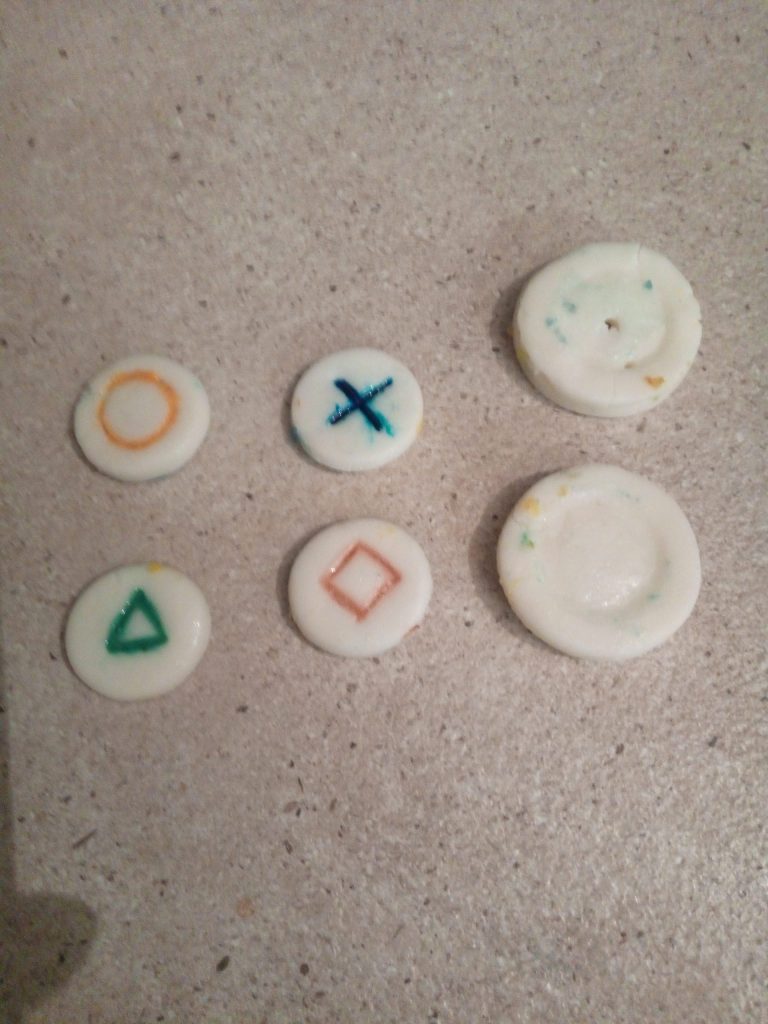
Now prepare the decorations with the white fondant: cut out four circles with a diameter of 1 1/4 inches for the controls, four with a diameter of 1 1/2 inches for the analog sticks, which you must join two by two, moistening them with a little water.
Cut out four arrows, two semicircles about 4 inches wide, two small ovals, the small center circle, two larger ovals for the back buttons, and an elongated oval for the backlight.
For the rectangle, melt the chocolate in the microwave, then spread it on a sheet of baking paper (about 6×4 inches), put it in the fridge to cool.
Once cooled, cut out a rectangle about 4×2 1/2 inches.
Now place all the decorations on the colored fondant, moistening the underside with a little water to make them adhere better.
Use the food colors to draw the symbols on the controls.
To insert the analog sticks into the cake, cover small pieces of straw with white fondant, insert the upper part into the lower part of the circle and the lower part into the cake.
And again happy birthday for your 18 years!
Suggestions/tips
If you liked the PS4 Controller Cake, try the other birthday cakes:
Cake with Custard, Mango, Jam, and Fruit
Cheesecake with Strawberry Jelly
My Social Channels!
To not miss any recipe, you can also follow me on:
Instagram; Pinterest and the YOUTUBE CHANNEL.
If you want to stay updated on news and the latest recipes, follow my Facebook page