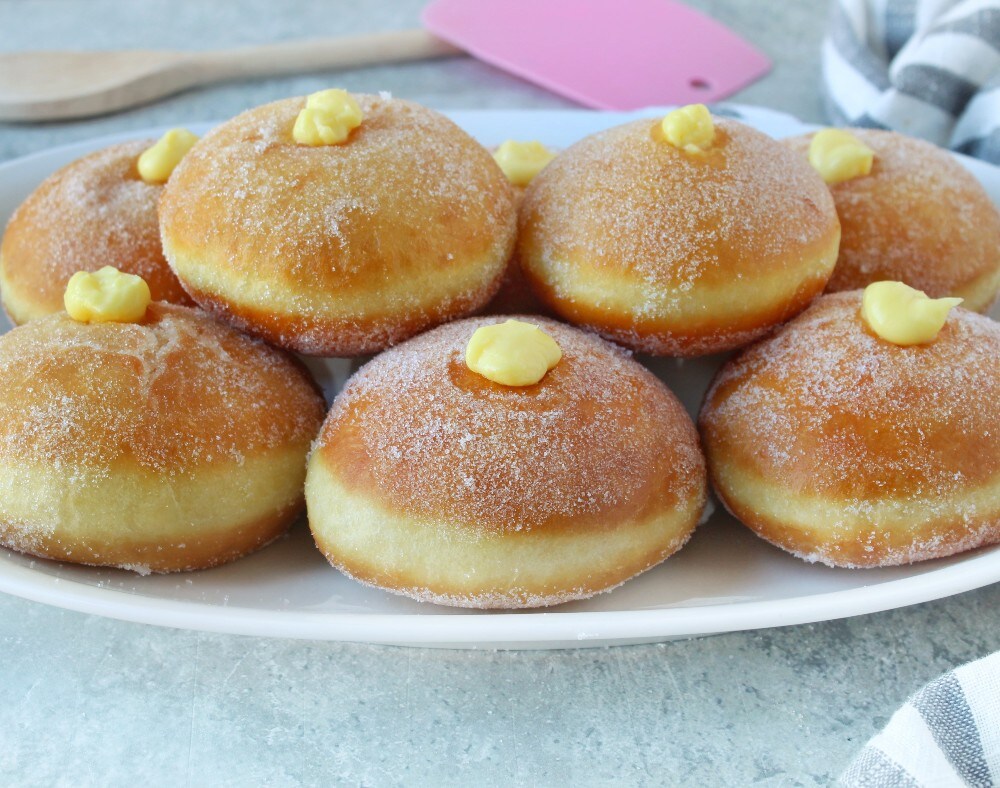
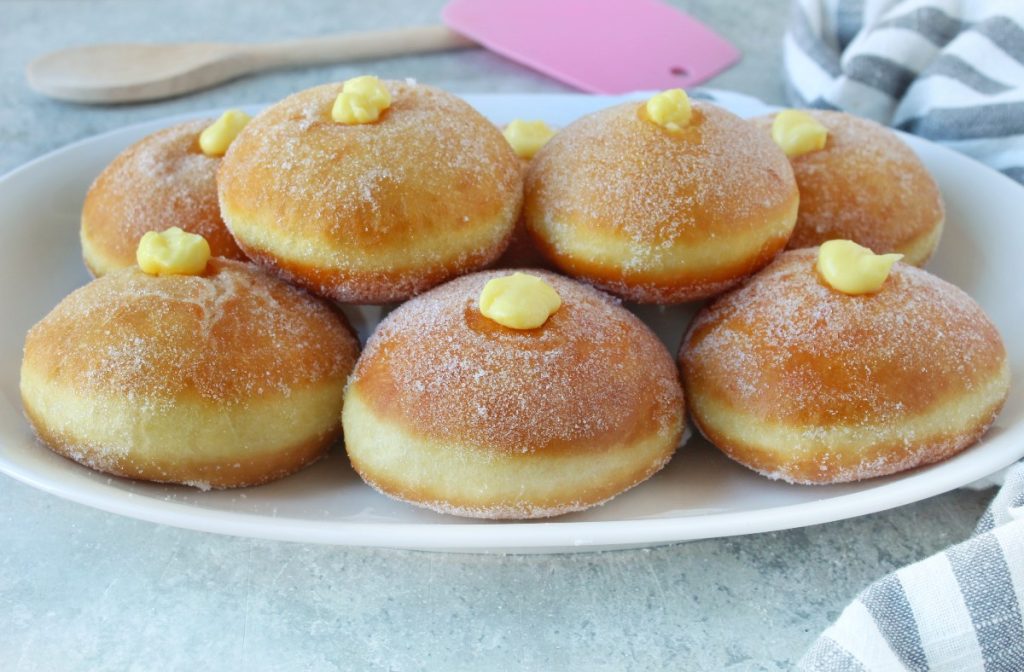
Here is my foolproof recipe for tall, fluffy, and soft bomboloni like a cloud.
I want to make an important premise right away: making bomboloni with a regular shape, beautifully puffy, super soft, and with the unmistakable lighter stripe in the center is certainly not very difficult, but it’s also not as simple as you sometimes see written. With the right ingredients, they always come out perfectly, but if you’re a bit picky like me, it might take a couple of tries before you’re fully satisfied and can say: ‘WOW!’
What I did on your behalf was try more than one recipe, and when I found the combination of ingredients that completely satisfied me, I tried them a couple more times to capture those small but important secrets to give you to maximize the chances of being fully satisfied with your bomboloni on the first try 😉
Because I assure you, seeing them succeed perfectly is a great satisfaction!
Another small premise, before providing you with the RECIPE and especially the COMPLETE and DETAILED VIDEO, I briefly explain the difference between bomboloni and krapfen, something I also wondered before trying to make them:
– Bomboloni were born in Tuscany and originally without eggs in the dough and without filling, decorated on the surface with granulated sugar.
– Krapfen, on the other hand, are made with eggs in the dough, with filling inside, and decorated on the surface with powdered sugar.
Nowadays, at least here in Italy, the characteristics of bombolone and krapfen have intertwined a bit, which is why the name bomboloni is much more commonly heard, even if they are made with eggs in the dough and filled.
Oh, I almost forgot something very important: I leave you HERE the direct link to the recipe (with complete video) of my perfect pastry cream to fill your bomboloni because it has a smooth, enveloping consistency and doesn’t drip!
Ok, it’s time to move on to the practical part, follow me and then tell me if I’m right in saying that this RECIPE, combined with all my tips and the COMPLETE VIDEO, will make you say ‘wow’!
- Difficulty: Medium
- Cost: Affordable
- Rest time: 12 Hours
- Preparation time: 30 Minutes
- Portions: makes about 15 bomboloni
- Cooking methods: Frying
- Cuisine: Italian
- Seasonality: Fall, Winter, and Spring
Ingredients for making BOMBOLONI
- 250 g Manitoba flour (with at least 13 g of protein, see package ingredients)
- 250 g all-purpose flour (+ about 90 g more towards the end of kneading)
- 3 eggs (medium)
- 90 g sugar
- 1.25 fl oz water
- 0.4 cup whole milk
- 10 g fine salt
- 25 g fresh yeast (or 7 g of dry yeast)
- 40 g vegetable oil (I use sunflower oil)
- grated zest of 1 lemon (edible peel)
- 1 packet vanillin (or 1 teaspoon of vanilla extract)
- 2 qt peanut oil (or frying oil, quantity based on your pot size)
Tools for making BOMBOLONI
- 1 Bowl large
- 1 Skimmer
- 1 Dough scraper
- 1 Frying pan I use a 10-inch aluminum one
- Thermometer for food
Steps to make BOMBOLONI
In a very large bowl, pour milk and water (previously warmed together on the stove), then add the sugar and fresh yeast crumbled with your hands (or a packet of dry yeast).
Stir well with a whisk until the yeast is completely dissolved. Set aside for a moment.
In another bowl pour both flours and the salt, mix well with a spoon.
Return to the liquid bowl and break the eggs, pour in the vegetable oil and continue to mix very well with the whisk. Ensure the oil is well mixed with the other liquids.
At this point, pour half of the flour into the liquids, take a fork and start mixing until the mixture becomes nice and smooth and lump-free, i.e. when the flour is completely absorbed.
Add the remaining flour all at once and continue mixing with the fork until the mixture is still very sticky and lumpy but you no longer see the white of the flour.
At this point, let the dough rest at room temperature for 5-6 minutes; meanwhile, prepare a small bowl with about 90 g of all-purpose flour, which you will need as soon as the dough has finished resting.
After resting, sprinkle a little flour on the dough until it is of a consistency a little less sticky, just enough to transfer it easily onto your work surface, preferably a wooden board.
Start working the dough, you will need to knead it for about 7-8 minutes, even 10 if you like.
Add a pinch of flour every time you feel the dough sticking to your fingers again.
N.B.: the amount of flour you will use in these 10 minutes will depend on many factors such as the quality of the flour, the size of the eggs, the temperature of your home, etc. So you may not need to use all the 90 g you prepared, or you may need a few more grams. The important thing is not to exceed 100 g of added flour, because in this case, the bomboloni will turn out less soft.
The more you knead, the taller and fluffier your bomboloni will be!
When the dough is nice and smooth, soft but not sticky, shape it as much as possible into a ball and place it in a large bowl after greasing it with a few drops of vegetable oil.
Cover the bowl with plastic wrap, then place it in the refrigerator for 10-12 hours.
I strongly recommend making the dough in the evening and leaving it in the refrigerator overnight. This way your bomboloni will be ready by the end of the next morning.
After the night, take the bowl out of the refrigerator, you should see the dough has increased in volume, but not too much because the refrigerator’s low temperatures significantly slow down the rising.
Gently press the dough with your fingers and reform a ball (watch the VIDEO if you want to be more certain of the steps).
At this point, cut with a dough scraper portions of dough about 2.5 ounces (better slightly less than 2.5 than more) and form balls as smooth and regular as possible, using your hands to gently guide the dough from the center toward the bottom of each ball (the video will help a lot with this step).
You will get about 15 balls, which you should position well spaced apart from each other – as they will need to more than double in volume – on two baking sheets lined with parchment paper, and in turn, the balls should be well covered with plastic wrap.
At this point, your balls should rise for 2.5 to 3 hours at room temperature, which should range from 79 to 82 degrees Fahrenheit. I suggest preheating the oven to 86°F, turn it off keeping the light on and place the trays inside the oven.
You will see that your future bomboloni balls almost triple in volume if you’ve done everything correctly up to this point.
It’s finally time to fry! 😉
Take the trays out just long enough to cut the parchment paper to separate the risen balls from each other, then immediately return them to the warm oven.
While you prepare everything you need and while heating the oil, keep the balls in the oven, otherwise, they could deflate slightly, and we certainly don’t want that, right?
Place on a medium-sized burner, with maximum flame, your aluminum pan (aluminum distributes heat more evenly) with plenty of peanut oil inside.
I recommend a large diameter pan with 2 quarts of oil for three reasons:
– you can fry more bomboloni at once, up to four;
– you will be able to control the oil temperature much more easily, which is ESSENTIAL for a successful fry.
– the oil level will tend to drop as you fry, so if you don’t start with a generous amount, you risk the bomboloni touching the bottom of the pan halfway through frying, which would ruin all your work.
Heat the oil to about 320°F; to check the temperature I strongly recommend a kitchen thermometer, it costs a few euros and will help you for all the times you need to fry, as well as for many other preparations like roasts. If you don’t have the thermometer, you can immerse a skewer stick, and if the tip starts creating lots of bubbles around it, the oil should be at the right temperature.
As soon as the oil reaches the right temperature, lower the heat to the minimum and initially dip a couple of bomboloni – and as they fry, aim to have at least 3 at a time in the pan, otherwise, the oil temperature will rise too high – without touching them with your hands but holding them solely through their parchment paper.
With a spoon, drizzle them with hot oil on the surface that remains in contact with the air; in this way, you will see your bomboloni puff up further. As soon as the parchment paper detaches on its own, remove it.
After a couple of minutes, turn them. If the lighter central stripe forms, it means you did an EXCELLENT job! If it doesn’t form, don’t worry, they will still be delicious, and on the second attempt, you will surely get it.
When they are nicely golden on both sides, drain them well with the skimmer and place them on absorbent paper.
When they are no longer burning hot, but still warm, place them on a plate with granulated sugar and turn them a couple of times to coat them well.
While they are still warm, fill them with a pastry bag with the cream you prefer or with jam. If you love pastry cream like I do, here’s HERE the direct link to my foolproof recipe with a complete video for a dense, mouth-watering cream that doesn’t drip.
And here are your BOMBOLONI, tall and fluffy like a cloud ready!
Storage and Tips
If you’re wondering if you can also bake them in the oven, the answer is absolutely YES; the important thing is you know that the texture and flavor completely change, they will be similar to sweet rolls; truly SUPER GOOD, I make them to fill with ham and cheese, for example, or you can think of them as similar to maritozzi and fill them with cream or whipped cream.
If you plan to bake them in the oven, you can decide to make them in just one morning, without preparing the dough the night before. Prepare it early in the morning, let it rise first for an hour and a half at room temperature in the oven, then an hour and a half in the refrigerator, and once the balls are formed, another hour or so at room temperature in the oven. After rising, bake at 180°C (356°F) in a fan oven for about 10 minutes and you’ll see how good and always fluffy they are.
Your fried bomboloni are best eaten on the same day; they are also great the next day if stored in an airtight container and warmed up before eating.
If you liked this recipe, find a HERE the direct link to the page of my blog dedicated to CARNIVAL RECIPES.
