A super classic and timeless dessert of Italian tradition, which needs no introduction, today I propose it to you in the version adapted to the new knowledge we have acquired over time in terms of food safety.
Here is the step-by-step recipe with the COMPLETE VIDEO of TIRAMISU’ WITH PASTEURIZED EGGS.
In my blog you will also find the version without pasteurized eggs, it was the first recipe I published and I leave it to you HERE.
Obviously, whether you want to pasteurize the eggs for extra safety, or choose not to pasteurize them, please purchase only super fresh supermarket eggs of category A, which are already highly safe by themselves.
Having made this premise, I also wanted to anticipate that the taste and creaminess of the tiramisu made with pasteurized eggs do not change at all compared to the one made with the more classic method.
Another small premise, I have always used beaten egg whites to give a nice fluffy and light appearance to the mascarpone cream, I don’t use cream as I often see done (even though I LOVE cream, eh!) because, besides not being foreseen by the original recipe, it gives the cream a slightly more liquid consistency, which is not too much to my liking.
Having made all the necessary premises and clarifications, follow me as we start right away with the list of ingredients!
P.S.: if you like this recipe, you might also be interested in:

- Difficulty: Very easy
- Cost: Economical
- Rest time: 4 Hours
- Preparation time: 20 Minutes
- Portions: 8
- Cooking methods: No cooking
- Cuisine: Italian
- Seasonality: All seasons
Ingredients for preparing TIRAMISU’ WITH PASTEURIZED EGGS
- 18 oz mascarpone
- 4 eggs
- 2/3 cup sugar
- 4 cups of espresso coffee (with or without sugar)
- 10.5 oz ladyfingers (about)
- to taste unsweetened cocoa powder (to sprinkle on top)
Tools for preparing TIRAMISU’ WITH PASTEURIZED EGGS
- Electric beaters
- Thermometer kitchen
Steps for preparing TIRAMISU’ WITH PASTEURIZED EGGS
The first thing you need to do is make the coffee (about four full cups) and pour them into a deep dish, so that the coffee has time to cool down while you prepare the mascarpone cream with pasteurized eggs.
Now start: break the eggs, separating the yolks and whites into two large bowls.
It is absolutely not important that the eggs are at room temperature, in fact, I recommend using them cold from the fridge, this way the mascarpone cream will be thicker right away.
Take the bowl with the whites and beat them until stiff with the electric beaters. I suggest starting them at the minimum speed and gradually (within a few seconds) going to the maximum speed.
Proceed to the pasteurization of the beaten whites: pour 40 g of sugar, half of the total, and half a cup of water into a saucepan. Turn on the heat to medium flame and stir for a few seconds.
Water and sugar will start to heat up, then they will start to boil. Initially, bubbles will form only on the outer circumference of the pan; when bubbles have formed over the entire surface of water and sugar, you can start monitoring the temperature with the food thermometer. It must reach 250°F, and that is, you must turn off the heat BEFORE the mixture starts to take on an amber color.
As soon as you turn off the heat, pour slowly the mixture of water and sugar into the whites beaten with the electric beaters already at maximum power and beat for a few seconds, just the time to evenly distribute the sugar.
Set aside.
Take the bowl with the yolks and start the electric beaters for 10 seconds, just the time to make them homogeneous and then proceed to do with the other half of the sugar and the other part of water the same procedure as before, that is, bring everything to 250°F using the thermometer.
As soon as you turn off the heat, pour always slowly the mixture of water and sugar into the yolks with the beaters running at maximum power, and beat until you get a lighter and foamy mixture. It will take about two minutes, no more. This way you will also have pasteurized the yolks.
At this point, pour all the mascarpone inside the beaten yolks and, always with the beaters, blend until you get a homogeneous cream.
Now put down the beaters (because you won’t need them anymore) and move on to incorporating into the mascarpone cream, a little at a time and gently, the beaten yolks.
Once you have done this step, the mascarpone cream is ready, now it’s just a matter of assembling the tiramisu.
Take the deep dish where you poured the coffee, the ladyfingers, and the baking dish (or the container you chose).
Make the first layer at the base with the ladyfingers quickly dipped in the coffee; consider that the ladyfingers, as they rest, will soak up more coffee than you might initially think as soon as you touch them, so adjust accordingly based on how much you want the coffee flavor to be felt.
Once the base of the baking dish is completely covered with ladyfingers, create a first layer of mascarpone cream with a spoon. Be generous with the amount and at the same time calculate to be able to make at least one more layer.
Make as many layers as your chosen container will allow, and the last layer should be mascarpone cream.
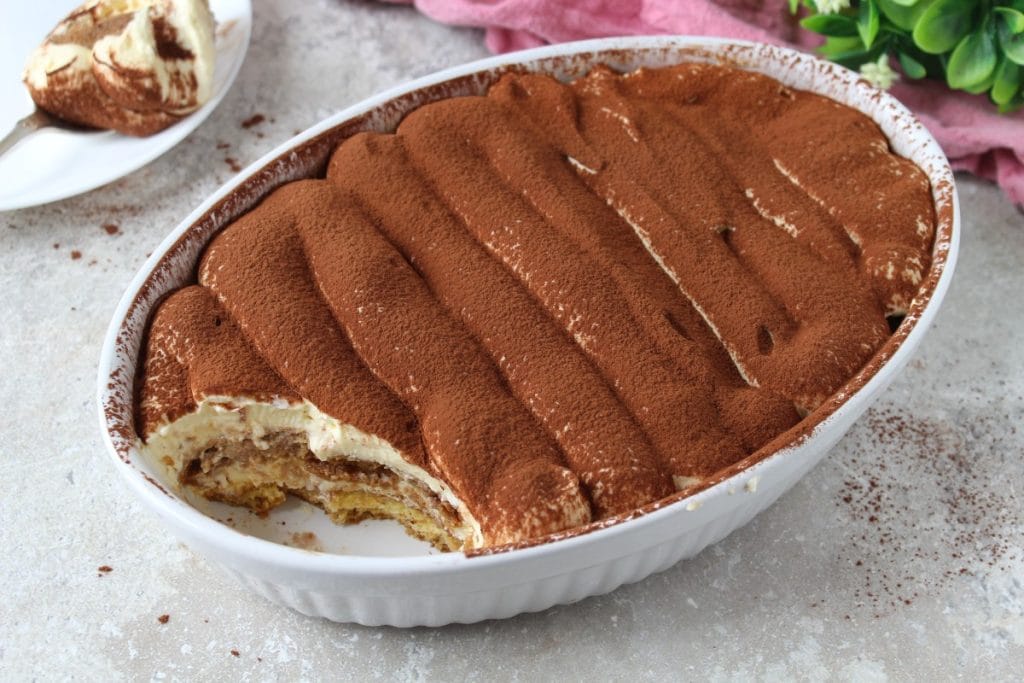
Finally, sprinkle with plenty of unsweetened cocoa powder and let rest in the fridge for at least 3-4 hours.
And here is your TIRAMISU’ with pasteurized eggs, AMAZING!
Tips and Storage
The thing I want to specify is that this tiramisu, although it is made with a slightly different procedure from the classic original one because it involves the pasteurization of the eggs, is exactly identical both in terms of taste and texture compared to what we have always been used to eating since we were kids. The pasteurization of the eggs is just an added value 🙂
Another very important thing to tell you is to purchase, even if you intend to pasteurize the eggs at home, super fresh supermarket eggs, which are already extremely safe by themselves; pasteurization done at home is not to be considered 100 percent safe, precisely because there are many factors that can compromise the success.
The tiramisu with pasteurized eggs keeps in the fridge, preferably covered with cling film, for a maximum of three days.
