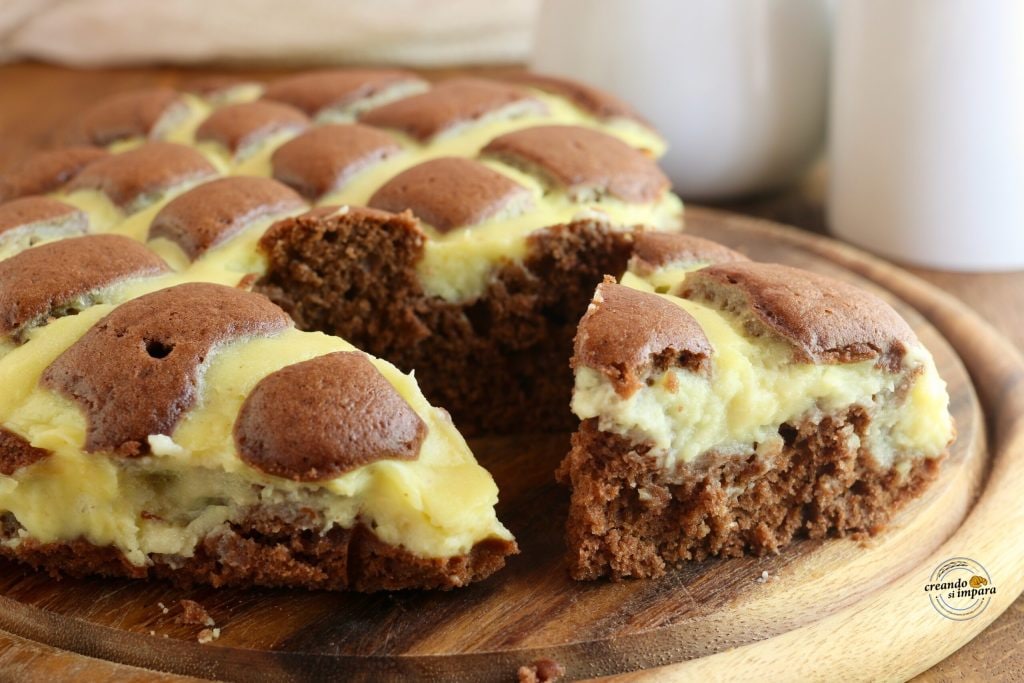
The quilted cake is a dessert that captures attention at first glance due to its unique embroidered surface. The name comes from the visual effect created by the custard, which slightly sinks into the cocoa batter during baking, creating a geometric pattern similar to a soft quilt.
This is a vegetarian recipe perfect for those who want to bring something original yet simple to the table. No butter needed: vegetable oil and yogurt (optional or replaced by milk) ensure a soft and moist base, ideal for holding the richness of vanilla cream.
If you like cocoa cakes, try the yogurt and chocolate ring cake, the chocolate cake without butter, milk, and eggs, the crazy chocolate cake or the chocolate cake.
Find among all my DESSERTS the one that’s right for you!
Follow my FACEBOOK page for daily cooking tips!
OTHER DESSERTS WITH CREAM
- Difficulty: Easy
- Cost: Economical
- Preparation time: 20 Minutes
- Portions: 8 people
- Cooking methods: Oven
- Cuisine: Italian
- Seasonality: All seasons
Ingredients for preparing the quilted cocoa and cream cake
- 2 cups whole milk
- 4 egg yolks
- 1/2 cup sugar
- 3.5 tbsps cornstarch
- 1 tsp vanilla extract
- 2 eggs
- 1/2 cup sugar
- 1.6 cups all-purpose flour
- 1/4 cup unsweetened cocoa powder
- 1/2 cup whole milk
- 1/4 cup vegetable oil
- Half packet baking powder
- 1 tsp vanilla extract
Tools for preparing the quilted cocoa
This post contains affiliate links.
- 1 Hand Whisk
- 1 Baking Pan 20x 25
- 1 Piping Bag
Steps for preparing the quilted cocoa and cream cake
Start with the filling: beat the egg yolks with sugar, add cornstarch and pour in the milk gradually while stirring with a whisk. Cook the mixture over low heat until the custard is thick and firm. This is crucial to keep the pattern defined. Cover with plastic wrap directly on the surface and let it cool.
In a large bowl, beat the eggs with sugar using a hand whisk. Once the mixture is smooth, add the milk, vegetable oil, and vanilla extract. Mix well to combine the liquids: this light base will allow the cake to rise correctly around the decoration.
Add the all-purpose flour, unsweetened cocoa, and previously sifted baking powder to the mixture. Add a pinch of salt and work the batter until smooth and free of lumps. Pour everything into a rectangular or square baking pan (to emphasize the quilt effect) lined with moistened and wrung-out parchment paper.
Place the cream in a piping bag with a plain tip. Draw diagonal parallel lines across the surface, then repeat in the other direction to form diamonds. Bake in a static oven at 356°F (180°C) for about 40 minutes. The cake will rise between the cream lines, creating the typical puffy quilt effect.
Tips for a Perfect Result
Pattern Precision: For a perfect “quilt”, try to maintain constant pressure on the piping bag while drawing the lines.
Cooling: Do not unmold the cake until completely cool; the cream needs time to set and not run.
Ideal Pan: A rectangular pan helps make the geometric pattern even more similar to real quilted fabric.
Variations
Black and White Diamonds: You can reverse the colors by preparing a light vanilla base and cocoa custard.
Jam Dots: Insert a dot of apricot or raspberry jam at the intersection of the cream lines for a touch of color and acidity.
Sugar Crystals: Sprinkle only the batter diamonds with sugar crystals before baking for a contrast of textures.
Storage
In the Fridge: Since it’s a cream-filled dessert, store it in the fridge for up to 2-3 days.
Serving: Bring to room temperature at least 15 minutes before serving to highlight the softness of the cocoa base.
Now It’s Your Turn!
The quilted cake is one of those desserts that provide great satisfaction with minimal effort. It is perfect to serve cut into squares, revealing its creamy interior.
Do you prefer the classic version or like experimenting with different cream colors? Let me know in the comments, and if you try it, remember to tag me on social media!
FAQ
The cream sank, what happened?
If the cream ends up at the bottom, the base batter was probably too thin, or the cream was still too warm when you decorated.
Can I use powdered sugar to finish?
Of course, a light dusting of powdered sugar will further highlight the “quilt” reliefs.
Can I use ready-made cream?
Yes, but make sure it’s very firm; otherwise, the pattern will disappear during baking.