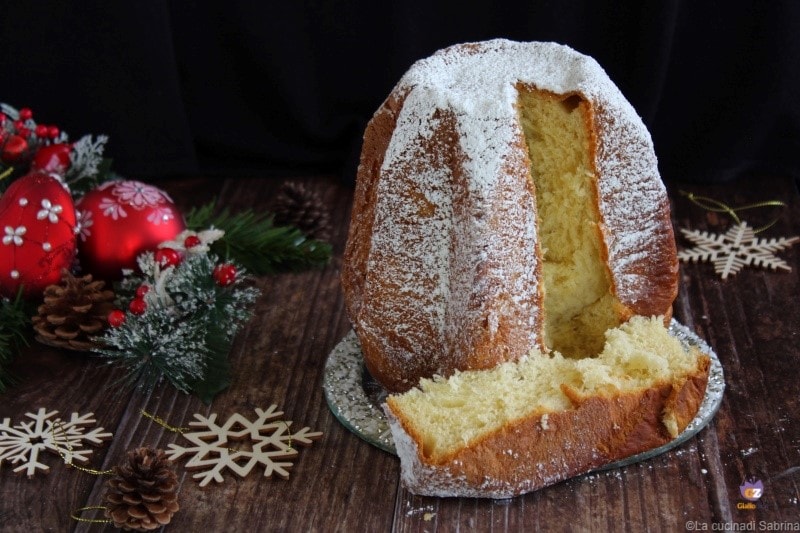
There’s no Christmas without Pandoro, so this year I present to you the Giorilli’s Pandoro with liquid sourdough starter.
It’s a large leavened cake that requires long preparation, needing a sourdough starter and lots of patience… but as I often say when making bread, it’s gratifying to see your efforts rewarded with a high-quality result since you’re kneading at home with a simple stand mixer.
But as we know, passion makes you do great things…
The aroma is spectacular and the taste is very similar to those found in large stores, with one extra secret: having made it with our own hands.
I know there’s everything out there on the web, but this is my personal success… having achieved it amidst all the chaos characterizing this period of mine; the fact that my son told me “it’s better than the ones you buy“… and so much more.
Usually, large leavened cakes are made with solid sourdough, but with a well-managed li.co.li., you can achieve excellent results.
The ingredients are important, so getting a good strong flour, excellent vanilla, and maybe German butter (available at Lidl) is fundamental.
If you’re passionate amateurs, have li.co.li., and want to try making your own Pandoro at home, here’s the recipe with step-by-step photos and tips to make Giorilli’s Pandoro with li.co.li.
The recipe in question is taken from here …
YOU MAY ALSO BE INTERESTED IN:
- Difficulty: Difficult
- Cost: Medium
- Rest time: 1 Day
- Preparation time: 2 Days
- Portions: 8/10
- Cooking methods: Oven
- Cuisine: Italian
- Seasonality: Christmas, New Year's
Ingredients
Mold for 2.2 lbs
- 1.8 oz liquid sourdough starter
- 2.75 cups Manitoba flour
- 1/2 cup sugar
- 4 Eggs
- 4 oz butter (soft)
- 4.25 oz butter (at room temperature)
- 1/4 cup sugar
- 2/3 oz white chocolate (or 0.9 oz cocoa butter)
- 2/3 oz acacia honey
- 1 pod vanilla
- (all of the first dough)
- 1/2 cup Manitoba flour
- 1.4 tsp honey
- 4 Egg Yolks
- 1.4 oz fresh liquid cream
- 1 tsp salt
Tools
A stand mixer is essential for handling these types of doughs, and having an infrared or probe thermometer helps keep the temperature in check.
- 1 Stand Mixer
- 1 Thermometer
Preparation of Giorilli’s Pandoro with li.co.li.
In the stand mixer bowl, combine the sifted flour, the li.co.li., and part of the eggs. Start the machine at speed 1 and work for about ten minutes or more with the paddle (the dough should be smooth).
– Gradually add the remaining eggs and, once absorbed, add the sugar and finally the room-temperature butter in several stages to avoid softening the dough.
– Gradually increase the speed to 2 and work until the dough is smooth and well-kneaded.
– Check the dough’s elasticity and temperature with the thermometer.
– Turn the dough out onto a slightly buttered surface and shape it (this video is very useful) without adding flour, place it in a tall, possibly transparent container, and mark the initial and final levels with a rubber band or a marker. Cover with plastic wrap and let it triple at room temperature overnight.
EDIT 2023: With the infrared thermometer and having kept the flour in the fridge in the afternoon, I finished the first dough at 71°F.
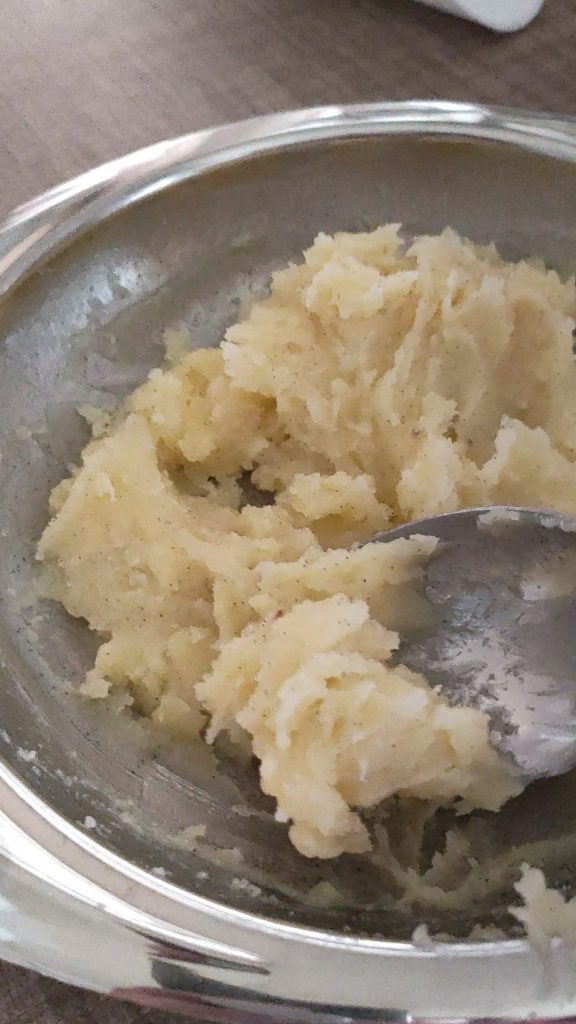
I melted the butter in pieces, the chopped chocolate, and the rest of the ingredients in a saucepan over low heat until emulsified. Covered with plastic wrap and put in the fridge.
For the cocoa butter, blend all the ingredients until a homogeneous cream is obtained.
Just made emulsion

Emulsion after resting in the fridge. Initially, it’s a bit firm, but by stirring with a whisk or fork, it slightly warms up and takes on the consistency of a thick pastry cream.
– It’s advisable at this stage to have cold ingredients, so it’s recommended to refrigerate the slightly deflated dough for half an hour before starting and maybe put the bowl and paddle in the freezer while measuring all the ingredients.
– Start the machine at its lowest speed with half of the first dough to “resume” it a little, add the flour and honey; when the dough appears smooth and compact, add the remaining part and salt.
– Once the dough is kneaded, gradually add the egg yolks in small batches until fully absorbed.
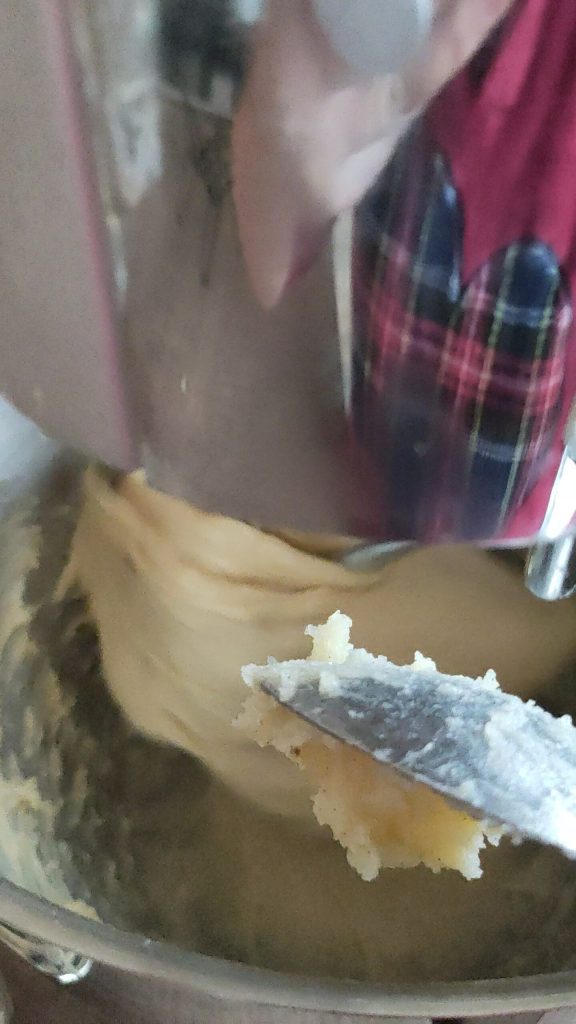
– When the dough appears smooth, start adding the previously mixed emulsion in small spoonfuls. In this phase, it is crucial not to lose the kneading, and finally, always slowly, add the cream in a stream.
Pour the first dough into the mixer

Give a few turns to resume the dough and add the flour.

Pour the honey with the paddle in motion.

Add the emulsion.
– I recommend turning the dough often in the bowl to avoid it heating up and finishing the work below 79°F.
– Remove the dough from the mixer and let it rest for 30′ covered with plastic wrap at 82°F (oven off with light on).
– Weigh the dough, calculate that the container should hold 10% more (In my case, the mold is for 1.65 lbs, so 1.82 lbs of dough should go in, and the rest in muffin cups).
Then turn the dough out onto the work surface and let it sit for 15′ and shape one or two times depending on how firm the dough is, spaced 15/20′ apart.
– Perfectly butter the mold, place the dough with the seam slightly to the side (online there are demonstration videos), cover with plastic wrap and wait for it to rise with the dome just outside.
– Uncover the dough while the oven reaches a temperature of 302°F (static) and 284°F (fan-forced) then bake and let it cook for about 50′, taking care to insert the probe thermometer about ten minutes before the end and leave the oven slightly ajar (with a ball of foil or a wooden spoon between the door and the oven itself). When it measures 201°F at the center, the Pandoro will be cooked.
Essential Tips:
For those approaching these types of doughs, I want to give some suggestions that help a lot:
– Read the recipe many times, make it “your own” to have time to resolve any doubts by asking or searching online.
– Weigh all the ingredients beforehand to avoid wasting time and have everything at hand… bowls, spatulas, thermometer…
– Do not let the dough heat up, if necessary stop the machine and put the accessories and dough in the fridge for a few minutes.
– Have patience; leavened products generally require patience… but then they reward you with their goodness.
– Calculate the times well. It’s always good to set aside a weekend for those who work and cancel any other commitments…
– The rising times of the first and second doughs also depend on how strong the starter is; the final dough temperature and the house temperature. I recommend letting it rise in the oven with the light on and a thermometer nearby to ensure it doesn’t exceed 82°F
EDIT 2023
–To ensure the dough temperature didn’t rise too much during preparation, before starting the first dough, I kept all the ingredients in the fridge (including the flour).
Notes on the flour:
Large leavened products require flours with high protein content. Therefore, it’s best to use Manitoba flour, which generally has a W400, but a flour with a W320-350 can also be used.
If in doubt, buy flours where the W is indicated.
If in doubt, buy flours where the W is indicated.
Notes on li.co.li
In the days leading up to kneading, refresh the li.co.li. with all-purpose flour (I recommend always doing this; there’s no need to load it with Manitoba) only when it has collapsed (usually after 24 hours). And if it’s lively, no need for frequent refreshments.