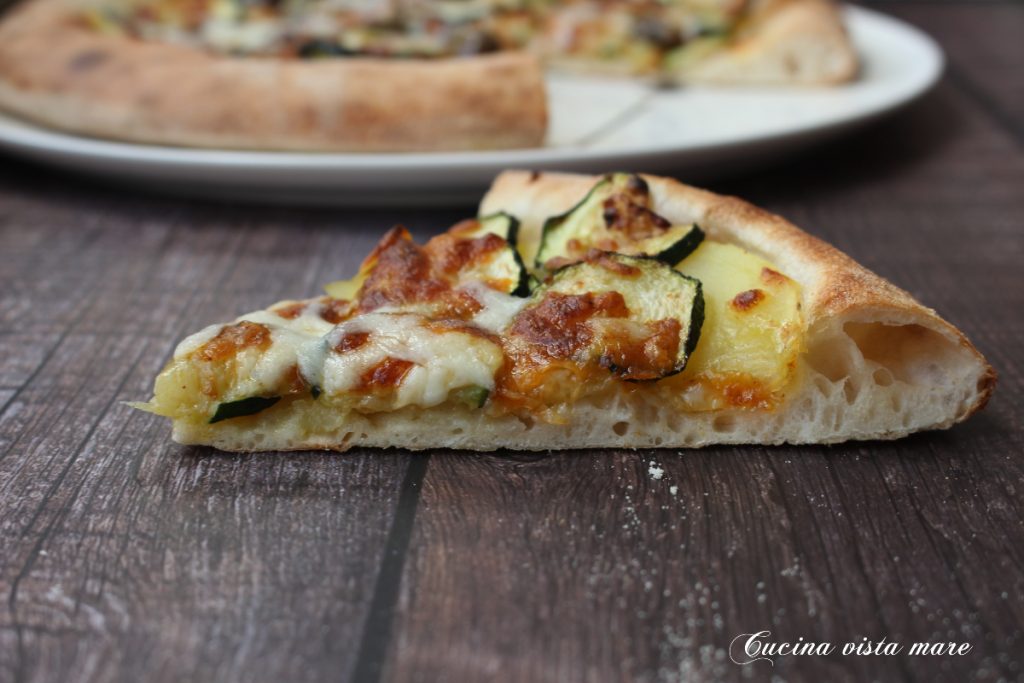
Pizza with one gram of yeast, thin, soft yet crunchy, with the classic slightly charred crust, light, delicate, digestible. Do we really need another recipe to make pizza? Maybe not, but I love experimenting, trying, modifying, adjusting, so here is the pizza with one gram of yeast. For baking, I used the baking stone that came with my oven. If you don’t have it, you can buy one or try the double cooking method I’ve explained HERE. In the meantime, let’s start kneading.
Don’t miss
- Difficulty: Medium
- Cost: Economical
- Rest time: 1 Day 4 Hours 30 Minutes
- Preparation time: 30 Minutes
- Portions: 2 pizzas
- Cooking methods: Electric Oven
- Cuisine: Italian
- Seasonality: All Seasons
Ingredients
For this dough, I used a professional strong flour with 13 grams of protein (you can find the proteins indicated in the nutritional chart) or you can check the W value, which in this case should range between 260 and 320. Nowadays, you can easily find flours with this indication on the packet at the supermarket.
- 3 1/4 cups all-purpose flour (13 grams of protein)
- 1/28 oz fresh yeast
- 1 1/4 cups of water
- 1 1/2 tsp salt
Tools
Here you find all the tools I use. You can adapt what you already have at home, but if you are passionate about dough and leavening, if you often make pizza at home, you will find it useful to have some of these tools because they will make a difference.
- 1 Mixer Kitchen Aid Artisan
- 1 Bowl
- 1 Proofing Lid
- 1 Proofing Box
- 1 Baking Stone
- 1 Wooden Pizza Peel
Steps
Prepare the dough: pour 1 cup of water into the stand mixer and dissolve the fresh yeast in it. Add the flour and start mixing at low speed, then add the salt. Gradually add the rest of the water, allowing it to be absorbed slowly by the dough (keep in mind that depending on the flour brand you use, it may not be necessary to use all the water, as each flour absorbs water differently). Work the dough for at least twenty minutes or until it is smooth, homogeneous, and well-developed.
Transfer the dough into a bowl, cover it, and leave it at room temperature for 30 minutes. Perform two rounds of folds directly in the bowl, allowing the dough to rest for 15 minutes between rounds. Cover the dough and place it in the refrigerator for 24 hours.
After the maturation time in the fridge, remove the dough and let it warm up to room temperature for 30 minutes. Divide the dough into two equal parts and form two dough balls. Perform a round of folds. Place the dough balls in the proofing box and let them rise at room temperature for 3 hours.
Preheat the oven for thirty minutes at the highest temperature with the stone inside: never place a cold stone in a hot oven or it might crack. My oven has a pizza function and reaches 572 °F. Not all home ovens go that high, but you can set yours to the maximum (usually 428/482 °F).
Roll out the pizzas one at a time on a work surface dusted with semolina and work with your fingertips from the center of the dough towards the edges to push the air outwards into what will become the pizza crust: this operation must be done delicately to prevent breaking the leavening bubbles that have formed.
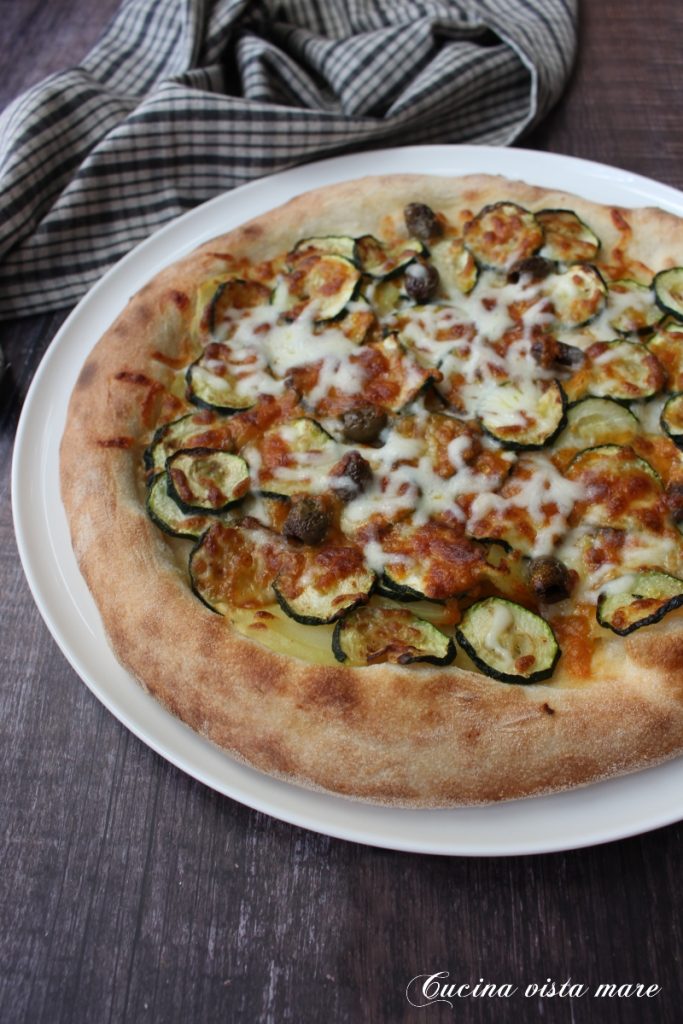
Top as desired (I used boiled potatoes, grilled zucchini, and mozzarella for pizza (make sure it’s nice and dry).
When the oven has reached the temperature, transfer the pizza to the peel (make sure to use plenty of semolina on the work surface or it will be difficult to move it) and slide it onto the baking stone.
Bake the pizza for 10/15 minutes (time depends greatly on the oven) or until the crust is nicely golden.
Notes
At which oven rack should the baking stone be placed? Usually, you can find it in the oven instructions. Mine says to place it at mid-height. But make sure to read the instructions (either of the oven or the stone).
This content contains one or more affiliate links.
